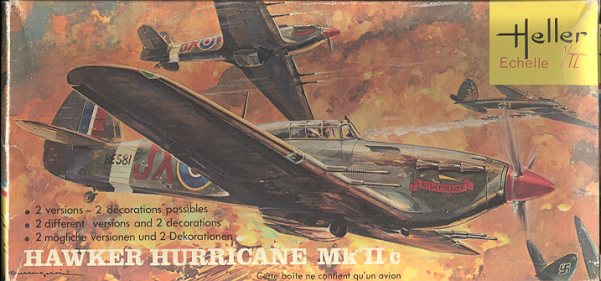
Heller 1/72 Hurricane IIc
|
KIT # |
152 |
|
PRICE: |
A couple of bucks at a swap meet. |
|
DECALS: |
Two aircraft |
|
REVIEW : |
|
|
NOTES: |
|
|
BACKGROUND |
To see what is in the box and read a short history, please visit the preview.
|
CONSTRUCTION |
Heller's Hurricane kit is just about as standard a kit as you can get. So with that in mind, let's start with the cockpit. There is a seat, control stick and floor section that are glued together and then painted RAF Interior Green. The instrument panel is painted flat black and when dry, dry-brushed with aluminum to bring out the detail. The panel is pretty flat so what detail there is does not stand out well.
The inside of the
fuselage halves were painted interior green as well and when dry, the fuselage
was glued together. The overall fit is quite good, but I always find a glitch or
two. During this period, the wings were glued as well. These also fit quite
well. An interesting 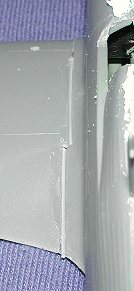 note is
that there are no alignment pins on any of the parts other than the landing gear
doors. Raised
note is
that there are no alignment pins on any of the parts other than the landing gear
doors. Raised  areas show where a
number of the bits go, so if you don't use a certain part (like the glare shield
for the exhaust), you may have to sand down those areas. Back at the wings, be
careful not to break off the guns as they are molded into the upper wings. I'd
much rather have these separate, but they are not.
areas show where a
number of the bits go, so if you don't use a certain part (like the glare shield
for the exhaust), you may have to sand down those areas. Back at the wings, be
careful not to break off the guns as they are molded into the upper wings. I'd
much rather have these separate, but they are not.
At this time, I joined the wings to the fuselage. Well, there are some real gap problems at the root (see image on the left). Perhaps these can be eliminated with a spreader bar in the fuselage, but it was too late for me. The best way to fix gaps of this size are to use stretched sprue. Just filling them with putty would not have worked well as it would have been a weak spot. Same for superglue. Once the gaps were filled with the sprue (see image to the right), filler was used to smooth things out and the sanded off panel lines were reapplied using an old Xacto knife.
With the wings nice a smooth, the tail planes were
glued in place. No real trouble here, though one of the roots has a large sink
mark in it that needed filled. The kit was flipped over and the underside
radiator glued in place. This has the shell in a left and right half. While it
makes for an accurate shape, it also means that the seams on the intake lips are
just about impossible to properly fill. Like most parts, this one
 has just a
raised guide area in which to glue it. The nose sand filter was glued together
and then glued on the nose. Since this is an optional part, there are no guide
marks, but the fit is good.
has just a
raised guide area in which to glue it. The nose sand filter was glued together
and then glued on the nose. Since this is an optional part, there are no guide
marks, but the fit is good.
Moving back to the top, the cockpit bulkhead was painted RAF Interior Green using ModelMaster paint. Then the windscreen was glued in place followed by the canopy. No real traumas here. The hood was glued shut as there is really little to see inside. It was then masked in preparation for painting. During this operation, I managed to break off one of the 20mm gun barrels. Typical!!
|
CAMOUFLAGE |
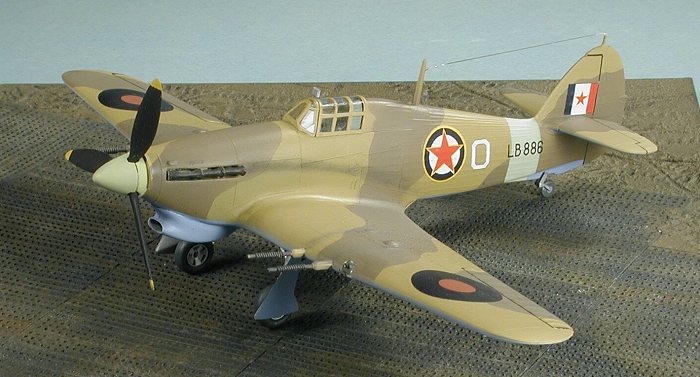
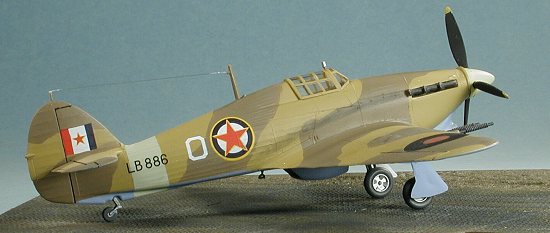
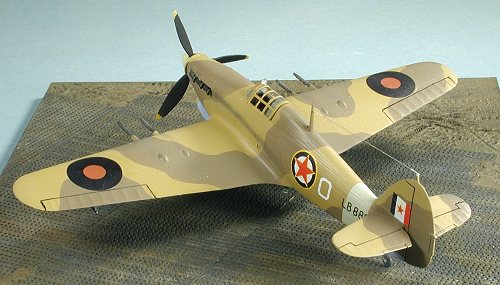
Well, it was time to do some painting on this beastie. Since the kit decals were toast due to age, I had to find an alternative. Aeromaster 72-024 has a number of interesting schemes for non RAF Hurricanes and has two in there for a IIc. One is an Indian AF version that duplicates what is in the Heller kit, so that was pretty well out. The other was a Jugoslavian version with desert camo and a Sky fuselage band. The choice being made, it was time to paint.
 The underside was treated to Aeromaster Acrylic Azure blue. When dry, a bit of
masking was done and the upper surface was painted Aeromaster Midstone enamel.
The kit was then taken back and mucho masking done to get ready for the other
upper surface color. This time Xtracolor Dark Earth enamel was used. When all
that had dried, the tape was removed. It was then that I realized I had
forgotten the Sky fuselage band. A bit more masking and Aeromaster Sky acrylic
was sprayed on the band.
The underside was treated to Aeromaster Acrylic Azure blue. When dry, a bit of
masking was done and the upper surface was painted Aeromaster Midstone enamel.
The kit was then taken back and mucho masking done to get ready for the other
upper surface color. This time Xtracolor Dark Earth enamel was used. When all
that had dried, the tape was removed. It was then that I realized I had
forgotten the Sky fuselage band. A bit more masking and Aeromaster Sky acrylic
was sprayed on the band.
With the colors pretty well on there, the model was returned to the work bench to have the landing gear attached. The gear fit very well as do the gear doors. I'd highly recommend attaching the gear and doors at the same time. I didn't and there is a bit of a gap where the aft portion of the doors are supposed to fit against the lower wing. The gear door interior and wheel wells were painted aluminum, though I guess they could just as easily been painted Azure or even interior green. I'm just not that pedantic about things like that (unless it is on a 109, of course!).
Back on its gear, it was sprayed with Future clear gloss acrylic in preparation for the decals.
|
DECALS AND FINAL STEPS |
The Aeromaster decals went on without a hitch. Of course, there are multiple
opportunities to mess things up as a few of the decals were multiple layer
jobbies. The fuselage roundel itself was three levels, but things managed to
work themselves out OK. No stencil markings are given on the sheet, so
apparently you are supposed to use those in the kit (none given) or assume the
plane was repainted and the markings had gone away. The overall effect of the
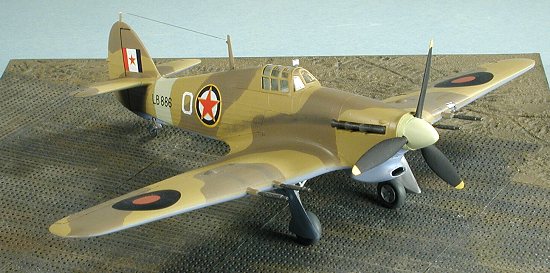
Jugoslav markings and the desert camo make for a rather colorful aircraft.
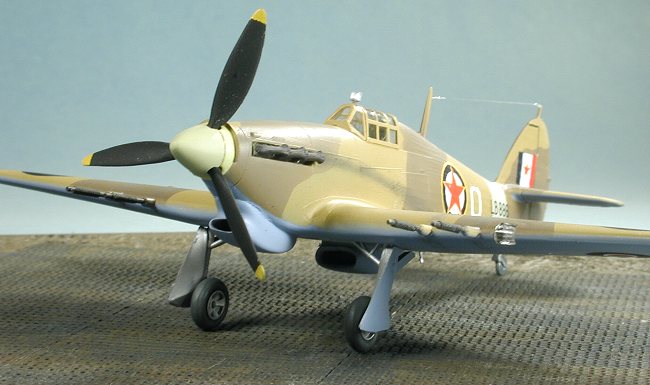
Once the decals were all on and dry, the plane was wiped down with water to remove setting solution. At this juncture, a few fiddly bits were added. This consisted of the under wing pitot tube, the exhaust, and the boarding step. The step and pitot were painted aluminum; the exhaust, burnt iron. Then a coat of acrylic matte was sprayed on to seal everything.
With that dry, the masking was taken off the canopy, the rear view mirror attached (it seems a trifle too large to me), a radio wire glued on, the landing light lens pressed in place, and the prop attached to the nose. Then the pastels were brought out for exhaust and some gun stains, but nothing really major. Though the aircraft undoubtedly operated from muddy fields when it rained, I'm not good at mud on planes so left it pretty clean.
|
CONCLUSIONS |
For very little money, I now have a very nice 1/72 Hurricane IIc to add to the Revell Mk IIb, the Hasegawa Mk I and the Airfix Mk I that were recently built. The kit goes together fairly well, though it does have its idiosyncrasies. It is a kit that I built back when I was getting underway in the hobby and is one that builders of all skill levels can enjoy. I'd put it between the Revell and the Airfix kit were I to rank it. Now to find another company's 1/72 Hurricane!
Review kit courtesy of my kit collection.
January 2002
Copyright ModelingMadness.com. All rights reserved. No reproduction in part or in whole without express permission from the editor.
If you would like your product reviewed fairly and quickly, please contact the editor or see other details in the Note to Contributors.