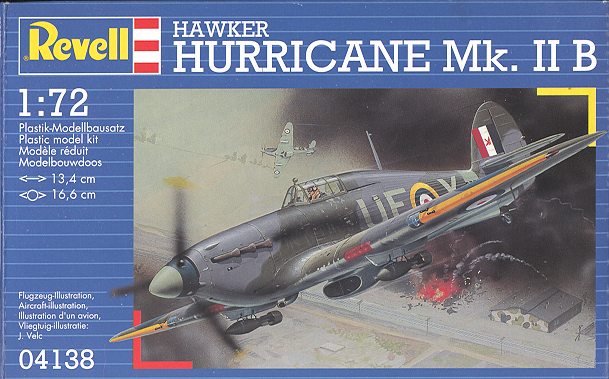
Revell 1/72 Hurricane IIB
|
KIT # |
4138 |
|
PRICE: |
$8.00 |
|
DECALS: |
Two Aircraft |
|
REVIEW : |
|
|
NOTES: |
` |
|
BACKGROUND |
A History and look in the box was done in an earlier preview.
|
CONSTRUCTION |
 While building this model, I was also constructing the Hasegawa
Hurricane I. Now I do realize that there is a difference between the two marks
as the Mk.II had a different engine and so had a fuselage stretch to accommodate
that engine stretch. I also realize that the Mk.IIB had the 12 gun wing and was
fitted with underwing racks for bombs or fuel tanks. However, both are pretty
similar from the firewall back. Just looking at the two, I noticed that Revell
did not include the slightly off center fin that Hasegawa does. I also think
that Revell did a better job on the fuselage fabric look, but Hasegawa did
better on the control surfaces. Revell's interior has sidewall detailing and
also a much broader seat. The headrest area on the Revell kit looks a bit odd to
me as well. There is also some difference in wheel well detailing between the
two. I'll let the Hurri-experts debate that one!
While building this model, I was also constructing the Hasegawa
Hurricane I. Now I do realize that there is a difference between the two marks
as the Mk.II had a different engine and so had a fuselage stretch to accommodate
that engine stretch. I also realize that the Mk.IIB had the 12 gun wing and was
fitted with underwing racks for bombs or fuel tanks. However, both are pretty
similar from the firewall back. Just looking at the two, I noticed that Revell
did not include the slightly off center fin that Hasegawa does. I also think
that Revell did a better job on the fuselage fabric look, but Hasegawa did
better on the control surfaces. Revell's interior has sidewall detailing and
also a much broader seat. The headrest area on the Revell kit looks a bit odd to
me as well. There is also some difference in wheel well detailing between the
two. I'll let the Hurri-experts debate that one!
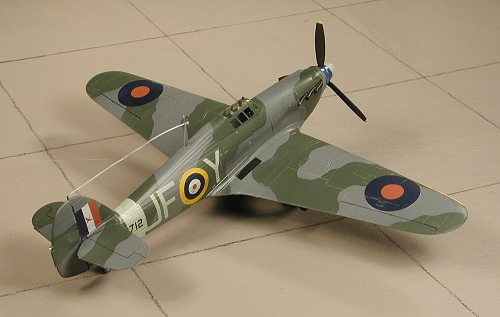
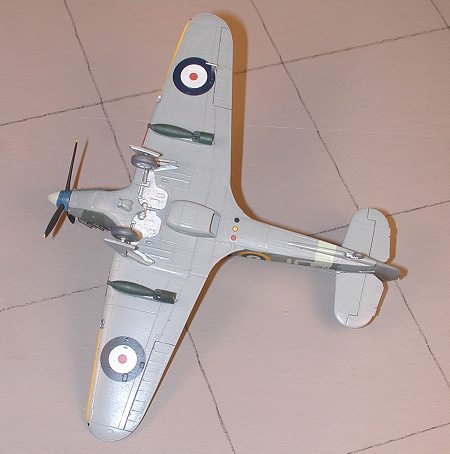
The breakdown of the wing is interesting. It consists of a lower center section and two outer wing panels for a total of five parts, whereas the Hasegawa kit has the standard three. Undoubtedly this is to allow incorporation of different wing types in later releases. I had decided on a fighter-bomber version so opened up the rather large holes for the bomb racks. Unlike the Hasegawa kit, the gun ports were already opened. The three part interior was assembled and painted RAF Interior Green. The detailing was picked out in various colors and drybrushing was done with a lighter green and aluminum.
The fuselage was then glued together, trapping the interior in place. The usual small amount of filler was needed to repair a gouge or two and a few seams that the glue didn't close. The rear fuselage insert was also glued in at this time. It doesn't fit as well as I'd have hoped and the contours of it and the surrounding fuselage are such that filling the gaps will be a very time-consuming process. True to my nature I did nothing about it other than clean it up as best as possible with a bit of filing and sandpaper.
 Next were the wings. These are five parts; a lower center
section and outer sections made of and upper and lower half. This is undoubtedly
done to get the proper wings for the different versions and Revell should be
congratulated on an ingenious method. However, I found the fit to be somewhat
lacking and the end result is that I had to use filler on the upper wing root
surface, destroying some of the detail in the process. Oh yes, I also opened up
the holes in the lower wings for the bomb racks. These are really a bit crude
and have some sink marks in them. They were glued to the holes I had just opened
up.
Next were the wings. These are five parts; a lower center
section and outer sections made of and upper and lower half. This is undoubtedly
done to get the proper wings for the different versions and Revell should be
congratulated on an ingenious method. However, I found the fit to be somewhat
lacking and the end result is that I had to use filler on the upper wing root
surface, destroying some of the detail in the process. Oh yes, I also opened up
the holes in the lower wings for the bomb racks. These are really a bit crude
and have some sink marks in them. They were glued to the holes I had just opened
up.
Tailplanes were glue in place without a fuss, but again, were not a perfect fit. The underfuselage radiator was then glued on. This fit fairly well, but again, wasn't perfect with lots of slop room. The canopy was then installed and masked after some touchup painting was done on the interior. It was then time to head for the paint shop.
|
CAMO & MARKINGS |
 First thing I did was to paint the wheel wells and insides of
the gear covers aluminum. When dry, those areas were masked as needed and the
leading edges of the wings painted white and then yellow using Testors Model
Master enamels. It was then masked of and the undersurface color of Medium
Aircraft Grey (using Extracolor enamels) was sprayed on the underside. Luck was
with me and it dried in just a few hours, though I waited until the next day to
mask it. Then the upper surface RAF Dark Green (an Aeromaster enamel) was
sprayed on. Finally, after masking the green using Tamiya tape, the upper
surface grey was painted on. After curing for a few days, the masking was taken
off the wing leading edges and the entire kit was given a coat of gloss
acrylic clear using Future. It was then back to the workbench for some more bits
and decals.
First thing I did was to paint the wheel wells and insides of
the gear covers aluminum. When dry, those areas were masked as needed and the
leading edges of the wings painted white and then yellow using Testors Model
Master enamels. It was then masked of and the undersurface color of Medium
Aircraft Grey (using Extracolor enamels) was sprayed on the underside. Luck was
with me and it dried in just a few hours, though I waited until the next day to
mask it. Then the upper surface RAF Dark Green (an Aeromaster enamel) was
sprayed on. Finally, after masking the green using Tamiya tape, the upper
surface grey was painted on. After curing for a few days, the masking was taken
off the wing leading edges and the entire kit was given a coat of gloss
acrylic clear using Future. It was then back to the workbench for some more bits
and decals.
|
FINISHING TOUCHES |
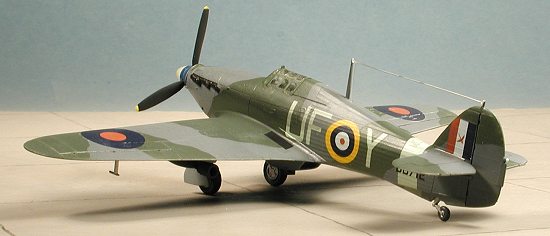
Returning to the bench, the masking was removed from the wheel wells and the paint touched up. The landing gear was then glued in with no trauma. Then the gear doors were glued in place. These fit fairly well, but not perfectly, a problem I had with the Hasegawa Hurricane, but not to the same degree. At this time, the tail wheel and strut were painted and the main wheels glued on.
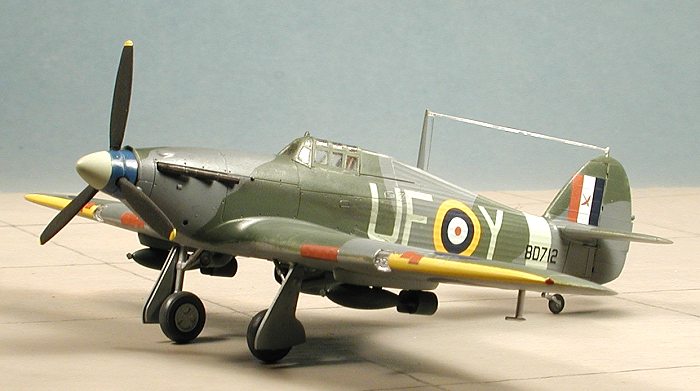
 With the kit on its wheels, it was time to apply the decals.
These are nicely done and fit fairly well. I used Solvaset as a solution and the
decals were able to handle it just fine. I also trimmed the decals a bit as the
clear carrier was a bit more than I'm used to. There was trouble in one area.
Not wanting to paint on the fuselage stripe, the decal was used. Unfortunately,
I had applied the roundels/code decal in the proper place first. When it came
time for the tail stripe, I found that it obscured a section of the code on the
right side. This means several things. Either I placed the roundel with codes
decal too far aft, the decal is too long, the tail stripe too broad, the
fuselage itself too short or the code letters are too large. Take your
pick. Next time, put on the tail band first. This will eliminate the
situation and give sufficient fudge room. The rest of the decals went on without
a problem. I didn't use the myriad stencil decals that are supplied.
With the kit on its wheels, it was time to apply the decals.
These are nicely done and fit fairly well. I used Solvaset as a solution and the
decals were able to handle it just fine. I also trimmed the decals a bit as the
clear carrier was a bit more than I'm used to. There was trouble in one area.
Not wanting to paint on the fuselage stripe, the decal was used. Unfortunately,
I had applied the roundels/code decal in the proper place first. When it came
time for the tail stripe, I found that it obscured a section of the code on the
right side. This means several things. Either I placed the roundel with codes
decal too far aft, the decal is too long, the tail stripe too broad, the
fuselage itself too short or the code letters are too large. Take your
pick. Next time, put on the tail band first. This will eliminate the
situation and give sufficient fudge room. The rest of the decals went on without
a problem. I didn't use the myriad stencil decals that are supplied.
The last steps were to spray the kit a matte clear, which I did after wiping any decal glue or setting solution off the model. While the matte clear was drying, The prop hub was painted Sky, masked off and half of it painted dark blue. When dry I glued the prop into the hub assembly. I'm no prop expert, but the one supplied with the kit seems a bit out of place on a Hurricane. I'll let the Hurrifans work that one out. It was then slipped onto the prop shaft. It's a tight fit so no gluing is needed.
Back at the airframe, the masking was taken off the canopy, the clear landing lights press fit into the wings, and the pitot probe glued to the underside of the wings. Some pastels were used to simulate the engine exhaust and stretched clear sprue for the antenna.
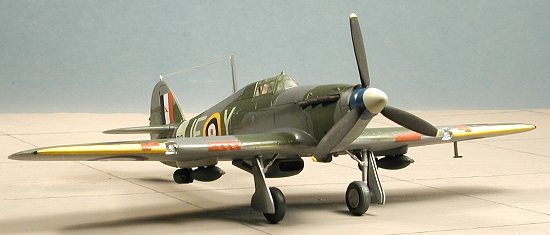
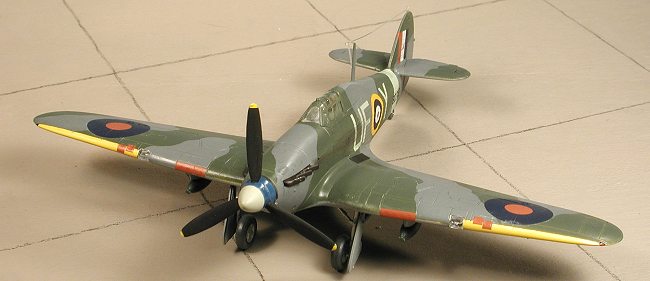
The result is a very nice little kit of a 12 gun Hurricane.
|
CONCLUSION |
Revell has done what it is good at. It has given us a very nice model at a reasonable price. I can easily recommend this kit to builders of all experiences though the beginner may find the wing to be a bit much.
|
COMPARISON |
My real motivation for building this kit was to compare it to the Hasegawa kit reviewed a bit earlier. The big question to me; 'Is the Hasegawa kit worth the extra money you pay for it?'.
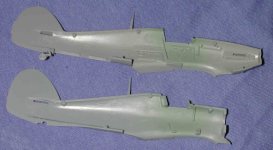
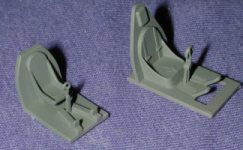
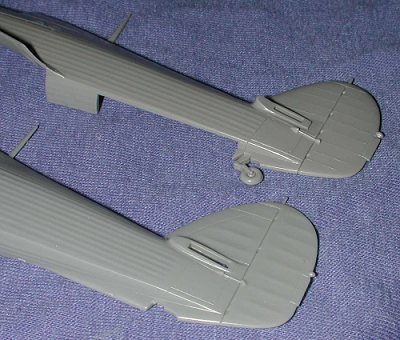
In one answer, yes. Now, here is why. Throughout the construction I compared parts of the kit and subassemblies. Looking at the fuselages (Revell on top), they appear to be same size and in fact can almost be perfectly matched to each other. The interiors of the two are quite different. The Revell one on the right is larger overall and has seatbelt detail. It also has a headrest molded into the back of the seat. The Revell kit also has sidewall detail that the Hasegawa kit lacks. However, it is quality of details where Hasegawa wins out. Look at the radiators. The Revell one on the left is not the proper shape at all as it should be oval and is not. This also shows up in things like the wheels, the area behind the pilot (there should be a section that sticks into the cockpit that the Revell kit does not have) and the underwing bombs/racks which are too large.
 |
 |
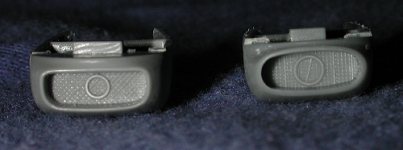 |
 If you look at
external detail as shown in the image to the right, you'll see that there
really isn't that much difference between the two (Revell at the top), though
the Hasegawa one seems to be a little bit better done, at least to my eyes, with
the Revell detailing being a bit more heavy-handed.
If you look at
external detail as shown in the image to the right, you'll see that there
really isn't that much difference between the two (Revell at the top), though
the Hasegawa one seems to be a little bit better done, at least to my eyes, with
the Revell detailing being a bit more heavy-handed.
However, the end result of both kits is that they both are unmistakably Hurricanes and it really is as much a matter of personal preferences as well as perhaps the amount of available cash that makes the choice for you.
Review kit courtesy of me and my wallet!
August 2001
Copyright ModelingMadness.com. All rights reserved. No reproduction in part or in whole without express permission from the editor.
If you would like your product reviewed fairly and fairly quickly, please contact the editor or see other details in the Note to Contributors.