Anigrand Craftworks 1/72 YF-93A
| KIT #: | AA-2039 |
| PRICE: | $44.00 |
| DECALS: | One option |
| REVIEWER: | Scott Van Aken |
| NOTES: | Resin kit with vacuform canopy |
| BACKGROUND |
Please visit the preview to get some historical background and to see what comes in the box.
| CONSTRUCTION |
As with any resin kit, I first check for glitches so I can fix them. This kit had air bubbles on some of the trailing edges of the wings and tail planes as well as on the intake lips that had to get fixed. For those new to this, the best way to take care of these is to fill the holes with super glue, immediately hit it with accelerator, wash it off and then start gently sanding it down. Doing all this quickly doesn't allow the super glue to get rock hard and it is easier to sand. You may have to go back over it 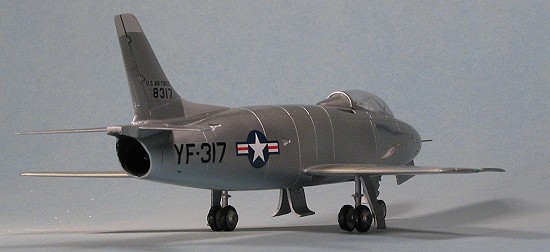 with standard filler to take care of minor imperfections, but usually it isn't needed. The most difficult were the intakes as I had to carve the inner parts rather than sand them. I also had to enlarge the intake openings to get the splitter plate sections to fit properly.
With all the airframe bits in pretty good shape, I then painted the interior bits matte black. The instructions say interior green, but I don't think so as black or dark grey were more in vogue. If I'm wrong, oh well as it is done. The interior pieces were obviously copied from either a Fujimi or Hobbycraft kit as they have great detail in terms of seat, instrument panel and consoles. It even has the detail behind the seat, but no clear bit for the ARN-6 ADF loop antenna.
While that was drying, I painted the inside of the splitter plate pieces aluminum and glued those into each side of the fuselage. These are somewhat keyed to each side so test fit first. Then the interior was glued in (minus the seat) as was a piece of weight in the nose. Then I glued the fuselage halves. Fit here was fair, but I did notice that th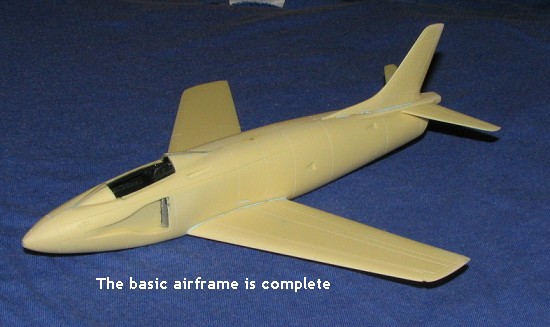 e panel lines didn't exactly match up from side to side. No worries as by the time I fill and sand the fuselage seams, I'll have to replace those lines and they'll match up this time!
Next was to attach the fin. This required that the mating surface be flat so a bit of sanding was needed. I also filled in the upper exhaust area to get it a bit smoother. Once the fin was in place, I glued on the wings. These have an alignment pin and the fit is quite good. I had to be sure there was no dihedral on the wings as these are quite flat. The inevitable gaps were filled with super glue. Same went for the tail planes. These are butt joined and have to be flat. Once these were in place, I had a pretty complete airframe.
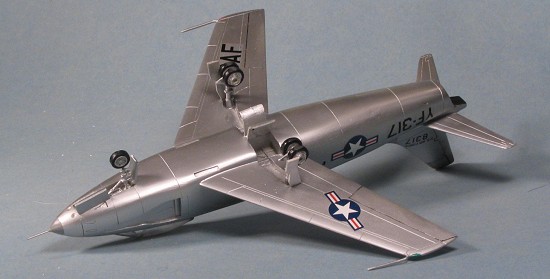
 Now it was time to clean up the undercarriage. The wheels were copied from whatever kit they copied for the interior and the wings. One of my main wheels was rather badly short shot. The nose gear axle was also too short, but since I was sure this would eventually collapse under the kit's weight (due to the gear design), I just glued the nose wheel to the strut to help strengthen it.
And then other things came up and the kit sat for about a month. Why these things happen is beyond me, but they do and that is that.
Returning to the fray, I built up the nose tip with super glue and drilled a hole for the pitot tube. Then, moving on to the main landing gear, I cleaned these up the best I could (both really need to have the oleo scissors replaced as they were short shot). I then drilled out the main wheels so they'd fit over the axle stubs. A smart builder would replace those that were deformed with a set from True Details, but I've never been accused of being smart and keeping my reputation intact, used the ones in the kit. I should also have not put these on until later, but worried that I'd have trouble getting them on straight, I glued these wheels to the gear. Then both the main gear and nose gear were cemented in place. I had to add a small section to the nose gear retraction strut as it was short shot.
 Next step was to glue on gear doors. These all had to be cut apart and that occurred with little drama. The nose gear aft door section was short shot and had a large air pocket so I filled it in with several applications of super glue, followed immediately with some accelerator, and then quickly sanded down. Took about 15 minutes to get things filled in and back to normal. These were then glued in place as were the inner main gear doors. I left the outer doors until near the end of construction to ease painting.
The lone canopy was carefully trimmed and test fit a number of times. When I had it about right, I masked it as best I could, installed the bang seat and did touch-up painting in the cockpit. Then I glued the canopy on using super glue and crossing my fingers that there'd be no fogging problems.
Then it was off to the paint shop.
| COLORS & MARKINGS |
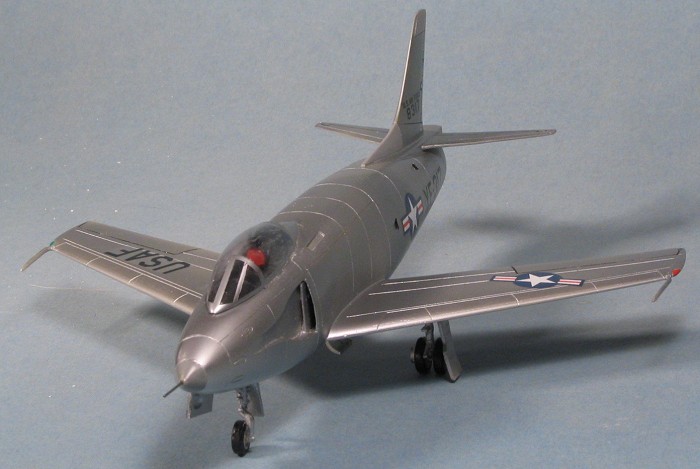
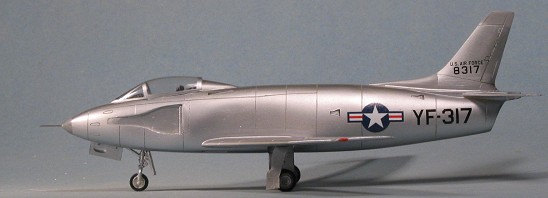
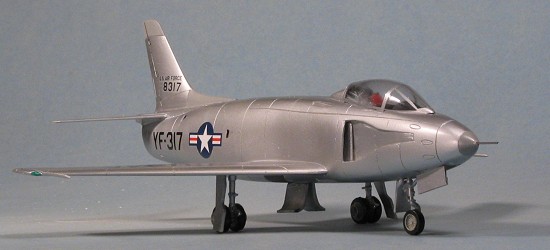
 Painting this one was a snap. Basically, the nose, fin fillet and upper fin were painted a grey shade. Then those were masked and the rest of the airframe given a coat or two or three of Alclad II Aluminum. I wasn't going to tempt fate and possible paint pull-up by doing multiple shades on this one so left it all in one shade.
Once the paint was dry, I took the kit back to the bench and painted the wheels. Not an easy task as the demarcation line between wheels and tires is quite faint. I also painted the wing tip formation lights. Then I applied the decals. The kit decals are well printed and go on without any real fuss. They are also pretty impervious to any setting solutions so getting them to snuggle down into the panel lines is pretty much an impossible task.
After they had dried, the kit was wiped down and the entire airframe was sprayed with some Metallizer Sealer to help protect the decals and the finish.
| FINAL BITS |
 Not really much to do in this step. I glued on the wing pitot tubes and the outer landing gear doors. I also used some stainless steel tubing for the nose probe. If you are doing a 'what if' model, the nose would be free of these instrumentation probes, but prototypes usually have a bunch of these things. The last things were the main gear outer doors which were just butt glued in place. I then went over the control demarcation lines and various vents with a drafting pen. These are really handy to have and though a bit expensive, are cheaper than most kits and will last through a lot of models. The canopy masking was removed, a small curse escaped my lips when I noticed a bit of fogging, I scraped much of that off with a small piece of plastic stretched sprue and then it was done. Oh yeah, for those of you who want to send me e-mails, save the electronic stamp. I have already noticed that the nose gear has the strut on the wrong side, but that was the way the thing was molded as the gear retraction strut would have been out the back of the nose gear well. I could also have trimmed the main gear outer doors a bit more and may well do that at a later date. I noticed from images that the nose gear forward door and the main gear inner doors could be closed as well as open. I don't know why I notice these things after the model is done and all the photos taken. It has to be a gift.......
| CONCLUSIONS |
I am finding that I'm building more and more of these kits. Anigrand is producing some excellent subjects and while these are not for beginners, kits like this YF-93 are basic enough for those who want to perhaps do their first full resin kit. It will allow them to develop 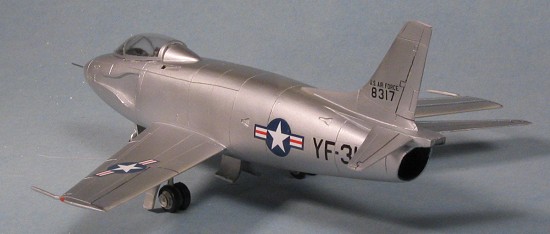 skills that will open up a whole new area of model building. Not only that, but these prototypes are just plain cool to have on the shelf!
November 2005
#1389 in a series
Copyright ModelingMadness.com. All rights reserved. No reproduction in part or in whole without express permission.
If you would like your product reviewed fairly and fairly quickly, please contact the editor or see other details in the Note to Contributors.