Hobbycraft 1/48 Seafire XV
| KIT #: | HC 1584 |
| PRICE: | around $5-10 at swap meets |
| DECALS: | One option |
| REVIEWER: | Scott Van Aken |
| NOTES: | Not quite as easy as it first seemed. |
| BACKGROUND |
First off, if you'd like a brief history of the aircraft and to see what comes in the box, pleasevisit the preview.
This was one of those kits that was initially concieved around a decal sheet. This happens to me all the time. I'll see a neat decal sheet for a model I had no real desire to build and the next thing you know, I'm making plans. Well, I managed to find one of these kits at a swap meet. They are not difficult to find and generally can be had for $5 to $10. This is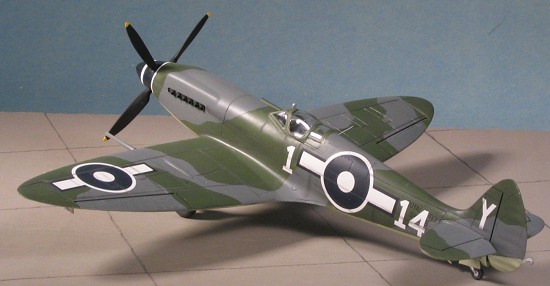 the first boxing of the kit so I knew that the decals would be trash anyway. It isn't until you start seeing the black background to the kit boxes that Hobbycraft started getting some decent, in fact really good, decals.
Looking over the kit, I knew I'd need some aftermarket. The biggie I saw was the landing gear, which are just not right in the kit. Fortunately, Aeroclub makes a set of replacement landing gear in metal, set V192, which I mail ordered direct along with something for another project. It came superbly packaged in about a week or so. It was placed in the box along with an Ultracast seat (48068) with harness that I had left over from my ICM Spit IX, which used a lot of Ultracast bits.
Time passed.
Come about a week ago and it was pretty obvious that what I had planned for the next kit review wasn't going to get finished in time. I have a back up review that I could use, but I wanted something new. I hit on the Hobbycraft kit on a Sunday afternoon and started in.
| CONSTRUCTION |
Before beginning, I made sure I had all the bits I needed. I also looked at some other HC Spitfire reviews and new I had to do something about the prop. The spinner is too big and the blades too short. Well, unfortunately, the nose is too big and my nice aftermarket prop and spinner would never fit as there would be about a 1/32 inch gap all the way around. I had to use 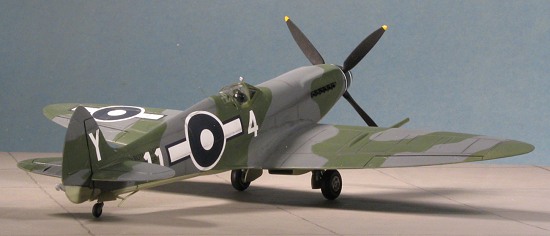 the kit spinner. But not the blades. Grabbing a Hasegawa Spitfire, I put the resin prop and spinner in that kit and robbed the prop.
Before tackling that, I started gluing bits. In this case it was all the interior parts, the spinner front and rear sections, and the wing upper and lower surfaces. The wing seems a bit thick, but fits together well. There is a gap under the deep wheel wells that attests to the thickness of the wing. I also noted that there were outer machine gun opening representations on both the upper and lower wing. Rather odd, but those would be sanded off.
Returning to the interior bits, after I glued on the armor plating, I filled the mounting holes and later sanded it smooth. Atop this went the Ultracast seat. I had the devil's time trying to figure out how the little subframe with the rudder pedals and control stick fit. Eventually I came up with something and in the end it makes little difference as you won't see them that well. All the interior bits and the sidewalls were painted RAF Interior Green using Testors enamels. When dry, I used Vallejo flat black acrylic to paint details which were then dry brushed. The harness was done in an ivory shade with details in leather and aluminum. Looks quite nice and much better than the kit seat, which is larger. This tendency to larger seems to be prevalent with this kit.
 I then drilled out the exhaust pipes and glued them into the forward fuselage. I'd thought about using some nice resin ones, but decided against it as the kit ones are not bad. The fuselage halves were glued together, trapping the interior bits. Fit is fairly good, but the fuselage is rife with sink areas so those were filled and sanded. The wing was then attached and it was noted that it has almost no dihedral at all. I scraped a bit at the roots and used tape to bend up the wings while the join was flooded with Pro-Weld. The end result did add some dihedral, but not really enough, in my opinion. While all the join surfaces needed filler, only the aft rear one was in major need.
You Spitfire fans will want to know if there is a lower gull in the wing. Yes there is, but it is, wait for it, too big. At least the center section of the gull is while the other parts are too small. Nothing that can be fixed aside from major surgery so it was left as is. The tail planes and lower rudder were then glued in place.
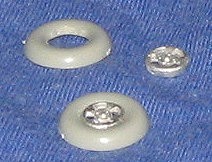
 While those were drying, I started work on the spinner. First, the attachment points for the kit props and the shanks for the Hasegawa props were grossly different. I had to spend some time drilling out the spinner until I could get the Hasegawa props to fit. Another area that needed work were the wheels. The Aeroclub landing gear set includes outer wheel hubs in four and five spokes. This kit uses the four spoke ones. Now there are nice resin options by True Details and Ultracast among others, but I felt I'd paid for the Aeroclub set so wanted to use them. This involved drilling out the old hubs. Fortunately, this isn't as difficult as it sounds with the majority of the plastic removed using a motor tool and then the rest whittled down with coarse sandpaper rolled into a tube. The metal wheels then just press into the holes (it is a tight fit) and the rest of the wheel can be assembled as normal.
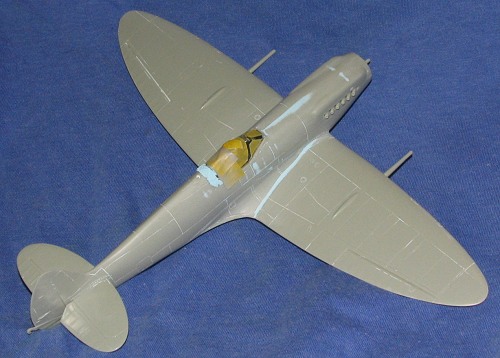 I now had a pretty complete airframe. I glued on the gun barrels, and looking at my decal sheet, noted that I didn't need the antenna mast so that was filled. I then glued on the kit canopy, after discovering that the vacuform one I wanted to use was too small. I'm not sure what plane these guys measured when doing the kit, but they sure did find an odd bird! Not only that, but my kit canopy was swaybacked. I guess they yanked it out of the mold too fast but the end was that the forward section fit fairly flat while the aft bit stuck up. I masked the canopy and then plunked on some filler to smooth out the transition from the back of the canopy to the fuselage. With that done, it was time to glue on the lower wing radiators, which fit just fine and the carb intake, which also fit well, even though it is a half moon shape and I do believe that isn't correct. Again, I thought of replacing it, but it is too wide and the replacement bit wouldn't fit well at all as it requires removing the lower cowling. I knew by this time that I had a bit of a pig in a poke. Not something that is impossible, but something that needed help.
| COLORS & MARKINGS |
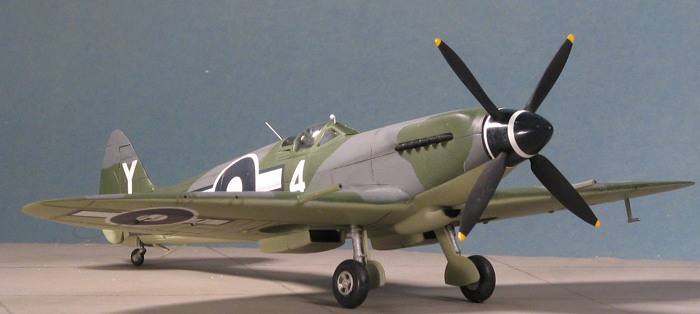
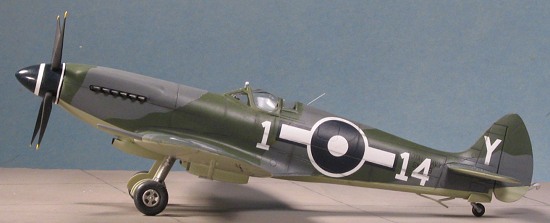
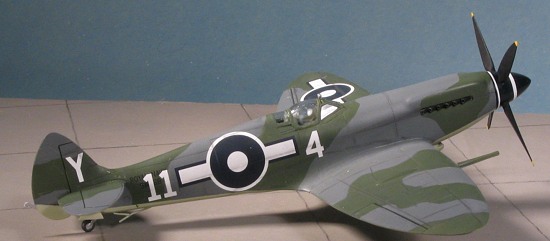 I chose to use the recent AeromasterSeafire sheet #48-698 for this one and chose one from 802 Sq aboard the HMS Glory in September 1946. This aircraft had the Dark Sea Grey/Dark Slate Grey over Sky scheme. I first painted the underside and the gear doors in Sky using some already mixed up Aeromaster Acrylics. That was masked and the upper surface painted Dark Slate Grey using some really old Humbrol enamels. That was masked (and I'm sure that many will freehand it, but I prefer to mask those schemes actually painted using masks) and I used Testors Dark Sea Grey enamel. The spinner was painted Sea Blue, again using Humbrol enamels. When all the masking was removed, I sprayed a clear
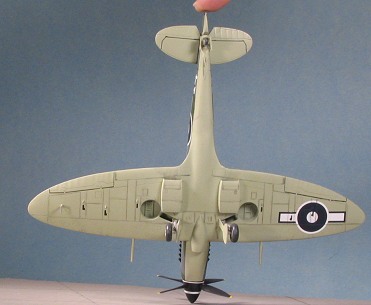 coat on it. This had the effect of turning the Dark Slate Grey a nearly green shade and darkening it up considerably. Where the shades were somewhat close, they were now very different.
Nothing to do but continue and hope that the flat coat will help.
Before applying the decals, I glued on the tail wheel and then the Aeroclub metal main gear. These needed to be cleaned up and the attachment hole enlarged. Once in, they were painted aluminum and had the oleos wrapped with Bare Metal Foil Chrome. The oleo scissors were then glued in place and the main wheel fitted once the axles were trimmed back a bit as they are too long.
The decals went on without a problem as they are printed by Microscale. I used Solvaset on them to make sure then snuggled down. The sheet includes spinner stripes that actually fit and are opaque so that when you double them over on the ends, they are not a lighter shade. With the decals dry, I used a drafting pen to highlight the control surfaces.
| FINAL CONSTRUCTION |
For this step, I pushed the Hasegawa props into the holes in the spinner. It is also a tight fit and they were not glued. The tips were painted yellow. I turned to the gear doors. These have alignment pins to fit into the kit legs. Those had to be cut off and the little trough they are in was enhanced with my motor tool. These were then glued to the gear lets. They look ok, but not precisely like Spitfire/Seafire gear doors. The little brace at t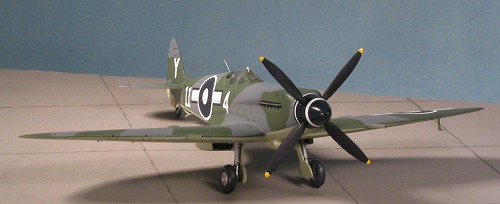 he back to prevent the wire from snagging the tail wheel was then added. Should have done this earlier and it really looks very little like what is on the real plane. This was sanded a bit and the area repainted. Tail wheel doors were then added as was the under wing pitot tube and the mirror above the canopy. I painted the exhaust with Burnt Iron at this time. The prop was glued on with white glue and I removed the masking from the clear bits. A hole was drilled aft of the canopy for the radio antenna and one made of stretched sprue was installed. The last thing I did was to go over the panel lines with some pastels and add a bit of engine exhaust.
| CONCLUSIONS |
The end result of all this is a model that looks very much like a Seafire XV. As you can probably tell, the kit has a plethora of inaccuracies that will not make those who are after total fidelity happy. Many of the problems can be cured with a bit of work, some aftermarket bits and a well-stocked spares box. Not counting the decals, I easily doubled the price I paid for the kit in aftermarket bits. My biggest disappointment, however, was not with the kit, but with the fact that my paints didn't return to their 'pre-glosscoat' shades. I'll have to keep all that in mind for the next build.
Late Note: Since running this article, I've been told by many that not only are the prop blades wrong, but I installed them backwards. Since then, through the kindness of Scott Persons, I've gotten the proper blades on the model.
May 2005
#1364 in a series
| REFERENCES |
Supermarine Seafire: Warpaint # 20, by Geoffrey Bussy,
Copyright ModelingMadness.com. All rights reserved. No reproduction in any form without express permission from the editor.
If you would like your product reviewed fairly and
fairly quickly, please contact
the editor or see other details in the