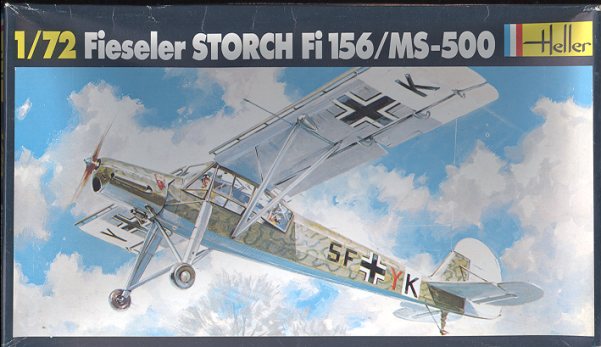
Heller 1/72 Fieseler Fi-156 Storch
|
KIT # |
227 |
|
PRICE: |
@$5.00 |
|
DECALS: |
Two Aircraft |
|
REVIEW : |
|
|
NOTES: |
` |
|
BACKGROUND |
For a bit of history and a look at what's in the box, visit the preview.

|
CONSTRUCTION |
 This one started with subassemblies. There really are not that
many on this kit due to its size and the fact that most parts are braces!
However, the wings were glued together, the seats and stick glued on the cockpit
flooring and the small airfoils were glued to the underside of the tail planes.
You have to make a choice of tail planes depending on if you are doing the French
or German version. Frankly, I saw little difference between the two. The
interior bits and the inside of the fuselage was sprayed RLM 66 dark grey,
though the instructions just called for grey. It could easily have been RLM 02.
Your choice on that one.
This one started with subassemblies. There really are not that
many on this kit due to its size and the fact that most parts are braces!
However, the wings were glued together, the seats and stick glued on the cockpit
flooring and the small airfoils were glued to the underside of the tail planes.
You have to make a choice of tail planes depending on if you are doing the French
or German version. Frankly, I saw little difference between the two. The
interior bits and the inside of the fuselage was sprayed RLM 66 dark grey,
though the instructions just called for grey. It could easily have been RLM 02.
Your choice on that one.
With the interior dry, the instrument panel was glued in place on one fuselage half, followed by the interior. Before the glue set, the other fuselage was dry fitted to make sure all will fit well. When that was dry, the fuselage halves were glued together. The fit is fairly good, though you'll have a lot of trouble getting the lower fuselage to mate. It is just because of the way it is formed that makes it difficult. I used clamps and had some success.
 What with the fuselage together,
I then added the required filler and wiped out the stitching detail on the
bottom of the fuselage. The nose cap was added on at this time as well. Yes,
filler was also used on this part. With that done, it was time for the canopy.
Now this is probably one of the more nerve-wracking parts of the build. The
canopy is six separate sections. You have a full left side, two forward
sections, an upper piece and two right sides.
What with the fuselage together,
I then added the required filler and wiped out the stitching detail on the
bottom of the fuselage. The nose cap was added on at this time as well. Yes,
filler was also used on this part. With that done, it was time for the canopy.
Now this is probably one of the more nerve-wracking parts of the build. The
canopy is six separate sections. You have a full left side, two forward
sections, an upper piece and two right sides.
Theoretically you can build the kit with the right door open. Unfortunately, there is no indication of how the thing in hinged! Getting all six pieces to fit is a real challenge. Not impossible, just a challenge. If you fit the back parts of the side pieces flush with the fuselage, you will not get the top to fit. I suggest doing all six pieces at once using slow setting glue. I had a particular problem with the door piece as I left it until the other five pieces had dried. A mistake. Once they are glued together and dry, I masked them. If you wait until later, you'll never be able to get a knife blade in there to cut the masking tape.
The tail planes were attached at this time. There is a strut that needs glued in place as well. Fit is fair, but like much of the rest of the kit, requires some fudging around to get things properly lined up. With those on firmly, the wings were attached. I did not add the Handley Page slotted slats until one of the last construction stages as they'd just get in the way. Attaching the wing struts requires the same fiddling and fussing that the rest of the kit requires. Fit is a bit sloppy, but once dry, it is a firm construct.
 Probably the fussiest part of the kit is the landing gear. Unlike the rest of
the kit, there are no attachment points for the struts that fit on the bottom of
the fuselage. The key is to get the other pieces sort of where you want them,
then to glue on the lower struts, trying to keep everything lined up on both
sides. I suggest doing both of the landing gear at the same time so that you can
move things around as needed before committing to firm gluing. Again, once the
glue is dry, it is a very sturdy assembly.
Probably the fussiest part of the kit is the landing gear. Unlike the rest of
the kit, there are no attachment points for the struts that fit on the bottom of
the fuselage. The key is to get the other pieces sort of where you want them,
then to glue on the lower struts, trying to keep everything lined up on both
sides. I suggest doing both of the landing gear at the same time so that you can
move things around as needed before committing to firm gluing. Again, once the
glue is dry, it is a very sturdy assembly.
After this, the pitot tube, landing light, mass balances, tail skid, exhausts, and the little thingies that go under the wing were glued in place. The kit was then taken to the paint shop.
|
PAINT & DECALS |
I bought this kit so that I could do the white ambulance Fi-156D shown in Mike Grant's most recent decal sheet on the Storch. I did not modify the kit with the extra rear windows that a proper ambulance Storch would have, nor did I open up the back wall for the stretcher (so sue me). However, 99.9% of the people who will see this kit (and haven't read this review) won't know the difference. The paint scheme is very simple: white. For paint, I used Floquil Reefer White straight out of the bottle with no thinning. I like this paint as it dries fast and covers in just a coat or two. I use it a LOT when white is needed. Once the paint was dry and cured for a day or so, the kit was sprayed with Future clear gloss acrylic to get ready for the decals.
 This is the first time I have used Mike Grant's decals. He says no Solvaset or
Champ decal setting solution, so they weren't used, though I did use
Microscale's products. The decals are ALPS printed so are on a continuous sheet.
Cutting them out wasn't a problem. What's even better is that they are super
thin and fit very well. I had no problems with them at all.
This is the first time I have used Mike Grant's decals. He says no Solvaset or
Champ decal setting solution, so they weren't used, though I did use
Microscale's products. The decals are ALPS printed so are on a continuous sheet.
Cutting them out wasn't a problem. What's even better is that they are super
thin and fit very well. I had no problems with them at all.
One thing was that I had to cut the upper tail plane supports to get the red tail band in place. You may want to keep that in mind if doing a similar scheme. The tail stripe was a bit shorter than the tail itself so I used Gunze red to paint over the sections that needed it. The match was quite good. With the decals done, the kit was sprayed with a matte clear to seal them in place.
|
CONSTRUCTION CONTINUES |
Back at the workbench, there was a bit of brush painting going on. First the exhausts were painted burnt iron. Then the engine intake and a few other places were done in black using a Rapidograph pen. The pitot tip was painted aluminum and then the masking was removed from the windows. This was a bit of a challenge as the struts were in the way, but using a toothpick, the masking was successfully removed.
 However, I wasn't done. There are a couple of antennas that fit
on the upper portion of the cabin. These were glued in place and then touched up
with Tamiya flat white. Then the tail skid was painted steel as was the intake
filter under the nose. Wing tip lights got a touch of color as well. The last
part to attach was the prop. It could have been natural wood, black or
black-green. I painted mine black-green and did the leading outer edges in brass
for the metal protective plate that was normally placed on wooden props like
this. Then some pastels were lightly used to simulate the exhaust stain on the underside
of the plane. No antenna rigging was done as I have no clear images of the
arrangement.
However, I wasn't done. There are a couple of antennas that fit
on the upper portion of the cabin. These were glued in place and then touched up
with Tamiya flat white. Then the tail skid was painted steel as was the intake
filter under the nose. Wing tip lights got a touch of color as well. The last
part to attach was the prop. It could have been natural wood, black or
black-green. I painted mine black-green and did the leading outer edges in brass
for the metal protective plate that was normally placed on wooden props like
this. Then some pastels were lightly used to simulate the exhaust stain on the underside
of the plane. No antenna rigging was done as I have no clear images of the
arrangement.
|
CONCLUSIONS |
If you can get past the spindly construct and the rather vague placement of some of the parts, then you'll really like this kit. It is a bit on the unusual side as you don't see it very often. Frankly, if it hadn't been for the Mike Grant decals, I probably would not have built this kit. However, they really add a lot to it. I might even do another one in the near future!
December 2001

Copyright ModelingMadness.com. All rights reserved. No reproduction in part or in whole without express permission from the editor.
Review kit courtesy of me and my wallet! Thanks to Mike Grant Decals for the decal sheet!
If you would like your product reviewed fairly and fairly quickly , please contact the editor or see other details in the Note to Contributors.