
| KIT #: | 02037 |
| PRICE: | 3400 yen SRP |
| DECALS: | Three options |
| REVIEWER: | Scott Van Aken |
| NOTES: | 2013 Limited Edition. |
| HISTORY |
The Ju 88C was originally intended as a fighter-bomber and heavy fighter by adding fixed, forward-firing guns to the nose while retaining some bomb carrying ability of the A-series bomber. The C-series had a solid metal nose, typically housing one 20 mm MG FF cannon and three 7.92 mm (.312 in) MG 17 machine guns. The aircraft retained the ventral Bola gondola under the crew compartment though individual units sometimes removed this to reduce weight and drag to enhance performance. The Ju-88C was later used as a night fighter, and this became its main role.
The first version of the Ju 88C was the C-1 with 20 aircraft converted
from A-1 airframes. Some of them entered service in the Zerstörerstaffel of KG
30 which became part of II./NJG 1 in July 1940. The C-1 was followed by
the C-2 of which 20 aircraft were converted from A-5 airframes with enlarged
wingspan. The C-4 became the first production version with 60 produced and 60
converted f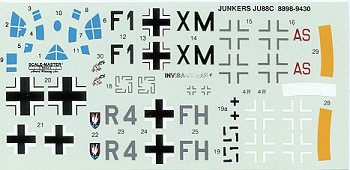 rom A-5 airframes. The C-6, of which 900 aircraft were produced, was
based on the A-4 airframe with more powerful engines and stronger defensive
armament (single- or dual-mount belt-fed 7.92 mm MG 81 or 13 mm MG 131 instead
of drum-fed MG 15 machine guns).The C-6 as night fighter was typically equipped
with FuG 202 Lichtenstein BC low-UHF band airborne intercept radar, using the
complex 32-dipole Matratze antennas. The first four C-6 night fighters were
tested in early 1942 by NJG 2. The trials were successful and the aircraft was
ordered into production. In October 1943, many C-6s were upgraded with new radar
systems. The first new radar equipment was the FuG 212 Lichtenstein C-1. After
the UHF-band Lichtenstein radars had been compromised to the Allies in the late
spring of 1943, the next development in German AI radar was the VHF-band FuG
220 Lichtenstein SN-2, discarding the 32-dipole Matratze antennae for the much
larger eight-dipole Hirschgeweih (stag's antlers) aerials, required for the
longer wavelength SN-2 system.
rom A-5 airframes. The C-6, of which 900 aircraft were produced, was
based on the A-4 airframe with more powerful engines and stronger defensive
armament (single- or dual-mount belt-fed 7.92 mm MG 81 or 13 mm MG 131 instead
of drum-fed MG 15 machine guns).The C-6 as night fighter was typically equipped
with FuG 202 Lichtenstein BC low-UHF band airborne intercept radar, using the
complex 32-dipole Matratze antennas. The first four C-6 night fighters were
tested in early 1942 by NJG 2. The trials were successful and the aircraft was
ordered into production. In October 1943, many C-6s were upgraded with new radar
systems. The first new radar equipment was the FuG 212 Lichtenstein C-1. After
the UHF-band Lichtenstein radars had been compromised to the Allies in the late
spring of 1943, the next development in German AI radar was the VHF-band FuG
220 Lichtenstein SN-2, discarding the 32-dipole Matratze antennae for the much
larger eight-dipole Hirschgeweih (stag's antlers) aerials, required for the
longer wavelength SN-2 system.
Many Ju-88C's had their Bola gondolas modified to hold up to two forward firing 20 mm cannons. Several C-6 night fighters were equipped with two "Schräge-Musik" upward-firing 20mm cannons in trial fittings, and from mid 1943 onward, there was an official field modification kit available for this arrangement.
A small number of the C-series day fighters had their new solid-metal noses specially painted to resemble the bomber A-series' "beetle's eye" faceted clear view nose glazing, in an attempt to deceive Allied pilots into thinking the fighters were actually bombers; the unusual "camouflage" attempt did result initially in a number of Allied aerial losses.
| THE KIT |
Any more, a major kit manufacturer will not expend the resources on a kit unless they can do multiple variants. The Ju-88 is a perfect subject for this as it was done in multiple variants, each of which was used by a large number of units. This allows for a large number of Limited Editions based on the Ju-88A-4 basic boxing. Hasegawa has done a good job of following this and so you have a kit that has a lot of subassemblies and inserts. While I wish they'd do an A-5 or A-1 variant, that requires different wings so Hasegawa has not gone that route yet. Too bad as those variants were the most used in the early war and the Battle of Britain. For that, you need to go to Revell.
This is the C-6 version with the solid nose and a few other differences, but as mentioned, it is basically very much like the basic boxing A-4. There are three markings options, which are all quite similar. However, one of the options takes the double rear guns and the other two take the single, so you do need to be aware of that. None of these have radar, even though they are night fighters. They also have early flame dampers. As expected, the nose is separate from the rest of the fuselage and since this does not have a bomber nose, the various small windows in the lower nose will need to be installed and filled in. The nicely done interior uses decals for instruments and this is adequate for the scale.
 Two hefty wing spars are installed to help keep the
wings properly aligned. Both options are Jumo powered so you get those engine
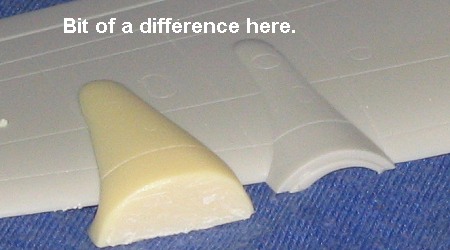
nacelles. Note also that the wing tips are separate items and are among the more
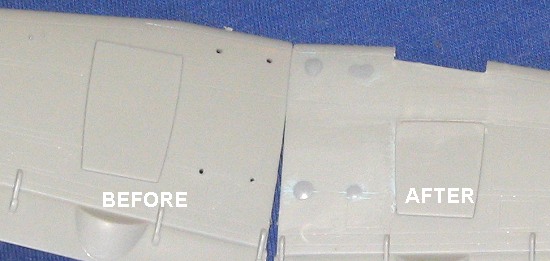
difficult pieces to get properly aligned. There are some holes you'll need to
open in the lower fuselage and that is shown in the instructions. One nice thing
is that you can install the main landing gear after the kit is painted. The tail
gear gets trapped between the fuselage halves so you'll need to mask that off
Two hefty wing spars are installed to help keep the
wings properly aligned. Both options are Jumo powered so you get those engine
nacelles. Note also that the wing tips are separate items and are among the more
difficult pieces to get properly aligned. There are some holes you'll need to
open in the lower fuselage and that is shown in the instructions. One nice thing
is that you can install the main landing gear after the kit is painted. The tail
gear gets trapped between the fuselage halves so you'll need to mask that off
As usual, the clear bits will be a challenge. I highly suggest a masking set and care with installation. One thing to keep in mind regarding masking sets is that all the ones I've seen are for the single rear defensive gun so you might want to get a standard Ju-88A-4 set for the double gun version. I've built a couple of Hasegawa Ju-88s and while they do have a goodly number of inserts, they are fairly straight-forward builds.
Instructions are well done with the usual Gunze paint references. The first two options are listed as the early versions and are in overall black and with NJG 2. The box art option has yellow lower engine cowlings for operations in Sicily. The third option is your standard night fighter scheme of overall RLM 76 with large RLM 75 splotches on the upper surface. This is a later version and is fitted with Shrage Musik upward firing guns. Decals are old school with off-white white areas and should be replaced. At least the insignia and the fuselage band. As with all Hasegawa's Ju-88s, you are provided decals for the cockpit instrumentation.
| CONSTRUCTION |
 This is one of three kits that I bought from a seller in Hong
Kong. It and the others were listed as unstarted, and that was true. However,
the previous owner had cut every part from the sprues and put them into bags. In
addition, he folded the boxes so that when I got the package, it was much
smaller than I thought the box for three fairly large Hasegawa kits should be.
This was four years ago and I set the kits aside in disgust as I didn't want to
dig through all those loose parts during the build.
This is one of three kits that I bought from a seller in Hong
Kong. It and the others were listed as unstarted, and that was true. However,
the previous owner had cut every part from the sprues and put them into bags. In
addition, he folded the boxes so that when I got the package, it was much
smaller than I thought the box for three fairly large Hasegawa kits should be.
This was four years ago and I set the kits aside in disgust as I didn't want to
dig through all those loose parts during the build.
A few weeks back, I decided to go ahead and build one of them. I'd built the Hasegawa Ju-88 before so knew that they'd have a goodly number inserts but also that the fit would be fairly good. It was then that I discovered that the guy had written the part number (but not the sprue number) on most of the parts. This included the clear parts so I hope the ink he used is water soluble. Not only that, but he put all the parts that were not called out in the instructions in a separate bag. This mollified my initial disdain as I figured that he did all this space saving as he didn't have room in what would be a fairly small Hong Kong residence for full size kit boxes like this. With that knowledge in hand, I started building.
 First thing I did was to prepaint all the interior bits using
RLM 02. Later I discovered that the instructions wanted me to use RLM 66, but
I'd already applied the interior decals and wasn't going to change things so
left it as it is. The trickiest part of building up the interior was the rudder
pedals and the rectangular piece that fits between them. One has to know which
marking option one is going to use fairly early in the construction process. In
this case it is step two when one attaches the nose section to the rear
fuselage. I chose the second option which has only one rear defensive gun so
used that insert. Note that one has to install the tail gear and wing spar
segments before closing the rear fuselage. I also assembled and attached the
tailplanes and fin at this time.
First thing I did was to prepaint all the interior bits using
RLM 02. Later I discovered that the instructions wanted me to use RLM 66, but
I'd already applied the interior decals and wasn't going to change things so
left it as it is. The trickiest part of building up the interior was the rudder
pedals and the rectangular piece that fits between them. One has to know which
marking option one is going to use fairly early in the construction process. In
this case it is step two when one attaches the nose section to the rear
fuselage. I chose the second option which has only one rear defensive gun so
used that insert. Note that one has to install the tail gear and wing spar
segments before closing the rear fuselage. I also assembled and attached the
tailplanes and fin at this time.
Building the engines is a fairly complex procedure and one at which I suck big time. I can never seems to get everything to line up well when doing the Junkers engine variant. It must be a curse. While building those, I assembled the wings. Getting the tips properly installed is a bit of an art. I generally install the tip into the upper wing section and get that lined up so any step will be on the lower section. This time things went fairly well. Installing the engine mounts also requires quite a bit of fiddling around to get a good fit. I then attached the two bomb bay inserts.
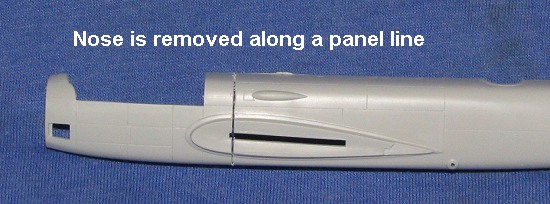
Moving to the front, the various inserts for the nose section were attached followed by the nose cone. This isn't supposed to be done until late in the build, but I did it now so I could get a smooth fit without having the wings/engines in the way of my speeding sanding stick. I then started the somewhat tedious job of masking the transparencies. Thanks to Eduard CX192, this was made much easier. Once the forward cockpit section was glued in place, the aft piece was a a very tight fit. I glued on the wings and tailplanes then headed for paint.
| COLORS & MARKINGS |
 This one is overall black. I thought that black might be a bit
too dark so intially sprayed everything with Tamiya's German Grey. While nice and
dark, it just looked too light so I misted on some Tamiya Semi-Gloss black.
While I'm not sure if that was better than all black, it certainly breaks up a
monotone scheme. Once dry, the airframe was given several coats of Mr.Color
gloss clear in preparation for the decals.
This one is overall black. I thought that black might be a bit
too dark so intially sprayed everything with Tamiya's German Grey. While nice and
dark, it just looked too light so I misted on some Tamiya Semi-Gloss black.
While I'm not sure if that was better than all black, it certainly breaks up a
monotone scheme. Once dry, the airframe was given several coats of Mr.Color
gloss clear in preparation for the decals.
Kit decals were that off-white shade typical of older Hasegawa kits. I was able to go through several Luftwaffe insignia sheets to find suitable replacements that were actually white. One was a Techmod sheet and those decals are VERY thin. Eventually I got them all in place.
Then the main landing gear was painted and installed along with the main and tail gear doors. Other items that needed installed were the nose gun barrels. I left off the radio mast and the clear df antenna along with the pitot until after I sprayed on a matte clear coat. Not surprising was that some of the kit decals I used silvered a bit.
With that done, the masking was removed, the pitot, radio mast and rear gun was installed. These were then touched up with matte black and it was obvious that the rest of the airframe was not that shade. The props were pushed on and that was it.
| CONCLUSIONS |
This is a very good kit and well worth building. While the newer Zvezda kit is nice, to me, the Hasegawa one is a bit nicer. Modelers also can do the older Italari kit that was reboxed by AMT or if they want an early 88, the even newer Revell kit. While I may have goofed on the interior color, a black interior on a black plane just doesn't offer any visual interest. Besides, I'm saying this aircraft was built prior to November 1941 when the RLM 66 interior was mandated. That's my story and I'm sticking with it.
16 May 2025
Copyright ModelingMadness.com. All rights reserved. No reproduction in
any form without express permission from the editor.
If you would like your product reviewed fairly and fairly quickly, please
contact
the editor or see other details in the
Note to
Contributors. Back to the Main Page
Back to the Review
Index Page
Back to the Previews Index Page