Revell 1/72 Fw-190A-8/R11
|
KIT # |
4118 |
|
PRICE: |
$8.00 |
|
DECALS: |
Two Aircraft |
|
REVIEW & |
|
|
NOTES: |
` |
|
HISTORY |

Kurt Tank's most prolific design was without a doubt, the FW-190 and myriad offshoots. Developed just prior to the start of WWII in Europe, the 190 was something a bit unusual for the Luftwaffe fighter corps. It was powered by a radial engine. Until then, it was thought that radials would not be able to be built small and powerful enough for a fighter. The combination of Focke-Wulf and BMW proved them wrong. Not to say that there were not teething troubles. Fires from overheating were a common problem in the early aircraft, however additional engineering removed those situations by the time the second major production series, the FW-190A-3 was underway.
The benefit of a radial engine is that there is one less system (the coolant system) to get shot up and cause damage during combat. As with the American P-47, there are many tales of cylinders being shot away and the plane still being able to bring back its pilot. The greatest production version of the 190 was the FW-190A-8, which entered units in early/mid 1944. This aircraft was heavily armed with six or more guns, was able to take on just about any field or factory modification package. These included armored glass and scabbed on plate, bomb racks, fuel tank racks, and was also able to carry a BT 700 torpedo! Derivations of the A-8, the F-8, were dedicated ground attack aircraft and was used to replace the Ju-87 Stuka in many units before the end of the war.
|
THE KIT |
Revell's Fw-190A-8 kit is a relatively new production, the copyright date inside the fuselage being 1996. Revell of Germany produced a number of new mold kits during this time in an effort to offer quality new mold kits at a price that was more affordable that similar products from Japan and Korea. In many ways they have succeeded, but in others, the Asian kits have the edge.
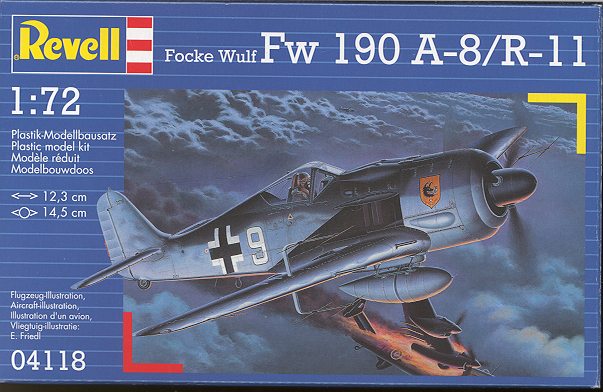
 This particular boxing is for the night fighter version.
Included in that kit are also bits to make a 'normal' A-8. In addition to the
night fighter antennas, you get a pair of underwing dual 20mm gun packages.
These were particularly effective against bombers, but at a price in speed and
maneuverability. As with the Hurricane IIB reviewed previously, Revell has
several advantages and disadvantages compared to other kits in this scale. First
of all, the cockpit is detailed with fine raised instrument detail vice decals.
It also offers a more convincing seat. Unlike the Hasegawa kit, this one has
actual exhaust stubs peeking from the exhaust openings. Wheel well detail seems
a bit more well done as well. Underwing shell ejector chutes are separate items
so if you are modeling an A-8 without outer guns (and several units removed them
to improve performance), you don't have to sand them off. You also get an
underwing Morane antenna that is not provided by the Hasegawa kit.
This particular boxing is for the night fighter version.
Included in that kit are also bits to make a 'normal' A-8. In addition to the
night fighter antennas, you get a pair of underwing dual 20mm gun packages.
These were particularly effective against bombers, but at a price in speed and
maneuverability. As with the Hurricane IIB reviewed previously, Revell has
several advantages and disadvantages compared to other kits in this scale. First
of all, the cockpit is detailed with fine raised instrument detail vice decals.
It also offers a more convincing seat. Unlike the Hasegawa kit, this one has
actual exhaust stubs peeking from the exhaust openings. Wheel well detail seems
a bit more well done as well. Underwing shell ejector chutes are separate items
so if you are modeling an A-8 without outer guns (and several units removed them
to improve performance), you don't have to sand them off. You also get an
underwing Morane antenna that is not provided by the Hasegawa kit.
On the minus side, the moveable part of the canopy frame is molded onto the fuselage halves. This means there is no way to display the kit with open canopy without some cutting. The detailing of the fabric control surfaces seems a bit heavy-handed to me as well. Other than that, initial impressions are quite good. For decals, you get the FW-190A-8/R-11 night fighter shown on the box art and an overall RLM 76 A-8 found in Denmark at the end of the war. As with most RoG decals, they are very matte and have lots of carrier film that needs t be trimmed off.
|
CONSTRUCTION |
I started with the
wings. This meant opening holes for the version I was doing. There are a lot of holes in the wings and you really need to pay attention to which ones
you open. I was not going to do the night fighter so all I needed to do was open
holes for the centerline rack, upper wing cannon bulge and lower wing shell
ejector chutes. You have to be very careful with the lower wing holes. If you
follow the instructions for the lower holes, you'll probably open the wrong
ones. Hold the wing to the light and open those that fall within the boundaries
of the lower gun access doors. You can then glue the bumps and chutes to
the wing. Since these are add on and not molded with the wing, they are a bit
chunky compared to the Hasegawa kit.
The next parts were the canopy and
windscreen. Once the anti-glare panel had been painted flat black and the
armored head rest installed and painted RLM 66, I glued in the windscreen. It
fit quite well with no real hassles. I used liquid cement to put it in place,
allowing capillary action to draw in the glue. The next item was the canopy.
Revell has stupidly, in my opinion, made the canopy frame as part of the
fuselage. This means there is no way to portray the canopy open unless you do
some surgery to the kit. It also means that it will be quite difficult to repair
any gouge made when removing the clear canopy from the sprue. I mean, what is
the point of having a detailed cockpit if you really cannot see it that well?
Anyway, once that was glued in place, the clear bits were masked and it was time
to apply the majority of the paint. I then turned my
attention to the interior. I bought this kit cheap at a swap meet. As usual, I
wasn't thorough enough when inspecting the kit and paid for it. No seat, broken
and missing pitot tube and one inner gun barrel. I put a plea on the Hyperscale
wants section and was rewarded with a very nice replacement seat from a more
than kind reader. I owe you one, Thanks!! With the interior bits glued in, it as
well as a few other bits were painted RLM 66. I also did some other piece
painting at this time. A bit of detailing and drybrushing was then done and the
interior installed in the fuselage. The fit is quite good and positive alignment
bits make it impossible to install incorrectly. The usual filler was added. The
wing was also glue onto the fuselage. Underside fit is very good, but the upper
wings are not so fortunate. There are large gaps that will have to taken care
of. Just bending the wings up to close the gap isn't an answer as you'll get a
grossly exaggerated dihedral if you do so. I stretched some sprue, stuffed it in
the gap and sanded it smooth. Some detail was lost. I would have used superglue,
but it would have eventually cracked.
I then turned my
attention to the interior. I bought this kit cheap at a swap meet. As usual, I
wasn't thorough enough when inspecting the kit and paid for it. No seat, broken
and missing pitot tube and one inner gun barrel. I put a plea on the Hyperscale
wants section and was rewarded with a very nice replacement seat from a more
than kind reader. I owe you one, Thanks!! With the interior bits glued in, it as
well as a few other bits were painted RLM 66. I also did some other piece
painting at this time. A bit of detailing and drybrushing was then done and the
interior installed in the fuselage. The fit is quite good and positive alignment
bits make it impossible to install incorrectly. The usual filler was added. The
wing was also glue onto the fuselage. Underside fit is very good, but the upper
wings are not so fortunate. There are large gaps that will have to taken care
of. Just bending the wings up to close the gap isn't an answer as you'll get a
grossly exaggerated dihedral if you do so. I stretched some sprue, stuffed it in
the gap and sanded it smooth. Some detail was lost. I would have used superglue,
but it would have eventually cracked. Once that was done, I was
able to continue on to other areas. One was the upper engine cowl. The fit on
this part is quite good, though I did have a bit of a gap at the very front.
Fortunately, this area is easy to fill and smooth out. The next part that got my
attention were the tailplanes. The mounting lugs are such that you cannot put
them on the wrong side unless you do some modification. Fit here was very good.
The underfuselage mount for the drop tank was next. This is a rather large piece
and so you may need to clamp it in place to get it to fit snugly. There were
depressions in it as well as it is a thick piece of plastic so filler was used
to take care of them.
Once that was done, I was
able to continue on to other areas. One was the upper engine cowl. The fit on
this part is quite good, though I did have a bit of a gap at the very front.
Fortunately, this area is easy to fill and smooth out. The next part that got my
attention were the tailplanes. The mounting lugs are such that you cannot put
them on the wrong side unless you do some modification. Fit here was very good.
The underfuselage mount for the drop tank was next. This is a rather large piece
and so you may need to clamp it in place to get it to fit snugly. There were
depressions in it as well as it is a thick piece of plastic so filler was used
to take care of them.
|
CAMOUFLAGE |
This plane was going to be a semi-late war A-8. The colors used for the
camouflage were RLM 81/82 upper with RLM 76 undersides. These were all from the
Aeromaster enamel line. The wheel wells and struts were painted RLM 02. I first
applied the underside color and when dry, masked off the tailplanes. Then the
upper RLM 82 was painted on. When dry, it was masked with Tamiya tape and the
camouflage area was cut out with a very sharp knife. I do the cutting right on
the model, making sure it cuts enough to slice the tape, but not so much as to
cut into the kit below.  This takes much practice and several
modelers I know don't do
this at all, preferring to mark the camo scheme of the tape, remove it to a
piece of glass, cut the camo lines and reapply it to the plane. This will
prevent any accidental slicing into the plane. You can also make masks out of
card and reuse them over and over again. If doing several of the same plane, it
is a really good idea.
This takes much practice and several
modelers I know don't do
this at all, preferring to mark the camo scheme of the tape, remove it to a
piece of glass, cut the camo lines and reapply it to the plane. This will
prevent any accidental slicing into the plane. You can also make masks out of
card and reuse them over and over again. If doing several of the same plane, it
is a really good idea.
Once all the main colors were on the kit, the wings and tailplanes were completely covered so that the side mottling could be done. I find this part of the kit the most fun. If you overdo it, simply spray on some RLM 76 to cut back on the effect or respray the area and try again. If you have messed up many times, you may need to strip the paint down to bare plastic, but I've never gotten things that bad in a long time. It was at this time that I realized I needed a yellow rudder so that was painted white then yellow and masked. The area I messed up was resprayed. Once that was done, it was back to the workbench for more construction.
|
THE FINAL STRETCH |
 With the camouflage scheme on, it was time to add some more parts. First on
this list was the main landing gear. This required a modification from the norm.
The plane I was modeling had no lower section to the main gear doors, so those
were removed and the ends cleaned up. Then it was time to do some decaling. I
had chosen a late war plane from an unknown unit that is on Aeromaster sheet
72-042. This one was green 3 with a chevron. The decals were made by Microscale,
so were nice and thin. I did notice that the 3 was a bit off register and you
can see some of the white background. It wasn't noticeable until it was already
on the plane, so I'll have to live with it. The decals reacted quite well to
setting solutions, as do all Microscale products. Had a bit of fun trying to get
the spiral on the spinner properly, but it eventually succumbed to setting
solution. With the decals on, the wheels
were glued in place.
With the camouflage scheme on, it was time to add some more parts. First on
this list was the main landing gear. This required a modification from the norm.
The plane I was modeling had no lower section to the main gear doors, so those
were removed and the ends cleaned up. Then it was time to do some decaling. I
had chosen a late war plane from an unknown unit that is on Aeromaster sheet
72-042. This one was green 3 with a chevron. The decals were made by Microscale,
so were nice and thin. I did notice that the 3 was a bit off register and you
can see some of the white background. It wasn't noticeable until it was already
on the plane, so I'll have to live with it. The decals reacted quite well to
setting solutions, as do all Microscale products. Had a bit of fun trying to get
the spiral on the spinner properly, but it eventually succumbed to setting
solution. With the decals on, the wheels
were glued in place.
Once all the decals were applied, the plane was wiped down with a damp rag to remove any residue from glue or setting solution. It was then resprayed with a matte acrylic clear to seal in the decals. Then the kit was taken back to the workbench to have the final bits and pieces applied.
During the construction process, I had managed to break off all the guns, however, the nice thing about having a spares bin is that you can easily find replacements! These were installed and painted gunmetal. At this stage, the masking was removed from the clear bits to check for paint creep. That which was found was chipped away with a sharpened toothpick. Then the radio antenna was attached using clear stretched sprue. I then applied some pastels to the exhaust and highlighted the control surfaces with a Rapidograph pen. The drop tank was not installed as it just didn't look good.
|
CONCLUSIONS |
So there you have it. A rather nice late war Fw-190A-8. Despite the non-opening canopy the kit is quite nice and has detail in places that the Hasegawa kit does not. It is also less expensive. However, I should point out that some of the detailing is much more exaggerated than on the Hasegawa kit; the upper cannon fairings and lower shell ejector chutes, for example. For my money, I'd rather have the Hasegawa kit as it just looks a bit better than the Revell version, but it is a judgment call as both will fill the bill.
October 2001

|
REFERENCES |
Aircraft Monograph #4: Fw-190A/F/G/S by Adam Skupiewski, AJ Press
Review kit courtesy of me and my wallet!
If you would like your product reviewed fairly and quickly, please contact me or see other details in the Note to Contributors.