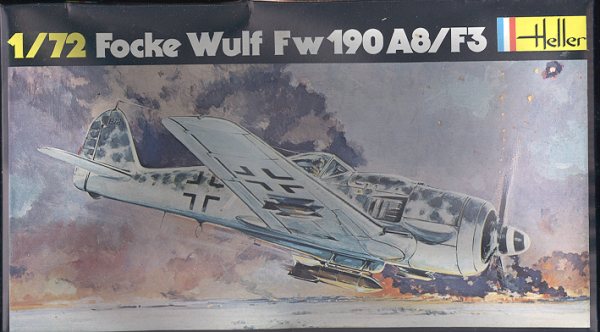
Heller 1/72 Fw-190A-8/F-3
|
KIT # |
235 |
|
PRICE: |
$5.00 |
|
DECALS: |
Two aircraft |
|
REVIEW : |
|
|
NOTES: |
|
BACKGROUND |
For a look at what comes in the box, please see the preview.
|
CONSTRUCTION |
Starting with the usual part of the kit, the cockpit, the side panels, control stick and seat were glued onto the floor section. All of the bits have ejector pin marks, and while the control stick and side panels are not visible when glued in, those on the floor and in the middle of the seat are. Your choice as to whether to remove them or not. I didn't.
During this time, the wing was assembled. It is very
straight-forward with a single piece lower wing and two upper halves. It is
quite obvious when gluing it that there is no boxed in wheel well, however, the
lower fuselage will at least keep you from seeing into the cockpit! With the
cockpit dry, I test fit it. As feared from the too large seat, the side consoles
prevented the fuselage halves from fitting. A bit of sanding took care of that!
Then the interior and fuselage interior were painted RLM 66 dark grey.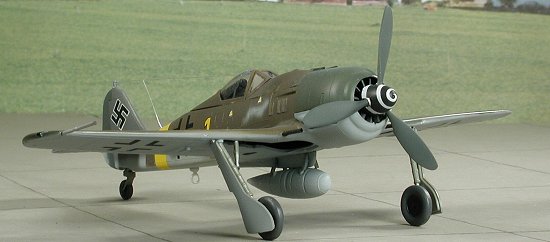
When that was dry, the interior and the forward 'engine' (or whatever that fan-looking thing is), were glued in and the fuselage glued together. Fit is fair. The wings were also glued to the fuselage at this time. They fit rather well with minimal gaps. This assembly was sanded and any seams filled. With the wings on, the stabilizers were next. These are a butt fit, but fit rather well.
On to the cockpit section again, where the head armor section was glued together. Since I was doing a late war A-8, I used the thicker looking armor piece. The instructions intimate that this will fit into the canopy, but don't be fooled as it won't. The windscreen was glue in place followed by the head armor, followed by the canopy. Fit on all is pretty good. Moving to the underside, the long bomb rack piece was glued on after the bomb mounts were glued in place. This doesn't fit too well and the placement guide shows it fitting too far aft. Once I had it in place, I left it to dry. Imagine my surprise when I came back to the kit several hours later to find that the rack had crept over to the side a bit and was no longer perfectly aligned! Well, this is not to be a contest model so I left it. The clear bits were masked and it was time to add some paint.
|
PAINT & DECALS |
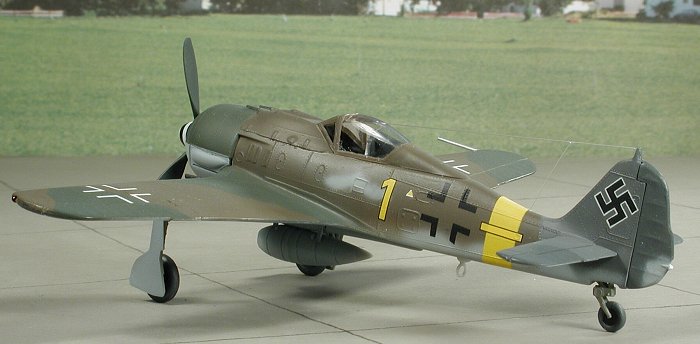
 This is my favorite construction phase. I decided to use yet another
scheme from Aeromaster sheet 72-042. There are a number of late war 190s on
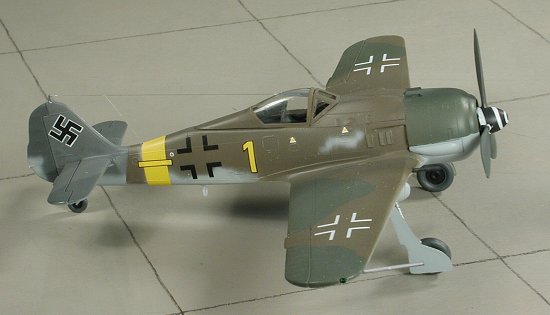
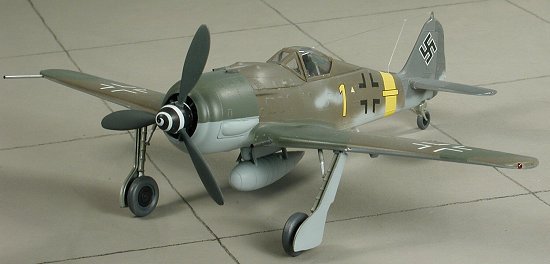
this sheet and I chose to do another from it. This time it was Yellow 1 from
II./JG 11. The plane has the forward section in late war colors and a
replacement tail section in an earlier scheme. This meant lots of masking. I
used a combination of Aeromaster and Xtracolor enamels when doing this
particular paint scheme and the end result looked quite convincing.
This is my favorite construction phase. I decided to use yet another
scheme from Aeromaster sheet 72-042. There are a number of late war 190s on
this sheet and I chose to do another from it. This time it was Yellow 1 from
II./JG 11. The plane has the forward section in late war colors and a
replacement tail section in an earlier scheme. This meant lots of masking. I
used a combination of Aeromaster and Xtracolor enamels when doing this
particular paint scheme and the end result looked quite convincing.
Once the paint was dry, the kit was brought back to the workbench to have the landing gear installed. The main gear are extremely flimsy since the retraction struts are too small, and mounted too low to offer any substantial support. After gluing them on and letting the glue dry, I added a 'collar' of superglue at the attachment point to offer some additional support. Then the axles were clipped shorter and the toy wheels glued in place. The tail wheel is built into one of the fuselage halves so that was painted the appropriate colors and the kit was then given a coat of clear gloss in preparation for the decals.
Aeromaster's decals for this plane worked just fine with no hassles at all. They succumbed as they should to Champ setting solution. The tail band does not fit well and you might want to consider painting this on. However, since this was to be a shelf sitter, I used the decal that was supplied. One glitch was that I accidentally brushed the bottom of the tail band while it was mush from the Champ. Once dry, the mangled section was just removed. I'll tell folks that this area was painted over. Hey, it could happen!
|
LAST BITS |
 With the decals on, I then proceeded to add some of the 'fiddly'
bits. The lower fuselage DF loop disappeared into the carpet during cleanup. A
search of the spare bits bin was made to find a replacement. Then the prop was
glued into the spinner; that assembly threaded through the fan and that assembly
glued in place.
With the decals on, I then proceeded to add some of the 'fiddly'
bits. The lower fuselage DF loop disappeared into the carpet during cleanup. A
search of the spare bits bin was made to find a replacement. Then the prop was
glued into the spinner; that assembly threaded through the fan and that assembly
glued in place.
Then I had to do something about the guns and pitot tube. If you recall, the cowl guns went flying early in the construction. These were replaced with little bits of stretched sprue. Not exactly prototypical, but better than what came with the kit. The inboard guns were attached by their little half-moon pegs as was the pitot tube. The guns were painted gun metal and the pitot tube aluminum. That basically was it for the bits to glue on. The outer guns were not fitted.
The kit was sprayed with matte clear, then the masking taken from the canopy and windscreen. Next a radio antenna was made from stretched sprue and some final touchup painting was done. That makes one more 1/72 FW-190 to add to the collection!
|
CONCLUSIONS |
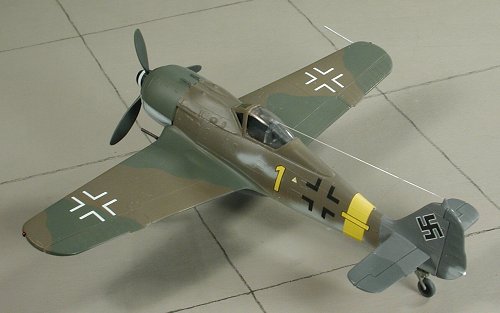
 In 1970, this was undoubtedly a super kit. In 2002 it is not. There are some
shape problems and the kit is just too crude for most of today's builders. Now
this would be a great kit for a newcomer. No worries if it is less than perfect.
It is also pretty easy to find at swap meets for a buck or two, so if you are a
modeler on a budget, then this wouldn't be a bad choice. Overall, it looks OK,
but once you place it next to a more modern 1/72 190 its flaws become quite
apparent.
In 1970, this was undoubtedly a super kit. In 2002 it is not. There are some
shape problems and the kit is just too crude for most of today's builders. Now
this would be a great kit for a newcomer. No worries if it is less than perfect.
It is also pretty easy to find at swap meets for a buck or two, so if you are a
modeler on a budget, then this wouldn't be a bad choice. Overall, it looks OK,
but once you place it next to a more modern 1/72 190 its flaws become quite
apparent.
February 2002
Copyright ModelingMadness.com. All rights reserved. No reproduction in part or in whole without express permission from the editor.
If you would like your product reviewed fairly and quickly, please contact the editor or see other details in the Note to Contributors.