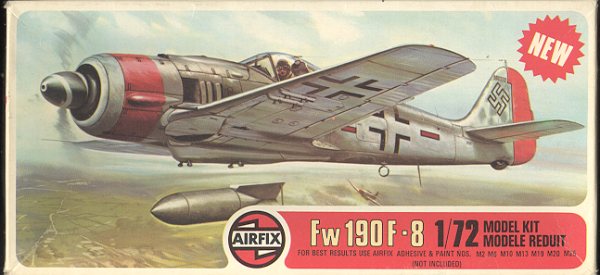
Airfix 1/72 FW-190F-8
|
KIT # |
2063 |
|
PRICE: |
$? |
|
DECALS: |
Two aircraft |
|
REVIEW : |
|
|
NOTES: |
|
|
BACKGROUND |
To read about the aircraft and see what is in the box, please follow this link.
|
CONSTRUCTION |
The first thing that one notices when starting work is that there is darn little in the cockpit. Basically just a seat on which to place the pilot (who has no feet). Fortunately, the cockpit is small and the transparencies thick so that is not really an issue. All this is painted RLM 66 to make it even darker! The wings were then assembled and since I am doing an F-8 variant, the inserts in the lower wing for the bomb racks were glued in place. Back at the fuselage, the interior as it were was glued into the fuselage and the fuselage halves glued together. Once that was complete, the nose section was glued on and then the wings glued to the fuselage. I then got out the filler and started filling in seams and gaps.
 This all sounds pretty straight-forward as it is. There are
really no surprises and for a 1977 kit, it really isn't too bad. However, it
isn't one of those "I didn't use a bit of filler" kits and those wanting to
enter contests won't be using the Airfix 190. Probably the biggest filler user
to this stage was the wing fuselage join on the right side. There was a gap that
was too big for putty and too small for card stock so I used super glue and can
only hope that it won't crack due to flexing.
This all sounds pretty straight-forward as it is. There are
really no surprises and for a 1977 kit, it really isn't too bad. However, it
isn't one of those "I didn't use a bit of filler" kits and those wanting to
enter contests won't be using the Airfix 190. Probably the biggest filler user
to this stage was the wing fuselage join on the right side. There was a gap that
was too big for putty and too small for card stock so I used super glue and can
only hope that it won't crack due to flexing.
With the wings and fuselage joined and filled, the head rest brace was added to the cockpit and the tailplanes glued in. The tail planes fit very well indeed and were nice and snug. Then the bomb racks were glued under the wings as was the centerline rack. The various undersurface antenna were cemented in place and the canopy was glued on. The canopy is really too wide for the fuselage and unless you want to spend time sanding it down, it may be better to leave it as it is. This was then masked and the aircraft taken to get some paint put on it.
|
CAMOUFLAGE |
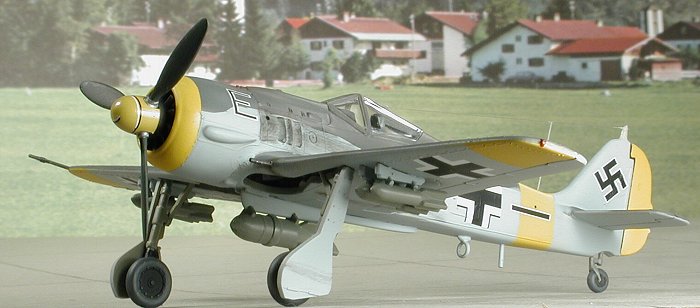
Though there are literally dozens of 1/72 sheets for the FW-190A-8, there are darn few for the F-8 version. Fortunately, Aeromaster 72-053 is full of ground attack 190s so I chose the one from SG 4 as it had some nice yellow Eastern Front markings. Whenever I start to paint an aircraft, I always start with the underside. That way I can mask off the horizontal stabilizers. Then the upper colors go next, generally starting with the lighter shade. Then that is masked and the darker shade is sprayed on. I used RLM 74/75/76 from the Aeromaster range. I'll be quite sad when this super enamel paint is used up, but perhaps something equally as good will come along.
 Anyway, with the underside color on, I thought I'd try to get
away without applying a white base for the yellow. I dutifully sprayed all the
yellow parts with Extracolor RLM 04. It dried quickly and gloss, just like it is
supposed too, but was too dark. A few days of curing and the areas were
resprayed with Floquil Reefer white. When that dried, it was gently buffed to
remove much of the matte and then the Extracolor was reapplied.
Anyway, with the underside color on, I thought I'd try to get
away without applying a white base for the yellow. I dutifully sprayed all the
yellow parts with Extracolor RLM 04. It dried quickly and gloss, just like it is
supposed too, but was too dark. A few days of curing and the areas were
resprayed with Floquil Reefer white. When that dried, it was gently buffed to
remove much of the matte and then the Extracolor was reapplied.
Now that the yellow was properly applied, it was masked and the rest of the scheme applied. I tend to mask camo schemes in 1/72 as freehand overspray is generally over done in this scale. Mottling has to be done freehand as there is no other way to successfully accomplish this. Fortunately, no mottling was needed on this kit. With all the colors on the kit and dry the masking was removed from all but the canopy.
|
A BIT MORE WORK; |
The aircraft was taken back to the bench to have the landing gear installed. The fit of the gear was not too bad, especially after the braces were glued in place. You do have to be careful when letting this all dry as it isn't a super tight fit. Being able to get the proper 'sit' of the gear is a major accomplishment with most 190 kits in any scale. When the aircraft was able to sit on its own gear, the wheels and landing gear covers were glued in place. As you can imagine, the Airfix landing gear covers are about 5 times too thick, but this is basically an OOB review and that is the way they were left.
 While the gear was
drying, the bombs were painted RLM 02, a pretty standard color for these items.
I had originally decided to use the centerline bomb carrier with four small
bombs on it, but in the end decided on the big one on the centerline and two
smaller bombs on each outer wing. After they had dried, they were glued onto the
racks. The attachment method for the wing racks worked quite well. I had some
problems with the centerline bomb as the rack is slightly curved down and
prevents the bomb from fitting all the way down. Next kit (as if there will be
one), I'll sand down on the centerline rack first. Final thing to do was to
paint the 'engine' area flat black. Then the kit was given an overall coat of
clear acrylic in preparation for decals.
While the gear was
drying, the bombs were painted RLM 02, a pretty standard color for these items.
I had originally decided to use the centerline bomb carrier with four small
bombs on it, but in the end decided on the big one on the centerline and two
smaller bombs on each outer wing. After they had dried, they were glued onto the
racks. The attachment method for the wing racks worked quite well. I had some
problems with the centerline bomb as the rack is slightly curved down and
prevents the bomb from fitting all the way down. Next kit (as if there will be
one), I'll sand down on the centerline rack first. Final thing to do was to
paint the 'engine' area flat black. Then the kit was given an overall coat of
clear acrylic in preparation for decals.
Then it was on to decals! As mentioned earlier, I used the markings for an SG 4 aircraft with all sorts of yellow. First thing I did was to apply the first part of the spinner decal. Yes, there are two that are supposed to fit side by side. Well, while it is on, it didn't fit quite as well as the makers would have hoped. Nonetheless, they did manage to get on there and look OK. THe rest of the decals fit just fine with a bit of Solvaset to snuggle them down. Most are two part decals so that registration isn't a problem. It took several days for me to get them all on.
|
THE LAST PARTS |
 With the decals on and dry, the
kit was wiped down and then given a coat of clear matte acrylic. I use a mixture
of Future and Tamiya flat base. It works quite well, dries quickly and you can
adjust the amount of matte that you want. It also will not react with the
underlying paint like Dullcote can. I've had a number of models ruined by
Dullcote, mostly by applying it too thick and it ate the paint! Anyway, with the
matte coat on, the masking was taken off the canopy. I recoiled in horror as I
looked upon the too-large canopy that had been forgotten under the tape!
With the decals on and dry, the
kit was wiped down and then given a coat of clear matte acrylic. I use a mixture
of Future and Tamiya flat base. It works quite well, dries quickly and you can
adjust the amount of matte that you want. It also will not react with the
underlying paint like Dullcote can. I've had a number of models ruined by
Dullcote, mostly by applying it too thick and it ate the paint! Anyway, with the
matte coat on, the masking was taken off the canopy. I recoiled in horror as I
looked upon the too-large canopy that had been forgotten under the tape!
The inner wing guns and the pitot tube were glued in place and painted. Then the prop/fan assembly was glued in. This did not fit too well. To me it looks as if it doesn't go back into the cowling far enough. I also should have painted the spinner attachment section yellow as it just looks a bit odd the way it is. An antenna was added from stretched clear sprue and exhaust and gun stains added with pastels. The wing tip lights were painted and the model photographed before I broke something!
|
CONCLUSIONS |
Overall I wasn't too disappointed by the kit. The canopy deal can be corrected by shimming the fuselage halves to match the width. The prop/fan deal can also be fixed by sanding the back of the fan to allow it to sit farther back. Bottom line is that it is a kit that doesn't take a lot of cash to buy, and can be made into a fairly nice model. It is one that I wouldn't be afraid to give to a youngster or someone who is beginning in the hobby as it allows the use and practice of several basic skills. Those who want a better kit can look to the recently tooled Airfix version and leave this older one to the youngsters or collectors.
April 2002

Copyright ModelingMadness.com. All rights reserved. No reproduction in part or in whole without express permission from the editor.
Review kit courtesy of my kit collection.
If you would like your product reviewed fairly and fairly quickly, please contact the editor or see other details in the Note to Contributors.
Back to Reviews Page 2022