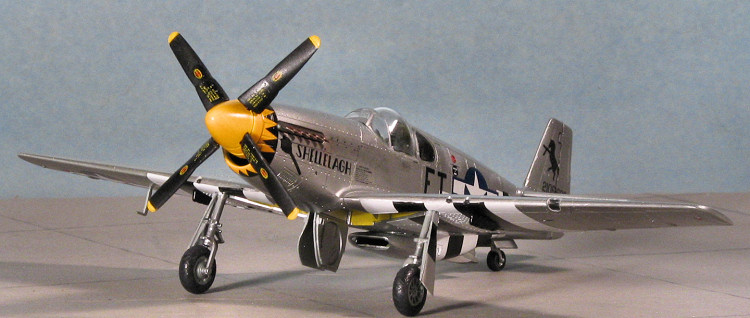
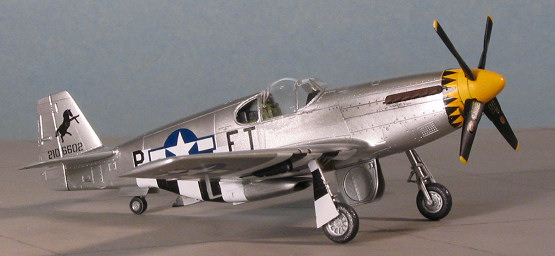
Academy 1/72 P-51B Mustang
| KIT #: | 1667 |
| PRICE: | $10.00 MSRP |
| DECALS: | Three options |
| REVIEWER: | Scott Van Aken |
| NOTES: |
| HISTORY |
Well, let's see. Where to start. The short version is
that North American was approached by the Brits to build P-40s. The N.A. guys
figured they could do better so in 90 days designed what turned out to be a
superior airframe around the same Allison engine used by the Warhawk. The Brits
were delighted and used their aircraft in the tactical recce role. The USAAF had
a number built as 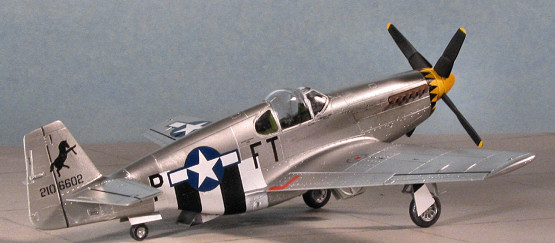 the A-36A Mustang ground attack aircraft
with a few mods. It was also well
liked.
the A-36A Mustang ground attack aircraft
with a few mods. It was also well
liked.
Meanwhile the US had gotten into the war and was looking for an escort fighter for its heavies out of Europe. US aircraft makers were doing a darn poor job of developing the plane needed. The P-38 suffered from high altitude engine failures and the P-47 was too short-legged. Meanwhile the Brits has stuffed a Merlin in a Mustang I and its performance at altitude was exceptional. US pilots that flew it were impressed. Army brass was against the Mustang as it 'wasn't designed for us'. They also didn't believe in drop tanks to extend range of fighters. Finally in 1943, someone got some sense and listened to the US pilots; ordering drop tanks for the P-47s (which helped but still left them short) and decided to have North American build the Mustang III with its Merlin engine for the US as well. These planes eventually got overseas in late 1943 and the rest is history.
| THE KIT |
Chris Baltrinic has done a good preview of this kit so I'll let his preview do all the required background.
| CONSTRUCTION |
After scoping out the instructions for things to be painted the same color, I glued together most of the cockpit components, glued together the wings and drop tanks, and then painted the interior bits with Testors Interior Green Enamel. When dry, various bits like the radio and instrument panel were painted matte black. As this is a P-51B, the floor was painted wood.
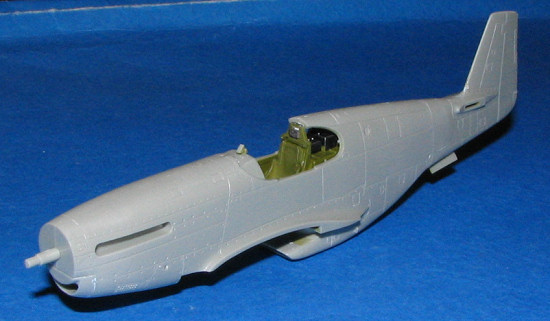 I then placed these into the interior, after a nice
dry-brushing, and cemented the fuselage halves together. At this time, the
radiator intake and oil cooler intakes were glued in. The latter seems a lot
wider than what is on a real Mustang, at least to me. I then took the time to
glue the wings together. Here again, things looked a tad odd. For one thing,
there is but a single shell ejection chute under each wing. This may be
prototypical, but I'd have thought there'd be one each. Secondly, the wing seems
to have too much 'crank' in it near the fuselage. More like a P-51D than the
shallower one of
I then placed these into the interior, after a nice
dry-brushing, and cemented the fuselage halves together. At this time, the
radiator intake and oil cooler intakes were glued in. The latter seems a lot
wider than what is on a real Mustang, at least to me. I then took the time to
glue the wings together. Here again, things looked a tad odd. For one thing,
there is but a single shell ejection chute under each wing. This may be
prototypical, but I'd have thought there'd be one each. Secondly, the wing seems
to have too much 'crank' in it near the fuselage. More like a P-51D than the
shallower one of 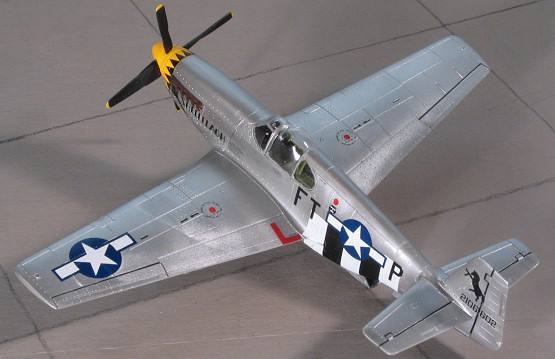 a P-51B. If the Hasegawa kit was the main inspiration, then
this may explain it.
a P-51B. If the Hasegawa kit was the main inspiration, then
this may explain it.
 With the fuselage together, puttied (and really not as
much as with some other kits), and sanded, I glued on the tail planes. On some
Mustangs, these are handed with the trim tab actuators on one side only. This
has them on both sides, which I don't think is right either. After they lined up
and dried, I glued on the wing. This has a step on the front where it meets the
fuselage, so you can either break out the sandpaper and files or the filler. I
used the files method.
With the fuselage together, puttied (and really not as
much as with some other kits), and sanded, I glued on the tail planes. On some
Mustangs, these are handed with the trim tab actuators on one side only. This
has them on both sides, which I don't think is right either. After they lined up
and dried, I glued on the wing. This has a step on the front where it meets the
fuselage, so you can either break out the sandpaper and files or the filler. I
used the files method.
Now that I had a pretty complete airframe, It was time for the canopy. Academy gives you three options. One is the standard 'framed' canopy, another is an opened 'framed' canopy, and the third is the Malcolm Hood. I chose the latter as it was to match the markings I had in mind. No canopy rails included in this kit either and I'm wondering if any Mustang kit offers these. Fit of the clear bits is excellent, but I have to say that once again 'odd' pops up as the forward windscreen portion just doesn't look totally right, especially near the top.
With all that masked, I headed for the paint shop.
| COLORS & MARKINGS |
This one was to be overall unpainted metal so I got out the Alclad and started spraying. Well, I goofed and put some of it on too thick as it slightly crazed the plastic underneath. Nothing major, but not the finish I was hoping for. Nothing to do but continue on so Afte the initial metallic coats were applied, I spray painted the nose and spinner with gloss white. The next thing that went on was some nice yellow and when dry, the nose was masked off and the area repainted with Alclad II.
 Though it is a bit late in the article to mention this,
two things. One is that when using the Malcolm Hood, there is no radio mast. The
normal mast is replaced further back on the fuselage with a simple whip antenna.
This means that you need to fill the hole for this radio mast. Secondly, Academy
molds the tail wheel doors with the fuselage halves, a nice touch as it is one
less thing to sweat when it comes to adding bits. During all this painting, the
wheels and struts and main gear doors were also painted using slightly darker
metallic shades. I should also note that once the tires have the mold seam
sanded down, that the tread was restored using a hobby knife. About 15 minutes
is all this takes and it really does make things look better.
Though it is a bit late in the article to mention this,
two things. One is that when using the Malcolm Hood, there is no radio mast. The
normal mast is replaced further back on the fuselage with a simple whip antenna.
This means that you need to fill the hole for this radio mast. Secondly, Academy
molds the tail wheel doors with the fuselage halves, a nice touch as it is one
less thing to sweat when it comes to adding bits. During all this painting, the
wheels and struts and main gear doors were also painted using slightly darker
metallic shades. I should also note that once the tires have the mold seam
sanded down, that the tread was restored using a hobby knife. About 15 minutes
is all this takes and it really does make things look better.
I then returned to the work bench to install the main gear and wheels along with the tail wheel gear so I'd be able to sit the plane down on the landing gear while applying decals. The fit of the gear is good, but sloppy. You really have to be sure they dry evenly.
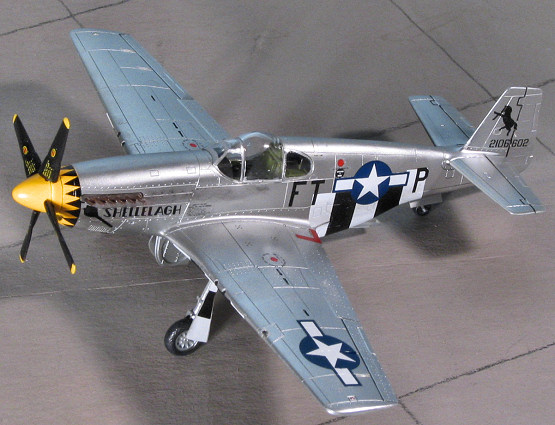
Now for the decals. I used
Superscale 72-874: 354 FG P-51B
Mustangs for this aircraft, picking 'Shellelagh' for this kit. The
instruction sheet specifies that this sheet is sized for the Academy kit. Well,
they must have based these markings on the P-51D as they didn't exactly fit the
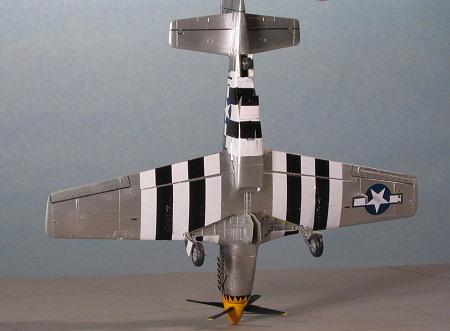
B model. I found this out when I went to apply the D-day stripes. The wing ones
are a forward section with the flap piece separate. This kit doesn't have
separate flaps. The decals did not take into account the molded on drop tank
pylons so the decal had to be cut to make room for it to fit and that area
repainted. I also found that the inboard section was way
 too large,
as if made for a P-51Ds larger inner wing section, so had to trim this off. The
flap pieces were too thin to fit on the flaps, leaving rather unsightly gaps
when applied. I put them near the trailing edge on the assumption that the
ground crew would have had the flaps down when they painted on these stripes.
too large,
as if made for a P-51Ds larger inner wing section, so had to trim this off. The
flap pieces were too thin to fit on the flaps, leaving rather unsightly gaps
when applied. I put them near the trailing edge on the assumption that the
ground crew would have had the flaps down when they painted on these stripes.
The ones for the center fuselage section do not conform to the area that well and again, more trimming of these markings had to be done to get them to fit. I had to paint the radiator exhaust door and part of the section that fits behind it. The pieces that go on the outer gear door fit fairly well, though are really a tad large for the doors. Trimming afterwards took care of this. The decal that fits around the nose not allow proper overlapping at the join or not designed for this particular kit, as the longer triangles extends too far into the short portion of the nose. To explain, there are two lengths of triangles on the nose decal; one is longer for the upper portion and one is shorter for the spots around the oil intake. There are more longer ones than shorter ones so the end effect is less than perfect. Eventually, all the decals were put in place and it was time to add all the last pieces.
| FINAL CONSTRUCTION |
 In
this case, there really wasn't much. I decided not to install the paper drop
tanks as they just looked like hell and would ruin the look of the model. The ID
lights and formation lights were painted and I installed the pitot tube. I then
drilled out the exhaust. These seem a bit small and have fishtail type openings.
The largest drill bit I could use was a #80 and it wasn't easy! Attempts at
drilling the gun ports resulted in disaster so I painted them gunmetal and left
well enough alone. I put on the prop and then took the plane to the paint shop
to have some Testors Metallizer Sealer put on to gloss up the prop and have all
the lower wing stripes the same basic shade as the gloss black paint was
glossier than the decals.
In
this case, there really wasn't much. I decided not to install the paper drop
tanks as they just looked like hell and would ruin the look of the model. The ID
lights and formation lights were painted and I installed the pitot tube. I then
drilled out the exhaust. These seem a bit small and have fishtail type openings.
The largest drill bit I could use was a #80 and it wasn't easy! Attempts at
drilling the gun ports resulted in disaster so I painted them gunmetal and left
well enough alone. I put on the prop and then took the plane to the paint shop
to have some Testors Metallizer Sealer put on to gloss up the prop and have all
the lower wing stripes the same basic shade as the gloss black paint was
glossier than the decals.
The control surfaces were outlined with a drafting pen, the masking removed from the canopy, and some pastels used for exhaust staining. Last thing was to glue on the landing light cover (which fit perfectly), and the canopy (which I managed to get some glue on the finish- GRR), and that, as they say, was it.
| CONCLUSIONS |
I originally bought this kit because I had thought that
the readership would choose it for the group build. However, I was foiled again
and an Academy kit was not the choice. Nothing left to do but build it, so I
did. Couple of things I was less than thrilled about. One was the separate rear
fuselage. I know why it was done, but I still don't like those kinds of things.
Second was that it 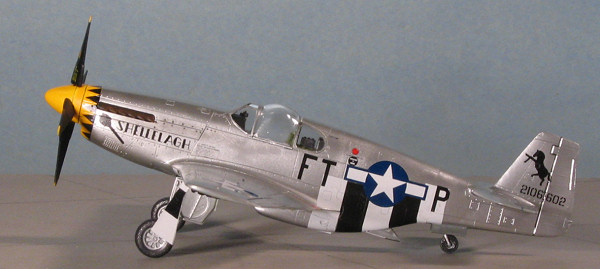 really is
not the most accurate P-51B on the market in this scale. This is shown by the
wrong shape of the oil cooler intake, the post war reinforcements on the top and
bottom of the wing, and the shape of the inner wing itself. Some other bits are
somewhat simplified or a bit oversize, while others (like the formation lights,
exhaust, ID lights and seat) seem too small.
really is
not the most accurate P-51B on the market in this scale. This is shown by the
wrong shape of the oil cooler intake, the post war reinforcements on the top and
bottom of the wing, and the shape of the inner wing itself. Some other bits are
somewhat simplified or a bit oversize, while others (like the formation lights,
exhaust, ID lights and seat) seem too small.
Now before you think I'm dumping on the kit, I'm not. It builds well with little in the way of fit problems. There are a goodly number of decal markings available on the sheet, it has several optional loads and the kit has good detail to it. The price is reasonable for a kit of this type and the huge majority of builders are not that concerned with the finer details of things and be very happy with the results. This last thing is really what is important in the scheme of things. It wasn't until I was into my 40s that I really started looking deeper into what I was building and things haven't quite been the same since.
For those who want a modern kit that will look great on the shelf next to your other 1/72 WWII fighters, this is a good one.
March 2006
# 1403 in a series
Copyright ModelingMadness.com. All rights reserved.
This kit is courtesy of me and I hope you appreciate it!
If you would like your product reviewed fairly and fairly quickly, please contact the editor or see other details in the Note to Contributors.
Back to the Review Index Page 2016