Installment 7
 At
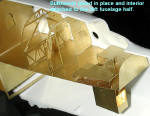
this point, I thought that perhaps I should go ahead and install the
bulkheads to the floor plate and then glue this into the left fuselage
side, as the instructions suggested early on. I found the fit to be a bit
looser than I'd anticipated, but that was not a problem as it ensured that
all the parts fit in there without any hassles. It also showed how little
will actually be seen from the outside! This is where you need very clear
transparencies to do a proper job of things.
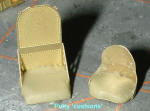
In addition to continuing to build little boxes for the
radios, I made some seat cushions out of A+B Epoxy Putty instead of plastic
as was recommended. You can use Milliput for the same thing. I also made
one set of radio boxes out
 of
this stuff as it is pretty solid and easy to work with. Naturally, I
made about 3 times the amount that I needed and used some of the extra to
fill in the previous radio boxes that I'd made. Once it dries, it can be
shaped and carved some more to remove any rough bits.
I also put together the co-pilot's seat. It looks just like the one for the pilot. Thanks to the long dry time for the putty, little else was done.
Installment 8
 With
all the putty and filler properly dried and sanded (as the case may be), I
then painted all this stuff and the fuselage with Testors ModelMaster RAF
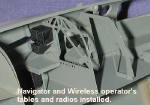
Interior Green enamel. Then I went about attaching the various black boxes
(which were painted, oddly enough, with flat black). The Navigator has a
dual radio installation that fits under the left side of his desk. To get
this to properly fit, I glued a few strips of thick plastic card under the
table and glued the radios to it. I then routed the radio cable behind the
bench and glued it and the Wireless Operator's bench into position.
I also built up some of the parts for just under the forward turret. Not really a whole lot for two day's work, but much of that was fiddling with the radios and waiting for paint to dry.
Thanks to White Ensign Models for the etched set and to Falcon for the clear-vax canopy.
|
COLORS & MARKINGS |
|
FINAL CONSTRUCTION |
|
CONCLUSIONS |
|
REFERENCES |