Revell 1/72 P-26A Peashooter
| KIT #: | H-656 |
| PRICE: | ~$5.00 |
| DECALS: | One option |
| REVIEWER: | Chris Mikesh |
| NOTES: |
| HISTORY |
It happened a long, long time ago. No one seems to remember the day, but it was sometime around spring, a late morning. There was an unfamiliar sound of a couple of radial engines flying overhead as farmers were planting corn and tending to their livestock out in the fields.
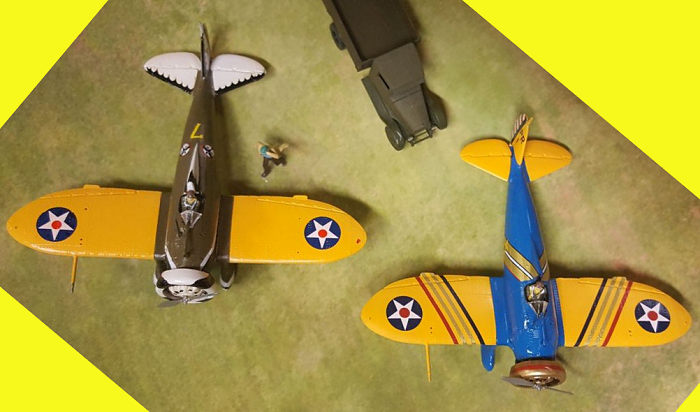
The sound got louder as the two planes grew closer and closer to an open field nearby where several people seemed to be waiting for them. Overhead, you can clearly see the US Army markings on the bottom of the wings of the brightly-painted aircraft. People gawked and shouted about how smart those planes looked in their beautiful yellow wings. Granny said they looked “dangerous”.
The Peashooters passed overhead, pulled up and
broke to the left as the engine slowed. With a small waft of dust the two planes
touched down and taxied up to the small group of photographers waiting fo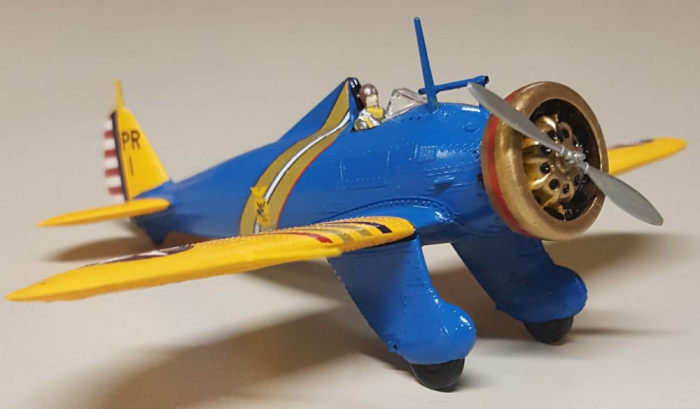 r
them.
r
them.
One of the Pilots was a local boy who made good and was proud of his new ‘Pilot’ status, as his father rushing up to meet him. These planes were making a cross-country trip, and the pilots needed to make one last stop to refuel and grab a sandwich. .
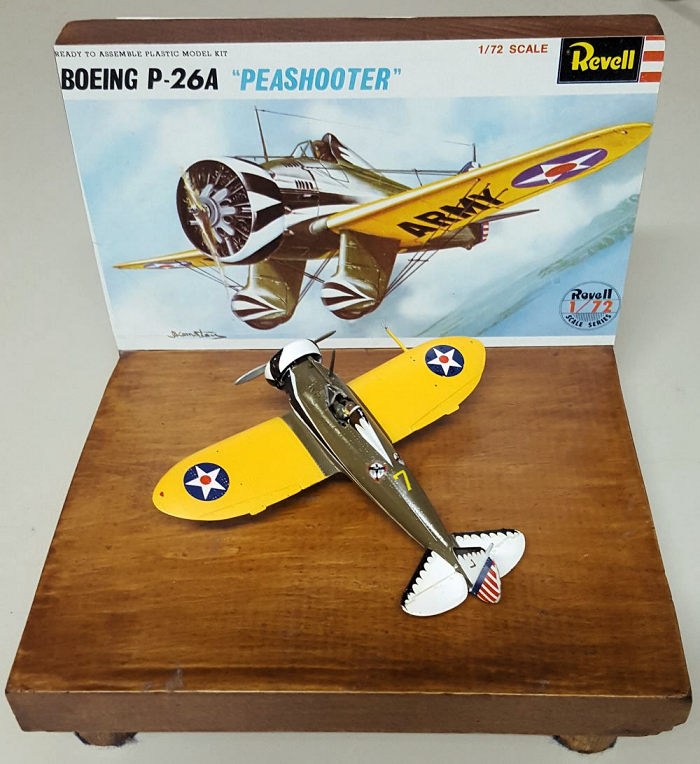
Fictional or not, the Revell P-26 in 1/72nd scale turned out to be very nice models.
(Quoted from the instruction sheet - Abridged)
Boeing's pint-sized P-26 was the fastest and most advanced fighter in the world when it first appeared in the early 1930s. Its performance was so outstanding that the US Army Air Corps formed their two top Pursuit squadrons around the little fighter.
In 1934 Boeing begin shipping peashooters to China where they were used against the Japanese early in World War II. On December 10th 1941, 3 Philippine Army Air Corps P-26s surprised a superior force of Japanese bombers and completely disrupted the enemy attack. Other P-26s were in service in Hawaii and the Panama Canal Zone when the war began.
| THE KIT |
 Years ago,
my father had a huge collection of models in the basement. The Revell 1/72 WWII
“H” series kits – specifically the fighters, (24 of them) were a favorite of
mine and I always wanted to build them. This build is #17 of the collection.
Years ago,
my father had a huge collection of models in the basement. The Revell 1/72 WWII
“H” series kits – specifically the fighters, (24 of them) were a favorite of
mine and I always wanted to build them. This build is #17 of the collection.
The models are built ‘out of the box’ and are straightforward. Wings, elevator, fuselage halves, engines, wheels, and propeller are common place for a 1960s era model kit.
Somewhere I found an extra P-26, and stuck it in the box with the original. However it did not have decals. Searching the internet, I rediscovered Starfighter Decals, and it filled the bill perfectly. I ordered the decal sheet and the decal sheet arrived before I got the pilots painted. Excellent service!
| CONSTRUCTION |
 As with most
kits, the builder would start with the cockpit… Well… that was easy! There is
none. Paint the interior a dark color because the glaring yellow plastic will be
telling that there is no interior. I used Testors (edible latex) Chromate Green
(blue label). It was all I had at the time.
As with most
kits, the builder would start with the cockpit… Well… that was easy! There is
none. Paint the interior a dark color because the glaring yellow plastic will be
telling that there is no interior. I used Testors (edible latex) Chromate Green
(blue label). It was all I had at the time.
However, painting the pilots would be the obvious choice because without the pilot there would just be a hole. By the way, Starfighter does have an Interior available: #7206. As my effort was to be out of the box I opted to paint the pilot according to the instructions. The pilot does fit in the cockpit area very closely so interior detail is not necessary.
In my examples both fuselage halves fit together with no trouble. Next, in all its simplicity, where the wings. Traditional to Revell, is a whole bottom half wing, with half to fit on top. Assembly was just as easy as the fuselage. However, this is where I diverted from the instruction sheet.
| COLORS & MARKINGS |
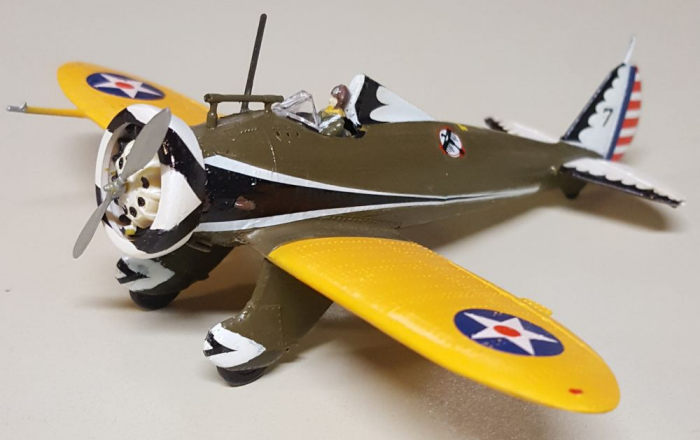
As I knew it would be easy to paint the wings then attach them to the fuselage I went ahead and painted them Chrome Yellow (Tamiya TS-47). Setting those aside to cure, I paid attention to the engines and cowling. The engines were painted with Tamia metallic gray (XF-56) and the propellers were painted with a silver Sharpie. (!!??) Yup – A Sharpie! Speaking of Sharpies, the cowling of the blue and yellow plane (Wheeler Field) was a gold Sharpie. The paints that I had were a very coarse metallic flake, and simply not up to the task. But the Sharpies don’t require clean-up, and literally get right to the point! Back to the fuselage; I used Tamiya Brilliant Blue (TS-44), and the other is Testors Olive Drab (1911) from a rattle can.
 As the
plastic was yellow in its natural state, the white paint for the cowling,
elevator and rudder (17th
PS) needed to be applied by airbrush and multiple coats. Three coats of white
finally covered the yellow plastic.
As the
plastic was yellow in its natural state, the white paint for the cowling,
elevator and rudder (17th
PS) needed to be applied by airbrush and multiple coats. Three coats of white
finally covered the yellow plastic.
Focusing on the blue and yellow plane (Wheeler), it was comparatively easy. Spray painting the fuselage blue, was no task at all, as you can see. Final assembly was easy, and all I needed to do was unmask the rudder, add the wings, wheels, engine cowling, and elevator, and most of the plane was completed including painting.
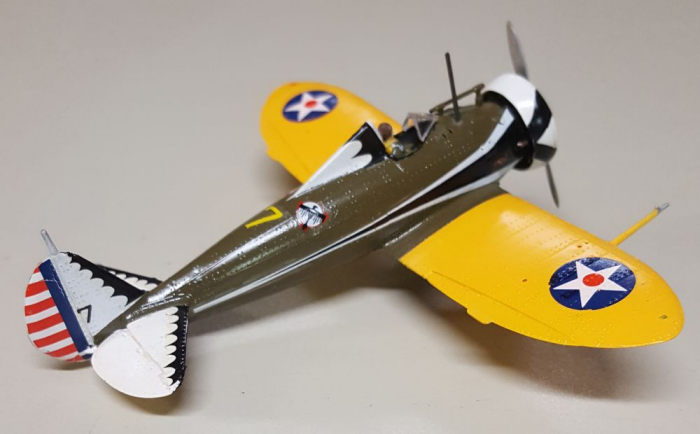
17th Persuit Sq. (Olive Drab) The original decals from the Revell kit were used. These were difficult to deal with because they were cracked due to age. I used Micro Scale Decal Saver to prevent the problem from getting greater. Even after sitting for several hours, I could see cracks developing and continuing as the Decal Saver was drying.
The scalloping on the elevators broke frequently and was difficult to bend around the leading edge from the top to the bottom. MicroSol helped a lot, but could not solve all problems. Once those decals we applied, I did touch up with fine point black Sharpie or paint as needed. The small scale made it difficult for precision work.
The cowling had a similar situation. Early Revell decals were not really meant to go around curved surfaces easily. Again, MicroSol helped solve the problem. The black and white fuselage striping as well as the elevator scalloping and rudder red and white stripes continued to be difficult, as they were thin and broke frequently.
Starfighter Decals. The decals on the blue and yellow plane from Wheeler Field were Stock number 72-126 “Peashooters in Gold”. Recommended! The decals were thin, and were very compatible with MicroSol and MicroSet. However, they settled very nicely without. The surface of the paint was glossy, and the decals were very well-suited with the spray painted areas.
| FINAL CONSTRUCTION |
 Finally, I
did not run the wires on the planes. As tempting as it was to put that final
definition on those planes, I simply did not have the resources to get the
extremely fine wire that would not be out of scale. The kit provides the holes
and pictures to run the wires. In addition, I knew I would never be able to dust
them without breaking the wires. Stretched sprue is an option. I may get back to
this someday if I get younger.
Finally, I
did not run the wires on the planes. As tempting as it was to put that final
definition on those planes, I simply did not have the resources to get the
extremely fine wire that would not be out of scale. The kit provides the holes
and pictures to run the wires. In addition, I knew I would never be able to dust
them without breaking the wires. Stretched sprue is an option. I may get back to
this someday if I get younger.
As everything completed, I coated the whole shebang with a diluted solution of water and Future Floor finish. This gave a nice sheen on the planes and coated the decals to prevent them from peeling more.
| CONCLUSIONS |
Any completed kit becomes a model. All models are respectable because people a drawn to them as they are all unique. Are the kits good and would I recommend them? Yes! Most certainly. These P-26s have good surface detail even for a 1960’s kit. They set a high standard for other model companies to aspire to. Averaging around $5 at most Model Swap Meets, you can’t beat the value. AZ and Pavla have made 1/72 P-26s, and have good reviews also.
No sanding sticks were harmed in the production of these models.
Display Stand: The model stand is easy to do. Here is a link if you’d like to give it a try.
3 June 2022
Copyright ModelingMadness.com. All rights reserved. No reproduction in part or in whole without express permission.
If you would like your product reviewed fairly and fairly quickly, please contact the editor or see other details in the Note to Contributors.