Hasegawa 1/72 MV-22B Osprey
| KIT #: | 01571 |
| PRICE: | 3060 yen |
| DECALS: | Three options |
| REVIEWER: | Dan Lee |
| NOTES: | Base Boxing 2013 |
| HISTORY |
From Wiki (edited)
The defining mission of the U.S Marine Corps (USMC) has been to perform an amphibious landing; the service quickly became interested in the JVX program. Recognizing that a concentrated force was vulnerable to a single nuclear weapon, airborne solutions with good speed and range allowed for rapid dispersal, and their CH-46s were wearing out. Without replacement, the USMC and the Army merging was a lingering threat, akin to President Truman's proposal following World War II. The OSD and Navy administration opposed the tiltrotor project, but congressional pressure proved persuasive.
The Navy and USMC were given the lead in 1983. The JVX combined requirements from the USMC, USAF, Army and Navy. A request for proposals (RFP) was issued in December 1982 for preliminary design work. Interest was expressed by Aérospatiale, Bell Helicopter, Boeing Vertol, Grumman, Lockheed, and Westland. Contractors were encouraged to form teams. Bell partnered with Boeing Vertol to submit a proposal for an enlarged version of the Bell XV-15 prototype on 17 February 1983. Being the only proposal received, a preliminary design contract was awarded on 26 April 1983.
 The JVX
aircraft was designated V-22 Osprey on 15 January 1985; by that March, the first
six prototypes were being produced, and Boeing Vertol was expanded to handle the
workload. Work was split evenly between Bell and Boeing. Bell Helicopter
manufactures and integrates the wing, nacelles, rotors, drive system, tail
surfaces, and aft ramp, as well as integrates the Rolls-Royce engines and
performs final assembly. Boeing Helicopters manufactures and integrates the
fuselage, cockpit, avionics, and flight controls. The USMC variant received the
MV-22 designation and the USAF variant received CV-22; this was reversed from
normal procedure to prevent USMC Ospreys from having a conflicting designation
with aircraft carriers (CV). Full-scale development began in 1986. On 3 May
1986, Bell Boeing was awarded a $1.714 billion contract for the V-22 by the U.S.
Navy. At this point, all four U.S. military services had acquisition plans for
the V-22.
The JVX
aircraft was designated V-22 Osprey on 15 January 1985; by that March, the first
six prototypes were being produced, and Boeing Vertol was expanded to handle the
workload. Work was split evenly between Bell and Boeing. Bell Helicopter
manufactures and integrates the wing, nacelles, rotors, drive system, tail
surfaces, and aft ramp, as well as integrates the Rolls-Royce engines and
performs final assembly. Boeing Helicopters manufactures and integrates the
fuselage, cockpit, avionics, and flight controls. The USMC variant received the
MV-22 designation and the USAF variant received CV-22; this was reversed from
normal procedure to prevent USMC Ospreys from having a conflicting designation
with aircraft carriers (CV). Full-scale development began in 1986. On 3 May
1986, Bell Boeing was awarded a $1.714 billion contract for the V-22 by the U.S.
Navy. At this point, all four U.S. military services had acquisition plans for
the V-22.
The first V-22 was publicly rolled out in May 1988. The project soon suffered several blows. That year, the U.S. Army left the program, citing a need to focus its budget on more immediate aviation programs. Despite the Senate's decision, the Department of Defense instructed the Navy not to spend more money on the V-22. When the projected development budget greatly increased in 1988, Defense Secretary Dick Cheney tried to defund it from 1989 to 1992 in order to cancel it. He was overruled by Congress, which provided unrequested program funding. Multiple studies of alternatives found the V-22 provided more capability and effectiveness with similar operating costs. The Clinton Administration was supportive of the V-22, helping it attain funding.
 Development
was protracted and controversial, partly due to large cost increases, some of
which are caused by a requirement to fold wing and rotors to fit aboard ships.
The development budget was first set at $2.5 billion in 1986, increasing to a
projected $30 billion in 1988. By 2008, $27 billion had been spent and another
$27.2 billion was required for planned production numbers. Between 2008 and
2011, the V-22's estimated lifetime cost grew by 61 percent, mostly for
maintenance and support.
Development
was protracted and controversial, partly due to large cost increases, some of
which are caused by a requirement to fold wing and rotors to fit aboard ships.
The development budget was first set at $2.5 billion in 1986, increasing to a
projected $30 billion in 1988. By 2008, $27 billion had been spent and another
$27.2 billion was required for planned production numbers. Between 2008 and
2011, the V-22's estimated lifetime cost grew by 61 percent, mostly for
maintenance and support.
The V-22 Osprey has had 12 hull-loss accidents with a total of 42 fatalities. During testing from 1991 to 2000, there were four crashes resulting in 30 fatalities. Since becoming operational in 2007, the V-22 has had seven crashes resulting in 12 fatalities, and several minor incidents. The aircraft's accident history has generated some controversy over its perceived safety issues.
The Osprey is currently being used by the USMC, USAF and USN while the Japanese SDF is the only current foreign user of the Osprey (in part due to the huge cost per airframe.)
| THE KIT |
See Scott's preview of the kit at this link.
| CONSTRUCTION |
The first thing I did was assemble the giant props. Each blade consists of three pieces so to avoid having to deal with phantom seams, I used CA glue at the center join and Tamiya extra thin along the blade edges as a phantom seam is not noticeable along a sharp edge compared to the middle of the prop blade. I set aside each of the blades when the seam work (sanding and filling) was done. Each blade was labeled port or starboard so as to keep the correct orientation and prevent embarrassing errors. The prop hubs were easier to assemble and set aside later for painting.
The tail assembly was built next. Major seams glued with CA glue and then sanded smooth. I left off the twin rudders to ease painting later.
The wing and engine nacelles were built in the same manner. I had to be careful with the sanding to protect the details especially on the underside. Again I left off some of the parts because adding them would make the painting difficult.
 The cockpit
was assembled primed and painted first with Dark Gull Grey via airbrush and the
various instrument panels brush painted flat black. Once the black paint was
dry, the decals were added. I used Solvaset to get them to settle into the
raised details. The small parts pilot figures and ejection seats would be
painted after construction. The cockpit tub was added to the fuselage along with
various other inserts and bulkheads. There is no interior to speak of outside of
the cockpit. Anyone thinking of building this kit with open cargo doors and
cargo bay interior would find it to be a major undertaking.
The cockpit
was assembled primed and painted first with Dark Gull Grey via airbrush and the
various instrument panels brush painted flat black. Once the black paint was
dry, the decals were added. I used Solvaset to get them to settle into the
raised details. The small parts pilot figures and ejection seats would be
painted after construction. The cockpit tub was added to the fuselage along with
various other inserts and bulkheads. There is no interior to speak of outside of
the cockpit. Anyone thinking of building this kit with open cargo doors and
cargo bay interior would find it to be a major undertaking.
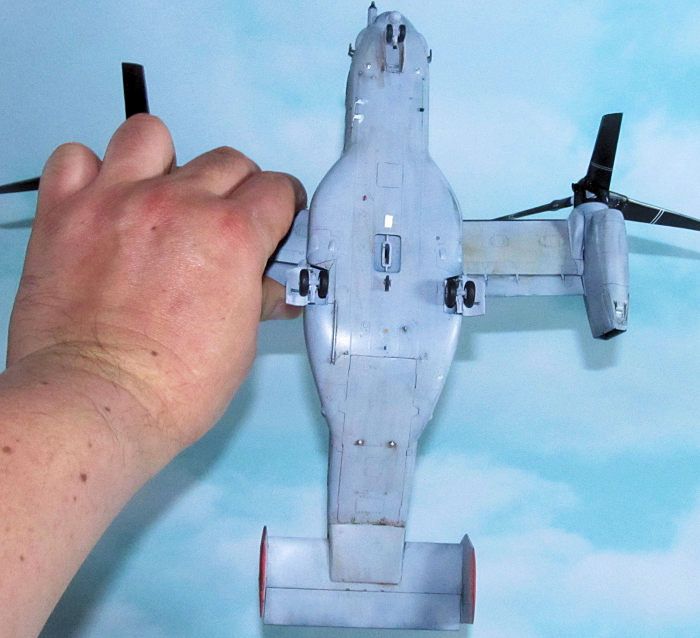
The two fuselage halves were glued together using a thin bead of CA glue. Unfortunately due to the complexity of the surface detail, the fuselage seam work was a difficult task. It took a few hours of work to sand down the seams. I found to my dismay that some Hasegawa kits (1/72 Skywarrior and 1/48 Mustang) seem to have a seam that refuses to go away. The underside of the Osprey was one of those seams. It took a fair amount of work to eventually went away after muttering some choice words and burning thru a sheet or two of multiple grits of 3M wet dry sandpaper.
The Osprey sub assemblies were now ready for painting.
| COLORS & MARKINGS |
First I primed the model subassemblies using black Stynylrez primer. When the parts were dry they were checked and sanded/polished smooth with some touchups. The props were gloss coated to provide a smooth base for the decals and the final inner details (white and/or silver) painted with a fine brush.
The ready fuselage/wing/tail subassemblies were sprayed Mission Models Light Ghost Grey on the lower surfaces. When it was dry 15 minutes later I sprayed on Mission Models Dark Ghost Grey for the middle and part of the top sections of the Osprey. Medium Grey FS35237 is the topside color in the Osprey color scheme but I didn't have it so I used Tamiya Ocean Grey instead as it seemed close enough for me. The colors were mostly free handed without masks except the sections around the main wing where I used paper masks held on with tape to try and prevent overspray yet keep a soft edge. These didn't work I had some overspray to fix (I ended up using cut up Post It Notes which held better with a sharper demarcation line.
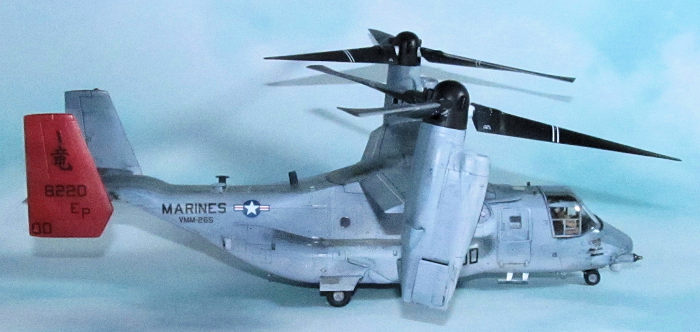
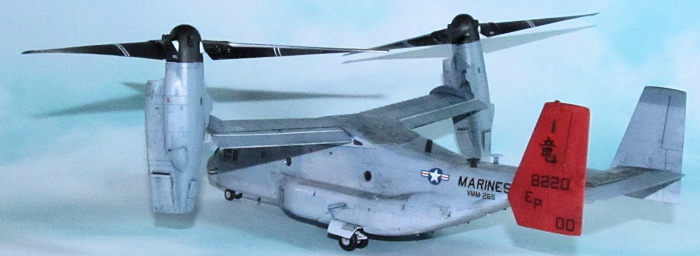 The inner
side of the rudders had to be masked off with low tack rice paper tape (I use
Chinese knock off tape as it barely sticks in place) as I wasn't going to use
the supplied large rudder decals due to the large decals in the past not working
out well for me. I preferred to paint those large decal markings instead. I used
Tamiya flat white on the outer side of each rudder to provide a base for the red
and then sprayed on Model Master Acrylic Insignia Red.
The inner
side of the rudders had to be masked off with low tack rice paper tape (I use
Chinese knock off tape as it barely sticks in place) as I wasn't going to use
the supplied large rudder decals due to the large decals in the past not working
out well for me. I preferred to paint those large decal markings instead. I used
Tamiya flat white on the outer side of each rudder to provide a base for the red
and then sprayed on Model Master Acrylic Insignia Red.
When the paint was dry I sprayed on two coats of Tamiya gloss in preparation for the decals.
The decals were the worst part of the build. Most of the small decals and Insignia went on okay but the larger markings for the top and side fine lines (that represent sensors or some kind of fine detail) didn't seem to want to stick. I don't recall ever having any problem with the stick of Hasegawa in-house decals before. The large decals required a fair amount of slicing and pouring of Solvaset to remove some but not all of the silvering. I thought it was okay till I got to the weathering stage.
When weathering, I started with a watercolor wash first but that didn't work out as planned so I went with an oil paint wash which was roughly 40% oil paint (a mix of two parts burnt umber and one part black) and 60% thinner. The oil paint wash did what the watercolor wash didn't which was highlight the panel lines and detail as well as provide some grime (the Osprey is flown often and can be quite dirty in large part to the dust it kicks up while landing.) However, as I was wiping it off, the decals started lifting off and peeling away. I wasn't very happy with the outcome, but I wiped the top and sides down the best I could without damaging the decals even more.
I sprayed on a flat coat on the model and sulked a little.
| FINAL CONSTRUCTION |
All the tiny details, refueling probe, clear parts and antennas were painted then added as per the instructions. Be warned there are a lot of them and tiny too. I did spend some time looking for pieces that flew out of my tweezers but I was fortunate that any piece I lost had an unused extra piece. This took about a hour of time to do.
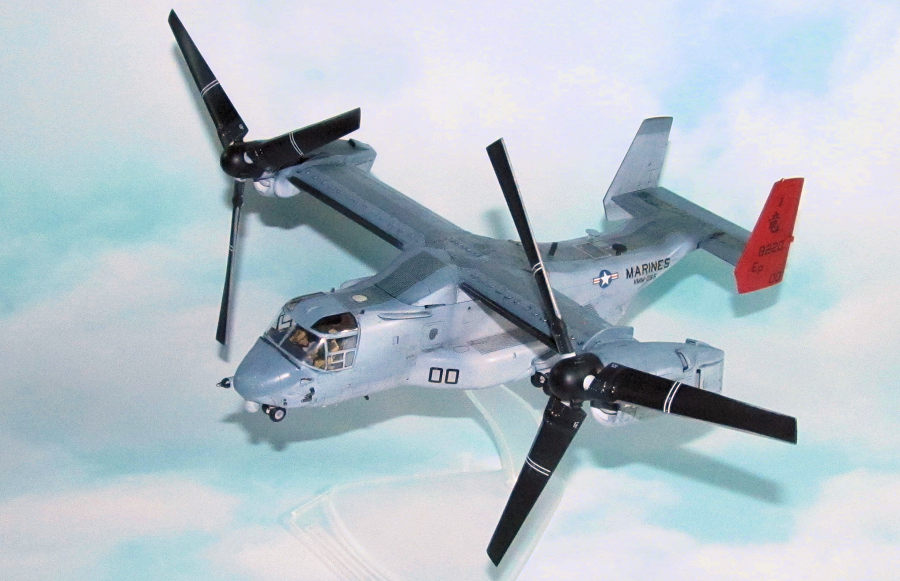
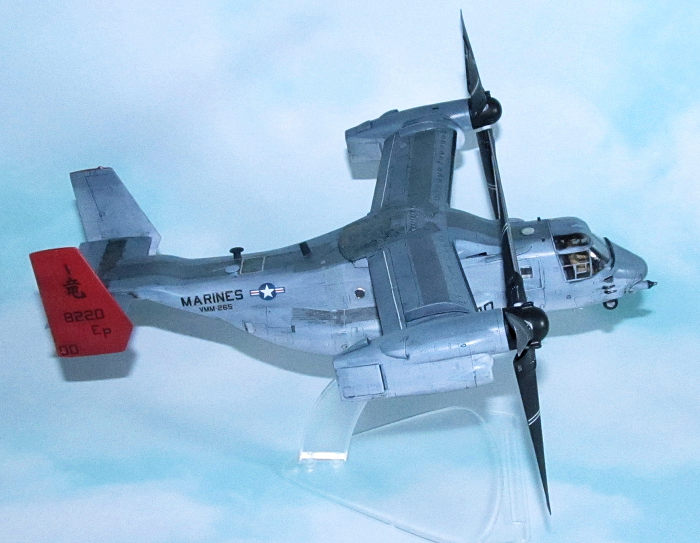
 The model
comes with a stand which allows one to pose the Osprey as if it were in flight.
I decided to use the stand which meant that I needed to use the pilot/copilot
figures otherwise it would look quite awkward flying without crew. The pilot
figures were painted according to instructions and mounted in place with a drop
of CA glue on the seat. I used white glue to secure the canopy which had been
weathered and painted (Tamiya Smoke) in certain clear areas.
The model
comes with a stand which allows one to pose the Osprey as if it were in flight.
I decided to use the stand which meant that I needed to use the pilot/copilot
figures otherwise it would look quite awkward flying without crew. The pilot
figures were painted according to instructions and mounted in place with a drop
of CA glue on the seat. I used white glue to secure the canopy which had been
weathered and painted (Tamiya Smoke) in certain clear areas.
Instead of posing it fully in flight, I positioned the landing gear in landing position. The landing gear is a touch fiddly but mostly because the parts are small and I'm used to maneuvering 1/48 scale landing gear in place.
The doors were glued in place using a drop of CA glue.
| CONCLUSIONS |
The Hasegawa Osprey was bit more difficult than I thought. At least for myself, I found this kit requires some planning and thought before slapping the parts together. I would not recommend this kit for the beginner, but anyone who has built a few kits and is comfortable dealing with several sub-assemblies or an experten. Bewary of the decals, as with my copy of the kit they had issues sticking to the surface. I'm not fully happy with how the model turned out based on my problems with the decals, but not much I can do about that.
13 April 2021
Copyright ModelingMadness.com
If you would like your product reviewed fairly and fairly quickly, please contact the editor or see other details in the Note to Contributors.