AMT 1/72 F-117A
| KIT #: | 8814 |
| PRICE: | $ |
| DECALS: | One option |
| REVIEWER: | Shawn Payne |
| NOTES: | First attempt at the stealth since the Testors F-19 |
| HISTORY |
The history of the F-117A has been well covered, but the reason for this
kits shape will be the focus of this part.
When it was rumored that the USAF had a Stealth fighter model company’s
took liberty at what such a jet would look like.
Testors and
 Monogram both released interesting concepts but both proved
to be way off when the Air Force finally released a single head-on slightly out
of focus photo of the F-117A.
From
that photo
Monogram both released interesting concepts but both proved
to be way off when the Air Force finally released a single head-on slightly out
of focus photo of the F-117A.
From
that photo
| THE KIT |
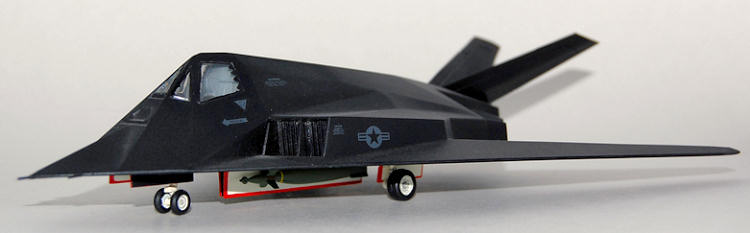
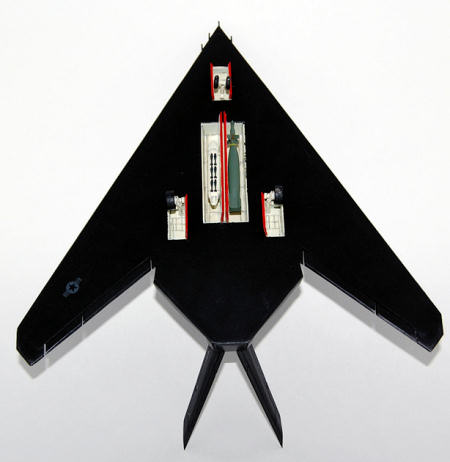
Molded in black styrene the kit was free of any flash and mold defects. Decals were a little thick and were for one aircraft minus any squadron markings. The instructions were basic and gave color suggestions as the build goes on. The clear part was the canopy insert. As for the weapons the kit included 2 maverick TV guided missiles and 2 GBU-10 Laser guided bombs. The two major parts were the top and lower fuselages halves. The bottom half was completely flat and had the gear and weapons bays molded in to it.
| CONSTRUCTION |
Starting with the
cockpit which was made up of the tub; instrument panel and ejection seat were
painted Testors Grey and the kit decals used for the instruments.
Olive Green for the seats cushions and the cockpit tub was complete and
glues to the upper fuselage half.
Next went the inserts for the engine inlets as were the inserts for the
engine outlets.
I painted the
engine outlet face with Testors steel and glued them into place before attaching
the rear inserts to the upper fuselage.
 Next part
was to glue the upper and lower fuselage halves together.
The parts assembled in such a way that the bottom part lay inside the
upper part making the seam on the bottom of the model.
Just a little filling and sanding takes care of the seam.
Now feeling adventurous I decided to scratch build the landing gear from
brass tubing and plastic rod.
Using
the kit parts as guides I re-constructed the gear struts.
One reason I was able to get away with this was because the kits landing
gear was very simplistic in design making scratch building rather straight
forward.
Next part
was to glue the upper and lower fuselage halves together.
The parts assembled in such a way that the bottom part lay inside the
upper part making the seam on the bottom of the model.
Just a little filling and sanding takes care of the seam.
Now feeling adventurous I decided to scratch build the landing gear from
brass tubing and plastic rod.
Using
the kit parts as guides I re-constructed the gear struts.
One reason I was able to get away with this was because the kits landing
gear was very simplistic in design making scratch building rather straight
forward.
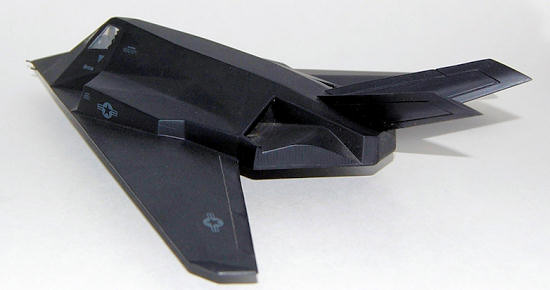
The other
modification that I did that strayed away from the kits design was the way the
weapons bay doors opened.
The kit
had the doors opening out towards the wing tips which would have hidden the
weapons extending on the sling pylons.
I just reversed the doors making them open to the inside and now you can
see the weapons.
Ok a little background here. From 1984 to 1988 I was a part of the 4450th TG. My AFSC was that of a 46150, Munitions specialist. So yes I had a little inside knowledge and wanted to show off the small part I played with this aircraft. This also is why I chose the weapons load for this kit. One GBU-10 LGB and one SUU-20 which carried 6 BDU-33 practice bombs. Both weapons came from the Hasegawa weapons sets.
| COLORS & MARKINGS |
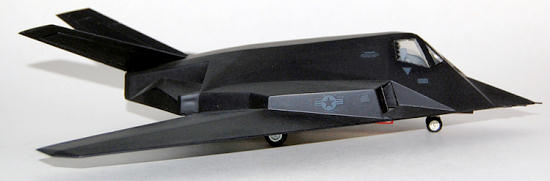
 The F-117A is an all
black jet.
Flat Black “special
paint” was used to paint this jet as it helped absorb radar waves lessening its
return signature.
So I painted the
model Testors Gloss Black.
Why
paint it Flat Black when you have to turn around and spray on a Gloss coat for
the decals to adhere to without silvering.
After the Gloss Black was dry I masked off and painted the weapons bay
and gear wells Gloss White.
At this
point I used a thinned down mixture of Payne’s Grey Oil paint as a wash in these
areas.
The F-117A is an all
black jet.
Flat Black “special
paint” was used to paint this jet as it helped absorb radar waves lessening its
return signature.
So I painted the
model Testors Gloss Black.
Why
paint it Flat Black when you have to turn around and spray on a Gloss coat for
the decals to adhere to without silvering.
After the Gloss Black was dry I masked off and painted the weapons bay
and gear wells Gloss White.
At this
point I used a thinned down mixture of Payne’s Grey Oil paint as a wash in these
areas.
Now came
the decals, they were a little thick but went on without any problems, what few
there were.
An overcoat of Testors
Dull Coat from the can and the painting and markings are completed.
I built
this model some 20 years ago and cannot remember at all as to why I painted the
edges of the gear and weapons doors red.
I have no idea what I was thinking.
| CONCLUSIONS |
 A very simple model to
construct.
And one can assemble
this one without any problems.
Now
I have seen this model done up and a German 1946 concept idea and really liked
it.
Someday I hope to find this kit
at a swap meet and build my own version like that.
A very simple model to
construct.
And one can assemble
this one without any problems.
Now
I have seen this model done up and a German 1946 concept idea and really liked
it.
Someday I hope to find this kit
at a swap meet and build my own version like that.
January 2010
Copyright ModelingMadness.com. All rights reserved. No reproduction in part or in whole without express permission.
If you would like your product reviewed fairly and quickly, please contact the editor or see other details in the Note to Contributors.