Monogram 1/48 EA-6B Prowler
|
KIT # |
5611 |
|
PRICE: |
$ |
|
DECALS: |
VAQ-131 from USS America in 1978 |
|
REVIEWER: |
|
|
NOTES: |
Cutting Edge CEC48053 Prowler Correction Set; CAM Decals 48-101 Jammin Prowlers |
|
HISTORY |
 I’m going to refer all folks that want to
know about the EA-6B to the following link:
http://www.globalsecurity.org/military/systems/aircraft/ea-6.htm
I’m doing this because I think any views I put down will be highly
subjective. Why you ask? It’s after having flown the Prowler for almost
seven years, I’ve grown a certain affinity to it. Go to the link, and
you’ll get a great description of one of the most important planes in our
nations inventory. Important because no strike aircraft, from the B-2
and F-117, to the F/A-18 and F-16 is going into harms way without an
EA-6B protecting them. The small number of planes lost since the Prowler
has been accompanying strikers can be attributed to their ability. But
enough of me and my soapbox, on to the model!
I’m going to refer all folks that want to
know about the EA-6B to the following link:
http://www.globalsecurity.org/military/systems/aircraft/ea-6.htm
I’m doing this because I think any views I put down will be highly
subjective. Why you ask? It’s after having flown the Prowler for almost
seven years, I’ve grown a certain affinity to it. Go to the link, and
you’ll get a great description of one of the most important planes in our
nations inventory. Important because no strike aircraft, from the B-2
and F-117, to the F/A-18 and F-16 is going into harms way without an
EA-6B protecting them. The small number of planes lost since the Prowler
has been accompanying strikers can be attributed to their ability. But
enough of me and my soapbox, on to the model!
|
THE KIT |
Revell first issued
this kit back in 1992. This kit is quite typical of their kits of that
time, consisting of excellent cockpit detail and raised panel lines.
Although it is probably the best 1/48 scale Prowler out there, (the other
kit being the archaic  Airfix EA-6B) it suffers from some severe errors
that need to be addressed. It’s quite obvious that Revell used several
sprues from their A-6 and EA-6A kits, which makes this pooch NQR—Not
Quite Right…
Airfix EA-6B) it suffers from some severe errors
that need to be addressed. It’s quite obvious that Revell used several
sprues from their A-6 and EA-6A kits, which makes this pooch NQR—Not
Quite Right…
When first opening the box, you’ll notice the model is bagged in two different bags. Also included is a clear sprue and tinted one for the canopies (more on this later), instructions and a decal sheet. About the easiest way to correct the multitude of errors on this kit is to pay the $40 for the Cutting Edge EA-6B Correction Set. Other aftermarket options will allow you to fold the wings, drop the flaps and slats, and don’t forget the great Black Box cockpit if you want the latest and greatest variant. Seamless Suckers has a set of intakes available now that will also help fix errors on the intakes. A number of aftermarket decals have been issued in the past few years, and they have helped make this a highly sought after kit (I’ve seen them go for as high as $100 dollars on E-bay!).
|
CONSTRUCTION |
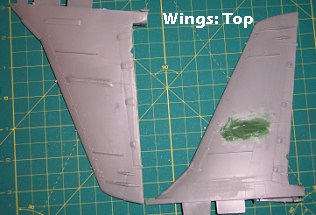 I’ve made about five of these kits in the past year alone
and I think that the best place to start construction is with the wings.
I start off by gluing the wing halves together and then I get out the
trusty motor tool. Starting on the top of the wings, I removed the wing
fold hinge, followed by the stiffener and part of the leading edge.
I’ve made about five of these kits in the past year alone
and I think that the best place to start construction is with the wings.
I start off by gluing the wing halves together and then I get out the
trusty motor tool. Starting on the top of the wings, I removed the wing
fold hinge, followed by the stiffener and part of the leading edge.
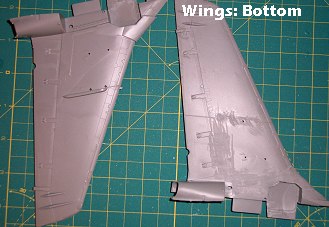 Revell simply used the A-6 wing, which is incorrect—the Prowler wing is
slightly different. On the bottom of the wing, I removed the bulge along
the wing fold, another stiffener, and the rest of the leading edge
fairing in front of the landing gear doors. I also ground out the
exhaust section so that it would accept a section of brass tubing. Most
of this will be covered up by resin, so it doesn’t have to be perfect,
but a word of caution—a little bit of restraint with the motor tool will
save you from having to putty a hole in the wing like I had to. : \
Revell simply used the A-6 wing, which is incorrect—the Prowler wing is
slightly different. On the bottom of the wing, I removed the bulge along
the wing fold, another stiffener, and the rest of the leading edge
fairing in front of the landing gear doors. I also ground out the
exhaust section so that it would accept a section of brass tubing. Most
of this will be covered up by resin, so it doesn’t have to be perfect,
but a word of caution—a little bit of restraint with the motor tool will
save you from having to putty a hole in the wing like I had to. : \
 The Cutting Edge resin bits were then added to the top and
bottoms of the wing. The slats will have to be rescribed to the correct
length and shape. The main landing gear doors are also from the A-6 kit
and are incorrect—the Prowler has another aerodynamic fairing that
extends the length of the door. CE provides gear doors to correct this.
The Cutting Edge resin bits were then added to the top and
bottoms of the wing. The slats will have to be rescribed to the correct
length and shape. The main landing gear doors are also from the A-6 kit
and are incorrect—the Prowler has another aerodynamic fairing that
extends the length of the door. CE provides gear doors to correct this.
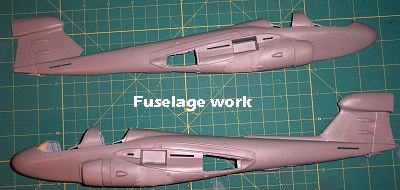
The surgery continued on the fuselage halves. Using the motor tool I ground off the armor plating on the engine bays and underneath the rudder. Again this is common on the A-6 not the Prowler. Continuing on, I removed the ALQ-126 coffee can on the tail section. Next I trimmed off spine for the HF antenna. The half round shape portrayed by Revell is incorrect, it is triangular in shape. I also trimmed off the NACA airscoops, which just don’t look right. All these bits are included in the CE correction kit and were glued in place.
 The Revell cockpit is a good representation
of an ICAP I bird. However I planned on doing a current aircraft. The
Black Box cockpit provides an AWESOME example of an ICAP II (Block
82/86/89) cockpit—no kidding when I opened the box for the first time I
was literally looking for the Grumman logo on the rudder pedals! I can’t
say enough good things about it. The resin cockpit tub needed some work
with the motor tool in order to mate it with the fuselage halves, but
that was the only extra grunt work performed. The GRUEA-7 Ejection Seats
are simply superb—all I did was attach brass handles. On the Prowler,
the firing mechanisms on top of the ejection seats are color coded to
help the aviators ensure that the correct seat has been installed. The
seats were painted the appropriate colors, (white for the left rear seat;
orange for
The Revell cockpit is a good representation
of an ICAP I bird. However I planned on doing a current aircraft. The
Black Box cockpit provides an AWESOME example of an ICAP II (Block
82/86/89) cockpit—no kidding when I opened the box for the first time I
was literally looking for the Grumman logo on the rudder pedals! I can’t
say enough good things about it. The resin cockpit tub needed some work
with the motor tool in order to mate it with the fuselage halves, but
that was the only extra grunt work performed. The GRUEA-7 Ejection Seats
are simply superb—all I did was attach brass handles. On the Prowler,
the firing mechanisms on top of the ejection seats are color coded to
help the aviators ensure that the correct seat has been installed. The
seats were painted the appropriate colors, (white for the left rear seat;
orange for 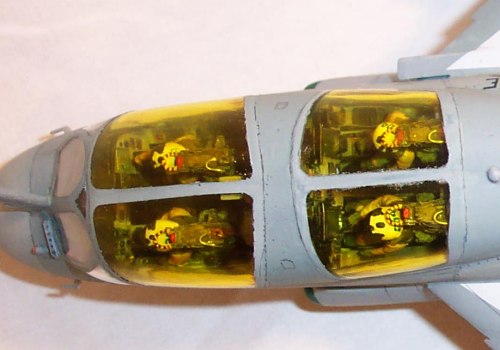 the right rear seat; purple for the right front seat; brown
for the left front seat) and installed. I included the four-man crew
complete with squadron appropriate helmet markings.
the right rear seat; purple for the right front seat; brown
for the left front seat) and installed. I included the four-man crew
complete with squadron appropriate helmet markings.
After completing the cockpit, I closed up the fuselage and attached the wings. As with any Revell/Monogram kit, if you want to display it with the gear up, you’ll end up doing some major finishing work. I closed up the gear doors, and brought out my trusty tube of Squadron Green Putty. All the major seams needed work not to mention the areas I massacred with my motor tool…
The intakes on the Prowler have a little step to allow the aircrew a place to stand when climbing up to the front cockpit. Again, the intakes provided are from the A-6 and are not correct. I glued a strip of styrene on top of the intake and faired it in with Green putty.
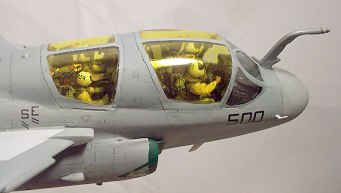
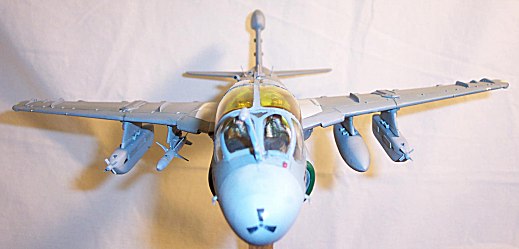
The canopies on the EA-6B have a gold
coating on the inside to protect the aircrew from being radiated while
jamming. Revell tried to replicate this by providing the two types of
clear sprue. I don’t think the tinted version is realistic enough, so I
used the clear canopies and painted the insides with a clear yellow. (I
haven’t fond a suitable match for the gold color yet, however this is the
best result I’ve been able to come up with.) A strip of styrene
represents the canopy framing complete with the grimes light hanging in
the center. The 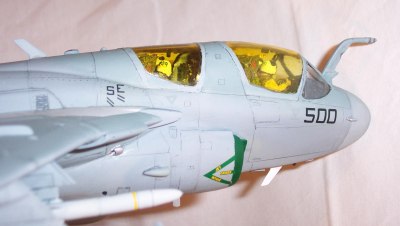 canopies don’t fit so well in the closed position, so
even more putty was required to fill the gaps. After all the sanding I
polished the canopies with 12,000 grit sandpaper and masked them to
prepare for painting.
canopies don’t fit so well in the closed position, so
even more putty was required to fill the gaps. After all the sanding I
polished the canopies with 12,000 grit sandpaper and masked them to
prepare for painting.
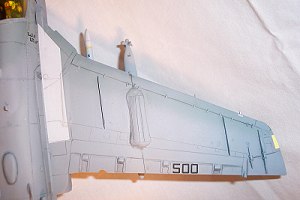
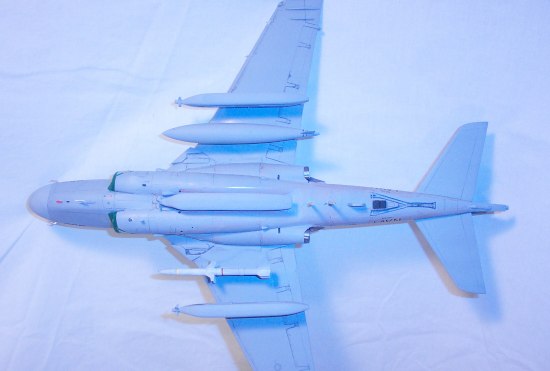
The last little bits of construction were centered on the ALQ-99 jammer pods and the AGM-88 HARM. The pods included in the kit are ALQ-76 pods from the EA-6A, which again aren’t correct for the Prowler. The CE correction kit includes new pods, pylons and the spacers used when mounting the pods. The pylons were glued to the wing with CA and the jammer pods had bits of wire attached to help facilitate attaching them after painting. I purchased a HARM from Cutting Edge complete with the LAU-118, and prepared that for painting as well.
I wrapped up the construction with a few minor odds and ends (as if I hadn’t done enough cutting, gluing, puttying and sanding at this point). The in-flight refueling probe on the Prowler is canted 12º to the starboard—it was straight on the Intruder, so I cut it off and re-glued it appropriately. I installed a strip of styrene drilled with several holes in front of the pilot’s windscreen for the rain removal system. I also installed the USQ-113 antenna underneath the fuselage. I glued new chaff buckets just behind these—the Prowler carries these very un-aerodynamic dispensers to accommodate certain types of chaff and flares.
|
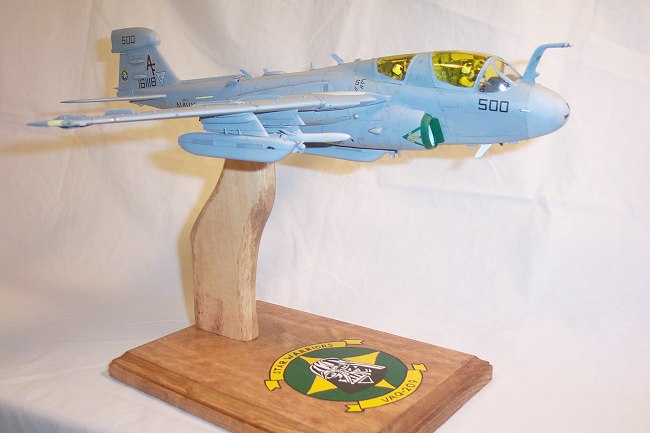
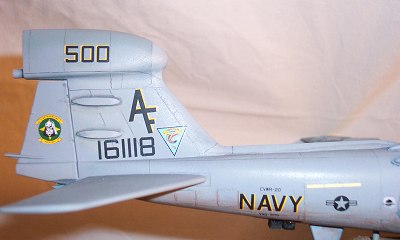
CAMOUFLAGE & MARKINGS |
 Finally after all the time spent correcting the
deficiencies, I was able to move on to the painting. I painted the model
with Model Master enamels in the three-tone TPS scheme using Light Ghost
Gray, Dark Ghost Gray and Medium Grey. As with most Naval aircraft, this
particular aircraft is heavily faded and has suffered from the constant
Corrosion Control efforts. While painting, I took time to mask off the
radome and paint it with a lighter shade of Light Ghost Grey. The radomes are made of fiberglass and often need replacement if a drogue
hits them while refueling, hence the many different shades often seen.
I also misted over several other panels for the same effect. In
preparation for the decals, I gave the model a coat of Testors Gloss
Cote.
Finally after all the time spent correcting the
deficiencies, I was able to move on to the painting. I painted the model
with Model Master enamels in the three-tone TPS scheme using Light Ghost
Gray, Dark Ghost Gray and Medium Grey. As with most Naval aircraft, this
particular aircraft is heavily faded and has suffered from the constant
Corrosion Control efforts. While painting, I took time to mask off the
radome and paint it with a lighter shade of Light Ghost Grey. The radomes are made of fiberglass and often need replacement if a drogue
hits them while refueling, hence the many different shades often seen.
I also misted over several other panels for the same effect. In
preparation for the decals, I gave the model a coat of Testors Gloss
Cote.
I used CAM decals sheet, 48-101 that included markings for VAQ-209. The sheet is accurate for the time frame depicted, however VAQ-209 is stationed at NAF Washington DC (otherwise known as Andrews AFB), not NAS Whidbey Island as noted on the sheet. After I finished with the decals, I sprayed another coat of gloss to seal the decals. I usually scribe all the panel lines, however to save some time on this kit, I just penciled in the lines with a mechanical pencil. To soften up the edges I sprayed a highly thinned mixture of gray, which also helped replicate the highly faded paint on this aircraft. I followed all this with some Flat Cote to seal everything.
|
FINAL CONSTRUCTION |
I finished the kit by attaching all the ALQ-99 pods, drop
tank, HARM as well as various antennas. The antennas used on the Prowler
vary widely from style to color, so you need to check which aircraft you
are modeling. Again the CE
 correction set provides all the different
styles you could need. Finally, with all the construction finished, the
plane was attached to it’s display stand.
correction set provides all the different
styles you could need. Finally, with all the construction finished, the
plane was attached to it’s display stand.
|
CONCLUSIONS |
In all, I spent about 27 hours on this kit, with the majority of them spent fixing the most obvious errors on the kit. Monogram’s EA-6B is a pooch to put it bluntly, but with a little help from Cutting Edge, you can make a decent kit into a great kit. Monogram is supposedly reissuing it in a few months, so I can say that I’d recommend it to all—I know I’ll be picking up my share!
Review courtesy of me and my wallet…
|
REFERENCES |
I’ve been helping the author of several Squadron Signal books on his efforts to produce a Walk Around on the EA-6B Prowler which will hopefully be coming out soon—it’ll be a great reference for building this kit.
 A-6 Intruder in
Action, No 138, Squadron Signal.
A-6 Intruder in
Action, No 138, Squadron Signal.
A-6 Intruder Walk Around, No 2. Squadron Signal
EA-6B Prowler In Detail and Scale, vol 46, Squadron Signal
Super Carriers by Tony Holmes at Osprey Publishing has some great shots of the EA-6B which not only show the antenna position, but what the effects of corrosion control on the paint scheme.
World Air Power Journal Volume 30 - Contains a 15-page article with full color pictures of numerous aircraft and text discussing the various versions of the Prowler. Good reference for recent colors and markings circa 1997.
Combat Aircraft Volume 2, No. 6, December 1999 – a short 6-page article on Prowlers
June 2003
Copyright ModelingMadness.com.
If you would like your product reviewed fairly and quickly, please contact the editor or see other details in the Note to Contributors.