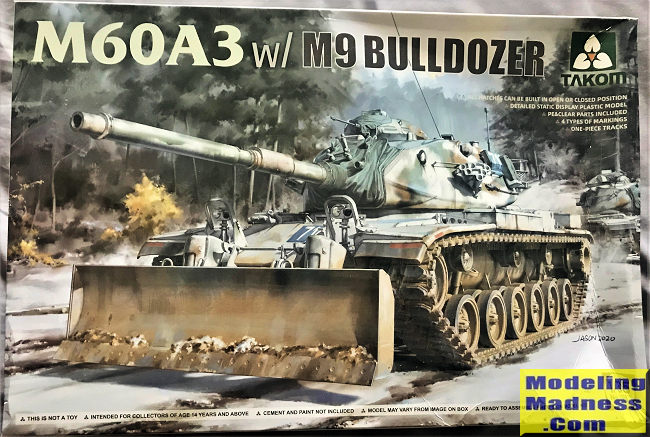
Takom 1/35 M60A3 w Bulldozer Blade
| KIT #: | 03022137 |
| PRICE: | $65.00 |
| DECALS: | Four options |
| REVIEWER: | Donald Zhou |
| NOTES: | Advantages: Extremely detailed and accurate, single piece tracks, lots of options. Disadvantages: commander cupola vision ports still not clear, assembly of the dozer blade is much more complex and main cannon barrel in two pieces. |
| HISTORY |
The development of the M60, naturally, was evolved from the M48. By late 1950’s, in order to counter the threat of the Russian T-54/55, which was growing like weeds out of Russia and her satellite states (if you count the numbers of copy cats like the Chinese Type-59, the T54/55 was the most produced tank ever, with some sources stating as much as 150,000 produced before production ceased in 1983), something better than the T-55 was sought. The development of this eventually led to the M60.
The driving force for developing the M60 occurred during the Hungarian Revolution of 1956. During the chaos, a T54A was captured by the Hungarians and they promptly drove it into the British Embassy in Budapest. The British quickly “turned” the tank around as war booty before the Soviets knew what had happened. During examination, it was quickly discovered that the British then 84mm 20 pounder gun was unable to defeat its frontal armor. This led the British to quickly developed their famed Royal Ordinance L7 105mm gun to defeat the T-54/55.
Meanwhile, in the U.S., research into improving the M48 were ongoing. As the info on the captured T-54 made its way into the U.S. (not just the Hungarian one, but then also captured examples made by the Israelis during their various wars with their Arab neighbors) the improvements were quickly made into a new tank that’s an obvious evolutionary to the M48, but vastly improved to deal with the new threats.
The initial experiments included vehicles such as the T95, with a then smoothbore 90mm, an X-shaped compression ignition engine, improved rangefinders etc. However, all these improvements eventually slowed the program to a crawl, especially since the T95 proved it was not that much of an advance over the M48A2 and was eventually cancelled in 1960. To improve the situation, programs were quickly put in place to consolidate improvements and technical advances into one vehicle.
The first to set in stone was the tank’s main weapon, test were conducted from the original 90mm on the M48, firing new and improved HEAT shells, to the British L7, modified for American use, and the 120mm on the heavy M103 tank were tested. The Army prefer the larger 120mm weapon. However, due to the weapon’s massive weight, and the fact the new tank would only have one loader, maximum rate of fire was reduced to only 4 rounds a minute, unacceptable to the Army. In the end, a compromise was made and the L7, with an American produced barrel and breech was made and adapted as the M68. The 90mm, whether the original or the smoothbore version was dropped as it was felt this diameter gun had ran its course and would have a hard time dealing with future threats, especially if the opponent tanks were up armored.
The tank would feature a new type of armor containing both appliqued armor plates trapped with silica implants. This composite armor would feature greater protection against high-explosives such as HEAT rounds. However, protection against kinetic rounds suffered. This plus maintenance issues soon cropped up. All these factors added to increase in costs to the point in 1958, the project was dropped and the new tank would use traditional Rolled Homogenous Armor, RHA instead. M60 would be the last American tanks to use RHA. It’s also the last American tank to feature a bottom escape hatch, provided to the driver since the turret nose overhang the driver’s hatch to the point it would be difficult for the driver to get out in an emergency. Armor would be increased to 155mm in the hull, compared to 110mm in the M48 and host of other improvements, such as more powerful diesel engine and better optics were also fielded. The M60 was standardized in 1959 after a series of developmental programs. It’s armed with a 105mm M68 gun, 155mm of armor, an improved engine and better optics. The first series of tanks did not have shock absorbers. These were quickly corrected since it was found the tank jostled badly over uneven grounds without these and the first two, and the last set of road wheels eventually would be modified with shock absorbers and the first really serious version of this new tank was born, the M60A1.
In fact, improvements were added throughout the tanks life, creating ever more advanced variants and others including bridge layers, combat engineer vehicles (CEV), armored recovery vehicles, and a complete failure in the M60A2 “Starship”….Supposed to be the next generation in tank development, the “Starship” featured a massive short barreled 156mm gun capable of firing the Shillelagh missile. Unfortunately, due to the electronic development of the time and the simple fact the tank was too ahead of itself, it proved to be nightmarishly unreliable and maintenance heavy and eventually, the vehicle was dropped.
As the time wore on, the tank found itself having to soldier on when replacements failed to the wayside. This was especially true of the MBT-70 project, a collaboration between the U.S. and Germany to develop a next generation main battle tank for both countries that failed miserably! The Germans would then go on to develop the very successful Leopard II MBT, the Americans of course, the M1 Abrams series. To allow time, the M60 RISE Passive, or Reliability Improved Selected Equipment and inclusion of new Passive sighting units were offered to the tank to upgrade them to modern standard. This, in conjunction with improvements made before, such as the AOS, or Add-On Stabilization systems, which allow the new tank to fire very accurately while on the move, gave the new tank a new lease on life. The production would not stop until 1983, after which some 15,000 vehicles were produced.
Despite the fact by 1980’s, the M1 series was introduced, the M60 remained a viable contender on the battlefields, especially with the Marines, who refuse to give up older equipment, so long as they work and worked well. To this end, a whole host of other improvements were added to create the M60A3, these include the above mentioned improvements, but also a wind correction sensor and a thermal sleeve jacket over the barrel of the main gun with improved infer-red sighting units. Also, Marines M60A1 were outfitted with Explosive Reactive Armor plates. These tanks and their M1 replacements were quickly thrown into the fray in the Middle East in 1990 during Operation Desert Shield, and as the Shield turned into Storm in 1991, the M60 found itself in combat against the Iraqi best. Overall, the Marine M60 performed very well against their Iraqi opposition, destroying over 200 various vehicles, including 50 T-72’s. After the war, the U.S. quickly pulled their M60 from active service, the Marines themselves eventually were able to replace all of their M60’s on an one to one basis with surplus Army M1A1’s, by 1997, the U.S. government declared the M60 as redundant and began to dispose of the surplus stocks. However, M60 is still in operation with foreign countries, these includes Egypt, Israel (as the radically improved Magachs), Turkey, Taiwan etc. Of these, Egypt is the largest operator with over 1700 examples.
| THE KIT |
 Finally! My last piece of the puzzle to my “70+ years
of U.S. Army tank development” series of builds. And safe to say, this Takom M60
kit is a doozie of a banger of a kit! Around 30 years ago (is it 30 years
already?) Academy produced an M60A1 RISE/Passive kit with the M9. I built that
so many moons ago but it got lost in the intervening years, now Takom decided to
go and beat the pants off of that kit!
Finally! My last piece of the puzzle to my “70+ years
of U.S. Army tank development” series of builds. And safe to say, this Takom M60
kit is a doozie of a banger of a kit! Around 30 years ago (is it 30 years
already?) Academy produced an M60A1 RISE/Passive kit with the M9. I built that
so many moons ago but it got lost in the intervening years, now Takom decided to
go and beat the pants off of that kit!
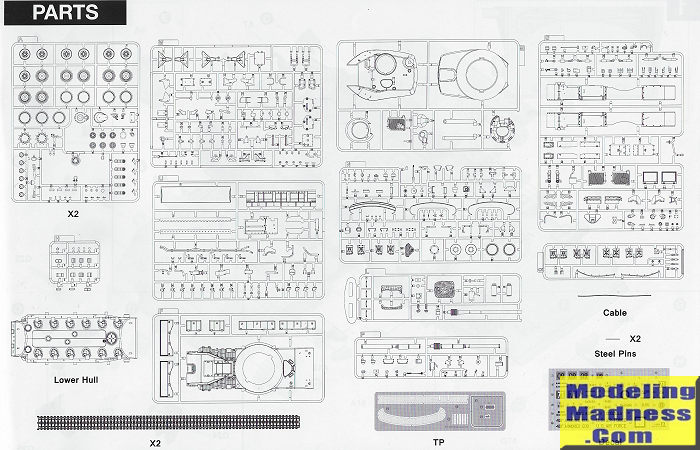
Now, previously, I reviewed Takom previous version of the M60, the U.S. Marines M60A1 RISE Passive with the ERA blocks. This can be seen here: https://modelingmadness.com/review/misc/vehicles/us/tanks/zhou60.htm . So as might have surmised, this kit is simply that one, without all the ERA parts, the kit added four sprues, namely sprues” P” and “Q”, which have all the parts necessary to correctly build a correct M60A3 with a slightly different turret in the correct shape of the A3, and also sprues “U” and “W” that contain all the parts necessary to make a M9 “Tank-dozer” blade. Starting in the late ‘70’s and early ‘80’s, the Army felt some tanks should be fixed with some sort of mine clearing and engineering equipment to add a quick “ad hoc” capability to remove mines or obstructions. Hence, some M60’s were fitted with M9 tank dozer blades up front to quickly clear a mine clearance lane or fill anti-tank ditches etc. During the Gulf War, it was reported some Marine units used the dozer blades to charge at Iraqi machine gun nests by filling them with tons of sand and dirt! It was not known how many were killed using this methods but safe to say, it’s a very effective way of removing a firing position!
Anyways, this is the same ol’ same ol’ Takom kit so expect the same quality and ease of construction. The disadvantages are few and covered in my previous M60A1 build, namely the opaque commander cupola viewing windows and this time, the M9 dozer blade is really complex. Unlike the previous Academy version that I built 30 years (….Sigh, THIRTY FREAKING YEARS AGO ALREADY?!?!?!?) ago, this thing is highly detailed, including the massive connection junction between the engine to the hydraulic gears up front and the supporting structures underneath the tank! This means reading of the instructions carefully will do you good here.
The next minor problem is the gun barrel. Now, the normal gun barrel, which is still in the kit is slide molded and in one piece. However, the A3 barrel is in two pieces. I was first miffed by this decision, then realized that the A3 barrel had that pesky thermal sleeve jacket and will be hard to realize with slide molding so Takom did it in two pieces. This leaves a slight seam on the barrel, top and bottom. Annoying but nothing but some putty that can’t fix.
Construction begins with the hull and the running gears as always with most armor projects. Again, the Patton series running gears are much more complex than that of the M1 so take your time. The instruction covers this in the first six steps. All the volute springs, the shock absorbers, the idler to tension wheel connections are all there so take your time, read the instructions carefully and make sure you use the right part. Just a minor note from what I’ve learned from my previous M60A1 kit, the idler wheels. They do not have location pegs so you can adjust the track tension yourself…This can be good or bad depending. I got the left wheel tension right, but if you look carefully at the pics I posted for my review, the right tension was a little bit loose. I later pried the idler forward just enough to get the correct tension! Yeah, was sweating a little! Turned out the cement was just loose enough that I can pry it without the wheel breaking off so I got the correct tension on both! So this time around, might use a bit of cement to hold the idlers in for painting, but loose enough that I can break them loose to adjust the tension correctly, then cement them permanently with super glue.
Next deal with all the upper hull details, again, attach the two side spoonsons first, then attach the details, you may wanna leave all the tool box handles for later, not unless you have a dying wish to feed the carpet monster! I will not attach the tracks till final assembly.
Next is the M9 tank dozer assembly. This covers seven steps with A LOT of assembly instructions with each step so take your time and read the instructions carefully as there gonna be a lot of parts going which ever where, especially the connection junction between the rear engine port to the front hydraulic assemblies, what with all the supports on the wheel arms in between. Have fun weathering this piece of equipment cause there are some pics where the blade have weathered down to bare metal.
Finally the turret. Again, the M60A1 parts are in the kit so don’t confused. Also, Takom did not punch out the holes for the spare smoke grenade box and the spare jerry can holders. ALL the holes for all the M60’s they produced, including all holes for the ERA brackets are on the inside of the turret! This means you need to study the instruction carefully so you don’t punch out the wrong holes by mistake! This also means using putty to fill all the nose ERA mounting brackets on the canvas mantlet cause Takom just decided to use the M60A1 W/ ERA kit’s mantlet, rather than create a new one (typical with ANY manufacturer cause they will not spend hundreds upon thousands of dollars to mess with the molds for one simple detail). Otherwise, the only other major assembly to watch out for is the bustle rack basket. The two biggest photo etch are in here. A tool is provided, like M60A1 kit so you can get the correct curve for the vertical mesh mounting. The bottom photo etch just goes right in and on top of the basket. Then it’s a matter getting all the plastic grill correct so you can mount them correctly onto the turret.
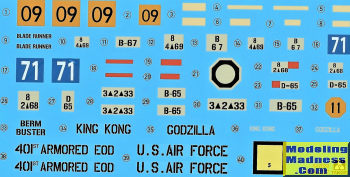 Other than that, nothing major. There are four
markings provided, most of them an M60 seen during the ‘80’s during various
REFORGER (REturn in FORce to GERmany) exercises that was held every year during
the height of the Cold War except the last one. This one’s paint job is boring,
one single tone of Forrest Green but is unique since it was an Air Force
ordinance disposal unit’s machine. Probably used to remove say, unexploded bombs
etc. The other three paint jobs includes two in the then standard four tone camo
of forest green, flat earth, armored sand, and black splotch while the third one
has white wash all over so you got your choices.
Other than that, nothing major. There are four
markings provided, most of them an M60 seen during the ‘80’s during various
REFORGER (REturn in FORce to GERmany) exercises that was held every year during
the height of the Cold War except the last one. This one’s paint job is boring,
one single tone of Forrest Green but is unique since it was an Air Force
ordinance disposal unit’s machine. Probably used to remove say, unexploded bombs
etc. The other three paint jobs includes two in the then standard four tone camo
of forest green, flat earth, armored sand, and black splotch while the third one
has white wash all over so you got your choices.
| CONCLUSIONS |
This kit is much more involving than the now ancient Academy kit, least of which are all the details missing from that kit on the M9 dozer blade, including again, the entire bottom details of the electrical connection junction between the engine and the front and the supports underneath. Not only that, except the commander cupola, the rest of the clear pieces are all provided, including the rarely seen centrally mounted swiveling driver periscope. All the other details are also correct for an A3 variant of the M60, including the improved chin on the turret, the wind correction sensor and the laser ranger finder and the improved 105mm with the thermal sleeve jacket…This should be a fun build…Provided I can find the time with all of my other projects that once again, is threatening to run of the table cause I keep on building them, but not finishing them!
June 2021
Copyright ModelingMadness.com. All rights reserved. No reproduction in part or in whole without express permission.
If you would like your product reviewed fairly and fairly quickly, please contact the editor or see other details in the Note to Contributors.