E-2046 1/3 Megan
| KIT #: | FG 7829 |
| PRICE: | $112.00 plus shipping |
| DECALS: | None |
| REVIEWER: | Donald Zhou |
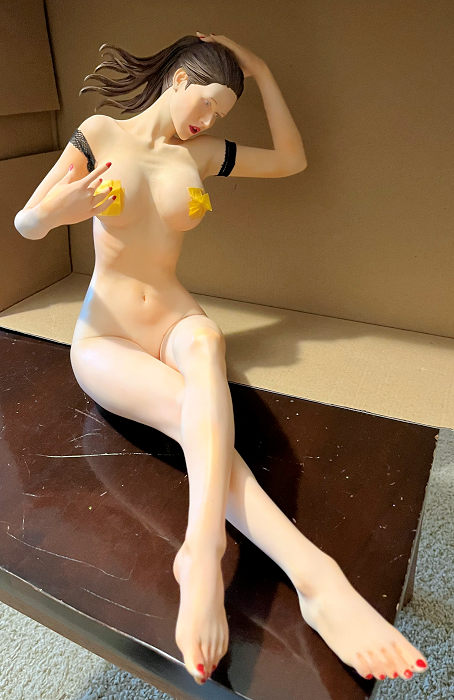
| NOTES: | Advantages: Extremely detailed, Excellent resin casting, Very sexy figure and absolutely heavy and huge: Disadvantages: Absolutely heavy and huge! Leg joints right at her private part, back is all flat (since she’s meant to be on her back when done), and you gonna need gallons upon gallons of paint to paint her! |
| HISTORY |
No history here. This is an E2046 exclusive. But judging by the name, Megan and her facial sculpt, she does look a bit like a certain Transformers/Teenage Mutant Ninja Turtle actress by the name Megan Fox…..Hrrrmmmmmm………
| THE KIT |
| CONSTRUCTION |
Again, not much here. As I’ve said in the preview, I just attached her right arm, which is slightly close to her right nipple, but far enough apart that I can paint her arm and nipple without pulling my hair out. I left off her left arm cause her left hand is under her hair. Same as I attached her right leg but left off her left one as they are so close to her crouch. The last piece I assembled now is her head. After that, was four day worth of puttying and sanding, especially along her hip joint, as this need some serious work to make the joint look right. I did carve out the joint lines as when you bend anyone’s legs up like this, a joint line will show. After sanding everything smooth, it’s time to hit the pain shop.
| COLORS & MARKINGS |
 Since
she’s buck naked, this is about your skillz with flesh painting and how you
shadowing and highlight everything. First of all, a good cleaning with soapy
water to prep her for spraying. Next, I sprayed a bottom coat of Tamiya Flesh.
This is much darker and more orange than my usual Testor’s Flesh base but again,
I’m trying to save my last few bottles here. After that has dried, time for the
long haul!
Since
she’s buck naked, this is about your skillz with flesh painting and how you
shadowing and highlight everything. First of all, a good cleaning with soapy
water to prep her for spraying. Next, I sprayed a bottom coat of Tamiya Flesh.
This is much darker and more orange than my usual Testor’s Flesh base but again,
I’m trying to save my last few bottles here. After that has dried, time for the
long haul!
After the base coat has dried, I sprayed on a light coat of Testor’s Flesh base. This will be the only coat. Next were four days of Apple Barrel Light Cream. At first a thick wash and sequentially thinner. After every 2 coats, I sealed it in with Future, and then more coats. Finally, after four days, her skin tone was lighten enough for the next step. Next, taking sequentially dark tones, I washed it over the figure. This is thinner than the Cream coating so it will fill the crevasses and nook and crannies to highlight them. That took another two days. After which, the figure finally started to look the part and not like someone who had a sunburn from hell! Finally, to complete her body, I used Testor Flesh Warm and shadow to highlight all the joint areas, her neither regions and her nipples. After this, I broke out the red paint and painted both her finger and toe nails red. Her body is now basically complete.
Next is her face. Following my usual methods, I first washed her with slightly dark tonal shades, then dry brushed on Testor’s Flesh Warm to highlight areas such as her brows, lashes, lip area, and cheek. I then took a thin brush and a bottle of brown paint to draw on her brows before using purple paints to highlight her eye area. Next, I painted her eyeballs white before using two photo realistic eye decals for her eyes. The eyes are 1/4th scale but large enough that they work for 1/3. Unfortunately, due to the slant of her head and the curvature of her face and eyes, the left eye gave me some problems lining up the eye with the right. I had to waste two extra eyeballs to get it close enough that I just said, “I gotta save the rest of the sheet and this is good enough”. On some angles in the photos, her eyes still looks weird but at least in reality, it looks good enough.
 With her
hair, I used mostly brown with washes of Tamiya Red Brown. Now, her ponytail and
a back piece are separate but the majority is molded onto the top of her head.
This meant I had to use a thin brush to first pick out all the edges. This was
especially tough around her ears so do becareful. After the edges are done, I
used a wider brush to brush on the rest of the color before highlighting it with
red brown. With that, painting is now complete. And it took 80% of the time to
do this, not just because there are so much to do, but also, the figure is heavy
and it was hard to left her off the ground while painting!
With her
hair, I used mostly brown with washes of Tamiya Red Brown. Now, her ponytail and
a back piece are separate but the majority is molded onto the top of her head.
This meant I had to use a thin brush to first pick out all the edges. This was
especially tough around her ears so do becareful. After the edges are done, I
used a wider brush to brush on the rest of the color before highlighting it with
red brown. With that, painting is now complete. And it took 80% of the time to
do this, not just because there are so much to do, but also, the figure is heavy
and it was hard to left her off the ground while painting!
| FINAL CONSTRUCTION |
It’s now time to
bring everything together. First to go is her left arm. Yes, there is a seam,
but since I still have a good length of lace arm covering left over from my Ada
Wong kit, I used the last bits on both of her arms. This worked very well in
hiding the offending seams. Her right leg, however, cannot be helped. After
supergluing on, I spent t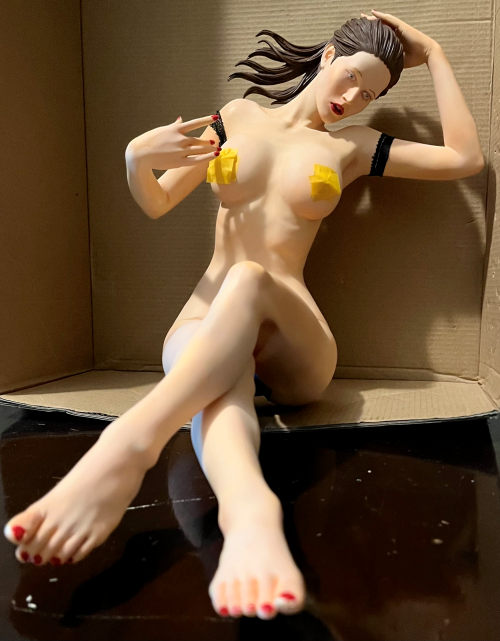 wo
more days puttying the seam up, sanding it, all the while working carefully
around her neither region with a thin file and then carving in the joint line
again before repaint and shading. You just have to hold it in and be patient.
Nothing you can do due to the nature of how the figure is casted. Finally, her
hair. The ponytail just will not stick on so I was forced to break out the two
part epoxy glue to get it settled in. Once it did, the figure is pretty much
done!
wo
more days puttying the seam up, sanding it, all the while working carefully
around her neither region with a thin file and then carving in the joint line
again before repaint and shading. You just have to hold it in and be patient.
Nothing you can do due to the nature of how the figure is casted. Finally, her
hair. The ponytail just will not stick on so I was forced to break out the two
part epoxy glue to get it settled in. Once it did, the figure is pretty much
done!
| CONCLUSIONS |
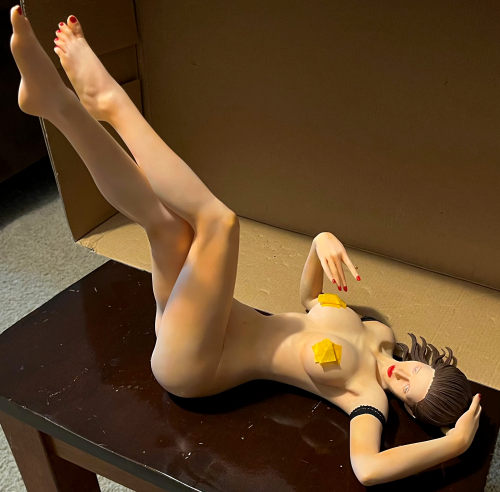
To say she is huge is to say the least. However, due to the fact she’s lying on her back with her legs in the air, she’s not all the big in her pose so she will save you some room. Still, she’s on top of my shelf here cause of how high her legs are. This is why she is still available to buy from E2046. Her size means you need some serious shelf space to display her properly. The other fact is that well…Safe to say this….She is DEFINITELY NSFW!!!! I thought of skipping of sending this review in but then again, this is an awesome kit and when done right, she simply is the centerpiece of any figure collection! So yeah, I taped up her offending parts and then took some photos. Hope you all enjoy it cause she is very nice looking when done.
20 January 2023
Back to the Previews Index Page
Back to the Previews Index Page