HobbyBoss 1/72 MiG-15bis
| KIT #: | 80263 |
| PRICE: | $8.00 |
| DECALS: | Two Options |
| REVIEWER: | Spiros Pendedekas |
| NOTES: | Easy Assembly kit |
| HISTORY |
Yevgeny Georgievich Pepelyaev
(Евгений Георгиевич Пепеляев) was born on 18 March 1918 in Bodaybo, Irkutsk,
in Eastern Siberia, the son of a railroad worker. His elder brother
Konstantin enlisted in the Soviet air force, and thus with the intention to
follow the steps of his brother he worked in Odessa with the city aeroclubs.
He graduated in 1938 from the 8th Military Pilots School and was sent to
serve in a regiment deployed in the Far East.
 With the German invasion of the USSR in June 1941, he was retained in the
Far East despite several requests for a combat posting in the west,
especially after his brother Konstantin was killed in action. In late 1943
he was still an instructor with the 162nd Fighter Aviation Regiment. He flew
at least 10 sorties on the Eastern Front, (some sources indicate 12 sorties)
flying the Yak-7B, but did not shoot down any German aircraft. In 1945 he
was made deputy commander of the 300th Fighter Aviation Regiment, and
participated in the Soviet invasion of Manchuria, during which he flew four
(by other accounts 30) ground-attack missions on the Yak-9T.
With the German invasion of the USSR in June 1941, he was retained in the
Far East despite several requests for a combat posting in the west,
especially after his brother Konstantin was killed in action. In late 1943
he was still an instructor with the 162nd Fighter Aviation Regiment. He flew
at least 10 sorties on the Eastern Front, (some sources indicate 12 sorties)
flying the Yak-7B, but did not shoot down any German aircraft. In 1945 he
was made deputy commander of the 300th Fighter Aviation Regiment, and
participated in the Soviet invasion of Manchuria, during which he flew four
(by other accounts 30) ground-attack missions on the Yak-9T.
The 300th Fighter Aviation Regiment was then assigned surveillance duties
covering the deployment of the US troops in Korea until March 1946, when the
unit was sent back to the Soviet Union. In December 1947 he became the
executive officer of the 196th Fighter Aviation Regiment. In 1949 the unit
began receiving the MiG-15 jet fighter.
Soon after the Korean War began, Pepelyaev commanded the 196th Fighter
Aviation Regiment. Secretly the USSR sent several air regiments equipped
with the MiG-15 to the Chinese base Antung in Manchuria to support Chinese
ground forces. In December 1950 the 64th Fighter Aviation Corps with two
fighter divisions was created; Pepelyaev's unit, 196th Fighter Aviation
Regiment, was soon put in the 324th Fighter Aviation Division (commanded by
Ivan Kozhedub).
Pepelyayev's personal combat record in Korea was
spectacular: he flew 109 combat sorties, he participated in 38 aerial
combats, and was credited with 19 aerial victories. For his impressive
performance, he was awarded with the Zolotaya Zvezda (Золотая Звезда -
Golden Star), which is the highest Soviet military decoration, becoming a
Hero of the Soviet Union.
 Upon his return to the Soviet Union, Pepelyayev was assigned to various
mainly commanding positions. Following a brain hemorrhage that took place in
1961 during a tight maneuver at an otherwise routine flight, he was
decommissioned from flight service and was assigned to the central command
post of the Soviet Air Defence Forces. He was demobilized from the military
in 1973.
Upon his return to the Soviet Union, Pepelyayev was assigned to various
mainly commanding positions. Following a brain hemorrhage that took place in
1961 during a tight maneuver at an otherwise routine flight, he was
decommissioned from flight service and was assigned to the central command
post of the Soviet Air Defence Forces. He was demobilized from the military
in 1973.
After demobilization, Pepelyaev lived in Moscow where he worked as a main
engineer at the Scientist Research Automatic Instruments Institute until
retirement in 1986. In July 1993, he returned to North Korea together with
Soviet flying aces Sergey Kramarenko and Dmitry Oskin, during the
commemoration of the 40th anniversary of the end of the Korean War.
In 1995, he was invited to visit Maxwell Air Force Base in Alabama where he
was inducted into the Gathering of Eagles Program. During his visit, he met
with American Korean War flying aces Gabby Gabreski, John F. Bolt and
Robinson Risner, and German World War II flying ace Alfred Grislawski. He
died on 4 January 2013.
As for the charismatic Mig-15 that Pepelayef flew in Korea, little can be
said that has not been said: light, sturdy and reliable, with a high thrust
to weight ratio, it could fly high, was reasonably maneuverable and well
armed. Definitely not without its vices (instability at high speeds because
of wing flexing, poor aileron effectiveness, heavy stick forces and
primitive instrumentation immediately spring into mind), it was a
charismatic machine that could only practically be outclassed by the equally
charismatic Sabre.
| THE KIT |
 This is yet another fine Hobby Boss “Easy Assembly” kit: general shapes of
parts look correct, molding is crisp, panel lines are finely recessed,
detail is in most areas good and clear parts are nice as are the decals.
Instructions are clear and the build itself is very easy.
This is yet another fine Hobby Boss “Easy Assembly” kit: general shapes of
parts look correct, molding is crisp, panel lines are finely recessed,
detail is in most areas good and clear parts are nice as are the decals.
Instructions are clear and the build itself is very easy.
In fact, what you get for the price is really outstanding, since the kit,
apart from the flat instrument panel (something not that difficult to deal
with) and the somewhat simplistic/generic cockpit, is not really out of
place when judged with modern standards, standing as a simpler yet
acceptable, cheap alternative.
The specific kit is the 2020 rebox, bought in 2023 from an Athens Hobby shop
at a bargain price and for a look at its contents you may read its preview,
found at the ever growing MM archives.
| CONSTRUCTION |
I started by attaching the instrument panel to the cockpit tub, followed by
the inner nose element at its front. The completed subassembly, together
with the one piece main wing and the exhaust pipe were trapped between the
fuselage halves. Since the model is a prime candidate for tail sitting, I
made sure I secured around 20 grams of suitably cut fishing weights
bilaterally on the cockpit walls, where they could not be seen.
 Basic cockpit color was Hu87 Steel Gray (dries to a lovely blue gray shade),
instrument panel, side consoles, stick grip and front inner anti glare area
were painted black. The rear view area was painted cockpit color. A leftover
instrument decal was applied and trimmed to fit at the instrument panel. The
KK1 seat had Its frame painted cockpit color, its rear cushion olive drab,
and its head cushion black, while the ejection handle was represented by
painting the corresponding area red. Seat belts were added from masking
tape. The intake innards were painted steel, while the shallow exhaust was
painted black, to add a sense of depth.
Basic cockpit color was Hu87 Steel Gray (dries to a lovely blue gray shade),
instrument panel, side consoles, stick grip and front inner anti glare area
were painted black. The rear view area was painted cockpit color. A leftover
instrument decal was applied and trimmed to fit at the instrument panel. The
KK1 seat had Its frame painted cockpit color, its rear cushion olive drab,
and its head cushion black, while the ejection handle was represented by
painting the corresponding area red. Seat belts were added from masking
tape. The intake innards were painted steel, while the shallow exhaust was
painted black, to add a sense of depth.
Continuing assembly, I attached the intake lip, the horizontal stabilizers
and the speed brakes (the latter in “retracted” position). Though not
usually carried, I decided to attach the 2-piece slipper tanks, just for the
sake of “different” looks.
This more or less concluded basic assembly, justifying the “Easy Assembly”
nature of this kit. Fit was really nice everywhere, needing some filler at
the usual areas (wing roots, fuselage joints, front lip). Unless you opt for
not gluing the parts, you may wish to cut off the various “snap-tite”
locating pins before assembly for more precise fit.
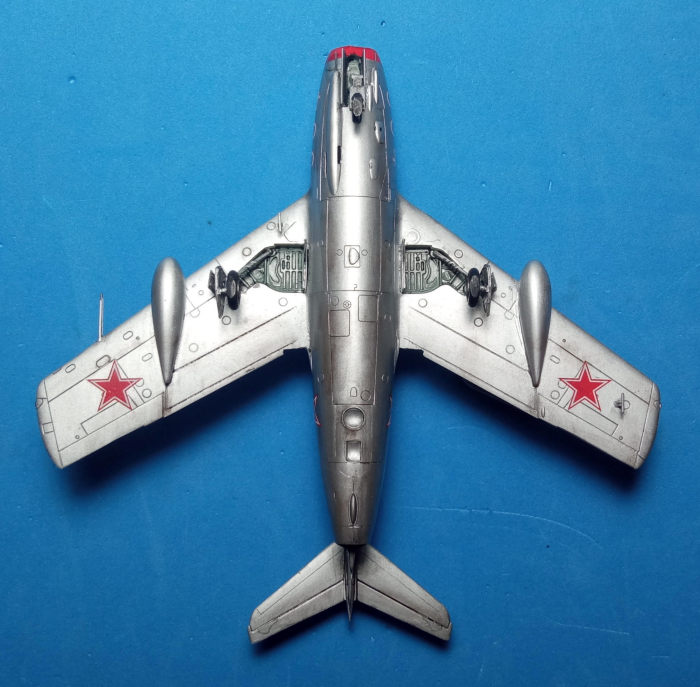
Though a variety of landing gear shades have been witnessed on those early
MiGs, I assumed that gear legs and door innards would be “silver” as the
airframe, with only the bay walls being light blue gray. This “assumption”
meant that I took the lazy road and attached all landing gear parts and
doors (sans the main wheels and the one piece nose wheel/strut) prior to
painting, in order to paint them silver, together with the airframe. Off to
the paint shop then!
| COLORS & MARKINGS |
 I gave the complete model a coat of Hu11 silver, which I lightly buffed with
a soft cloth once dry. Needing no Future to prepare for decals, this must
have been one of the easiest paint jobs I have ever done!
I gave the complete model a coat of Hu11 silver, which I lightly buffed with
a soft cloth once dry. Needing no Future to prepare for decals, this must
have been one of the easiest paint jobs I have ever done!
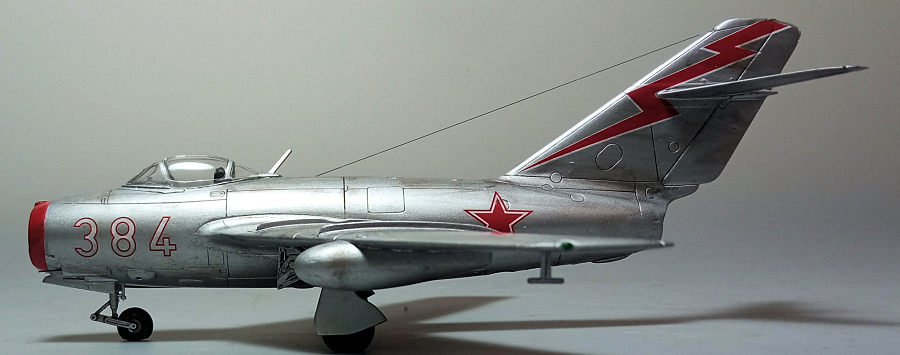
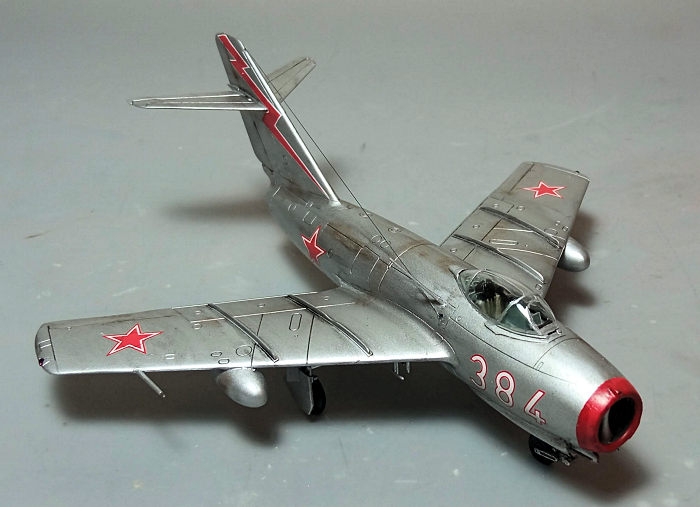
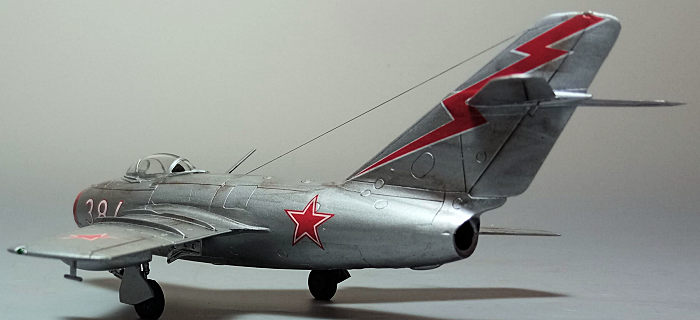
Off to the decals: I used the kit decals to represent Belyy (White) 384, as
it stood in Korea during summer 1951. This machine carried a striking red
lightning on its fin and was reportedly (though not fully justified) flown
by Pepelayev. Decals behaved supremely and, with the help of some mild
softener, succumbed to every engraved detail. I was particularly pleased
with the red lip decal that easily followed the complex contour, only
needing minor trimming and retouching. A coat of Future sealed the decals.
| FINAL CONSTRUCTION |
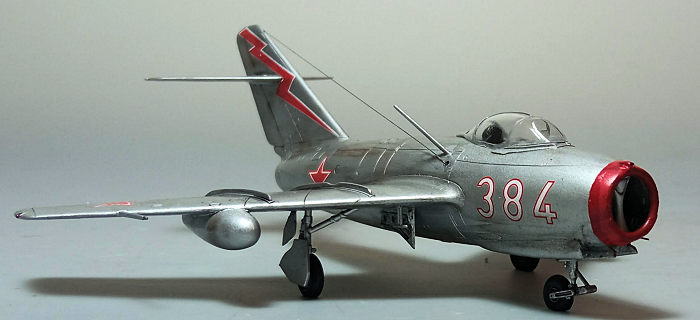
The main wheels and the one piece nose wheel/strut were attached in
position, with the bird nicely standing on her shoes. All three wheels were
filed to look weighted. Rims were painted green, tires were black, main
wheel brake housings were painted gunmetal, while the wheel well walls were
painted Hu87 Steel Gray.
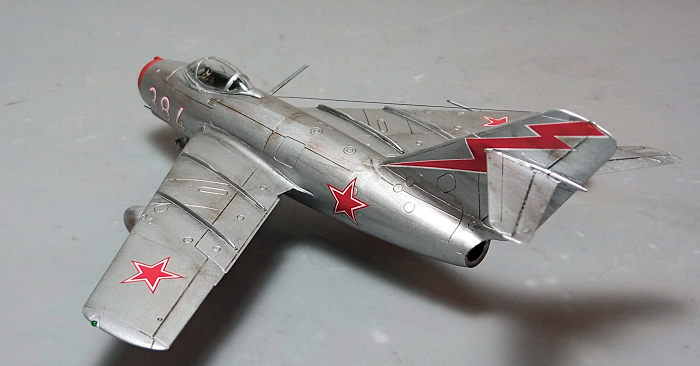
 I decided to apply some weathering, consisting of a black wash to accentuate
all the finely recessed panel lines (and a heavier like wash in the landing
gear areas, to exhibit a used, oily look) and light application of dark
brown and black dry pastels to represent dirt, grime and the like. A satin
coat gave the bird its final hue.
I decided to apply some weathering, consisting of a black wash to accentuate
all the finely recessed panel lines (and a heavier like wash in the landing
gear areas, to exhibit a used, oily look) and light application of dark
brown and black dry pastels to represent dirt, grime and the like. A satin
coat gave the bird its final hue.
A small acetate piece was glued on top of the instrument panel, to represent
the gunsight. The canopy had then its well defined frames hand painted and
attached its position, with fit being quite good and needing only small
amounts of white glue to fair the gaps. The two rear underside
transparencies were attached at this time, as well, using Future as bonding
agent.
Final attachment of bits and pieces included the three gun barrels (they
were fabricated from stretched sprue for more realistic looks), the two
underside RV-2 transmitting antennas and the top side mounted antenna mast.
Thin stretched sprue was run from the fin to a hole opened just aft of the
mast base, to represent the aerial wire. Blobs of red and green clear paint
represented the wingtip lights, before calling the MiG-15 done!
| CONCLUSIONS |
This is yet another really nice “Easy Assembly” Hobby Boss offering: general
shape looks correct, molding is crisp, panel lines are finely recessed, fit
is good, cockpit detail is adequate, landing gear is finely represented,
transparencies are nice and clear and decals are superb. All this is offered
at a surprising low price.
It is true that, judged in absolute terms, this kit might lack in overall
detail compared to the latest “Non-easy assembly” super lits, but then it
costs half the price, if not less. Also, due to the clever engineering,
construction could not be simpler, easily tackled by an absolute beginner.
Though overlooked by some, Hobby Boss “Easy Assembly” kits are really
excellent in their own manner, with some being better than others, as is the
case here. If you want a quick trouble free build but still opt for a good
result, or, even better, if you want to introduce a toddler to the magic
world of modeling, you might look no further than this Easy Assembly Hobby
Boss offering.
Happy Modeling!
Spiros Pendedekas
| REFERENCES |
Copyright ModelingMadness.com. All rights reserved. No reproduction in part or in whole without express permission from the editor.
Thanks t
If you would like your product reviewed fairly and fairly quickly, please contact the editor or see other details in the Note to Contributors.