| KIT: | AM tech 1/48 Ta-183 |
| KIT #: | 484601 |
| PRICE: | $39.95 MSRP |
| DECALS: | Six options |
| REVIEWER: | Dale Rannals |
| NOTES: |
| BACKGROUND |
For a history and a look at what’s in the box, please take a peek at Scott’s excellent preview.
| CONSTRUCTION |
 If you’ve
read the other reviews of this kit, then you already know it is just
marvelously engineered. The fit and finish are fantastic. I built this as
I was building a Dragon Ho-229 kit (I usually build kits in pairs for some
reason) and while the Dragon fit was good but had a few problem areas, this
one is simply great. Greater than great! Greater than…ah, you get the
idea.
If you’ve
read the other reviews of this kit, then you already know it is just
marvelously engineered. The fit and finish are fantastic. I built this as
I was building a Dragon Ho-229 kit (I usually build kits in pairs for some
reason) and while the Dragon fit was good but had a few problem areas, this
one is simply great. Greater than great! Greater than…ah, you get the
idea.
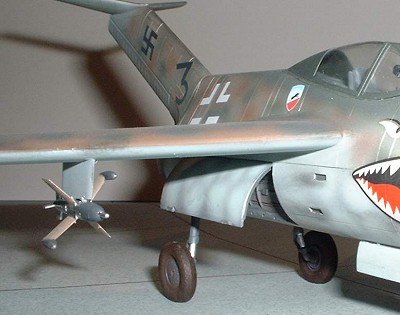
The cockpit assembly screamed “build me first”…..so I did. Painted all the interior bits Testors Model Master RLM-66. The wing halves came next (I decided on fitting just one pair of missiles under them), then the wheel wells into the fuselage, then the fuselage halves, etc., etc., etc. Everything fit so well usual time consuming aspects (putty, sanding) were minimal, so assembly time was quite quick.
Have I mentioned that the fit is really good?
In no time at all I was ready for the paint shed.
| COLORS & MARKINGS |
This is where I came across my only stumbling block. The kit has options for six aircraft. And they’re all quite interesting. I sat for two days looking at the different schemes trying to decide which to choose (I call the process “option paralysis”, where you have so many choices [or things to do] you can’t decide on one, and end up doing nothing. Hey, it works for the wife’s honey-do list!).
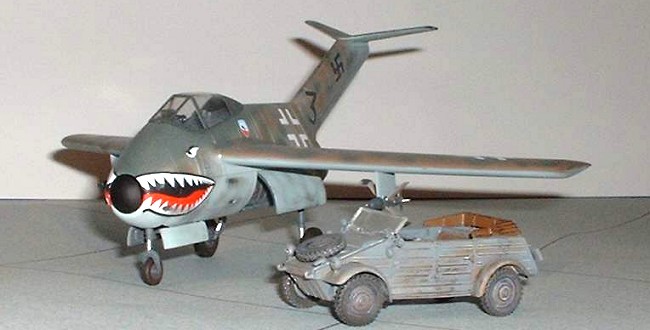
 Anyway, my three-year-old, who
loves my shark-mouthed MkVIII Spitfire “Grey Nurse”, came up to me and
asked “Is this gonna be a shark mouth?” Hmmm……why not? I dug out what
was left of Eagle Strike “Warhawks” decal sheet (#48075) and found some
quite suitable teeth.
Anyway, my three-year-old, who
loves my shark-mouthed MkVIII Spitfire “Grey Nurse”, came up to me and
asked “Is this gonna be a shark mouth?” Hmmm……why not? I dug out what
was left of Eagle Strike “Warhawks” decal sheet (#48075) and found some
quite suitable teeth.
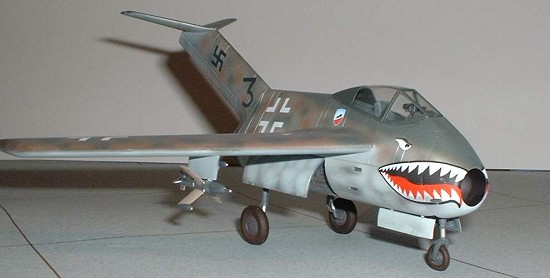
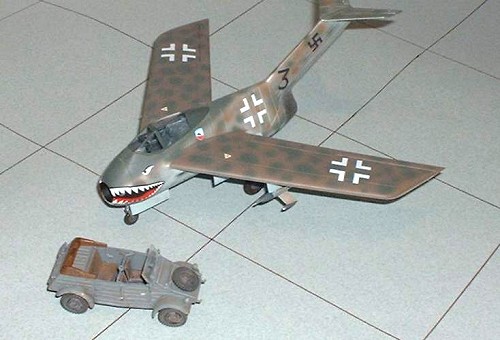
Taking cues from the kits six schemes, I first masked off the wings and then sprayed the fuselage with Testors Metalizer Aluminum. After buffing it out it then got a shot of Future to seal it up a bit. The underside got a dose of RLM65 Hellblau and the wing tops were sprayed with my brown mixture (see my Ho-229A-1 review for an explanation). I mottled the fuselage top with the brown also. I then got out the RLM82 Dunklegrun and sprayed the fuselage front, mottling it aft. The wings also got spotted with green.
Everything then got the usual coat of Future to prep for the decals. Both the kit decals and the Eagle Strike decals went down well, both reacting well to Micro-set and –sol. Then a coat of Model Master Clear Flat acrylic to dull things down some, and I was basically finished.
I added the landing gear and the canopy, and painted and hung the pair of missiles under the wings. I kept the weathering to a bare minimum.
| CONCLUSIONS |
 This is an awesome kit. Again, since it is Luft ’46 stuff you can pretty much do anything you like (Hmmm….one in
British markings .......).
Recommended to beginners, experts, and all in between!
This is an awesome kit. Again, since it is Luft ’46 stuff you can pretty much do anything you like (Hmmm….one in
British markings .......).
Recommended to beginners, experts, and all in between!
Did I mention that the fit is great?
May 2005
If you would like your product reviewed fairly and quickly by a site that has around 300,000 visitors a month, please contact me or see other details in the Note to Contributors.