| KIT #: | H-637 |
| PRICE: | $5.00 'used' |
| DECALS: | One option |
| REVIEWER: | Chris Mikesh |
| NOTES: | Reissue |
| HISTORY |
 The Nakajima
Ki-84 Hayate (Gale[strong wind]in Japanese) is a single-seat fighter flown by
the Imperial Japanese Army Air Service in the last two years of World War II.
The Allied name was "Frank. The Ki-84 is generally considered the best Japanese
fighter to operate in large numbers during the conflict. The aircraft boasted
high speeds and excellent maneuverability with an armament of two 30 mm and two
20 mm cannon that gave it formidable firepower. The Ki-84's performance matched
that of any single-engine Allied fighter it faced, while its operational ceiling
enabled it to intercept high-flying B-29 Superfortress bombers. Pilots and crews
in the field learned to take care with the plane's high-maintenance Nakajima
Homare engine and a landing gear prone to buckling. The difficulties of Japan's
situation late in the war took a toll on the aircraft's field performance as
manufacturing defects multiplied, quality fuel proved difficult to procure and
experienced pilots grew scarce. The pilot of a well-maintained Ki-84 took to the
skies in possession of Japan's fastest fighter. A total of 3,514 aircraft were
built.
The Nakajima
Ki-84 Hayate (Gale[strong wind]in Japanese) is a single-seat fighter flown by
the Imperial Japanese Army Air Service in the last two years of World War II.
The Allied name was "Frank. The Ki-84 is generally considered the best Japanese
fighter to operate in large numbers during the conflict. The aircraft boasted
high speeds and excellent maneuverability with an armament of two 30 mm and two
20 mm cannon that gave it formidable firepower. The Ki-84's performance matched
that of any single-engine Allied fighter it faced, while its operational ceiling
enabled it to intercept high-flying B-29 Superfortress bombers. Pilots and crews
in the field learned to take care with the plane's high-maintenance Nakajima
Homare engine and a landing gear prone to buckling. The difficulties of Japan's
situation late in the war took a toll on the aircraft's field performance as
manufacturing defects multiplied, quality fuel proved difficult to procure and
experienced pilots grew scarce. The pilot of a well-maintained Ki-84 took to the
skies in possession of Japan's fastest fighter. A total of 3,514 aircraft were
built.
| THE KIT |
 Years ago, my
father had a huge collection of models in the basement. As I am an aircraft-oholic
(building since I was 7), I lusted to build the many he had down there. As time
goes by, he wanted me to buy/sell them at an IPMS Convention (a whole different
chapter in my life with Nostalgic Plastic, Inc.). But, I wanted to keep the
Revell 1/72 WWII “H” series kits – specifically the fighters, which number 24 of
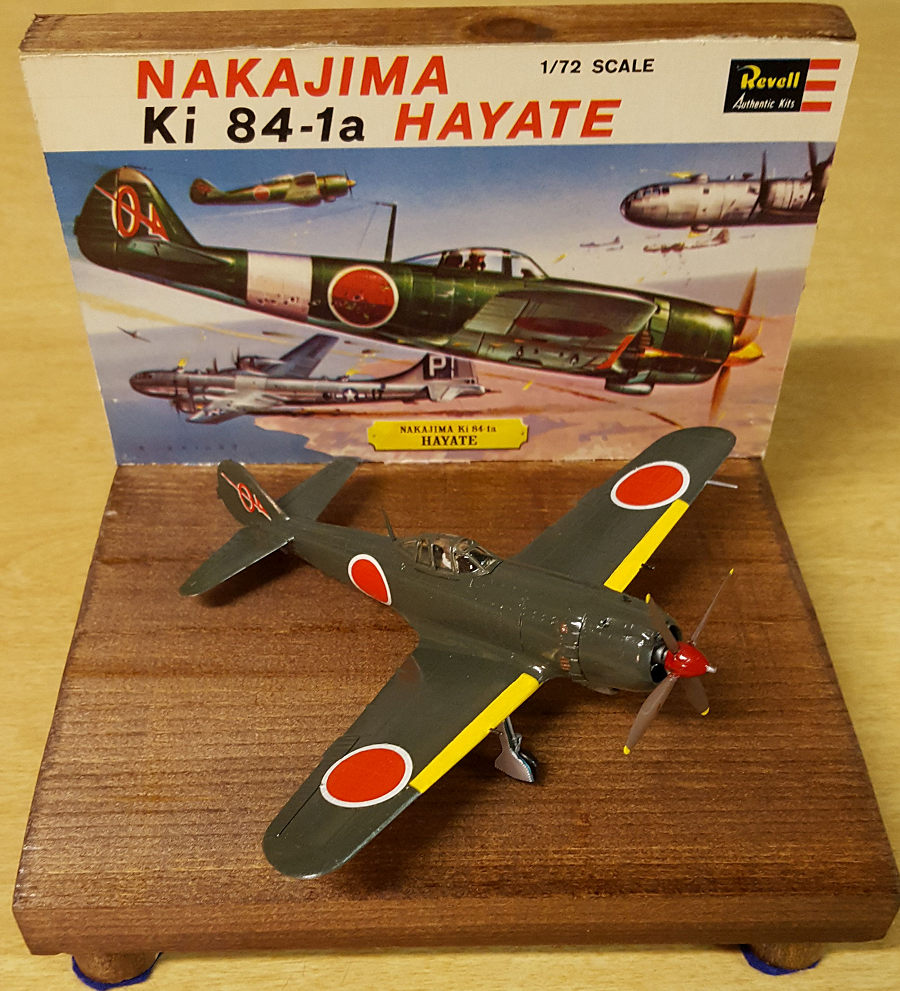
them. The box art is what inspired my early desire to build the kits. So I set
out to build all of them the best I could – but preserve as much of the intended
model and box art as possible. Straight out of the box, plus paint and glue
where possible. This building series is in honor of the early Revell Box
artists, Jack Leynnwood, Richard Kishady, Scott Eidson, Brian Knight, George
Akimoto, and John Steel who inspired all of us.
Years ago, my
father had a huge collection of models in the basement. As I am an aircraft-oholic
(building since I was 7), I lusted to build the many he had down there. As time
goes by, he wanted me to buy/sell them at an IPMS Convention (a whole different
chapter in my life with Nostalgic Plastic, Inc.). But, I wanted to keep the
Revell 1/72 WWII “H” series kits – specifically the fighters, which number 24 of
them. The box art is what inspired my early desire to build the kits. So I set
out to build all of them the best I could – but preserve as much of the intended
model and box art as possible. Straight out of the box, plus paint and glue
where possible. This building series is in honor of the early Revell Box
artists, Jack Leynnwood, Richard Kishady, Scott Eidson, Brian Knight, George
Akimoto, and John Steel who inspired all of us.
The KI.84 kit is of the good ‘ole hard dark green. Dry fit was excellent – as those early models often were (circa 1964). Typical, is the thick “bullet proof” clear plastic canopy. Unlike other Revell molds of the time, this model had finer rivets and raised details. There is no cockpit to speak of except a seat and pilot. The next concern will be the 50+ year old decals trying to rest on rivets. I’ll be looking for replacements if possible.
| CONSTRUCTION |
The instructions for assembly were intuitive but often misleading when noting color. I did not deviate from the instructions for the most part except where knowledge prevailed. I anticipate this will be an easy build (Jinx!).
 Starting
from the fuselage (per instructions), I mopped brown paint on the pilot. After
drying, I painted the face, belts, and oxygen mask appropriately. I over-did the
white belts and converted the mistake to a white scarf. (Why not?!) There is
only a seat, and no other cockpit arrangements to worry about. The interior is
painted a metallic blue/green as were many Japanese WWII planes. (Many resources
show greens, blues, grays, or silvers.) No one will see it anyway after the
canopy is attached. The deck behind the seat under the canopy is generally
painted green, the same as the fuselage.
Starting
from the fuselage (per instructions), I mopped brown paint on the pilot. After
drying, I painted the face, belts, and oxygen mask appropriately. I over-did the
white belts and converted the mistake to a white scarf. (Why not?!) There is
only a seat, and no other cockpit arrangements to worry about. The interior is
painted a metallic blue/green as were many Japanese WWII planes. (Many resources
show greens, blues, grays, or silvers.) No one will see it anyway after the
canopy is attached. The deck behind the seat under the canopy is generally
painted green, the same as the fuselage.
The wings built perfectly. Three pieces consisting of 2 top halves and a lower wing. It’s a beautiful fit that modern model manufactures would be envious of. The guns and pitot tube are molded on the top wings. Watch out! With the brittle plastic, these may snap off quickly while handling.
The wheel wells have ‘tabs’ on them to seat the wheel covers. These are great if you plan to simulate flight and gear folded. If landing gear is going to be down, remove these tabs – gently (snap!) Note that the wheel wells are not boxed in – so you can see the canopy from the wells. I recommend stuffing or masking the wells before painting.
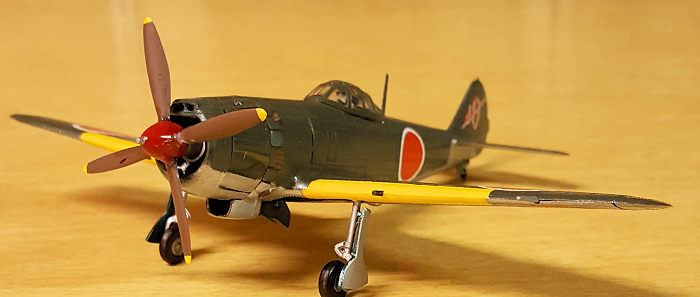
The engine fits together with 4 parts: 2 cylinder radials, and a propeller shaft and retainer. I did not bother with the retainer as I know if I glue it in, it will lock in place. When the time comes, put the shaft on the propeller and insert into the engine so the Grandkids can blow on the prop (**see end of review for prop update). The engine was separately painted with Tamiya Metallic Grey (XF-56) then dry-brushed with silver, and then set aside. The Metallic Grey is highly recommended because as the paint dries on the engine, the silver separates and highlights raised parts of the engine. It really looks like a metal engine!
The wing fit to the fuselage was nearly perfect. Like the Hawker Tempest (Revell H-620) the Radiator housing needs to be filled at the joint between the fuselage and wing. (Oddly, I forgot to fill that area when I painted the silver bottom.) I covered the wing and fuselage surrounding the area to be sanded with masking tape as I smoothed the area. That way, I could preserve as many rivets and kit detail as possible if I get too energized while sanding the area.
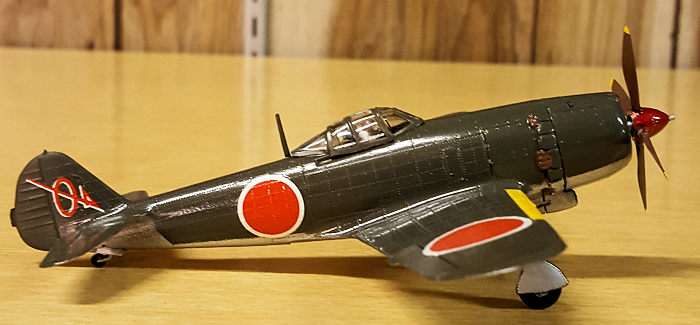 Careful! I
almost broke the Antennae Mast behind the canopy. Be ready for that since the
mast stands taller than the tail. Rest the model in the box if upside down.
Careful! I
almost broke the Antennae Mast behind the canopy. Be ready for that since the
mast stands taller than the tail. Rest the model in the box if upside down.
The canopy was dipped in Future to improve luster and clarity (not that there is anything to see). White glue is great for attaching the canopy. It will not mar the canopy, and if you need to take it off (static attracting interior dust for example) it will be easy to re-glue. Also Elmer’s is good for filling badly fitted canopies. Once glued in place, the canopy was masked waiting for paint. I used a combination of regular clear tape, (so I could see the frames and trim around them), and Tamiya Masking Tape for Curves (great stuff!). Also MicroScale Canopy Mask is great for seams or cracks between layers of tape, so the paint does not run under the tapes – just for added assurance.
The cowling was temporarily glued on with white glue (no engine yet) so that painting can be expedited or masked as needed. Note also that the model has a removable cowling hatch to display the engine. This was temporarily glued in place too.
| COLORS & MARKINGS |
Decals indicate the 104 Sentai. I had noticed that the 50+ year old decals will be nearly useless, but I figured I’d give it my best shot. I mopped on some Microscale Liquid Decal Film in preparation. I had already seen some cracks, but wanted to try anyway.
The cowling and engine door was temporarily glued on with white glue so they could be painted. Mask off or stuff paper in the wheel wells as it is a straight shot to the cockpit. I don’t recommend painting the inside of the canopy that way!
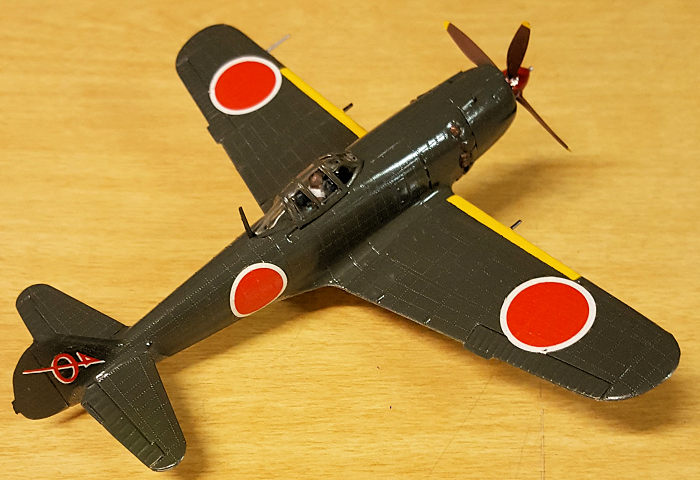
 I painted
the top side with Gunzi Sangyo (H-60) IJA Green. I also noticed that the Gunzi
paint seemed to be like an olive drab, and not the brighter green I had
anticipated. Other modelers have used Tamiya J.A. Green (XF-13, close to
FS34089), but I did not have any in my stocks. The instruction sheet called for
“dark green” and nothing specific, so I proceeded anyway. It airbrushed very
nicely, and I was satisfied with that.
I painted
the top side with Gunzi Sangyo (H-60) IJA Green. I also noticed that the Gunzi
paint seemed to be like an olive drab, and not the brighter green I had
anticipated. Other modelers have used Tamiya J.A. Green (XF-13, close to
FS34089), but I did not have any in my stocks. The instruction sheet called for
“dark green” and nothing specific, so I proceeded anyway. It airbrushed very
nicely, and I was satisfied with that.
After it had all dried and cured for 24 hours, I masked the upper surfaces with tape and proceeded with the underside of silver. I can really recommend Tamiya TS-17 Gloss Aluminum (spray). I have used it on several models including the bottom of this kit. It is a very forgiving aluminum paint that bites into the plastic well, covers surface errors, and looks great after it’s dry to the point you can handle it in 30-40 minutes without wearing off in your hands or fingerprints.
A trick I learned from someone, or figured out myself, is that a silver Sharpie® (#39109) permanent marker has a similar silver pigment as the Tamiya Aluminum paint. Excellent for touch-ups or overpaints.
The leading edge of the wing and propeller tips are Tamiya XF-3 yellow, and the interior is Gunzy Sangyo H-63 Metallic blue-green. I used Tamiya XF-64 Red Brown on the exhaust ports, propeller blades, and Tamiya X-7 red on the nose cone. Guns and engine were painted with Tamiya XF-56 Metallic Grey. All the paints are excellent and brushes on with no brush marks.
| FINAL CONSTRUCTION |
Decals were not as bad as
anticipated. I started with the bottom Hinomaru (Red national insignia). Soaking
for about 10 minutes, it would not release from the paper. Using an X-acto knife
I (gently) separated the decal from th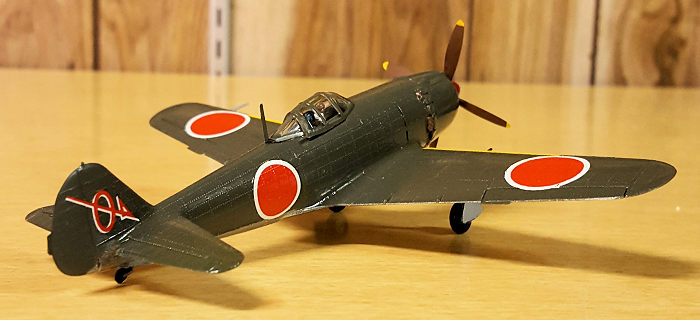 e
paper and floated it to the model. I also used MicroSol and Set with gentle
pressure to settle the decal. And of course, in 5 minutes, the edges curled.
Having seen this before, I made a solution of Elmer’s Glue and MicroSol (or
water if you don’t want the decal to soften) and worked it under the decal.
Blowing and pressing enough to make the glue stick, it finally settled enough to
plug in the hair dryer. Cooking and pressing with a damp paper towel, it really
dropped in place nicely. Good ‘ole brute force! All the other decals were the
same way.
e
paper and floated it to the model. I also used MicroSol and Set with gentle
pressure to settle the decal. And of course, in 5 minutes, the edges curled.
Having seen this before, I made a solution of Elmer’s Glue and MicroSol (or
water if you don’t want the decal to soften) and worked it under the decal.
Blowing and pressing enough to make the glue stick, it finally settled enough to
plug in the hair dryer. Cooking and pressing with a damp paper towel, it really
dropped in place nicely. Good ‘ole brute force! All the other decals were the
same way.
Final parts were glued in place like the landing gear, engine, and cowling.
** Now I have a problem with the prop. It sits too far out from the engine. I have a choice… clip the shaft, and glue the prop on permanently, or leave it the way it is and let the G-kids blow the prop. Kids are more important than plastic, so I left it the way it is. Stick it in the hole and blow!
A quick coat of Future all around to seal everything and unmask the canopy - we’re done!
The full details on building the stands for this series are provided in the initial article. That can be reached if you visit this link.
| CONCLUSIONS |
Is this a great kit? It depends on your end goal. Compared to more modern kits of different brands…no. For a 1964 vintage model…yes. I think it was way ahead of its time by comparison to models from Shizuoka or early Tamiya (very early) Ki.84s. External details and fit are very good for a raised detail kit. Internals are non-existent. It’s a great kit to re-live your past or if you want to go to the trouble of fixing the interiors and detailing the engine. Externally, it is still quite good.
But re-consider what the end goal was in building this model. It was to honor the kit makers and box artists of Revell. Another goal was to build it as intended. Granted, ‘builder prerogative’ can take precedence over the model as he sees fit. This model – and especially my skills – is not contest competitive. But a completed kit always graduates to a good model - until you drop it, and it becomes a kit again – but that’s a different review.
**A final note: As the prop was NOT glued in, (for the grandkids to blow), I discovered it on the floor one evening in several pieces (I may have stepped on it). It is un-reparable due to the brittle plastic and missing parts. I can’t believe I mail-ordered another kit just for the prop!
| REFERENCES |
Scalemates web site: https://www.scalemates.com/search.php?fkSECTION%5B%5D=All&q=ki-84
Modeling Madness (other Ki.84 builders) http://modelingmadness.com
Wikipedia: https://en.wikipedia.org/wiki/Nakajima_Ki-84
19 February 2019
Copyright ModelingMadness.com
If you would like your product reviewed fairly and fairly quickly, please
contact
the editor or see other details in the
Note to
Contributors.
Back to the Main Page
Back to the Review
Index Page
Back to the Previews Index Page