
| KIT #: | H-567 |
| PRICE: | $5.00 |
| DECALS: | One option |
| REVIEWER: | Chris Mikesh |
| NOTES: | Built right out of the box |
| HISTORY |
One of the most rugged
fighters of World War II was the Italian Macchi MC.200 Saetta (Arrow). This
durable plane owes its development to the brilliant design genius of Mario
Castaldi designer of the famed Macchi-Castaldi race planes. Macchi MC.200s
fought in nearly every Italian battle and escort to German Stukas during the
invasion of Russia. Acceptance of the new monoplane by the Italian fighter
squadrons was
 unenthusiastic.
Accustomed to the slower but more nimble biplanes, many Pilots we're reluctant
to accept the more advanced Saetta. Before long, wholehearted approval replaced
their early rejection of the Saetta, which easily outmaneuvered English
Spitfires and Hurricanes.
unenthusiastic.
Accustomed to the slower but more nimble biplanes, many Pilots we're reluctant
to accept the more advanced Saetta. Before long, wholehearted approval replaced
their early rejection of the Saetta, which easily outmaneuvered English
Spitfires and Hurricanes.
Saettas constituted Italy's chief fighter strength. With their Air Force relying heavily on this plane the MC.200 was discovered to have 1 deadly flaw, a tendency to stall under certain flight conditions. All Saettas we're immediately grounded following two fatal crashes and the future of the fighter was in sudden jeopardy. The difficulty was finally traced to the wing design and following a minor modification, the Saettas had no further problems.
The soundness of the Saettas basic concept was demonstrated by its remaining virtually unchanged throughout its operational life. By the time of the Italian surrender, nearly 1,000 MC.200s had been completed. Following the Italian Armistice, 23 Saettas continued fighting on the side of the Allies. Allied pilots who flew her had only praise for the little fighter, the ultimate tribute to her designer.
| THE KIT |
Years ago, my father had a huge collection of models in the basement. The Revell 1/72 WWII “H” series kits – specifically the fighters, (24 of them) were a favorite of mine and I always wanted to build them. This is #19 of the collection. Also this is a tribute to the box art that inspired all kids to build models.
The kit is very straight forward, with no glaring shape flaws. My kit was light gray in color plastic and in good shape. It has raised panel lines and is typical of a mid 1960’s kit. I expected this to be a great week-end build – and for the most-part it was.
| CONSTRUCTION |
 Assembly
begins with the fuselage halves. No need to pre-paint the cockpit because if
building out-of-the–box (OTB), you will not see the interior because of the
pilot. There is no interior to speak of except for a seat and the pilot. The
pilot was painted with Tamiya Red Brown XF-64, with a white helmet and glued
into place in the fuselage.
Assembly
begins with the fuselage halves. No need to pre-paint the cockpit because if
building out-of-the–box (OTB), you will not see the interior because of the
pilot. There is no interior to speak of except for a seat and the pilot. The
pilot was painted with Tamiya Red Brown XF-64, with a white helmet and glued
into place in the fuselage.
Externally the fuselage detail looks very good. However, the fuselage halves were misaligned from the pins. This appears to be a measurement problem from the mold designer. Oops!. I removed the pins to realign the fuselage, and then used Liquid cement to glue the halves together. The fuselage had a bit of a warp, but the solution was to glue the front have first and let it set, then glue the back half after a while and clamp it together. All in all, not difficult to deal with. I really like the Irwin Quick-Grip clamps (found in any hardware store) as they are easily adjustable and has a ‘trigger’ style tensioner. The Quick-Grip has a rubber clamp, so the model rarely slips. They offer good control so you don’t crack the plastic.
 Engine: The
engine assembly is pretty straightforward and common to many of the Revell
models. However my example had a considerable amount of flash and due to its
detail, I needed to use a very small file to get into and between the engine
cylinders. The cowling is a similar problem except it's molded as one piece and
slightly off center. So again a very fine small Jewelers file is needed to round
off between the bumps on the cowling. I used Tamiya XF 56 Metallic Grey for the
engines. You will only see the front of the engine, so there is no need to
detail the back half (if OTB).
Engine: The
engine assembly is pretty straightforward and common to many of the Revell
models. However my example had a considerable amount of flash and due to its
detail, I needed to use a very small file to get into and between the engine
cylinders. The cowling is a similar problem except it's molded as one piece and
slightly off center. So again a very fine small Jewelers file is needed to round
off between the bumps on the cowling. I used Tamiya XF 56 Metallic Grey for the
engines. You will only see the front of the engine, so there is no need to
detail the back half (if OTB).
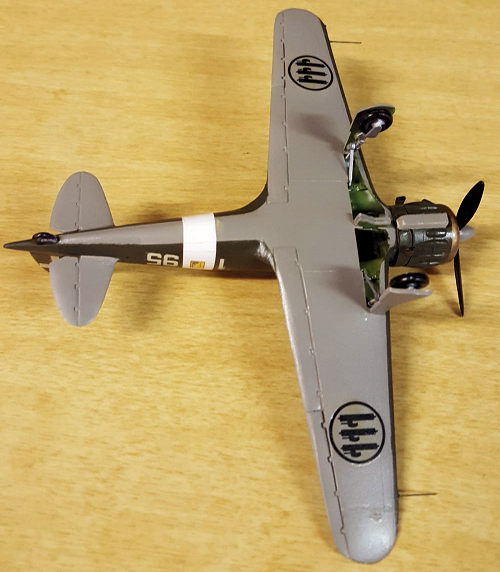
Wing assembly was pretty normal. The lower half is in one piece and the upper halves were glued in place. No fit problems. Assembly to the fuselage was good fit, with minor sanding. Be careful of the wheel well - there is no wheel well! The well will need to be masked off, otherwise you will be spraying into the cockpit as you paint the lower fuselage and wing.
The elevators needed a little pre-sanding. The tabs were also too large to fit in the slots – no big deal – just trim. However the elevators did not fit flush leaving a large gap that would need to be filled. To prevent the extra work, I removed the tabs completely and sanded the surface to be glued totally flat. I used a dot of super glue and put them in place and then it fit totally flush. Minimal sanding at the glue joint, and the problem was solved.
| COLORS & MARKINGS |
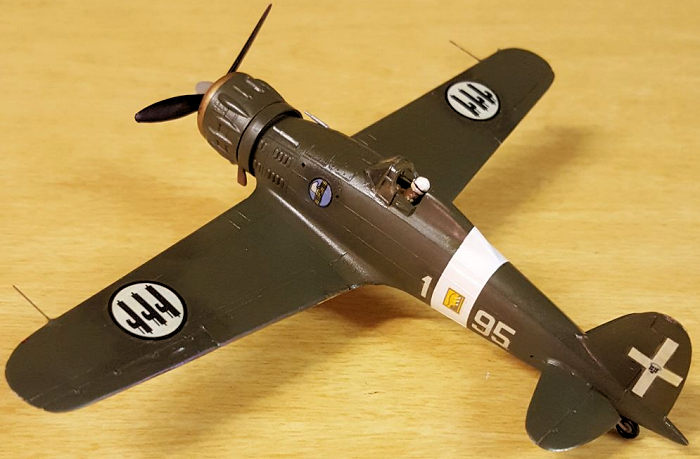
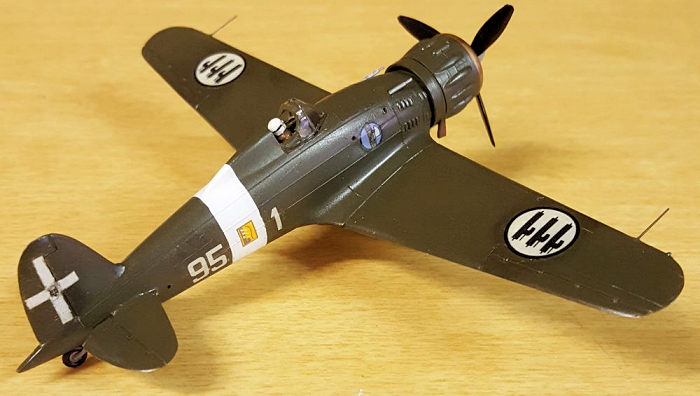
I used Tamiya XF-81 Dark Green (2) RAF for the top, and Tamiya XF-53 Neutral Gray for the bottom. Caution on Tamiya paints. I love them dearly because they go on smooth and airbrush very well if fresh. But I recommend test painting something before expecting the proper end result. The bottle cap colors are misleading and once the paint is dry they tend to darken compared to the color at the bottom of the bottle.
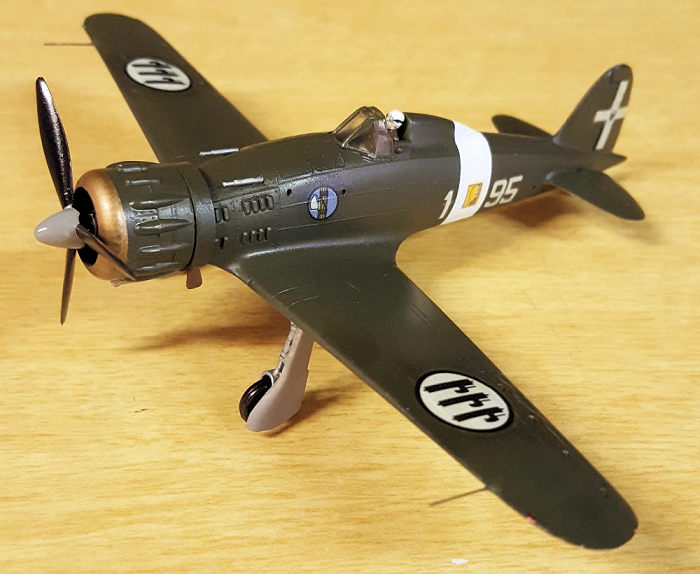 The copper
colored cowling is a copper Sharpie found in any office supply place. Silver and
black are always handy too.
The copper
colored cowling is a copper Sharpie found in any office supply place. Silver and
black are always handy too.
Here is a problem that plagues every builder. The white band around the fuselage (Tamiya White X-2) is rarely the same white as the decals. The decals are over 50 years old, and finding kit decals that are still white would be nearly impossible. Yes, I could have tried to “muddy” the white to match closer to the decals, but to be honest… it was too much work. If I were competing – I would have taken the effort to alter the paint color. Frankly, I was lucky enough that I got the band on straight and consistent – so I wasn’t going to push my luck.
As I mentioned, the decals are nearly 60 years old. I noticed that the 196X decals for this model looked okay from the surface, but as I examined it with a magnifying glass; I saw very small cracks very close together. That meant that this decal sheet was going to have some problems with shattering once in water. (I had no replacement decals.) So, I mopped on some liquid decal film. This is much recommended with any aged decal sheet.
Of course the decals have yellowed with age – nothing I can do about that except to trim as much of the yellowed clear away. The adhesive on the decal sheet was actually in good shape. I used mostly Micro Sol and Micro Set to assist the decals. The decals laid down reasonably good and only a little Elmer’s glue (dries mostly clear) was needed on stubborn corners and trailing edges.
 Landing Gear
is straight forward also. I only had a small dilemma with the support struts as
they were just slightly long. Simply trim to fit. Pre-paint the wheels and let
dry. As with all kits that come with Pitot tubes pre molded, they tend to break
off during assembly and are usually out of scale. I replaced the tubes with
stretched sprue and simply superglued them on to the leading edges where the
others broke off.
Landing Gear
is straight forward also. I only had a small dilemma with the support struts as
they were just slightly long. Simply trim to fit. Pre-paint the wheels and let
dry. As with all kits that come with Pitot tubes pre molded, they tend to break
off during assembly and are usually out of scale. I replaced the tubes with
stretched sprue and simply superglued them on to the leading edges where the
others broke off.
I used a clear coating of Future Floor Finish overall. This seals in the decals and adds a hard surface over flat paints (reduces scratching as you handle it). The Future adds a pleasant ‘sheen’ on the plane for what appears to be a bit more realistic. But beauty is in the eye of the beholder.
| CONCLUSIONS |
Is this a great kit? It depends on your end goal. Compared to more modern kits of different brands…no. For a 196X vintage model…it can hold its own even today. It lacks a lot of details modern kits provide, but the surface textures, ease of assembly, and fit reveal a very respectable model. It’s a great kit to re-live your past.
Re-consider what the end goal was in building this model. It is part of a series of 24 Revell Fighters of WWII kitted in the ‘60s. For me, this model is not contest competitive because of my lack of skills. But I really like it. Recommended.
Display Stand: The model stand is easy to do. Here is a link if you’d like to give it a try. https://modelingmadness.com/review/allies/gb/fighters/miktem.htm
| REFERENCES |
Kit Instructions
Profile Publications #64 “The Macchi MC.200”
29 January 2020
Copyright ModelingMadness.com If you would like your product reviewed fairly and fairly quickly, please contact the editor or see other details in the Note to Contributors.
Back to the Main Page Back to the Review Index Page Back to the Previews Index Page