Revell 1/72 P-47D Thunderbolt
| KIT #: | H-613 |
| PRICE: | $5.00 today. $39 cents in 1963 |
| DECALS: | one option |
| REVIEWER: | Chris Mikesh |
| NOTES: |
| HISTORY |
 (Quote from
the instruction sheet)
(Quote from
the instruction sheet)
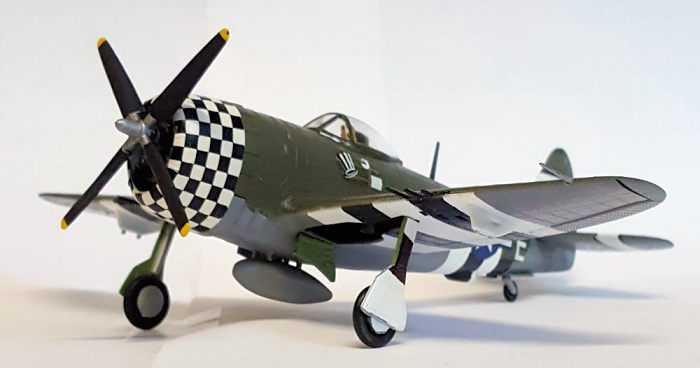
Republic Aircraft’s Thunderbolt was the largest single seat, single-engine propeller-driven fighter ever produced. Fat and heavy, the P-47 was often called the juggernaut, or “Jug”, by the men who flew her. The P-47 had an outstanding record of victories over its opponents. (edited) This P-47D- 25 is patterned after one of the Thunderbolts used by the 56th Fighter Group of the US Army Air Corps. This group was based at Duxford England, near Cambridge. Thunderbolts from the 56th ranged deep into the German Homeland on escort and interception missions which were to assure the theme of the huge fighter. The Republic P-47D had a wingspan of 40 feet 9 in, overall length was 36 FT 1 in, and height was 14 ft 2 inches. A Pratt & Whitney R 2800 engine was coupled to one of the largest propellers ever used on a fighter and gave the Thunderbolt a maximum speed of 429 miles per hour at 30,000 ft.
| THE KIT |
 Years ago,
my father had a huge collection of models in the basement. The Revell 1/72 WWII
“H” series kits – specifically the fighters, (24 of them) were a favorite of
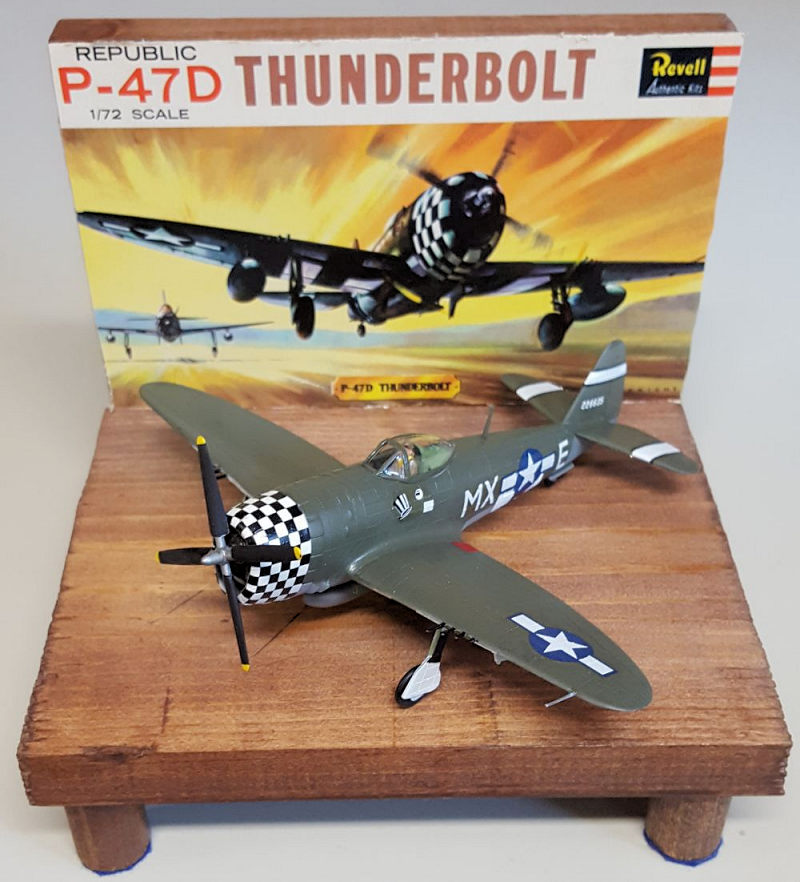
mine and I always wanted to build them. This is #21 of the collection. Also,
this is a tribute to the box art that inspired all kids to build models.
Years ago,
my father had a huge collection of models in the basement. The Revell 1/72 WWII
“H” series kits – specifically the fighters, (24 of them) were a favorite of
mine and I always wanted to build them. This is #21 of the collection. Also,
this is a tribute to the box art that inspired all kids to build models.
Looking at the model prior to construction, (aside from the fantastic artwork by Brian Knight), the kit does not reveal anything outstanding. It is typical of a 1963 issue model. My example had a good amount of flash as noted in the photograph that will need to be trimmed.
A closer look showed a glaring feature: the bombs were badly formed. For some reason they have a ring around the tail fin and Revell stretching the bomb making it badly inaccurate. Otherwise typical of Revell kits of the time there are: 2 Fuselage halves, a Pilot, Seat, Wings, bullet proof canopy, and miscellaneous other details. Another problem I saw was after 60 years of moving this kit from one base to another, the wing guns are damaged or broken off. The decals are of equal age. They are yellowed and off register. But nothing I could not overcome, and it looked fun, simple, and easy. (The Model Gods are laughing at me as I write this: rarely is a classic OTB model what you think.) The instruction sheet is straightforward with appropriate graphics. Typical for 1963.
| CONSTRUCTION |
The instruction sheet indicates to build the pilot and the seat as a separate item, and glue the two fuselage halves together, followed by inserting the pilot and seat from underneath into the cockpit area. This is a little unusual, as we often place the cockpit seat on top of the ledge in the fuselage, then glue the two halves together. If you follow your habit, the pilot will be seated too high. So, follow the instructions in this case. The first step is to glue the two fuselage halves together followed by the seat (from underneath).
When assembling the wings, my model needed a significant amount of
sanding and trimming because of the flash. There is a Grand Canyon gap between
the fuselage and the wing roots. I do not recommend filling it with putty. The
putty will sag in time showing the gap regardless, and as you sand the wing root
you will destroy all the raised details. I inserted a piece of Evergreen sheet
plastic and g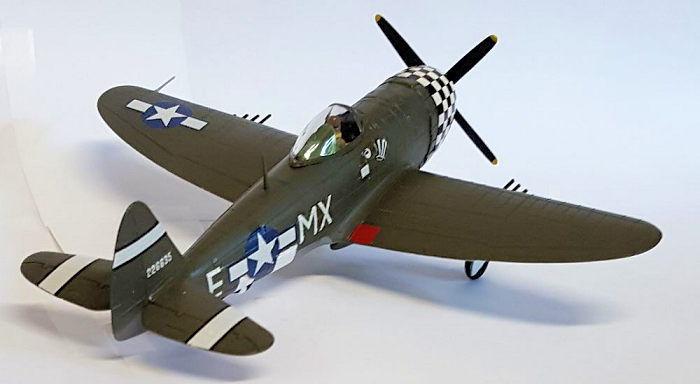 lued
in place (both sides). Trim and use a thin file or sanding stick to remove the
extra. It is almost undetectable, and you save the details.
lued
in place (both sides). Trim and use a thin file or sanding stick to remove the
extra. It is almost undetectable, and you save the details.
Reminder, the wheel wells are open to the cockpit. Close your wheel wells before painting. That way you will not inadvertently spray paint into the cockpit. Alternatively, if you are doing a true out of box (OTB) model, don’t paint the interior or add the pilot yet. There is plenty of room to paint it later and add the pilot. If you are adding your own interior, (WHY!!?) you are on your own at this point.
The remainder of the construction is straightforward. Just a reminder, all details are raised. When sanding and feeling gaps - like on the fuselage, put tape down both sides of the surface, then sand to prevent destroying the surface detail. Scribe using an X-Acto knife and using the sharp tip of a #11 blade, you can ‘crater’ where the rivets used to be.
My example had a lot of flash on the engine. Simply trimming that flash was no problem and the cowling covers over the rough area. So, detailing the engine is sort of pointless. I used Tamiya XF-56 Metallic Grey for most of the engine.
| COLORS & MARKINGS |
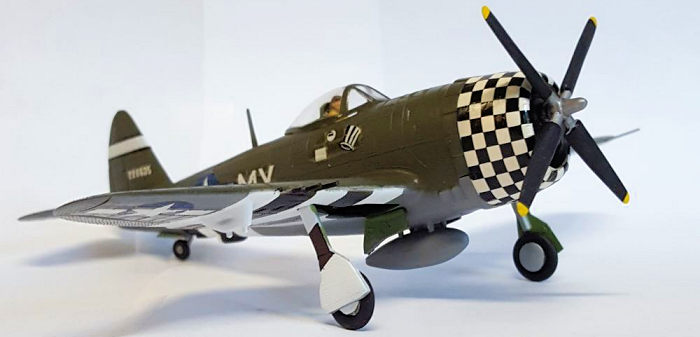
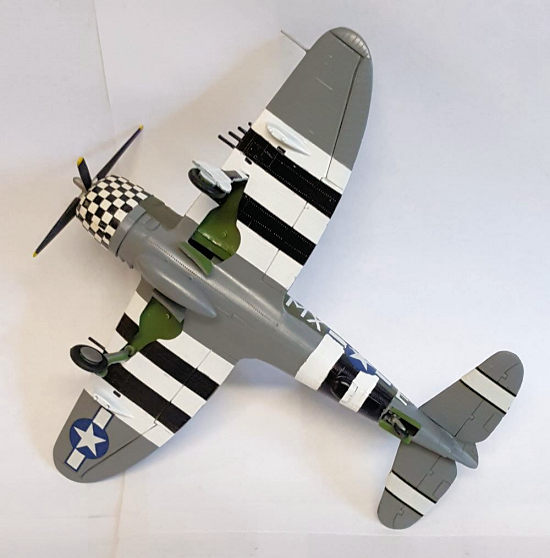
I used Tamiya XF-62 Olive Drab for the top, and Tamiya XF-53 Neutral Gray for the bottom. Caution on Tamiya paints. I love them dearly because they go on smooth and airbrush very well if fresh. But I recommend test painting something before expecting the hopeful result. The bottle cap colors are misleading and once the paint is dry, they tend to darken.
If you have an appropriate decal sheet for the invasion stripes, use it, and it will save you a headache. But if you have to hand-paint the stripes, I made them 8mm, both black and white. So, I painted 4cm of white on the wings and 2 each 8mm black stripes. It is easier said than done, but at least it is close. Same on the fuselage.
 I
like the Tamiya white plastic (vinyl) masking tape for curves. It sticks well
and will hold shape. I used a combination of Tamiya (paper) Masking and Vinyl
for all surfaces, then airbrushed.
I
like the Tamiya white plastic (vinyl) masking tape for curves. It sticks well
and will hold shape. I used a combination of Tamiya (paper) Masking and Vinyl
for all surfaces, then airbrushed.
A lot was assumed about markings of WWII aircraft back in 1963 (see also the Revell P-51D and you will know what I mean). The pilot actually had 2 US markings on the bottom of the wings (not provided in the kit or instructions) and they were oversized encompassing the remainder of the wings on the bottom. All other decals were surprising in good shape and stuck well.
Then kit provides a checkerboard for the cowling. Thank God for MicroSol and MircoSet. It actually worked! Just keep working it until it softens and wraps evenly. I was surprised at how few wrinkles occurred and were easily corrected. Revell didn’t make bad decals even in 1963.
Landing Gear is straight forward also. At this point I also glued on the engine, cowling, propeller, finished the interior of the cockpit (what little there is) and added the pilot and canopy.
I used a clear coating of Future Floor Finish overall. This seals in the decals and adds a hard surface over flat paints (reduces scratching as you handle it). The Future adds a pleasant ‘sheen’ on the plane for what appears to be a bit more realistic. But beauty is in the eye of the beholder.
| CONCLUSIONS |
Is this a great kit? It depends on your end goal. Compared to more modern kits of different brands…No. For a 1963 vintage model…it can hold its own even today. It lacks a lot of details modern kits provide, but the surface textures, ease of assembly, and fit reveals a very respectable model. It’s a great kit to re-live your past.
Re-consider what the end goal was in building this model. It is part of a series of 24 Revell Fighters of WWII kitted in the ‘60s. For me, this model is not contest competitive because of my lack of skills and quality of model. But I really like it. Recommended – especially for the Grand-Kids or a week-end build.
Display Stand: The model stand is easy to do. Here is a link if you’d like to give it a try. https://modelingmadness.com/review/allies/gb/fighters/miktem.htm
| REFERENCES |
https://imodeler.com/2020/03/p-47d-bubbletop-hasegawa-1-32/
https://modelingmadness.com/review/allies/us/cleaver47d.htm
https://forum.largescaleplanes.com/index.php?/topic/25571-p47-mx-e/
12 April 2021 Copyright ModelingMadness.com.
All rights reserved. If you would like your product reviewed fairly and
fairly quickly, please
contact
the editor or see other details in the
Note to
Contributors.