
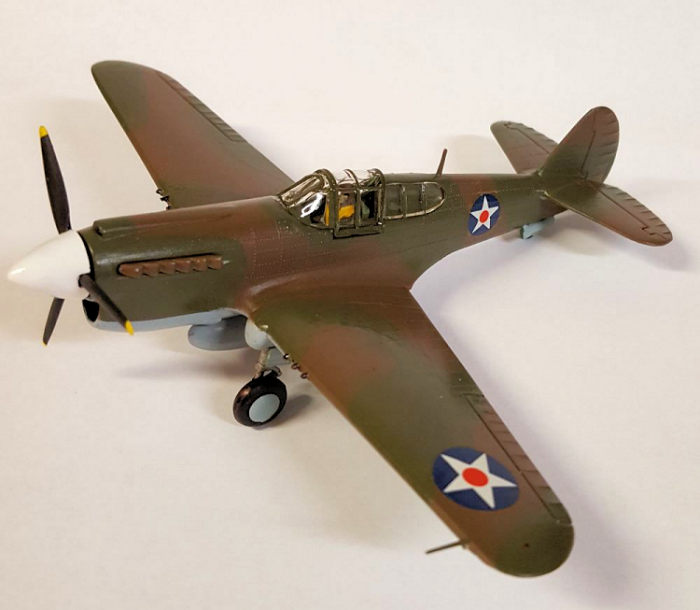
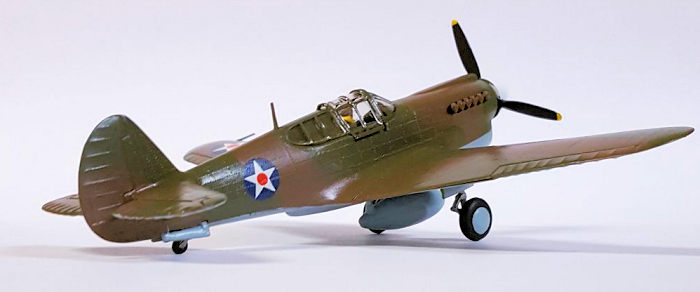
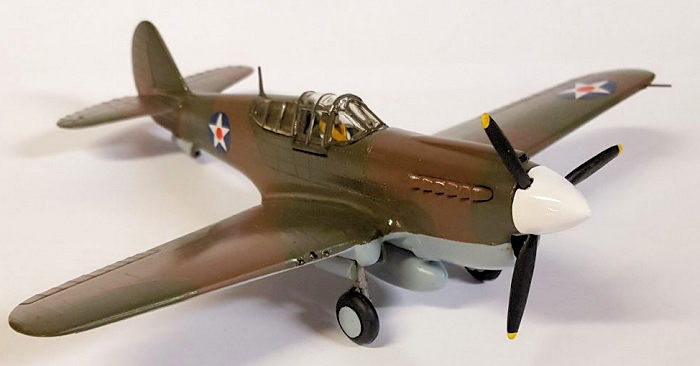
Revell 1/72 P-40E Warhawk
| KIT #: | H-623 |
| PRICE: | $5.00 or so |
| DECALS: | One option |
| REVIEWER: | Chris Mikesh |
| NOTES: |
| HISTORY |
(Quote from the instruction sheet - Abridged)
 The distinction of being the first mass-produced
American fighter plane goes to the Curtiss P-40, which was variously known
throughout its life as Tomahawk, Kittyhawk, or Warhawk. The Revell model is a
replica of a P-40E-CE, Warhawk of which 1400 were produced.
The distinction of being the first mass-produced
American fighter plane goes to the Curtiss P-40, which was variously known
throughout its life as Tomahawk, Kittyhawk, or Warhawk. The Revell model is a
replica of a P-40E-CE, Warhawk of which 1400 were produced.
The durability of this Curtiss fighter was soon to become one of its most outstanding characteristics. It could withstand more punishment than many of its more notable opponents and could gain an advantage in combat. The P-40 was originally designed as a low-level attack fighter and as such was successfully employed by the Allies in routing Rommel's Afrika Corps with the RAF.
The Curtiss P-40E was armed with six, 50 caliber machine guns in the wings and could carry a variety of bombs in its ground attack operations. Its Allison V 1710-30-1 engine provided 1150 horsepower enabling the plane to reach speeds of over 350 miles per hour. This version of the Warhawk had a wingspan of 37 ft and 4 in.
| THE KIT |
 Years ago, my father had a huge
collection of models in the basement. The Revell 1/72 WWII “H” series kits –
specifically the fighters, (24 of them) were a favorite of mine and I always
wanted to build them. This build is #20 of the collection. Also this is a
tribute to the box art that inspired all kids to build models.
Years ago, my father had a huge
collection of models in the basement. The Revell 1/72 WWII “H” series kits –
specifically the fighters, (24 of them) were a favorite of mine and I always
wanted to build them. This build is #20 of the collection. Also this is a
tribute to the box art that inspired all kids to build models.
The kit is very straight forward, with no glaring shape flaws. My kit was silver plastic and in good shape. It has raised panel lines and is typical of a 1964 kit. I expected this to be a great week-end build, but work and health interrupted. Once I was able to restart, it was a smooth build.
| CONSTRUCTION |
 Assembly begins with the fuselage halves. There is
no interior to speak of except for a seat and the pilot. The pilot was painted
with Tamiya Red Brown XF-64, with a brown helmet. Chromate Green was painted in
the interior with black “instruments and side panels”. There are no instruments
and side panels provided with the kit, and I painted the illusion on the sides.
The seat was painted and glued to the floor of the wings with Pilot per
instructions. Externally the fuselage detail looks very good. It was simply
glued and together. Fit was good and sanded after it was set. Engine exhausted
were painted separately and added later in the build.
Assembly begins with the fuselage halves. There is
no interior to speak of except for a seat and the pilot. The pilot was painted
with Tamiya Red Brown XF-64, with a brown helmet. Chromate Green was painted in
the interior with black “instruments and side panels”. There are no instruments
and side panels provided with the kit, and I painted the illusion on the sides.
The seat was painted and glued to the floor of the wings with Pilot per
instructions. Externally the fuselage detail looks very good. It was simply
glued and together. Fit was good and sanded after it was set. Engine exhausted
were painted separately and added later in the build.
Wing assembly was pretty normal. The lower
half is in one piece and the upper halves were glued in place. Sadly there were
huge gaps at the main gear joints. These needed to be filled and rounded. I used
a Mr. Surfacer 500 in l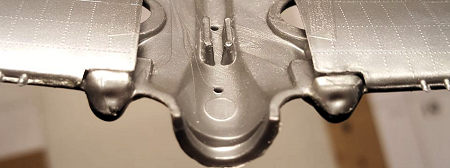 ayers and sanded until closer to correct. As there was so
much work needed, I used tape (any kind will do) to cover the surrounding
surface details as I sanded. This preserved the details. A good #11 X-Acto blade
will can restore some raised rivets by GENTLY using the point pry up the surface
to fake a rivet. (Paint will fill the hole made by the point of the X-Acto
point.) Be patient and go slow – remember it is only 1/72 scale!
ayers and sanded until closer to correct. As there was so
much work needed, I used tape (any kind will do) to cover the surrounding
surface details as I sanded. This preserved the details. A good #11 X-Acto blade
will can restore some raised rivets by GENTLY using the point pry up the surface
to fake a rivet. (Paint will fill the hole made by the point of the X-Acto
point.) Be patient and go slow – remember it is only 1/72 scale!
After the detail sanding and re-scribing of the fuselage and wings, they were glued together per the instructions. After all that work, it actually fit very snugly. Using Tamiya Extra Thin Cement, the parts were secured. Now the fuselage looks like it can take flight. (I felt like I was 9 again and my imagination took flight…ZOOM!)
The elevators needed a little pre-sanding. The tabs were also too large to fit in the slots – no big deal – just trim. However the elevators did not fit flush leaving a noticeable gap that would need to be filled. Extra sanding and on the glue surface did not solve the problem. I used an X-Acto Needle file to “square” the joint around the tab. Problem solved and it only takes a minute.
| COLORS & MARKINGS |
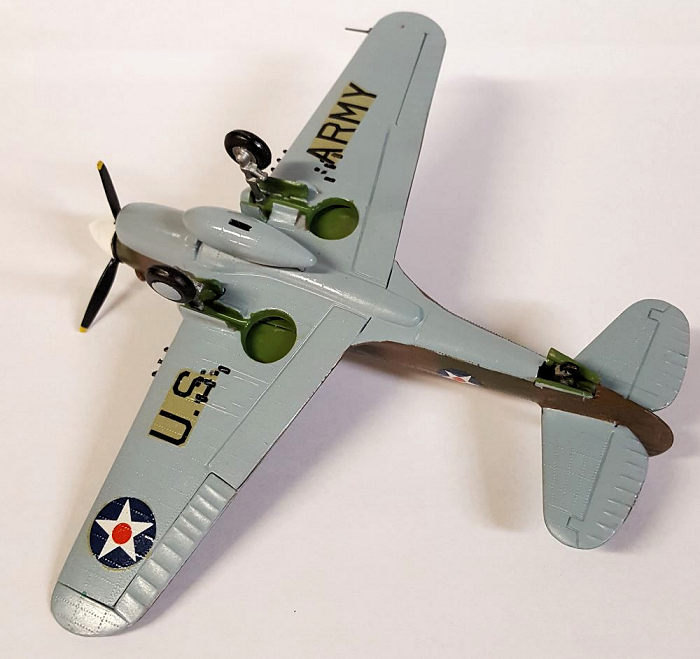
I used Tamiya AS-22 Dark Earth (RAF) spray on the top, with XF-81 Dark Green (2) RAF to complete the camouflage. Model Master Acryl (red label) HellBlau RLM 76 (#4700) was used for the light blue on the bottom. (Yeah ...I know… most US Army P-40s had Neutral Gray on the bottom. But this is per instructions. Builder’s prerogative.)
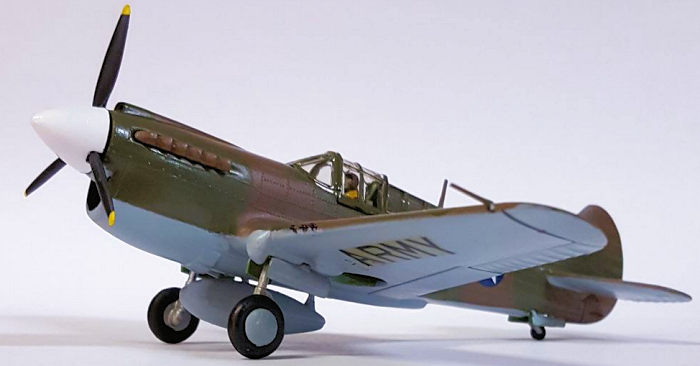
I noticed that the 1964 decals for this model looked okay from the surface, but as I examined it with a magnifying glass; I saw very small cracks very close together. That meant that this decal sheet was going to have some problems with shattering once in water. (I had no replacement decals.) So, I mopped on some liquid decal film. This is much recommended with any aged decal sheet. I cannot do anything about the yellowing on the bottom “U.S. Army”. I trimmed the best I could. No, I did not have a replacement – but should have as it is very distracting.
| FINAL CONSTRUCTION |
 Landing Gear is straight
forward also. Pre-paint the wheels and let dry. I used Sharpie for the Silver
and the black. This prevents paint build-up, and dries in seconds. The wells
were painted Chromate Green and gear doors were attached after painting. As with
all kits that come with Pitot tubes pre molded, they tend to break off during
assembly and are usually out of scale. I replaced the tube with stretched sprue
and simply superglued in place. Surprisingly, the Antennae Mast on the fuselage
remained and did not break off.
Landing Gear is straight
forward also. Pre-paint the wheels and let dry. I used Sharpie for the Silver
and the black. This prevents paint build-up, and dries in seconds. The wells
were painted Chromate Green and gear doors were attached after painting. As with
all kits that come with Pitot tubes pre molded, they tend to break off during
assembly and are usually out of scale. I replaced the tube with stretched sprue
and simply superglued in place. Surprisingly, the Antennae Mast on the fuselage
remained and did not break off.
The engine exhausts (pre-painted – see above) were super-glued on – and these were actually very nice as a redeeming feature of the kit. No glue or paint blobs to deal with, and the paint is distinct.
The canopy had a fit problem that I could not solve. I had to press very hard to snap it in place – and even then it had a small gap in front. The canopy had to go on last as the rear windows needed to be painted under them on the fuselage. However, after the paining was completed on the framing, I was able to dip the canopy in Future Acrylic floor finish to make the canopy clearer. It turned out very well.
I used a clear coating of Future Floor Finish overall. This seals in the decals and adds a hard surface over the paints (reduces scratching as you handle it). The Future adds a pleasant ‘sheen’ on the plane for what appears to be a bit more realistic. But beauty is in the eye of the beholder. If you use Future, I recommend adding a little water to thin it out. I forgot and airbrushed it on straight from the bottle, and it made the model too shiny. Oops.
| CONCLUSIONS |
 Is this a great kit? It depends on your end goal. Compared to
more modern kits of different brands…no. For a 1964 vintage model…it was very
respectable for its time. It lacks a lot of details modern kits provide. But the
surface textures, ease of assembly, and fit reveal a decent model. I recommend
new decals, and probably force fit a resin interior for it. I don’t recommend
going to that expense as there are better kits available for the same price
range. It’s a great kit to re-live your past though. I’d recommend the kit for a
new builder. (I have another in reserve for my Grandson.)
Is this a great kit? It depends on your end goal. Compared to
more modern kits of different brands…no. For a 1964 vintage model…it was very
respectable for its time. It lacks a lot of details modern kits provide. But the
surface textures, ease of assembly, and fit reveal a decent model. I recommend
new decals, and probably force fit a resin interior for it. I don’t recommend
going to that expense as there are better kits available for the same price
range. It’s a great kit to re-live your past though. I’d recommend the kit for a
new builder. (I have another in reserve for my Grandson.)
Re-consider what the end goal was in building this model. It is part of a series of 24 Revell Fighters of WWII kitted in the ‘60s. For me, this model is not contest competitive because of my lack of skills and kit quality. But I really like it. Classic kit builders – this is a challenge!
NOTE: Just as an interest item, I built the Monogram P-40N Warhawk at the same time. How do they compare? They don’t! The 1969 P-40N from Monogram has problems of its own (including this builder), but both look like P-40s. Build the Hasegawa kit!
Display Stand: The model stand is easy to do. Here is a link if you’d like to give it a try. https://modelingmadness.com/review/allies/gb/fighters/miktem.htm
| REFERENCES |
Profile Publications #35 The Curtiss P-40 Tomahawk”
Internet
12 March 2020
Copyright ModelingMadness.com
If you would like your product reviewed fairly and fairly quickly, please
contact
the editor or see other details in the
Note to
Contributors.
Back to the Main Page
Back to the Review
Index Page
Back to the Previews Index Page