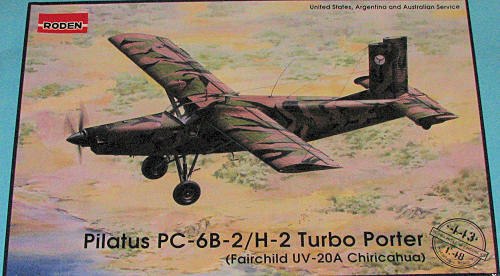
Roden 1/48 Pilatus PC-6B-2/H-2 Turbo Porter
| KIT #: | 443 |
| PRICE: | $52.99 MSRP |
| DECALS: | Five options |
| REVIEWER: | Scott Van Aken |
| NOTES: |
| HISTORY |
The first prototype of the Pilatus PC-6 made its maiden flight on 4 May 1959 powered by a 254 kW (340-shp) piston engine. The first Turbo Porter, powered by a turboprop, flew in 1961. The Turbo Porter received an engine upgrade in 1963, which increased its power to its present value of 410 kW (550-shp).
In the United States, the Porter was manufactured under license by Fairchild Hiller. In service with the U.S. Air Force, it received the designation AU-23A Peacemaker. In U.S. Army use, it was designated UV-20 Chiricahua.
The PC-6 is noted for its Short Take-off and Landing (STOL) performance on almost any type of terrain - it can take-off within a distance of 195 metres (640 ft) and land within a distance of 130 metres (427 ft) while carrying a payload of 1,500 kg (3,300 lb) (The length of a soccer field is enough, Pilatus test pilots were able to land on not much more than 50 metres (164 ft) of space). Thanks to its STOL performance, the PC-6 holds the world record for highest landing by a fixed wing aircraft, at 5,750 metres (18,865 ft), on the Dhaulagiri glacier in Nepal.
| THE KIT |
 Here is the third boxing of this particular kit and includes an upgraded nose section to match the variant that is kitted. From what I've seen when looking at photos of the PC-6, this engine is the one that is most often seen on the aircraft. There are also two identical sprues that include different seats from the previous kits. As a result, there are q
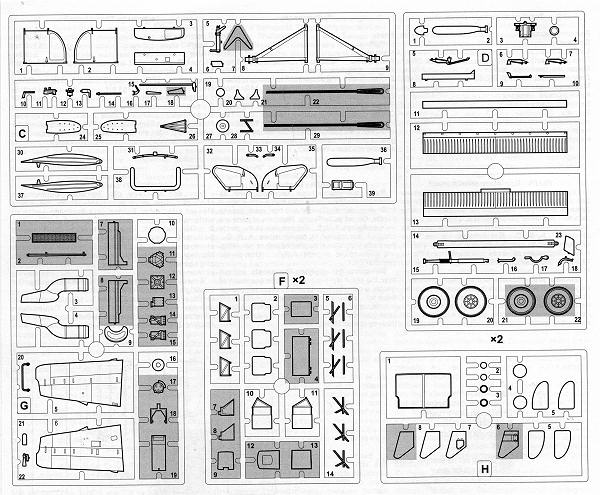
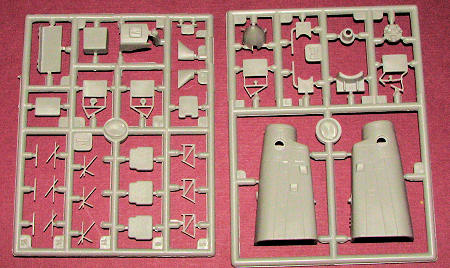 uite a few more options in this kit than in earlier releases. Otherwise the plastic is pretty much the same. I've shown the new sprues in addition to the overall sprues image as was shown in a previous preview.
Molded in grey plastic, there are nine total sprues, all of them with very nice surface detailing. Two of them are duplicated (the one with the seats and the one with the wheels) and one is clear. I found no real problem with flash, though there are a couple of sink areas on the ones that are really thick. Anything of any size had ejector pin marks or towers on one side. This means that a few parts (like the doors) will need some additional attention.
The cockpit and cabin areas are nicely detailed with the cockpit being well appointed with seats that are different from previous boxings, control sticks, rudder pedals and so on. The cabin has a number of the more open seats that are similar to previous kits. This particular version does not have a sliding door on both sides, so on the left there are two hinged doors that open outwards from the center. These parts were on the previous kit but not to be used. There are separate elevators, ailerons and flaps. However, these are to be constructed in the neutral position otherwise the various actuating rods won't fit. There is a separate lower fuselage section on which the landing gear will be attached. Not sure why this wasn't part of the fuselage halves, but there you have it. Of course, the engine assembly is separate to the rest of the airframe and is to be attached near the end of construction.

 Instructions are well done with color references in FS 595, Testors Acrylic and Testors Model Master references. The instructions also have two diagrams to show where to drill various holes for the antennas and such. None of these holes are started so the measurements are quite exact as to placement. When I built the AU-23, I copied the diagram to size and placed it on the fuselage top, drilling through the areas marked. It worked very well. Markings are provided for no fewer than five different aircraft. Two of them are US with one being with the Golden Knights as used in 2009 with their colorful scheme and another with the US Army in Berlin during 1980 in gloss OD and white. Two options are with the AAAvn (Australian Army Aviation Corps). The box art plane is with 173 Squadron in 1988 in their low viz scheme while the other is with 161 flight in Vietnam during 1969 in an overall foliage green camo. Finally, a shark mouthed Argentine Navy plane from the 1980s. The decals are well printed. Roden decals have a checkered history in terms of silvering and resistance to setting solutions, but they can be used successfully if there are not many curves to follow. Hopefully this set is improved.
| CONCLUSIONS |
I like that Roden has decided to do this series. I can see that there are several more boxings that can be done as the PC-6 was quite a popular aircraft. The AU-23 I built required careful construction, but turned out quite well. I'm' sure this one will be the same.
| REFERENCES |
December 2010
Thanks to Squadron Products for the preview kit. Get yours at your local shop or on-line retailer.
If you would like your product reviewed fairly and fairly quickly, please contact the editor or see other details in the