| KIT #: | SP 30 (51530) |
| PRICE: | $16.98 SRP when it was new |
| DECALS: | Five options |
| REVIEWER: | Scott Van Aken |
| NOTES: |
| HISTORY |
When the Vietnam war was winding down, the US Navy was looking for a replacement aircraft for its F-8 and A-7 aircraft, though more for the A-7. A light strike fighter with the ability to hold its own in air to air combat was sought. the F-14 Tomcat was already slated for Fleet Defense and a replacement for the Phantom. Well, somewhere along the line, it was decided that what the Navy really wanted was the loser in the USAF's Light Fighter competition, the Northrop YF-17.
The YF-17 had several things going for it. One was a decent air to air capability and it had two engines. The Navy likes having an extra engine on its planes in case one quits while flying over water. Saves hassles, saves crews and saves money. However, the YF-17 was far too light for the Navy's needs. No way would that spindly USAF landing gear and airframe stand up to the pounding the plane would take on carrier decks. It also did not have enough range, and the list went on. A deal was struck with McDonnell/Douglas that they would develop and s ell the Navy version, while Northrop would develop and sell a land based version. Northrop got screwed. No land based fighters were ever sold and they ended up just becoming a parts supplier to McD/Douglas.
Anyway, after years of trying to get the plane to meet specs, it was decided that for the good of the country and to keep overpaid aerospace workers able to pay off their motor homes, that the Navy would have to fudge on its requirements and accept a plane that was 90% as good as what they wanted. Eventually, as happens to almost every plane ever built, it was developed into an aircraft that was able to get the job done; just that it had to get closer to the job than was originally planned and it had to carry a lot of external fuel to do so. Now, nearly 30 years after entering fleet service, the original A model is pretty well gone with but a few A+ airframes flying with the Marines and some really old airframes with the Blue Angels. Of course, if any are in service, the Naval Air Test Center has to have an example on which to try new stuff and find fixes for glitches.
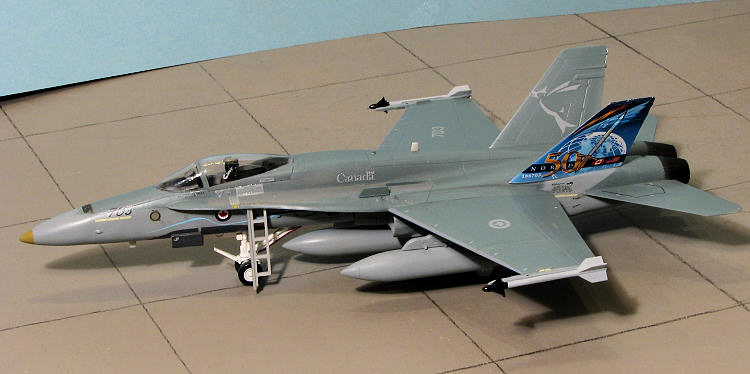
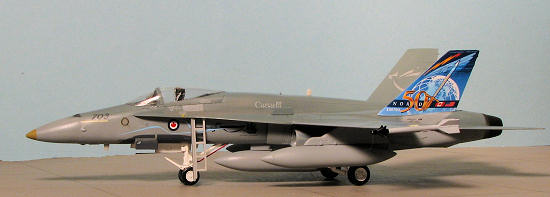
One of the major purchasers of the F-18 was Canada who called it the CF-188, but everyone I know refers to it as the CF-18. To say they were pleased with the aircraft is a bit of an understatement as it replaced the obsolete CF-101B Voodoo and the CF-104 Starfighter as Canada's premiere fighter. Canada added a few items to make it more of an interceptor, the most visible being a spotlight on the left side of the nose. Canada also standardized on the false canopy and darker greys for the camouflage scheme. Most of these aircraft are still in service and are frequently updated as there is no replacement on the near horizon.
| THE KIT |
 Hasegawa's kit of the F-18 is by no means new. The original kit was a prototype with raised panel lines and fairly good detailing. This kit had enough differences with the production F-18 that a new one was tooled in the mid 1980s; this new kit having engraved panel lines.
The kit is really quite well done by the standards of the time, and despite its growing age, holds up well when compared to more modern kits, though the engraving could be considered by some to be a bit soft. What this kit provides are the baseline sprues for that A model F-18. As I'm a lazy sot, I've left the C sprues image in place, but simply delete the lowermost sprue as that has the C bits on it. The rather basic cockpit consists of a two piece seat, floor with side consoles and a control stick. The instruments are decals, which works well in this scale.
Hasegawa is a master of the 'multiple variants' and so all of their 1/72 F-18A/B/C/D kits have a set of four base sprues to which are added whatever is needed to make the specific variant. That means that the molds for these have gone through a lot of cycles. Despite that, they have held up well with only a bit of flash found. I also found two rather large depressions ju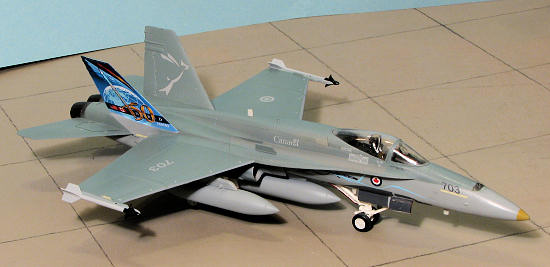 st forward of the LEREX exhaust that will have to filled in.
For things under wings you get three ferry tanks and two sidewinders. Any bombs will have to come from the various weapons sets. The two intake mounted sensors are included if you wish or you can attach Sparrows. I've rarely seen 'Legacy' F-18s with even dummy Sparrows in this position. The boarding ladder may be posed down if you wish. Actually, there is no 'well' for it so that is a tad inaccurate. The canopy and windscreen are separate. No canopy actuator mechanism is included if you wish to pose your canopy open. Though the kit cockpit is adequate, you may wish to substitute an aftermarket one for that.
| CONSTRUCTION |
Though it is 'relatively' new technology (engraved panel lines), the actual fit of the kit is a bit on the dodgy side in places. Like any good modeler, I started with subassemblies, and that meant drop tanks and the interior. Though I'm pretty sure the F-18 will not need it, I also glued some weight in the nose are once the cockpit had been installed in the lower fuselage. I also installed a replacement resin seat as the kit one is little more than a shape.
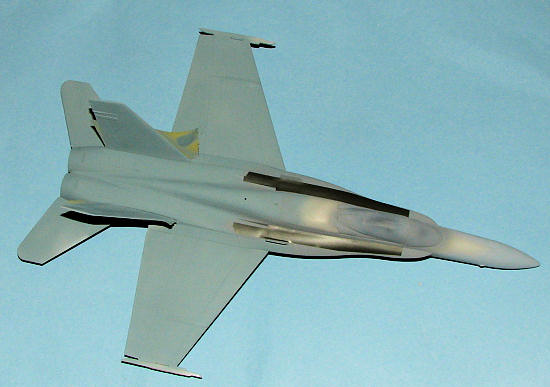
Hasegawa kits are rife with inserts and the Hornet is no exception. There are some lower inserts for the LEREX and th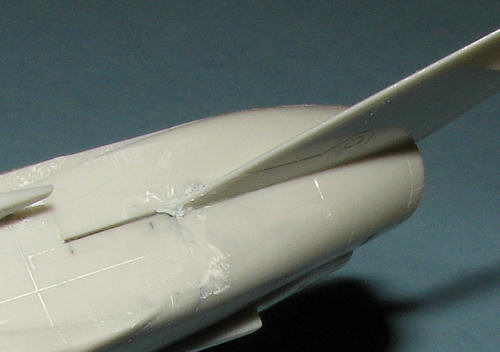 e engine housings for the side are inserts as well. Both do not fit as snugly as one would wish, with the side engine ones being particularly nasty. A great deal of the build time of this kit was spent will filler and sandpaper. In fact, one of the side panels had such a huge gap that I used super glue to fill it. As you can see by the photo, it wasn't pretty. The upper cockpit area also has inserts as the sprues are used for the two seat F-18B. Unfortunately, the kit doesn't have the canopy sprue for the two seater,
 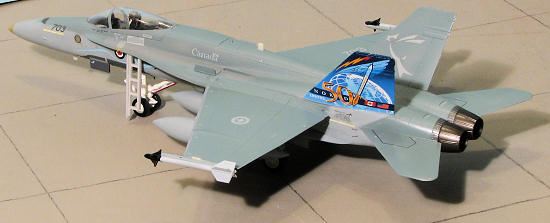 nor the additional cockpit bits and seat. That comes in the B kit and means you are limited to the single seater. This is standard Hasegawa practice to sell more kits. I also installed the speed brake in the lowered position. You just don't see these items extended unless being used or undergoing maintenance. Fit is fair, but not great.
Moving to the intakes, I installed the blanking plates and then the intake lips. Fit is not good for these either and sanding/filler is difficult in the confined spaces. The fuselage halves were joined and more filler and sanding commenced. I 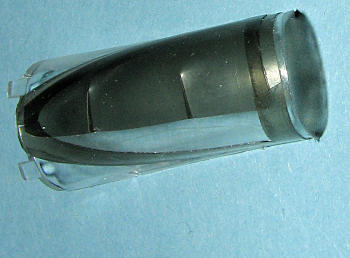 also installed the radome. If this sounds like a pig of a kit, it really isn't, but it takes a more talented modeler than I to get all the pieces together without help. As I've done probably a half dozen before, none of this was a surprise. The wings and tails were glued in place, giving me a rather complete airframe. I wanted to use the pylons so did not fill the pre-drilled holes for them under the wings.
The seat was installed as was the canopy. The airframe was prepped for painting. This gave me an excuse to use the excellent Leading Edge Quality Paint Masking set that is specifically designed for the Hasegawa kit. Here is a link to the review of this handy set. These work quite well, though I found out that one doesn't want to leave them on for an extended period of time as unlike most tape, they loose adhesion after a few months. They follow the 'Eduard' method with thin outer areas and then bits to fill in the middle.
| COLORS & MARKINGS |
 First job was to paint the wheel wells white. When dry, I used the foam masks. These worked as advertised and have the bonus of being re-usable if one does not saturate them with paint. They are also tight enough to where they were not accidentally blown out by the air brush, something that has happened on more than
 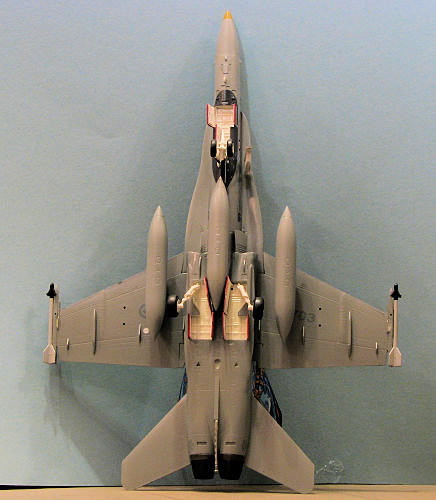 one occasion when using damp tissue. For the two main camouflage colors, I used Testors Model Master enamels. But first, I painted the upper wing walk areas prior to masking them with the LE set. Then the upper and lower colors were painted on. For this kit I was using the Leading Edge sheet LED72.61 for the 2008 display Hornet. The photos showed a rather sharp demarcation line so I masked that.
The landing gear were glued in place once the foam masks were removed, so that I could spray on the clear gloss acrylic in preparation for decals. The sheet includes separate fin markings for the Academy and the Hasegawa kit. The down side to these fin markings is that they need to be cut out from the white backing first. I also found them to be a little on the brittle side and had difficulty getting them to conform to the tips of the fin. I then began applying the seemingly zillions of decals that are the bane of jet modelers everywhere. These decals are quite thin and so care is needed. I also found out that using a strong setting solution is not a good idea. Some of the false canopy decals sprouted 'zits' the showed the underlying paint. Somewhere about half way through this, I completely lost interest in the model and it sat for many months.
Returning to it a week or so ago, I went back to applying decals. Still daunted by the large number remaining, I decided to just use enough to make things believable, thus saving myself from applying another 60 or so tiny markings.
| FINAL CONSTRUCTION |
 With all the decals on that I was going to apply, I started gluing on other bits. This meant the tail hook, wheels, gear doors, exhaust, pylons, radio antennas, and fuel tanks. I debated about adding the weapons as this was a display plane. In the end, I added Sidewinders, but left the outer pylons off and the gaping holes unfilled. It will be sitting on a shelf, unseen by many aside from the few of you who read my articles! I sprayed some semi-matte clear on it, unmasked the clear bits and painted them with Vallejo clear gloss as they had become badly scratched over the years. As a note on the main gear doors, there is an actuating brace for the big ones, but I could not figure how to get it in place so I left it off. I also used a red Sharpie to outline the door edges. I wish I'd have used this method long ago as it sure saves on a lot of frustration painting these with a brush.
| CONCLUSIONS |
As I've built a few of these, I'd expect each one to be easier than the one before. To some extent that is true as I'm no longer frustrated, by the dodgy fit of the intake area. It does still make a nice model, though to have it contest quality requires more work than I'm willing to put into it. The Leading Edge decals are quite nice and add to the final build. Perhaps next time it won't take over 6 months to finish one of these!
| REFERENCES |
September 2009
Copyright ModelingMadness.com. All rights reserved. No reproduction in part or in whole without express permission.
Thanks to me for the kit and to Leading Edge Decals for the decals (properly pronounced DEE-Kals) and masks. If you would like your product reviewed fairly and fairly quickly, please contact the editor or see other details in the