Anigrand Craftworks 1/72 X-7 and X-8
| KIT #: | AA 2072 |
| PRICE: | $64.00 MSRP from www.NostalgicPlastic.com Free US shipping |
| DECALS: | one option |
| REVIEWER: | Scott Van Aken |
| NOTES: | Part of resin missile set |
| HISTORY |
 The Lockheed X-7 (dubbed the "Flying Stove Pipe") was an unmanned test bed for ramjet engines and missile guidance technology. It was carried aloft by a B-29 or B-50 Superfortress carrier aircraft. The booster ignited after launch and propelled the vehicle to a speed of 1,000 mph (1,625 km/h). The booster was then jettisoned, and the underslung ramjet took over from that point. The X-7 eventually returned to Earth, its descent slowed by parachute. A maximum speed of 2,881 mph (4640 km/h / Mach 4.31) was attained, setting a record for fastest air-breathing aircraft. A total of 130 X-7 flights were conducted from April 1951 to July 1960.
The Aerojet General X-8 was an unguided, spin-stabilized sounding rocket designed to launch a 150 pound (68 kg) payload to 200,000 feet (61 km). The X-8 was later spun-off into the prolific Aerobee rocket.
At launch, an 18,000 pound force (80 kN) thrust Aerojet solid rocket booster fired for 2.5 seconds. After booster jettison, a 2,600 pound force (12 kN) thrust RTV-N10 liquid fuel rocket burned for up to 40 seconds (depending on desired apogee). The spent rocket then fell back in a ballistic arc, the payload returning to Earth via parachute. The baseline X-8 measured 20.2 feet (6.2 m) in length and measured 5.25 feet (1.6 m) across the fins. In testing, a maximum altitude of 138 miles (222 km) and a speed of Mach six were achieved.
| THE KIT |
Anigrand has provided four nicely done missile prototypes, all in Anigrand's usual tan resin, all with engraved detailing and all with some sort of stand. Inspection of the parts shows that there is the usual flash that on associates with any resin kit. I also found some relatively large resin gates that will have to be carefully removed from some of the smaller bits to prevent chunking. 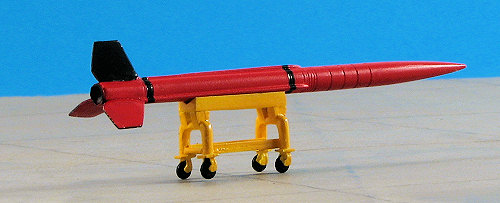 There was no major problem seen on any of the missile bodies in terms of mold slip, something that could well ruin a project like this. I did see a few pinholes, but these seemed to all be on one part, the intake to the engine of the X-7 kit. Fixing it should provide no problems for those who are into resin kits. A nice touch is that each separate vehicle is in its own separate zip-lock bag.
The instructions continue with Anigrand's photo-realistic 3D presentation. Personally, I found the exploded view to be a much easier way to see where the various bits are to be assembled. The photo style isn't as clear to me as the drawings and were any of these kits to be complex, it would be a real chore to see where things go. I'm not sure why Anigrand did this, but perhaps they should either rethink things, or also include an easy to see drawing. The kit also includes two small decal sheets for use with these vehicles. The painting and decal guide are well drawn and you also have the box top photos to help out if needed. Predominately, these vehicles are white, though the X-7 and X-8 can be overall red and the X-9 is quite colorful. I'd be willing to bet that the red band on the X-9 is da-glo red, though I'm not sure about the X-7. Anigrand's decals work well so should provide no problems in construction. To see the others in this set,visit the preview.
| CONSTRUCTION |
Knowing that doing all four of these would take me quite a while. I have decided to concentrate this build on the first two in the series, the X-7 and the X-8. For those thinking that these can be built in a day, I should point out that short run kits can be deceptively simple in parts numbers, but deceivingly difficult to build. Especially for this reviewer who does not have several hours a day to spend working on building models, one of the reasons that it takes me an age to finish stuff. So, doing the first two was a logical choice for me, especially as the X-7 was the favorite of the group.
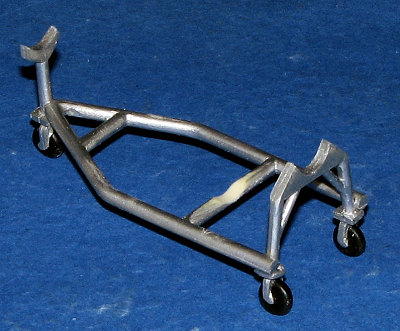
First thing to do was to clean up the parts. These mini-kits each come with their own display stands and that is where I started. Now you have read what I think of the build instructions, and the ones for the stands are even less of any sort of help. One basically has to figure out what goes where and go from there. In some cases, making a guess. While the paint and decal drawings are excellent, there is no mention on the stands. The X-7 stand was particularly rife with air pockets on the caster mounts. The only good way to fix these would be to cut off the square mounts and replace them with plastic card. I didn't and so have some rather large holes showing. I assembled both of them the best that I could. The X-8 mount shows where some sort of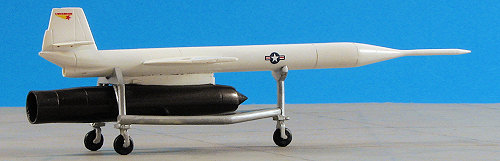 mounting holes should be, but they are narrower than the pins on the wheel assemblies. I ended up cutting off the pins and butt joining things. The troughed piece of the X-8 mount goes on the top to hold the missile.
With those together, I set them aside until it was time to toss about some paint.
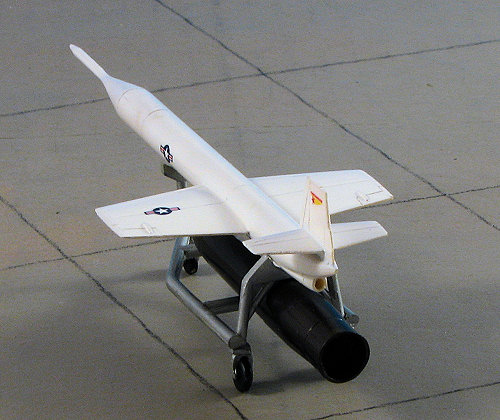
The X-7 consists of a fuselage, two wings, a fin, a ramjet, two horizontal stabs and a nose spike. I first attached the wings. The mounting holes were nearly filled in on my example and needed drilled out. In one case, I really didn't need to do that much as the mounting pins were short shot and nearly non-existent. With the wings on, I used filler on the joins and attached the fin. Fit of the fin was good and filling an air bubble on the rudder was easy enough. The horizontal stabs needed their mounting holes drilled as well and I drilled them both right through the fin and all matched up. Unfortunately, the mounting pins on the horizontal stabs were such that only one of them actually matched the holes. The other was far too wide and even leaving one would have been a problem, so those were cut off and the stab butt joined. More filler and sanding. Careful sanding as these parts are thin.
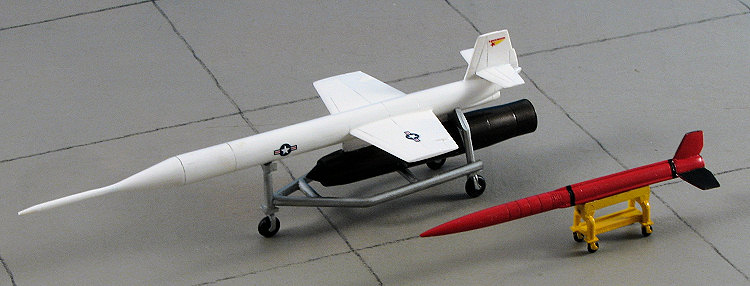
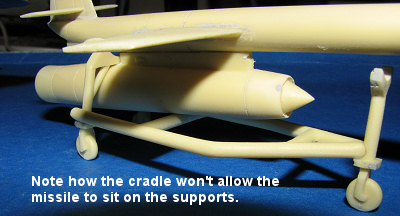 Final bit was the ramjet. This part had several air holes and try as I might, one refused to stay filled so I just left it as it was. I didn't try to do anything about the holes around the intake as that would have been near impossible. Another case of cut out the bad piece and replace it with card and hope. The ramjet was then glued to the underside. Finally the nose piece was sanded flat on the mating surface and attached. After quite a bit of tweaking I got it in place. More filler and more very gentle sanding. When sanding resin it is always best to use the finest grade paper you can live with as it sure eliminates the possibilities of over-sanding something and leaving a groove. During this I wanted to use the X-7 handling dolly as sort of a work stand, but the missile does not fit as you can see from the image. As there were no instructions on assembling the dolly, I haven't a clue where I could have gone wrong.
 The X-8 was a bit more simple and yet a bit more complex. You see, while the casting was fine at the tip, as the molding headed for the tail section, the alignment got more and more out of whack. Nothing huge, but enough to have a bit of a 'lip' to contend with sanding down. Worse is that this mold seam was right up against one of the three ridges on the fuselage body, making it tough to sand down. Sand down I did and had to restore some of the engraved work afterwards.
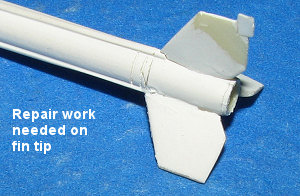
There are three fins for this and they fit into slots in the rear body. Of course, the tabs are a bit too large so needed sanding down in thickness and in length before they'd fit. As there were sprue gates on the tips of the fins, it wasn't surprising that one had a notch in it. This was fixed by cutting out a square section, installing a bit of card with superglue and then sanding it all flush when it had dried.
| COLORS & MARKINGS |
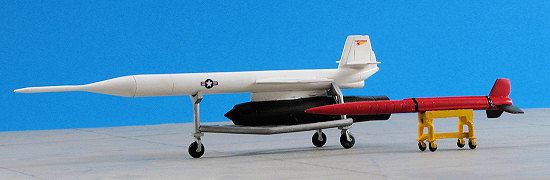 I'd decided to paint all four of the component pieces a different color. The X-7, X-8 and the X-8 stand were all painted Floquil Reefer White, while I painted the X-7 handling dolly with Alclad II Aluminum. Once again, the Alclad II remained a bit tacky, not enough to show fingerprints, but enough to where one could feel it. Yet I'd shaken the bottle until my arm hurt to be sure of a proper mix.
The X-7 also had the ramjet itself painted in Burnt Iron and I used Alclad II for that with no sticky problems from this shade. The X-8 was painted with Tamiya Gloss Red Acrylic. The missile body was masked off and one side of each fin was painted black. I used Insignia Yellow from the Testors Model Master line for the X-8 handling dolly.
The X-7 did have decals with it in the guise of four insignia and a Lockheed logo on the fin. Had I painted this in the optional red color, I doubt if the logo would have been visible at all. The X-8 had two bands around it in black and I used some Microscale Railroad stripes for those.
| FINAL CONSTRUCTION |
 All this brings us to the final bit of work. If you recall, the X-7 didn't fit its handling dolly. The problem was that the bracing bar under the engine (and this whole 'A' piece is a single casting) sits too high. The best option was to sand a groove in this bar until the missile finally sits flat as it should. This required some careful sanding with round and half-round files, followed by sandpaper. It would have been MUCH easier to do were not the dolly already built so mark this down on your instructions if you have the kit and do it before you start gluing. Once done, I painted the area silver again and then placed my missiles on their respective dollies.
| CONCLUSIONS |
They are cool and you just have to have these to add to any decent X-plane collection. They are not complex so can be built rather quickly. The X-7 took me about the same amount of time as to do a 1/72 P-51, mostly because of the filling and sanding needed. The X-8 was a bit less. Regardless, it is a great set and I'm very much looking forward to more like this as I think rockets and missiles are an up and coming thing.
| REFERENCES |
May 2007
#1469 in a series
Copyright ModelingMadness.com. All rights reserved.
If you would like your product reviewed fairly and fairly quickly, please
contact the
editor
or see other details in the
Back to the Review Index Page
2017