| KIT #: | GA 72-01 |
| PRICE: | $ |
| DECALS: | One option |
| REVIEWER: | Scott Van Aken |
| NOTES: | Short run kit |
| HISTORY |
Providing adequate stability and control for aircraft flying at high supersonic speeds was only one of the major difficulties facing flight researchers as they approached Mach 3. For, at speeds in that region, they knew they would also begin to encounter a "thermal barrier", severe heating effects caused by aerodynamic friction. Constructed of stainless steel and a copper-nickel alloy, and powered by a two-chamber XLR25 2,500 to 15,000 lbf (11 to 67 kN) thrust throttleable rocket engine, the swept wing Bell X-2 was designed to probe this region.
A pair of young test pilots, Captains Iven C. Kincheloe and Milburn G. "Mel" Apt, were assigned the job of further expanding the envelope and, on 7 September 1956, Kincheloe became the first pilot ever to climb above 100,000 ft (30,500 m) as he flew the X-2 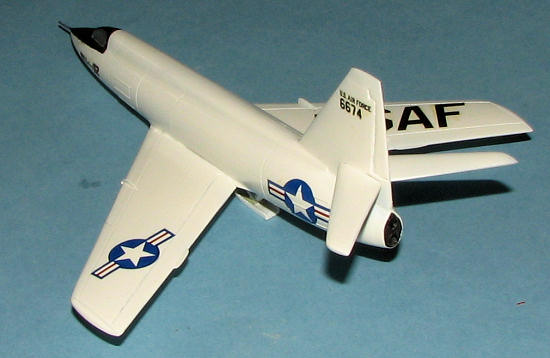 to a peak altitude of 126,200 ft (38,466 m). Just 20 days later, on the morning of 27 September, Mel Apt was launched from the B-50 for his first flight in a rocket airplane. He had been instructed to follow the "optimum maximum energy flight path" and to avoid any rapid control movements beyond Mach 2.7. Flying an extraordinarily precise profile, he became the first man to exceed Mach 3 that day, as he accelerated to a speed of Mach 3.2 (2,094 mph, 3,370 km/h) at 65,500 ft (19,960 m). The flight had been flawless to this point, but, for some reason, shortly after attaining top speed, Apt attempted a banking turn while the airplane was still well above Mach 3 (lagging instrumentation may have indicated that he was flying at a slower speed or perhaps he feared he was straying too far from the safety of his landing site on Rogers Dry Lake). The X-2 tumbled violently out of control and he found himself struggling with the same problem of "inertia coupling" which had overtaken Chuck Yeager in the X-1A nearly three years before. Unlike Yeager, however, Apt was unable to recover and both he and the aircraft were lost.
While the X-2 had delivered valuable research data on high-speed aerodynamic heat build-up and extreme high-altitude flight conditions, this tragic event terminated the program before the National Advisory Committee for Aeronautics could commence detailed flight research with the airplane, and the search for answers to many of the riddles of high-Mach flight had to be postponed until the arrival, three years later, of the most advanced of all the experimental rocket planes, the North American X-15.
| THE KIT |
This kit by Golden Age has been preceded in 1/72 by at least two kits that I know of; the X-Planes 1/72 Vacuformed version and the Alliance resin kit. This is the first done entirely from injected plastic. The injected Mach 2 kit was released after this kit came into my hands..
 I should point out at the very start that this is a short run kit and not to be confused with anything from Tamiya or Italeri. The kit has three full sprues, one in medium grey, one in dirty white and a rather cloudy clear canopy piece. The two fuselage halves and tail planes are separate in the bag. Many of the parts have flash as the molding process is undoubtedly low pressure. Sprue gates are not huge, but they do encroach on the parts themselves, requiring some additional clean up of all the bits. I found the molding to be somewhat reminiscent of Ace or Siga kits.
Panel lines are nicely engraved and not 'soft' as one would think. There also seems to be an attempt at a screw-head pattern on many of the panels, but it is somewhat inconsistent and would probably disappear under the first coat of paint anyway. As it is short run, I found some instances of detritus on a few parts, though it was limited to the two images shown. That on the wing will be easy to clean up, but the nozzle part will take more effort. I also found one of the wing skids to be seriously deformed as if it was pushed in while still hot. A nice touch is that the control surfaces are molded onto one wing half, allowing the trailing edges to be nice and sharp.
The kit includes a fairly nicely done cockpit with raised console details on the tub. A small instrument panel and control stick finish things out. No bang seat on this one. The nose gear well fits under the cockpit tub floor. Really, most of the work will be with the skid on the centerline. There are wing skids as well, but their plac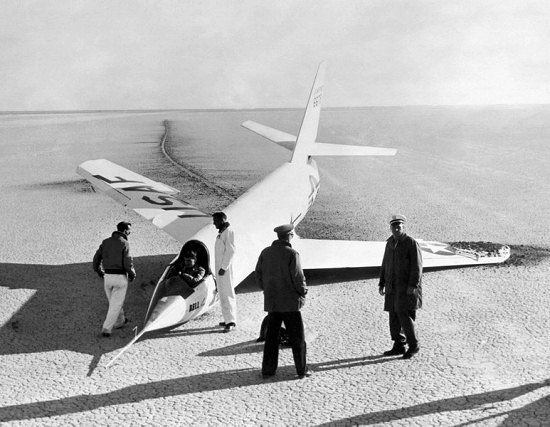 ement is not shown on the wing underside itself and the the instructions are a tad vague on placement. It may well be that these were not standard fare and only used for ground display. Fortunately, the molds do not suffer from any mold shift that one often sees from short run kits so construction should move rather quickly. There isn't much room to put weight in the nose so any needed will probably be best placed behind the cockpit.
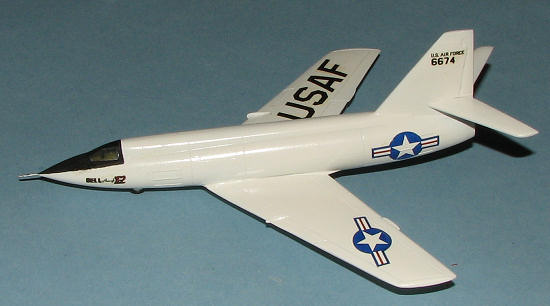
Instructions are a single sheet of folded paper with a history, parts layout and four construction steps. Colors are listed in Humbrol, ModelMaster and Revell references with most of the plane being white. Decals are nicely printed, but I think the blue background to the insignia is a bit light. Fortunately, aftermarket insignia are easy to come by.
| CONSTRUCTION |
As is the norm, construction begins with the cockpit. Now this is a short run kit and not like a current MPM short run kit but more like earlier Eastern European companies with thick sprues and gates that intrude on the parts, if you know what I mean. There is more than the usual clean up and test fitting to be done to the somewhat softly detailed parts. Golden Age provides a relatively complete cockpit, but really, thanks to the very thick canopy, little aside from a general impression will be seen.
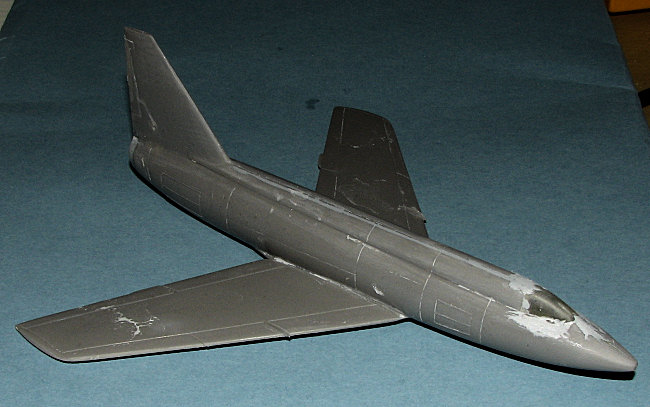
 Now, with the benefit of hindsight, let me pass on a couple of suggestions. First is to take the fuselage halves and tape them together. Then, take the canopy and see how it compares in terms of width to the fuselage. This I did not do and when it came to attaching the canopy, found it was far too narrow for the opening. Means you will be sanding fuselage mating surfaces quite a bit. This will also prevent the slightly oval fuselage cross section that is quite apparent in the nose area of my build. The second suggestion is to be sure that the nose wheel well area is FIRMLY cemented to the bottom of the cockpit section. Reinforce it if you must, but be sure it will not come adrift. Mine did so well after the fuselage halves were mated and filled, causing a hassle not only getting it into some sort of position, but also in attaching the nose gear.
Once the fuselage halves are together (and make sure that the skid well is level when installing it), take your sanding stick and sand the heck out of the fin to bring it down to proper width. You'll see what I mean when you get the fuselage together. With that accomplished, I glued on the exhaust piece. That is not the cleanest molding I've ever seen, but not impossible. A bit of work with a fine chisel and some drill bits (to ream out the exhaust), as well as what would be a litany of fill, sand, fill again, sand again, brought it to specs. I then attached the wings. Now these are not bad as things go, but typical of short run, one has to be one with the filler.
Then the canopy.
 Well, this puppy fits as well as Ann Coulter in a gay bar. The only thing to do was to use filler once the canopy was sanded down so it would fit into the appropriate hole. This effectively destroys the minimal frame lines, but what can one do? In fact I was reaching a frustration level and so the kit sat for a considerable amount of time while I went off on other tangents.
Returning to building again, I was refreshed enough to tackle this one. After all, I'd done most of the nasty work and the rest should be easy!
 A bit more filler, some sanding with multiple grades of sandpaper in a futile effort to make the canopy clear, and I then masked it as what I hoped would look like the box art and moved on. In this case, it was tail plane time. The two parts have pegs that fit into holes in the fin. These holes require reaming out to a size that matches the pegs. One of my stabs was a bit warped so the hot water deal straightened it out. So I thought. It returned to its warped condition after painting........
Anyway, gluing was a success and I was equally successful in attaching the kit's nose probe and sanding it down to fit. Landing gear was a bit of a bother. If you recall, the nose well broke loose. I got it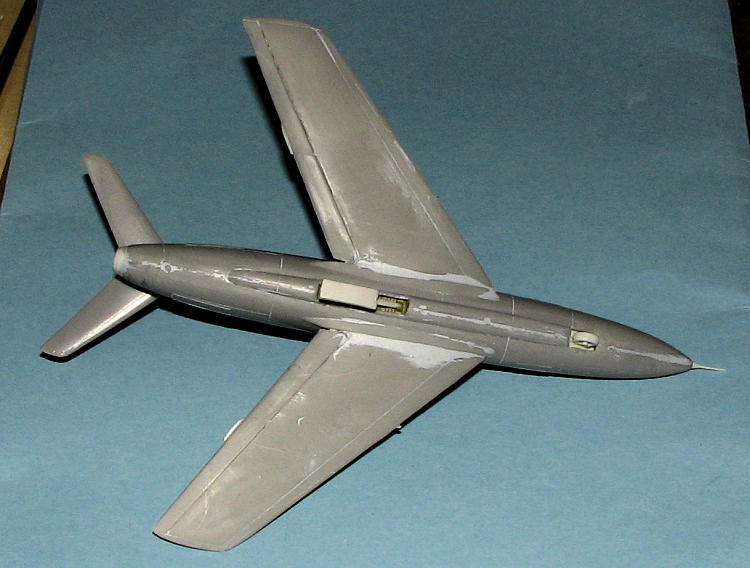 attached and flooded the area around it with super glue in hopes it would stay. The one piece nose wheel was tacked in place and it was obvious from photos that it was too long. I cut on it a few times until it was more realistically jutting out. There is a small retraction strut that was added, though it is pretty much invisible.
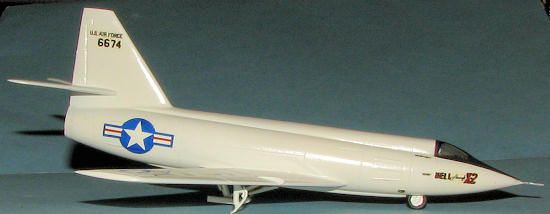
Moving to the main skid, this construct requires much test fitting and trimming to be sure that the struts and shocks will be properly aligned. A third hand would be helpful when getting it all glued in, but it can be done. One has to be sure that the skid is at a proper angle as well. The X-2 was obviously nose down when on the ground after a flight. The forward gear door is far too long and has to be trimmed. While on the subject of doors, I left off the nose gear door as I couldn't find any photos that showed it visible when the wheel was down. Perhaps the nose door disappears into the well. Perhaps it slides back into the keel. Perhaps it is jettisoned when the nose gear is lowered. Who knows.
This is a great time to paint things.
| COLORS & MARKINGS |
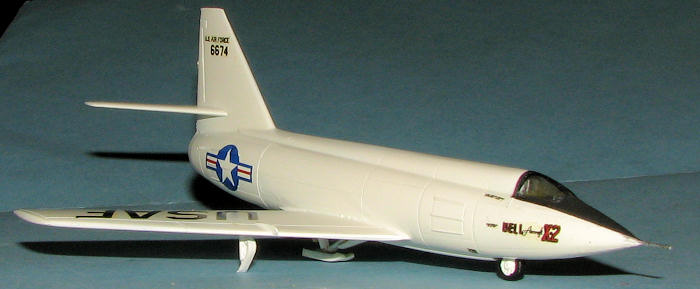
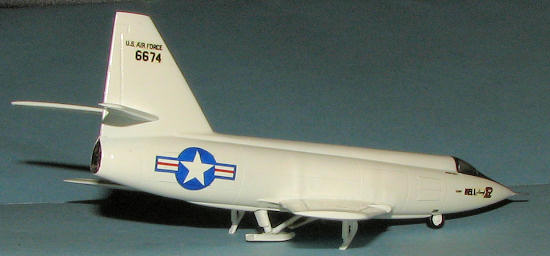
You can paint the X-2 any color as long as it is gloss white. No problem here as I have lots of Floquil Reefer White and several coats of this were all that was needed. A couple of Future coats was next to gloss things up and then on to the decals.
 Kit decals are superbly printed as I mentioned. The blue of the national insignia is still too light for my tastes. These decals are ultra thin and I had troubles. I highly recommend coating the entire sheet with Microscale Decal Film before use. Yes, you will have to cut out each marking and it will make things a tad thicker, but it will save a lot of hassle. You see, while the painted parts of the decal hold together fine, the clear parts tend to break up. So much so that on the USAF, when trying to move the decal from the paper to the model, instead of one large decal, I got four small ones. This is even more hassle with the small US AIR FORCE and serial on the fin, which also divided down into its component letters/numbers. The smaller black data decals were fine. The red ones disintegrated completely. The decal's clear film was also slightly yellowed so those markings that did hold together show a slight yellowish tinge.
I was, however, able to finish things up and once dry, the markings had Future brushed over them to hold them in place.
| FINAL CONSTRUCTION |
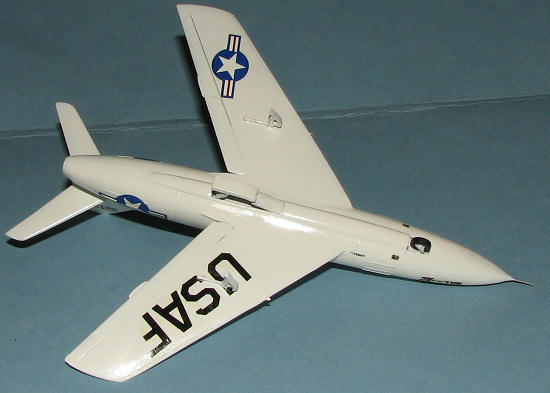 The absolute last things to be added on, are the 'whisker' outriggers. These were deployed by the pilot just before the aircraft got slow enough for a wing to drop, and kept things relatively stable. The kit items have two concerns. One is that they are grossly oversized. However, short of scratchbuilding new ones, they will have to do. Instruction placement information is also a bit hazy on exactly where they go. Secondly, they are molded in a decidedly non-prototypical position. They seem to be like little snow skis with the skids flat on the ground. In reality, these skids are more hinged at the leading edge and the tips of the aft ends are what skid across the desert floor. In Golden Age's defense, I think they used a photo of the X-2 after it had 'ground looped'. One photo in the reference shows the outrigger very clearly, but it has also clearly had the forward mount ripped from the airframe and bent back quite a bit.
This required me to do some cutting and trimming of the actuating pistons and the skids themselves. Even then, I got the skids a bit too vertical, so they appear short. However, they do the job as expected. These were then glued on and final skid trimming was done in small steps to be sure I didn't overshorten them. Final painting and touchup was accomplished and I was done.
| CONCLUSIONS |
This is, so far, the best injected styrene kit of the X-2 available. Still have to give the Maintrack vac kit the title of the most accurate,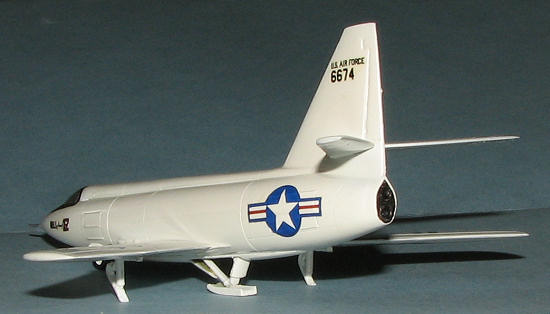 and that is as much due to details as anything. You see, the Golden Age kit isn't really sure just what part of the program the vehicle represents. Early flights had the longish main skid struts and had small pieced on the underside of the wing tip for the wing to fall over on after the flight. Early aircraft also had a tail bumper, but that was not present on the later versions that had much longer and protruding exhaust cones, something not provided with this kit, which is more like the aircraft used in early glide tests than in powered flight.
Later versions included the under wing supports, but had a much shorter set of skid struts and considerably more detail in the rear when it comes to fuel vents and the like. The X-2 also had a bit deeper keel than what is provided in the kit, though this may be more in line with the earlier drop test aircraft. Experimental planes went through changes from flight to flight, and while some were small, others were more obvious. The Golden Age kit provides those who want an injected styrene kit a better place to start than the Mach 2 version. It is not perfect, but then, bringing it to specs is often a lot of the fun of building kits.
| REFERENCES |
I have to say that I could not have gotten anywhere in terms of knowing what bits go with what time period of the plane's existence without the Rocket Aero DVD: Mach 2. This reference is a must have for the X-2 fan.
May 2008
My thanks to www.olimpmodelsgroup.com for the review kit and for having the foresight to produce it in the first place.
Copyright ModelingMadness.com. All rights reserved.
If you would like your product reviewed fairly and fairly quickly, please contact the editor or see other details in the Note to Contributors.