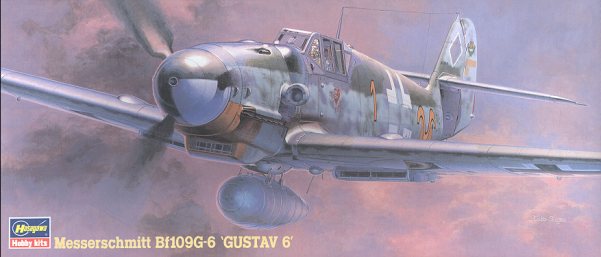
Hasegawa 1/72 Bf-109G-6 'Gustav 6'
|
KIT # |
51317 (AP 17) |
|
PRICE: |
$12.98 |
|
DECALS: |
Three aircraft |
|
REVIEW : |
|
|
NOTES: |
|
|
HISTORY |
Undoubtedly the most built and exported German aircraft of the Second World War was the Bf-109G-6. This particular variant accounted for nearly half of the 33,000 plus 109 built from 1936 to 1945. As such, it is an aircraft that is much beloved by WWII aircraft modelers in general and by 109 modelers in particular.
|
THE KIT |
 In the late 1980s and early 1990s, Hasegawa embarked on a program of
producing new molds of some of its favorite aircraft. Specifically, this
included the Fw-190s and the Bf-109s. Not that the old molds were bad, just that
these are better. What separated the new 109 kit from the old was the 'multiple
versions' mantra that had taken over the industry since the original kits were
released back 30 years ago. As a result of that this kit has a lot more parts to
enable different versions to be built.
In the late 1980s and early 1990s, Hasegawa embarked on a program of
producing new molds of some of its favorite aircraft. Specifically, this
included the Fw-190s and the Bf-109s. Not that the old molds were bad, just that
these are better. What separated the new 109 kit from the old was the 'multiple
versions' mantra that had taken over the industry since the original kits were
released back 30 years ago. As a result of that this kit has a lot more parts to
enable different versions to be built.
One thing that hasn't changed is Hasegawa's lack of cockpit detail. This is carried on even in the most modern of 1/72 kits. You get a basic seat/floor onto which you glue a control column. The instrument panel is designed to take a decal to give you the instruments. Fortunately, there are a LOT of aftermarket cockpit sets for this kit so those who want a detailed cockpit can have it.
The tail section is separate so that those aircraft that take a tall tail can
have it. You also get optional canopies; the original framing or the later Erla
Haube canopy. Unfortunately, they ar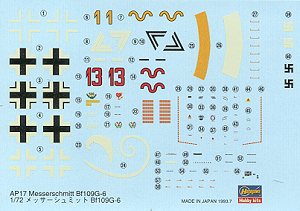 e
single pieces and cannot be displayed open. Again, the aftermarket comes to the
rescue with replacement vac canopies. Other options are limited to a tropical
filter and under wing 20mm gun pods. One 'modern' touch is the inclusion of
separate prop blades. While this does make it somewhat easier to paint any
complicated spinner markings, it makes it tough for most of us to have the props
properly aligned.
e
single pieces and cannot be displayed open. Again, the aftermarket comes to the
rescue with replacement vac canopies. Other options are limited to a tropical
filter and under wing 20mm gun pods. One 'modern' touch is the inclusion of
separate prop blades. While this does make it somewhat easier to paint any
complicated spinner markings, it makes it tough for most of us to have the props
properly aligned.
Decals include three aircraft, all painted in RLM 74/75/76. The first is the box art aircraft of Erich Hartmann when he was Staffelkaptain of 9/JG 52. Next is Gerhard Barkhorn's 109 in the markings of Kommandeur II/JG 52. Both of these planes have Russian front markings of yellow wing tips, fuselage band and nose under side. Finally, from the Mediterranean Front, comes the plane of 11 /JG 27s Heinrich Bartels. This aircraft has a white rudder with Bartels large score and carries the under wing cannon pods.
|
CONSTRUCTION |
Normally construction would begin with the cockpit, however, this kit was purchased as part of a lot of kits at a swap meet. Imagine my surprise when I popped open the box to see a completely built airframe. Now that definitely shortens the build time a bit. The previous owner was none to picky about construction as the tail section was pretty far out of kilter. Nothing that couldn't be fixed by industrial strength sandpaper and filler, though. The rest of the airframe was also treated to some filler at this time.
 When that had dried, the gun bulges were attached as was the
drop tank mount. I also added the aileron mass balances at this time. This could
easily be left to the final stage as they are frequently lost during
construction. (If you are an enterprising individual, you might consider making
replacements out of resin or metal. There is definitely a market for
these things.)
When that had dried, the gun bulges were attached as was the
drop tank mount. I also added the aileron mass balances at this time. This could
easily be left to the final stage as they are frequently lost during
construction. (If you are an enterprising individual, you might consider making
replacements out of resin or metal. There is definitely a market for
these things.)
Then the supercharger intake was glued together. If you can get a small bead of glue on the outer rim of the two parts, leave it there. This part was spot welded and there should be a seam that is not on the kit parts. It was then cleaned up a bit and glued in place. At the interior, the armored head rest was glued to the back part of the interior. This item should be attached to the inside of the canopy itself. However it is too small to fit properly so the mounting suggested in the kit will work just fine. Then the canopy itself was glued on and masked.
|
CAMOUFLAGE |
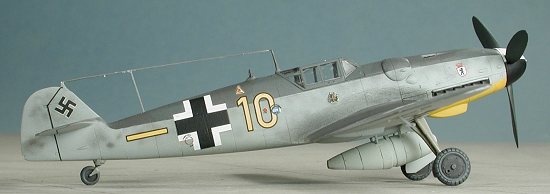
With all the main bits in place, it seemed like a good time to start painting. First the underside was sprayed with RLM 76 blue grey from my dwindling Aeromaster enamel stocks. When dry, the underside of the tail planes were masked and the underside of the nose painted yellow for the camo scheme I was doing. This was covered when dry and the upper portions of the airframe painted in RLM 75 dark grey, this color coming from Xtracolor stocks. Then I let things dry a bit as I had run out of RLM 74 and had to go buy some more. The upper surfaces were masked in the proper pattern, and when I got back with some Testors RLM 74, they were painted.
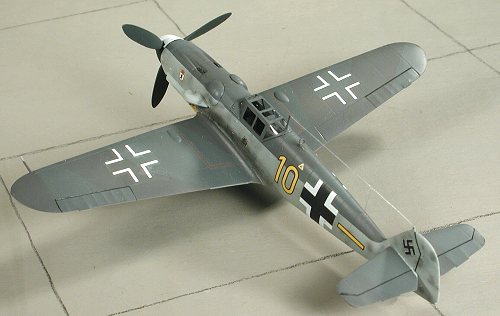 When the paint was dry the masking was removed from the fuselage
and then the area was remasked to make the straight line needed for the camo
scheme. When working in 1/72 scale and smaller, it is generally makes for a much
better presentation of camouflage to mask than to try to spray the areas
freehanded. Of course, this doesn't apply to mottling or the 'mirror wave'
schemes that were so prevalent with German and Japanese aircraft. Unless the
prototype paint was applied with a sponge or brush, the effect just isn't the
same. Once the fuselage, wings and tail planes were masked to prevent problems
with overspray, the fuselage sides were given a mottling of RLM 74 and RLM 75.
The decal instructions said that the plane was 'lightly mottled' and looking at
what I had done appeared too dense. To lighten things up again, the fuselage had RLM 76 misted over the mottling until it had been toned down to a much less
dense pattern. I also took the opportunity to paint the prop blades (RLM 70),
and the spinner (black with 1/3 of it in white).
When the paint was dry the masking was removed from the fuselage
and then the area was remasked to make the straight line needed for the camo
scheme. When working in 1/72 scale and smaller, it is generally makes for a much
better presentation of camouflage to mask than to try to spray the areas
freehanded. Of course, this doesn't apply to mottling or the 'mirror wave'
schemes that were so prevalent with German and Japanese aircraft. Unless the
prototype paint was applied with a sponge or brush, the effect just isn't the
same. Once the fuselage, wings and tail planes were masked to prevent problems
with overspray, the fuselage sides were given a mottling of RLM 74 and RLM 75.
The decal instructions said that the plane was 'lightly mottled' and looking at
what I had done appeared too dense. To lighten things up again, the fuselage had RLM 76 misted over the mottling until it had been toned down to a much less
dense pattern. I also took the opportunity to paint the prop blades (RLM 70),
and the spinner (black with 1/3 of it in white).
|
BACK TO THE BENCH |
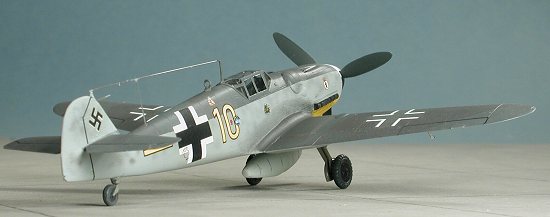
As I generally do after painting, the kit was returned to the workbench to have landing gear installed. The fit of the kit gear is quite good. Though the struts are keyed, the fit is pretty sloppy so care needs to be taken to ensure proper alignment. This is generally a major problem with 109. Despite having a lot of photos of 109s (and other aircraft) sitting slightly skewed, contest judges are looking for perfection, and that does not always jibe with reality, so if you plan on having your kit judged, you need to be as close to perfect as possible in this area.
 With the gear under it, the kit was then sprayed with Future to
provide a glossy base for decals. Many readers have had trouble using Future. I
put it on in many fine coats using relatively low air pressure. This gives the
Future a chance to dry and prevents the build up that can cause runs. This
method works well even on glossy surfaces, which half of this 109 was due to
using Xtracolor paint.
With the gear under it, the kit was then sprayed with Future to
provide a glossy base for decals. Many readers have had trouble using Future. I
put it on in many fine coats using relatively low air pressure. This gives the
Future a chance to dry and prevents the build up that can cause runs. This
method works well even on glossy surfaces, which half of this 109 was due to
using Xtracolor paint.
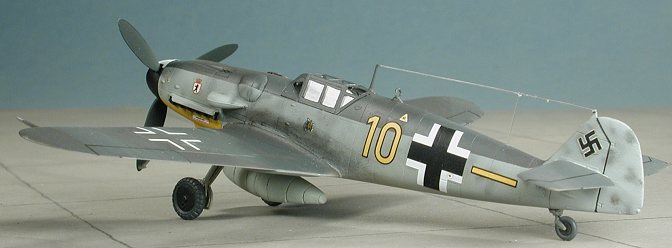
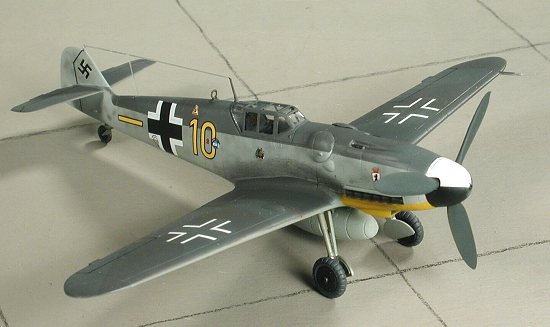
Returning to the workbench, it was time to apply the decals. I used Aeromaster 72-072 "Reich Defense Bf-109s", which is a sheet full of Bf-109G-6 markings. The one that I chose was not the most flamboyant, but one that was pretty normal as color schemes go from 6./JG 27 at Wiesbaden in the fall of 1944. Even in this small scale, Aeromaster has a number of markings that require overlaying two decals. Personally, I'd rather have these tiny decals as one, for I found it quite difficult to properly align most of them. Anyway, the decals went on without too much trouble, though I found that I needed to apply a strong setting solution to get them to bed down properly.
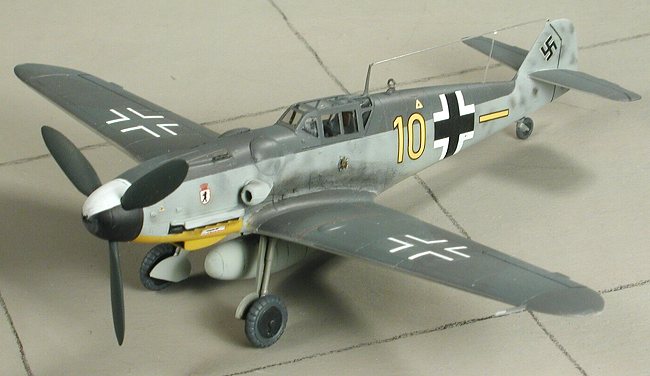
Once the decals were on and properly dried, some of the final bits and pieces were attached. This included the gear doors, radio mast, and the DF loop. The engine exhausts and exhaust shields are a very tight fit and were just pressed into place. Then a coat of matte acrylic clear was sprayed on the kit and when dry, the masking taken off the canopy. Then the drop tank was glued in place, the prop installed and a radio antenna wire made from stretched sprue. A bit of pastel work for the exhaust stains and the kit was done!
|
CONCLUSIONS |
It has been a number of years since I last built a Hasegawa 1/72 Bf-109G kit. It really is quite a nice model, appears to be accurate in outline and though a bit fiddly in places (whaddya expect with some of the teeny parts), makes into an extremely nice model. It has been reboxed in probably a dozen or more boxes, each with new decals, but it is the same kit. It is one that I really can recommend and it is a pretty quick build. If you want more detail, True Details makes a resin interior for this kit for a pittance and finding a vac canopy to display the interior work should not be difficult at all.
January 2002
Copyright ModelingMadness.com. All rights reserved.
Review kit courtesy of my kit collection.
If you would like your product reviewed fairly and fairly quickly, please contact the editor or see other details in the Note to Contributors.