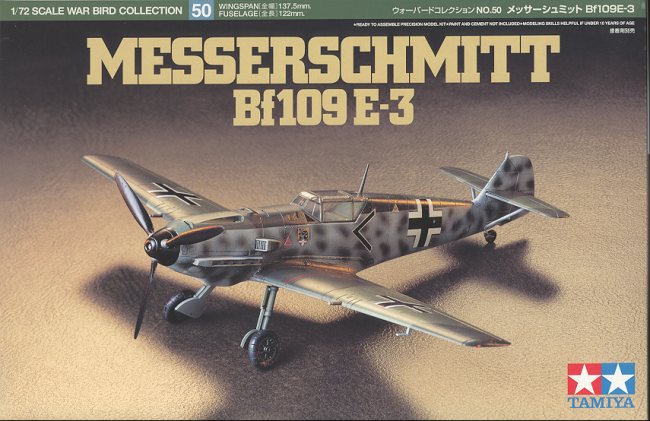
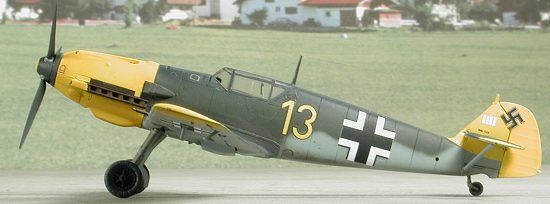
Tamiya 1/72 Bf-109E-3
|
KIT # |
60750 |
|
PRICE: |
$16.50 |
|
DECALS: |
Three aircraft |
|
REVIEWER: |
|
|
NOTES: |
|
BACKGROUND |
For a look in the box and a brief historical section, please visit the preview.
|
CONSTRUCTION |
For me, this is deja vu all over again. It is the second time that I've built this kit. One may ask why bother to do it twice. Well the answers are that the last build was so easy that I figured I could plop one out in a pretty short time. The other is that I had a decal sheet that was begging to be used (if you listen to your decal collection, you can also hear them calling out in a little tiny voice.....'use me, use me').
 Actually, that is only partially true. I started on a
Tamiya 1/72 Bf-109E-4 kit. When it came time to glue
together the fuselage halves, I couldn't find one of the halves. I searched for
it mightily with no luck. Interrogating my cats came up with nothing (though I
suspected them both of not fully cooperating). Having no real choice, I opened
up a 109E-3 kit and used that fuselage half. No sooner did I get that half
painted and mated with the other side than I found the original 'missing' half
in a very open place. Now did the cats have a guilt attack and sneak it in so I
could find it? Were the carpet gnomes responsible for this? I'll never
know but since I had 'started' on the E-3 kit, I figured I may as well finish
it. And now you know the rest of the story.
Actually, that is only partially true. I started on a
Tamiya 1/72 Bf-109E-4 kit. When it came time to glue
together the fuselage halves, I couldn't find one of the halves. I searched for
it mightily with no luck. Interrogating my cats came up with nothing (though I
suspected them both of not fully cooperating). Having no real choice, I opened
up a 109E-3 kit and used that fuselage half. No sooner did I get that half
painted and mated with the other side than I found the original 'missing' half
in a very open place. Now did the cats have a guilt attack and sneak it in so I
could find it? Were the carpet gnomes responsible for this? I'll never
know but since I had 'started' on the E-3 kit, I figured I may as well finish
it. And now you know the rest of the story.
Construction started with the cockpit (not very original, but there it is). I like to glue together as many parts
together prior to painting as I can. In this case it was basically the seat and
control stick. The tub as well as forward bulkhead and cockpit sidewalls were
painted RLM 02 grey as was normal with these early 109s. I used Xtracolor to do
this. Next the instrument panel was painted RLM 66 and when dry, the panel
decals were placed over it. A touch of Champ after it was pretty well set
allowed it to snuggle down. Then the sidewalls were painted various colors
according to the instructions and dry brushed. A decal harness is provided and
that was put in place. 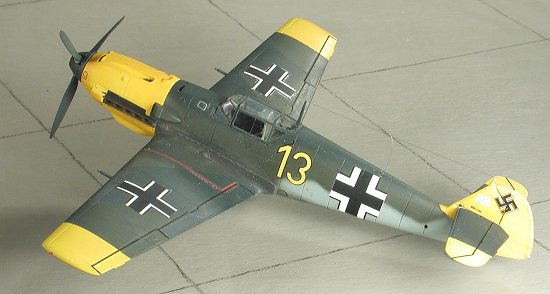
Meanwhile, the wings were glued together after I opened the holes for the drop tank or bomb rack. In this case it would be the bomb rack. Then the mating surfaces were cleaned up. The cockpit was glued into the fuselage and the wings glued on. Fit is really very good with only a touch of filler needed at the rear wing/fuselage join. Next the tail planes were attached, but not the braces. The canopy and windscreen were masked and the windscreen glued in place. The gunsight was next and when dry, the canopy tacked in place. The lower cowling was then next to be assembled, but not glued in place.
However, it wasn't long before things started to vary. While all of the initial construction bits went according to plan, when it came to painting, things changed.
|
CAMOUFLAGE |
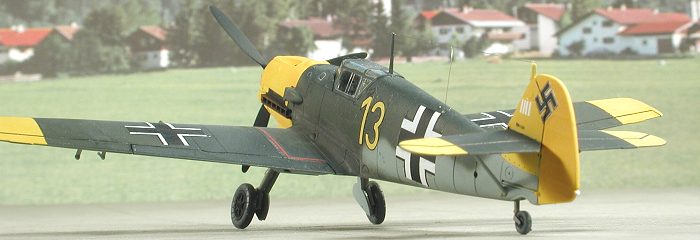
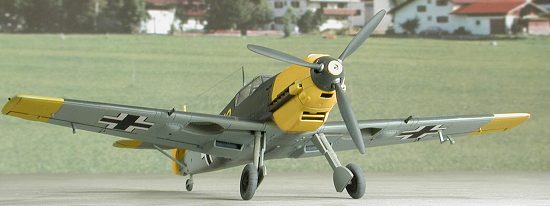
This one started out much the same way, with the nose and rudder being yellow. However, on this one, the wing tips, horizontal stabilizer tips and the fin were to be yellow. Had some problems getting the yellows to be the same intensity/shade on this one for some reason. Using the guide from the decal sheet, I dutifully painted the areas shown. The rest of the colors, RLM 70/71/65 were then sprayed on and masked as appropriate.
 However, once I had those done, it seemed to me that the yellow
areas painted on the wings and stabs were way too wide. Digging through some
references verified that there was too much. I also wasn't really sure about the
extent of the yellow on the fin or even if it was yellow. The few pictures I
found were not very conclusive. So I decided to do the whole upper fin section
from where it attaches to the rear fuselage. This meant some very tricky masking
once it had all been painted. I also remasked the wing and stabilizer tips to
where they were not so extensive. The upper and lower colors were then repainted
with RLM 70 and RLM 65. Then the lower bits and fin were masked as well as those
upper sections I wanted to keep as RLM 70. The RLM 71 areas were then painted.
This included much of the fuselage side, leaving only a thin area of the aft
fuselage and the forward section upper from a line about even with the lower
part of the canopy. When that had dried. I then went back over the
fuselage side with some RLM 65.
However, once I had those done, it seemed to me that the yellow
areas painted on the wings and stabs were way too wide. Digging through some
references verified that there was too much. I also wasn't really sure about the
extent of the yellow on the fin or even if it was yellow. The few pictures I
found were not very conclusive. So I decided to do the whole upper fin section
from where it attaches to the rear fuselage. This meant some very tricky masking
once it had all been painted. I also remasked the wing and stabilizer tips to
where they were not so extensive. The upper and lower colors were then repainted
with RLM 70 and RLM 65. Then the lower bits and fin were masked as well as those
upper sections I wanted to keep as RLM 70. The RLM 71 areas were then painted.
This included much of the fuselage side, leaving only a thin area of the aft
fuselage and the forward section upper from a line about even with the lower
part of the canopy. When that had dried. I then went back over the
fuselage side with some RLM 65.
|
MARKINGS |
 With all that done, the kit was returned to the work area to
have its landing gear installed. After it had dried, the model was sprayed with
clear acrylic gloss and ready for the decals. I used Aeromaster
72-003 and picked another JG 53 Battle of Britain scheme. This one was well
documented in the latest Jagdwaffe
book, which did help as the Aeromaster painting scheme was not totally correct.
Again, I found the Aeromaster decals to be a bit on the thick side and not very
responsive to setting solutions. The common markings were from the Tamiya sheet.
With all the decals in place, the model was sprayed with a clear matte and it
was time to finish adding pieces to it.
With all that done, the kit was returned to the work area to
have its landing gear installed. After it had dried, the model was sprayed with
clear acrylic gloss and ready for the decals. I used Aeromaster
72-003 and picked another JG 53 Battle of Britain scheme. This one was well
documented in the latest Jagdwaffe
book, which did help as the Aeromaster painting scheme was not totally correct.
Again, I found the Aeromaster decals to be a bit on the thick side and not very
responsive to setting solutions. The common markings were from the Tamiya sheet.
With all the decals in place, the model was sprayed with a clear matte and it
was time to finish adding pieces to it.
|
THE REST OF THE BITS |
 Starting at the front, I painted the exhaust area with Burnt Iron. Then the
wheels were glued on, followed by the landing gear doors. Moving to the wings,
the aileron mass balances and the pitot tube were glued in place. Next the guns
were installed on the leading edge of the wing. I popped off the canopy and
installed the head armor. Not all E-3s had this so you need to check your
references. I could find no photo of this plane with the armor, but all the
pictures were of the plane after it had crash landed in the UK and were without
the canopy. I figured that by this late date in the battle, that armor plating
would have been a normal configuration for fighters.
Starting at the front, I painted the exhaust area with Burnt Iron. Then the
wheels were glued on, followed by the landing gear doors. Moving to the wings,
the aileron mass balances and the pitot tube were glued in place. Next the guns
were installed on the leading edge of the wing. I popped off the canopy and
installed the head armor. Not all E-3s had this so you need to check your
references. I could find no photo of this plane with the armor, but all the
pictures were of the plane after it had crash landed in the UK and were without
the canopy. I figured that by this late date in the battle, that armor plating
would have been a normal configuration for fighters.
With all the pieces on, I removed the tape from the canopy, glued it in place
and installed the radio mast. Then I got out the pastels for some exhaust
stains. The prop was stuck on, a radio antenna was made from hair and the model
was finished. I rushed to the photo shop to take pictures before I broke
anything!
|
CONCLUSIONS |
Well, this one was pretty well like the last one. It is a well engineered kit and fits well. If you work at it you can mess it up, so it isn't a total sleeper! Unless you are brand new to the hobby, this is a kit I can easily recommend.
August 2002
Kit from my kit collection.
If you would like your product reviewed fairly and fairly quickly, please contact the editor or see other details in the Note to Contributors.