Hasegawa 1/48 Bf-109v15 (a 109T prototype)
|
KIT: |
Hasegawa 1/48 Bf-109v15 (a 109T prototype) |
|
KIT # |
09172 (JT 112) |
|
PRICE: |
$25.98 |
|
DECALS: |
See review |
|
REVIEW : |
|
|
NOTES: |
Conversion using Hawkeye Designs 109T set |
|
HISTORY |

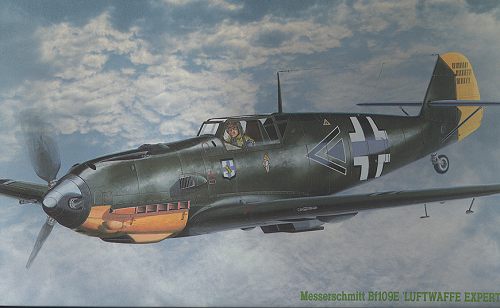
The major workhorse of the Luftwaffe fighter arm during the first part of WW2 was the Bf-109E. An improvement over earlier models with its Daimler-Benz DB601 engine in place of the older Junkers Jumo, the 109E was the aircraft most often met by the RAF during the battle of Britain. The versions most widely produced of the E were the E-3 and the E-4/7. The E-4/7 has protruding wing cannon barrels and a more square canopy than the E-3 version. The E-7 can a cap over the nose cannon producing a more streamlined prop spinner. The E-7 was also fitted with a centerline rack for a drop tank or bomb.
The E-4/7 was flown by a number of the early aces or 'experten' of the Luftwaffe including Galland, Molders, Priller and others. The E version soldiered on after being replaced by the more uptodate F model in training schools and by being sold off to other Axis allies.
|
THE KIT |

Hasegawa has always gotten excellent mileage out of it's kits. Often by doing nothing more than supplying new box art and a new decal sheet. The Bf-109E series probably has made more use of this than any other Hasegawa kit. I know of at least ten different boxings of this kit, all with the same plastic inside. This one is for two Luftwaffe 'experten'. One is an E-7 from JG 5 flown by Gunter Scholz and is depicted on the boxtop. The other is an E-3/4 from JG 77 flown by Ludwig Froba. Unfortunately for me, the decal sheet managed to stick to the bottom of the box so tore when removing it. Not a real problem as I had planned on using aftermarket decals for this aircraft anyway. The kit decals look a bit transparent as I could easily see the blue backing under the white parts.
 This kit is the modified 109E. The very earliest E models had
some shape problems in the nose and rear fuselage. Those were marketed with the
'J' series boxes while the revised ones are all in 'JT' boxes. Typical of
Hasegawa, the parts are very well molded in grey plastic with superb detail and
engraved panel lines. There is a small fret of etched parts for the radiators
and the canopy armor. I have never had any real success with the canopy armor,
always managing to mess it up in some way or other.
This kit is the modified 109E. The very earliest E models had
some shape problems in the nose and rear fuselage. Those were marketed with the
'J' series boxes while the revised ones are all in 'JT' boxes. Typical of
Hasegawa, the parts are very well molded in grey plastic with superb detail and
engraved panel lines. There is a small fret of etched parts for the radiators
and the canopy armor. I have never had any real success with the canopy armor,
always managing to mess it up in some way or other.
In addition to the usual bits and pieces, one gets both the rounded and more square canopies, so you can do an E-3, E-4 or E-7 with this kit. If you like 109's like I do, buy a bunch of them when you see them on sale. Like the Tamiya or Hobbycraft 109E, this one comes with droppable flaps. It also has separate slats. The cockpit detail is good right from the box, but like most models, can be improved with an aftermarket cockpit set, same with the wheels, which are not flattened.
This kit is to be built as one of the Bf-109T prototypes; the 109v15. The 109T was designed to be used from the Graf Zepplin, Germany's first aircraft carrier. Due to a number of delays, the ship was launched, but never finished and never has a single aircraft take off or land on its deck. The 109Ts were then shorn of their aircraft carrier specific equipment and used in Norway and in local defense in the North Sea. Their longer wingspan and more powerful engines gave them good altitude performance and they were in use until late 1944 when the tired airframes were scrapped.
 Hasegawa has recently released this kit
yet again as a regular Bf-109T with resin detail parts for the longer wings and the new
supercharger intake. I haven't seen the kit, but have been told that the resin
bits are by Jaguar. Apparently missing from the Hasegawa kit are the carrier equipment such
as catapult attachment points, tailhook, and holdbacks. MPM produced this kit a few years ago, however it is limited run and
the fit is not to Hasegawa standards
Hasegawa has recently released this kit
yet again as a regular Bf-109T with resin detail parts for the longer wings and the new
supercharger intake. I haven't seen the kit, but have been told that the resin
bits are by Jaguar. Apparently missing from the Hasegawa kit are the carrier equipment such
as catapult attachment points, tailhook, and holdbacks. MPM produced this kit a few years ago, however it is limited run and
the fit is not to Hasegawa standards
Really wanting to do one of these, I purchased the Hawkeye Designs conversion set. A friend sent me a set of MPM decals for the 109T which include the version I want to do, so I have all I need for a nice 109T. Since I'm going to be putting in the conversion set, the equally superb Hawkeye Designs interior will be used as well as some True Details resin wheels. I have used the last items before with a 109D and have nothing but praise for them.
|
CONSTRUCTION |
 First order of business is to prepare
the kit wings for the extended tips. They are cut, using a razor saw, at the
spot indicated in the HD instruction sheet. Actually, I fudged a bit and cut
them a bit log to make sure they wouldn't be too short then sanded them back.
The HD set includes new longer ailerons
First order of business is to prepare
the kit wings for the extended tips. They are cut, using a razor saw, at the
spot indicated in the HD instruction sheet. Actually, I fudged a bit and cut
them a bit log to make sure they wouldn't be too short then sanded them back.
The HD set includes new longer ailerons
 and slats. At the same time, the two
bulges under the wings were removed to make room for the catapult attachment
brackets. Once that was done, the wing was assembled as per kit instructions.
and slats. At the same time, the two
bulges under the wings were removed to make room for the catapult attachment
brackets. Once that was done, the wing was assembled as per kit instructions.
Basically, that takes care of the cutting and hacking part of the conversion. Pretty simple, really as the cuts are along a panel line. Next was to get to work on the new resin cockpit. This set is truly super and really looks a bunch better than the stock cockpit. The basic bits were glued into place, not forgetting to use the kit forward bulkhead, and the whole cockpit was sprayed RLM 02 green-grey. Next, some seat belts were attached from a Reheat etched brass set. If I may hop up on the soapbox for a moment, I feel that these interior sets should either include etched brass belts or have them molded on the seat. The modeler shouldn't have to fork out another 10 or 12 dollars for a belt set.
 While that was drying, the kit etched
radiators were glued in place and the wing halves and fuselage halves glued
together. Fit for these parts is good with only minimal filler needed. Next, one
of the new resin wingtips was glued into place. I found that the panel lines are
not exactly the same on the top and bottom of the wing so some additional
sanding was needed to even things up. Then the wing tip was smothered in super
glue, the tip lined up and then hit with accelerator. During this, I found that
the wing tip was slightly less thick than the kit wing, so the kit wing was
sanded down to smoothly match.
While that was drying, the kit etched
radiators were glued in place and the wing halves and fuselage halves glued
together. Fit for these parts is good with only minimal filler needed. Next, one
of the new resin wingtips was glued into place. I found that the panel lines are
not exactly the same on the top and bottom of the wing so some additional
sanding was needed to even things up. Then the wing tip was smothered in super
glue, the tip lined up and then hit with accelerator. During this, I found that
the wing tip was slightly less thick than the kit wing, so the kit wing was
sanded down to smoothly match.
 The Hawkeye Designs kit gives you
replacement slats and ailerons. The slat was slightly too long so sanded down a
bit. Then it was glued onto the leading edge. There was a rather large gap on
the bottom of the slat that was filled with superglue and then sanded. Any pits
were filled and sanded smooth. As a note, none of the Bf-109Ts (and this included the
prototypes) had functional wing slats. Because of the longer wings, when they
deployed they really upset the stability of the aircraft. Therefore, the slats were
all bolted into place in the up position. As you might expect, though the parts
fit ok, I had the usual problems as I always do with any conversion set so it
wasn't exactly a trouble free process!
The Hawkeye Designs kit gives you
replacement slats and ailerons. The slat was slightly too long so sanded down a
bit. Then it was glued onto the leading edge. There was a rather large gap on
the bottom of the slat that was filled with superglue and then sanded. Any pits
were filled and sanded smooth. As a note, none of the Bf-109Ts (and this included the
prototypes) had functional wing slats. Because of the longer wings, when they
deployed they really upset the stability of the aircraft. Therefore, the slats were
all bolted into place in the up position. As you might expect, though the parts
fit ok, I had the usual problems as I always do with any conversion set so it
wasn't exactly a trouble free process!
Then it was time to put some of the fuselage bits together. The instrument panel was superglued into place and the cockpit was then installed. YIKES! It was not even. Somehow, I missed the fact that the aft bulkhead was warped so getting the cockpit to fit in the fuselage took some careful tweaking and lots of superglue. Finally, it was installed to my satisfaction and looks pretty good. Then it was time to glue the wings on. Dry fitting it, I noticed that the front was a bit too tall, not letting the upper wings match up to the root. A tiny bit of sanding on the front fuselage attachment point took care of that. The rear part gave me fits, until I finally got it to fit in there level. At that time, the wing was then glued to the fuselage and set aside to dry.

 Once dry the filler was sanded down and
smoothed into the surrounding surfaces. Then I looked for the nose guns.
Somehow, they had disappeared and no amount of searching turned them up.
Fortunately, I have a rather full spares box for the 109 and was able to
scrounge some from there. These were glued in place and the cowling was glued
onto the nose of the aircraft. During all this handling on of the resin wing
tips had broken loose so was cleaned up and reattached. The tailplanes were then
glued in place without the braces to facilitate painting. The flaps were glued
in the up position and the ailerons were then glued at a bit of an angle to give
it some interest. The balances were left till the last step to prevent them from
being broken off and lost.
Once dry the filler was sanded down and
smoothed into the surrounding surfaces. Then I looked for the nose guns.
Somehow, they had disappeared and no amount of searching turned them up.
Fortunately, I have a rather full spares box for the 109 and was able to
scrounge some from there. These were glued in place and the cowling was glued
onto the nose of the aircraft. During all this handling on of the resin wing
tips had broken loose so was cleaned up and reattached. The tailplanes were then
glued in place without the braces to facilitate painting. The flaps were glued
in the up position and the ailerons were then glued at a bit of an angle to give
it some interest. The balances were left till the last step to prevent them from
being broken off and lost.
 Next the gunsight was installed in the
interior and the clear bits glued in place. Then the forward resin catapult
attachments were glued in place as I doubt I would be knocking these off. I used the older of the two canopies
as is fitting for an early 109E. They were then masked with low tack tape and
Bare Metal Foil. The wheel wells filled with tissue and
it was off to the paint shop for the first round of painting.
Next the gunsight was installed in the
interior and the clear bits glued in place. Then the forward resin catapult
attachments were glued in place as I doubt I would be knocking these off. I used the older of the two canopies
as is fitting for an early 109E. They were then masked with low tack tape and
Bare Metal Foil. The wheel wells filled with tissue and
it was off to the paint shop for the first round of painting.
|
PAINT & DECALS |
Since I was doing an early paint scheme, the underside of the plane was painted RLM 65 light blue using Aeromaster enamels. When dry, the tailplanes were masked off. Then the upper surfaces were painted RLM 71 green, again using Aeromaster enamels. When that had dried, a lot of tape was used to mask off the 71 areas and the kit was then painted RLM 70 black-green. It was during this evolution that I dropped the kit and broke off one of the resin wing tips. AARRGGHH! When the paint had dried, the kit was taken back to the workshop and the wing reattached. This meant that I also had to use more filler to smooth out the broken areas and patch some of the filler that popped out during it's trip to the concrete. This easily added nearly a week to the completion date of the project. In addition, it didn't go on as straight as I would have hoped so that pretty well rules this kit out as being a contest winner!!
After getting the kit back into one piece, the model was repaired and repainted. I then tried out the red tail band that was with the decal sheet I had for this aircraft. Naturally, it was too small so that meant back to the paint shop to have white and then red painted on the tail and then the overspray touched up. When dry, it was given a couple of coats of acrylic clear and then it was ready for decals.
 For markings, I chose to do the aerodynamic prototype for the
109T series, the Bf-109v15, D-IPHR. This aircraft had all the carrier mods to
it, but did not have the supercharged DB601N installed in it. This is why I did
not choose to use the new resin intake. Decals came from the MPM kit. It was
fortunate that I had two sets of decals as I managed to mangle about half of
them getting them on the aircraft. Propagteam decals are wonderfully thin, but
that thinness brings a curse along with it in the form of being very fragile.
After the decals were on and dry, a coat of clear acrylic matte was sprayed on.
Then the aircraft was very lightly weathered with pastels and the pastels sealed
with another coat of clear acrylic matte.
For markings, I chose to do the aerodynamic prototype for the
109T series, the Bf-109v15, D-IPHR. This aircraft had all the carrier mods to
it, but did not have the supercharged DB601N installed in it. This is why I did
not choose to use the new resin intake. Decals came from the MPM kit. It was
fortunate that I had two sets of decals as I managed to mangle about half of
them getting them on the aircraft. Propagteam decals are wonderfully thin, but
that thinness brings a curse along with it in the form of being very fragile.
After the decals were on and dry, a coat of clear acrylic matte was sprayed on.
Then the aircraft was very lightly weathered with pastels and the pastels sealed
with another coat of clear acrylic matte.
Final construction steps included the attachment of all those bits that are easy to break off. This includes the aft holdback bars and the tailhook. These items along with the radio mast, elevator balances and pitot tube were attached with superglue. The masking was removed from the canopy bits and the canopy posed in the open position. Finally a radio wire was made from stretched sprue and it was done.
|
CONCLUSIONS |
 I learned something from this conversion. Never butt join heavy
items like wing tips. On the next similar project, I will make some sort of
attachment bits from wire as I found all the breakage to be a real pain. I was
also surprised at the poor fit of the wing slats. I can only assume that I
screwed something up as Hawkeye Design parts are usually very good. Needless to
say, the end result belies all the work that went into it and it looks very good
(despite the crooked wing tip).
I learned something from this conversion. Never butt join heavy
items like wing tips. On the next similar project, I will make some sort of
attachment bits from wire as I found all the breakage to be a real pain. I was
also surprised at the poor fit of the wing slats. I can only assume that I
screwed something up as Hawkeye Design parts are usually very good. Needless to
say, the end result belies all the work that went into it and it looks very good
(despite the crooked wing tip).
Having all that carrier stuff installed adds a bit of the new to the kit and it really looks great on the now growing shelf full of 1/48 109s.
|
REFERENCES |
Sea Eagles: the Messerschmitt Bf-109T, by Francis L.
Marshall
1993, Air Research Publications. £19.95
April 2000
Copyright ModelingMadness.com. All rights reserved.
Review copy courtesy of me and my wallet!! A very late note (2008) Hawkeye Designs has been out of business for many years so do not be disappointed if you can't find their stuff.
If you would like your product reviewed fairly and quickly, please contact me or see other details in the Note to Contributors.