Yak-3 of unknown origin
| KIT #: | ? |
| PRICE: | I paid $5 from the 'sales' table |
| DECALS: | Generic insignia |
| REVIEWER: | Scott Van Aken |
| NOTES: | Stand model with no gear or gear doors. No interior and it is underscale if it is supposed to be 1/48 |
| HISTORY |
Lighter and smaller than Yak-9 but powered by the same engine, the Yak-3
was a very agile dogfighter and a forgiving, easy-to-handle aircraft loved by
both rookie and veteran pilots. Early combat experience showed it to be superior
to all Luftwaffe fighters at altitudes below 5,000 m (16,400 ft). It could roll
with the Focke-Wulf Fw 190 and its turn rate was almost eq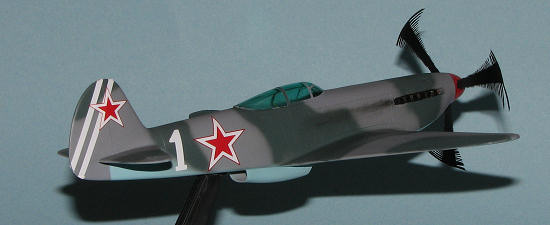 ual to the Bf 109.
The biggest drawbacks of the aircraft were its short range, the tendency of the glued-on plywood covering the top of the wings to tear away under high-G loads, and poor engine reliability. The pneumatic system for actuating landing gear, flaps and brakes, typical for all Yakovlev fighters of the time, was problematic. Though less reliable than hydraulic or electrical alternatives, the pneumatic system was preferred due to significant weight savings.
Since 1991, a number of Yak-3s have been newly manufactured by Yakovlev for the warbird market using the original plans and dies. These are powered by Allison V-1710 engines and have the designation Yak-3M. Several of these are airworthy today, mostly in the United States, but also in Germany and Australia. Others have been converted to "Yak-3U" status from Yak-11 trainers for private owners, with these aircraft also being popular worldwide.
| THE KIT |
Visit the preview for a look at the bits that come in the box. There aren't many.
| CONSTRUCTION |
 Construction
begins with the cockpit........ha,ha,ha. There isn't one so actually,
construction begins with rescribing the control surfaces. I used the
UMM SCR-01 that I previewed a few
months back as I'd never used one of these. It was simple enough to follow the
extant raised lines, though I think I applied too much pressure to it. Those
that actually want straight lines will want to use embossing tape or something
else as a guide.
Construction
begins with the cockpit........ha,ha,ha. There isn't one so actually,
construction begins with rescribing the control surfaces. I used the
UMM SCR-01 that I previewed a few
months back as I'd never used one of these. It was simple enough to follow the
extant raised lines, though I think I applied too much pressure to it. Those
that actually want straight lines will want to use embossing tape or something
else as a guide.
I then started cleaning up all the mating surfaces. This thing does have alignment pins, but they will cause misalignment so off they went. I glued the fuselage halves together then the wing halves. When dry, these items were mated to each other. I also glued on the spinner after cutting off the prop blades. Were I smart, I'd have drilled the holes for the Prop-blur right then, but I'm not so I didn't. These items then were liberally smothered in Tamiya filler as the gaps were somewhat large. This was especially true at the underside of the wings.
Much sanding an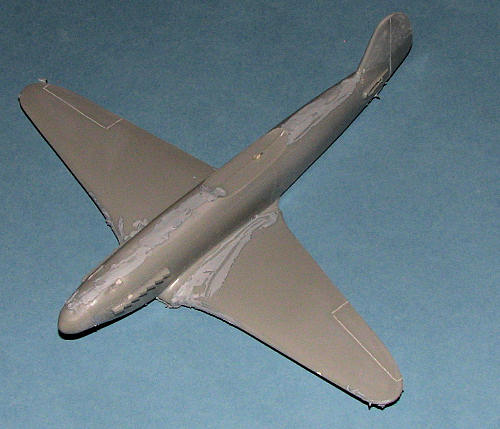 d
more filler later, things were properly smoothed out. I also filled in the gap
between the prop spinner and the fuselage. The wing leading edge intakes were
quite crudely done so I made an attempt to make them more oval in shape. Not
totally successful, but better than before. More filler and the tailplanes were
attached. Did I mention more filler? Sanding all this down was quite theraputic
and eventually I had it all done.
d
more filler later, things were properly smoothed out. I also filled in the gap
between the prop spinner and the fuselage. The wing leading edge intakes were
quite crudely done so I made an attempt to make them more oval in shape. Not
totally successful, but better than before. More filler and the tailplanes were
attached. Did I mention more filler? Sanding all this down was quite theraputic
and eventually I had it all done.
The last piece to add was the lower fuselage radiator. Filler anyone? More sanding and finally it looked nearly ready to paint. I thought about painting the inside of the canopy with a dark blue, but thought better of it. The canopy did not fit very well so out came the mini grinders to slough away more plastic to get a better fit. Once that was nearly achieved, I painted the cockpit area black and started masking the canopy. This has no real frame lines to follow. There is a single line that shows where frames could be and so I masked a bit away from either side of this line. The canopy was then attached using clear paint.
| COLORS & MARKINGS |
Now time to paint. Of course, the kit's instructions were little help
and I certainly wasn't going to use the kit decals. The star I tested in water
broke into sub-atomic components so were not usable. I searched around for a
nice Yak-3 scheme and found one that was pretty simple.
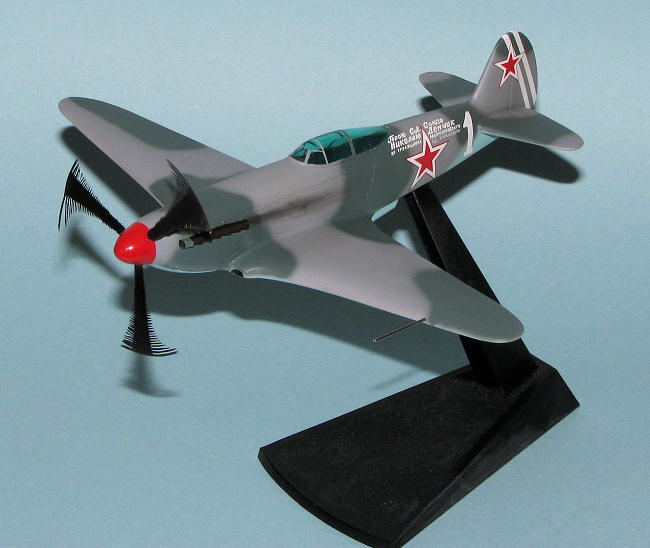
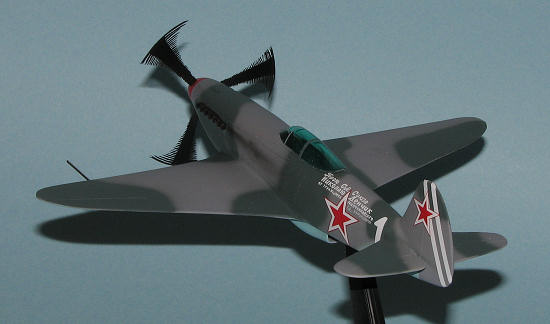
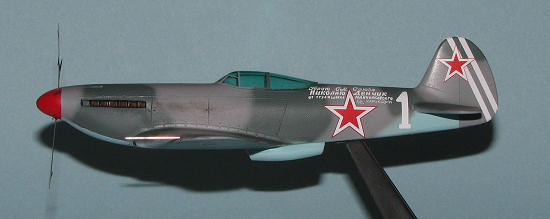
 It was the
plane of Major Nikolai Fedorovich Denchik who was commander of the guards unit
'Order of Aleksandr Nevskii' IAP, 4 GIAD in the Baltic during 1944. Denchik had
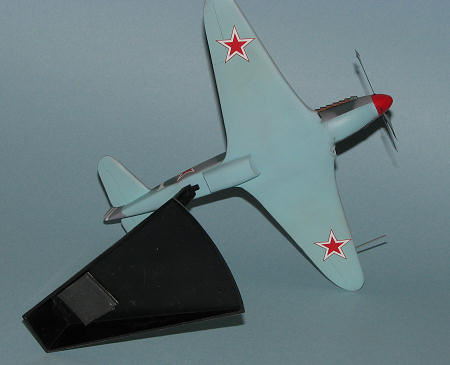
19 victories. His plane was AMT-11/12 upper with AMT-7 undersides and a red
spinner.
It was the
plane of Major Nikolai Fedorovich Denchik who was commander of the guards unit
'Order of Aleksandr Nevskii' IAP, 4 GIAD in the Baltic during 1944. Denchik had
19 victories. His plane was AMT-11/12 upper with AMT-7 undersides and a red
spinner.
Simple enough to paint and I used Colourcoats enamels for these shades. I also used the Aztek 480 airbrush to hand paint these colors. The airbrush did a fine job on all the colors and even did OK with the camo demarcation lines. I've still not figured out how to get a really tight line with this airbrush, but I learned a lot about its use, one of the reasons for building this kit.
Not surprisingly, the markings were all rather oversize so some adjustment did have to be made. However, if I hadn't told you they were too big, you may not have realized it. These came from old Aeromaster sheet 48-642, "The Russians are Coming part 2".
| FINAL CONSTRUCTION |
With the markings in place, the airframe was given a wash to remove
any setting solution residue. I then drilled the holes for the
Prop-blur. I used a large spinner
from another kit to provide the proper angle by placing the spinner over the one
on the Yak to
 determine
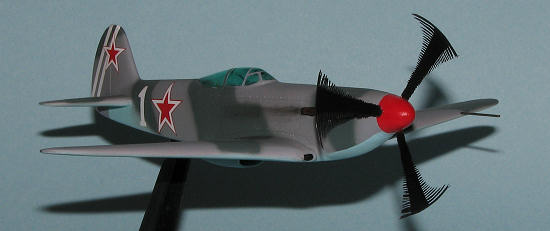
hole placement. I also trimmed back the Prop-blur as they were too long.
Initially I cut one at the top, but it just didn't look right so cut the next at
the bottom. That was more the ticket so I did the same with the other two. These
were then glued in the holes drilled in the spinner, being sure they were shown
rotating clockwise as looking from the front, as the Klimov engine rotated in
that direction. These were then painted matte black.
determine
hole placement. I also trimmed back the Prop-blur as they were too long.
Initially I cut one at the top, but it just didn't look right so cut the next at
the bottom. That was more the ticket so I did the same with the other two. These
were then glued in the holes drilled in the spinner, being sure they were shown
rotating clockwise as looking from the front, as the Klimov engine rotated in
that direction. These were then painted matte black.
The airframe was then given a coat of matte clear acrylic, using my time tested mixture of Future and Tamiya flat base. Then I took away the masking from the canopy and to my amazement, it looked just fine (aside from the usual area where the masking lifted slightly during painting). A bit of trimming was done to the attachment point on the base to keep the plane from setting 'nose down' and the model was attached using super glue. It proved to be nose heavy no matter which direction it faced on the base so I settled on one pose and glued some weight to the underside of the back of the base to make it more stable. The exhaust were painted with Vallejo's Tinny Tin as it looks like Burnt Iron and is easier to apply.
A section of stainless tubing was used for the pitot tube and I used some pastels for exhaust stains. That was it.
| CONCLUSIONS |
 OK,
I know that most of you would not waste your time on something like this so I
figured I'd do it for you. It isn't going to win awards, it isn't even a proper
scale, but it does look nice on the stand and I'm glad I took the time to build
it, despite all its faults. Besides, it aroused the cheap in me and for $5 (ok,
make that $12 as I had to buy the decals), it is a bargain.
OK,
I know that most of you would not waste your time on something like this so I
figured I'd do it for you. It isn't going to win awards, it isn't even a proper
scale, but it does look nice on the stand and I'm glad I took the time to build
it, despite all its faults. Besides, it aroused the cheap in me and for $5 (ok,
make that $12 as I had to buy the decals), it is a bargain.
| REFERENCES |
http://en.wikipedia.org
February 2009
Copyright ModelingMadness.com. All rights reserved.
Thank you to Testors,
UMM, and Prop-Blur for
providing their materials used in this article. If you would like your product reviewed fairly and quickly, please
contact the editor or see other details in the
Note to
Contributors.