|
KIT # |
1587 |
|
PRICE: |
$11.98 |
|
DECALS: |
Three aircraft |
|
REVIEWER: |
|
|
NOTES: |
|
BACKGROUND |
Please visit the preview for a look in the box and a historical background.
|
CONSTRUCTION |
As with most kits, this one starts by assembling the cockpit.
Basically, one glues together several flat pieces to make up the cockpit
structure. I did lots of test fitting with the fuselage halves to make sure that
the cockpit would fit properly when the glue had dried. The detailing in it is
rather odd with a very large seat and instrument panel. No sidewall detail is
provided. 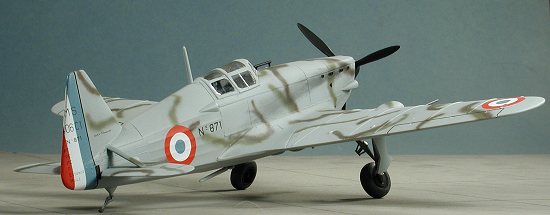 The 'rudder pedals' that are built into the floor portion look way
undersized. Basically, the kit is screaming for a decent interior as the one
provided has to be an approximation. Fortunately, the interior color of most
French planes of the day was a dark blue, so not much will be seen. I used an
Aeromaster Acrylic for this color.
The 'rudder pedals' that are built into the floor portion look way
undersized. Basically, the kit is screaming for a decent interior as the one
provided has to be an approximation. Fortunately, the interior color of most
French planes of the day was a dark blue, so not much will be seen. I used an
Aeromaster Acrylic for this color.
Meanwhile, I assembled the wings and the fuselage. I've heard that the shape of the wings is not correct and it may well be. However, the 406 is not well known outside of France so I don't think that most who will be seeing this model will spot that problem. The wing guns are molded in with the wing and they were soon broken off despite my attempts to keep them intact. The fuselage was glued together with minimal hassles and the cockpit was fit into it. The instructions point out that the instrument panel needs to be trimmed on the back side and if you don't do this, the interior won't fit properly. I used the brute force method and simply cut off large chunks with my cutters. It worked fine and didn't break anything. Fit was quite good.
 Now to the start of a real problem. That is wing fit. The
way that the wing is designed to attach to the fuselage is not the best that
I've seen. This is exacerbated by the fact that small portions of the 'fuselage'
are incorporated in the lower wing construct. If the fuselage happens to be a
bit wider than this section of the wing (which it is), then there will not be a
smooth join. It also doesn't help that the front section of the wing is too wide
and that the rear fuselage/wing join (which has a fabric ribbing), is poor. In
fact, the fit and fill problems are such that I fear many modelers would give up
on this kit at this point. However, your intrepid editor slogged on after
several daunting filler and filing sessions!
Now to the start of a real problem. That is wing fit. The
way that the wing is designed to attach to the fuselage is not the best that
I've seen. This is exacerbated by the fact that small portions of the 'fuselage'
are incorporated in the lower wing construct. If the fuselage happens to be a
bit wider than this section of the wing (which it is), then there will not be a
smooth join. It also doesn't help that the front section of the wing is too wide
and that the rear fuselage/wing join (which has a fabric ribbing), is poor. In
fact, the fit and fill problems are such that I fear many modelers would give up
on this kit at this point. However, your intrepid editor slogged on after
several daunting filler and filing sessions!
With the wing sorta
in place, the radiator was assembled as per the instructions. After everything
had dried, it came to me that one would be better off to have installed the
radiator core in the reverse, with the radiator detail to the front rather than
to the rear as the instructions would have you do it. The tail planes are a bit
thin looking, but glued in place just fine. Then came the tail plane braces.
Frankly, this was a real poser. They didn't seem to want to fit well.
 The
instructions are vague at best and the small 'bumps' on the rear fuselage where
they theoretically are to attach, are way too low and too far aft. In addition,
the engravings for the elevators are all messed up and the the tail planes have
a forward sweep.
The
instructions are vague at best and the small 'bumps' on the rear fuselage where
they theoretically are to attach, are way too low and too far aft. In addition,
the engravings for the elevators are all messed up and the the tail planes have
a forward sweep.
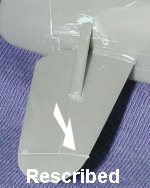
A real nice kettle of fish, as they say. Well, I decided to cut my losses and so removed the small bumps, remounted the braces farther forward, and then filled in and rescribed the elevators. Still had the forward sweep but this kit was lucky to still be on the bench and not in the trash.
Hoping that nothing else would go wrong, I moved on. The
next item was the canopy. The windscreen and rear section are a single piece
with the canopy itself as separate. Naturally, it didn't fit. This was because
the 'seat' was too tall and angular. A bit of trimming got the clear bit to fit.
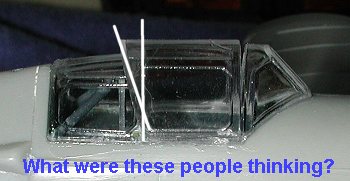 Then came the canopy. Now I'm not
sure how kits are engineered and designed in Korea, but it seems as if this one
had all the parts done by separate people who didn't talk to each other. The
canopy was in no way even close to the part that it had to fit. In addition to
being too large, it had an odd rear sweep that didn't match the rear of the
fuselage. I tried to sand it down to fit, but that was a lesson in total
futility. Not wanting to do any more work than needed, I eventually used a spare
P-36 vac canopy. I cut it to fit and then superglued it over the top of the
opening. Yes, none of the canopy frame lines matched, but when I masked the
clear bits, I cut the tape for the canopy section to somewhat match what was
already there on the aft section . Not pretty, but at this point, I didn't care
that much. BTW, I used Acrabond superglue (info in the
T-34C review) and it did not have any
problems with fogging. Only problem I had was when I smudged the right quarter
window when gluing it in place with Pro-Weld. Finally, I glued on the tail skid.
Then came the canopy. Now I'm not
sure how kits are engineered and designed in Korea, but it seems as if this one
had all the parts done by separate people who didn't talk to each other. The
canopy was in no way even close to the part that it had to fit. In addition to
being too large, it had an odd rear sweep that didn't match the rear of the
fuselage. I tried to sand it down to fit, but that was a lesson in total
futility. Not wanting to do any more work than needed, I eventually used a spare
P-36 vac canopy. I cut it to fit and then superglued it over the top of the
opening. Yes, none of the canopy frame lines matched, but when I masked the
clear bits, I cut the tape for the canopy section to somewhat match what was
already there on the aft section . Not pretty, but at this point, I didn't care
that much. BTW, I used Acrabond superglue (info in the
T-34C review) and it did not have any
problems with fogging. Only problem I had was when I smudged the right quarter
window when gluing it in place with Pro-Weld. Finally, I glued on the tail skid.
With that in place, it was time to consider some sort of paint scheme.
|
PAINT & DECALS |
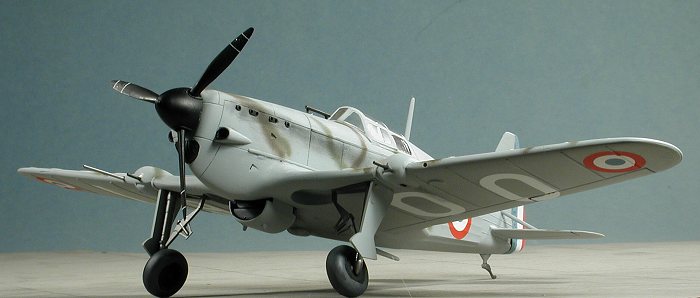
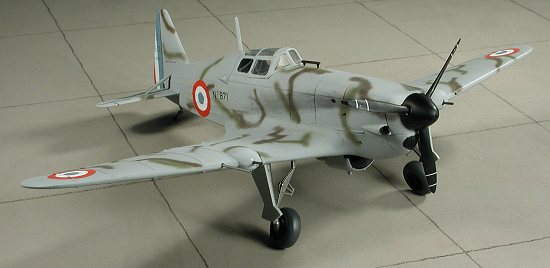 I recently reviewed Aeromaster 48-455
that had some interesting schemes for the 406. I'm a sucker for experimental
camouflage and chose a nearly overall light blue grey scheme from one of the
factory protection flights. Using up the last of my Aeromaster paint (sniff...)
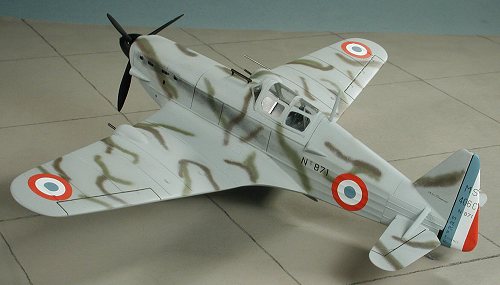
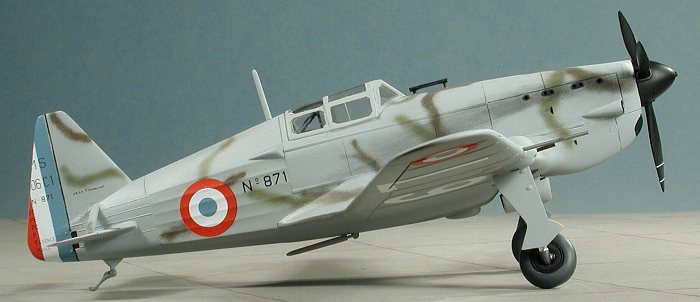
in this color, I sprayed the entire airframe with the Light Blue-Grey. later,
small streaks of Green and Brown were painted onto the upper surface of the
aircraft.
I recently reviewed Aeromaster 48-455
that had some interesting schemes for the 406. I'm a sucker for experimental
camouflage and chose a nearly overall light blue grey scheme from one of the
factory protection flights. Using up the last of my Aeromaster paint (sniff...)
in this color, I sprayed the entire airframe with the Light Blue-Grey. later,
small streaks of Green and Brown were painted onto the upper surface of the
aircraft.
When it was dry, the kit was returned to the bench and the landing gear struts
were glued in place. These were a simple butt join, but since it has a wide
base, the join was very good and solid. The kit wheels were a joke, so I spent
the $2 on a set of True Details resin wheels. Well these babies are weighted,
but they are done as if the wheel is vertical on the strut. The 406s wheels are
anything but vertical leaning over at a rather extreme angle. The only thing to
do was to sand off as much of the bulge as possible and then mount the wheels.
It isn't as pretty as if 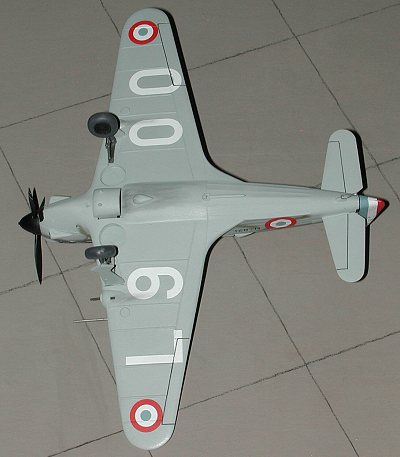 they were properly designed in the first place, but
better than the kit one.
they were properly designed in the first place, but
better than the kit one.
At this time, I sprayed on some clear acrylic gloss and when dry started to apply the decals. The decals are well done and didn't give any real problems. However, they were designed for the Classic Airframes kit. The rudder markings were WAY oversized so this leads me to believe that the Hobbycraft fin is too small or the CA one too large. The rest of the decals were not a problem. The under wing numbers actually fit well and I guess the wing is too broad as they should have intruded on the gear doors. Didn't come close.
|
FINAL ASSEMBLY |
This left not much to add. I glued the already painted gear doors on so that they looked somewhat proper. The machine guns that I broke off early in construction were replaced with some small tubing. I also couldn't see using the kit pitot tube as it was a scale foot thick! I used tubing for that as well. Really a waste of good tubing, but I generally do the best I can regardless of the quality of the kit. Then the exhaust ports were drilled out. I'd though of using the long sweeping exhaust stacks, but saw almost no pictures of planes using them. It would also have meant that I'd have to remove the small ones molded on the kit. NAH! The exhaust ports were drilled out just to have something to do. The radio masts were attached, the prop stuck in the hub and that then glued to the nose. The masking was removed, some exhaust stains added with pastels and I was done.
|
CONCLUSIONS |
It isn't often that I build a kit that I can't recommend in some way. This is one of those. First of all, it is very poorly engineered and the fit in some very important areas is horrendous. Secondly, the kit is obviously just a caricature of the MS.406. Parts are too large or too small. Unless you live in Togo, really want an MS.406 in 1/48, and can't get anything else, I'd stay away from this kit. The only reason this one didn't end up in the trash was that I'm not going to let $12.00 worth of plastic beat me!
December 2002
# 1252 in a series
|
REFERENCES |
Fighters, Volume 1, William Green, 1960
Copyright ModelingMadness.com. All rights reserved. No reproduction in part or in whole without express permission from the editor
If you would like your product reviewed fairly and fairly quickly, please contact the editor or see other details in the Note to Contributors.