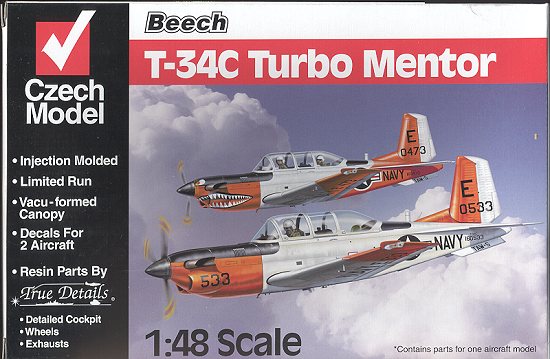
Czech Model 1/48 T-34C Mentor
| KIT # | 4809 |
| PRICE: | $29.95 SRP |
| DECALS: | Two aircraft |
| REVIEWER: | |
| NOTES: | Short run with resin parts and vac canopies. |
| BACKGROUND AND SOME PICTURES |
For a look in the box and some pictures of T-34Cs, please visit the preview. Here's one below as well.
| CONSTRUCTION |

First step with these kinds of kits is to remove all the bits from the resin blocks. This is 'old' technology resin so the parts have rather large blocks of material that must be laboriously removed. Take special care of the one for the cockpit as the floor is not very strong and may break under the stress of sawing. The exhaust are also parts that need care during removal. Once they were removed, the attachment points were cleaned up and the parts washed.
The first thing I did was to glue the nose wheel well into place. This wasn't that tough to do, but did show that the resin parts are not a perfect fit as some sanding was needed to get it in properly. Once that was done, I turned my attention to the interior. The interior bits were removed from either the resin blocks or sprue tree depending on the parts. The seats and control sticks were glued in place then the whole assembly was painted FS 36231, Dark Gull Grey. This was also applied to the inside of the fuselage halves. The instrument panels were painted flat black as were the anti-glare panels.
 While the interior bits were drying, the wing halves were glued together. No real problems for these parts at all and fit was good. The wheel wells are not boxed in, but it won't really detract from the kit once it is done as little can be seen. I also crammed weight into the nose of the plane in hopes I'd have enough there to prevent tail sitting. The T-34 is a rather tail heavy aircraft. Back at the interior, those few details on the side walls were painted and after some careful fudging, the interior was glued in place. There is no real positive locator for the interior so you really do have to play it by ear when installing it.
With the interior in place, the forward instrument panel was glued in and the fuselage halves were cemented together. I did it in stages to make sure that the fit was good and clamped each stage. Thanks to using a 'hot' glue and the relatively soft plastic, the fuselage was firmly glued solid. I did need some filler, especially on the bottom, but nothing out of the ordinary. Then the wings were joined to the fuselage. It is a butt join, but again, hot glue and soft plastic makes for a good combination. Be very careful to get things properly aligned. With the wings in place, the fin and horizontal stabilizers were glued on. I had to be very careful when trimming the mating surfaces to get the small stubs on the stabs to the proper size. Try to get this right the first time and not use any filler on the stabs. These parts are quite obviously not faired in when one looks at photos of the plane. In fact, it is almost as if there is a rubber seal between them and the fuselage.
 With a complete basic airframe, it was time to install the forward intake scoops. These fit fairly well, but be sure to test fit them often for a good fit. Prior to installation, I made sure that the seam between the intake and the rest of the scoop was properly filled and sanded smooth on the inside as it will be easy to see. There are guide engravings to help get it properly done.
Next step was the canopy. There are two and they are very clear. So much so that I decided not to open them. Problem is that either the back of the canopy is too shallow, or the rear fuselage is too tall as it doesn't fit well back there. I got out the sandpaper and started grinding away on it until the fit was much better. You can always take the easy way out and display the plane with the canopies open. At this time, I also installed the anti-glare panels. These do not fit well. The forward one seems a bit small and the aft one a bit large. The aft one also interferes with the forward seat. As a result, the aft instrument panel seems to sit too deep. With all the interior bits in place, I put tape over it to keep paint out.
The final bits before hitting the paint shop were the rear stability strakes and the wing tip fences. During all this, I also assembled the prop. One thing you need to be aware of is that when the plane is at rest on the ramp, the prop is feathered. The instructions don't point this out. You also should not install the small VOR antennas on the fin. In-service planes do not use this type of antenna for this. None of my photos of USN T-34Cs show this feature.
| PAINT |
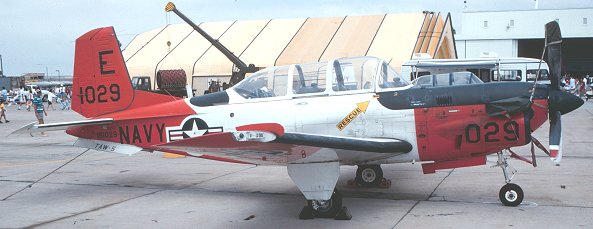
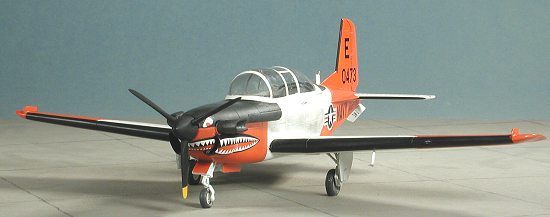
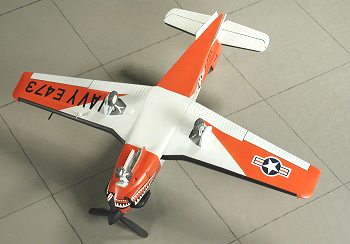
 First application of paint is a no-brainer. White. I used Floquil Reefer white for this portion of the painting. It not only covers very well, but also acts as a primer so that I can spot any glitches. Once again looking through my numerous T-34C photos, I could not find any that were painted just exactly like the two shown in the kit instructions. Most were done similar to the shark-mouthed one with the large areas of International Orange done in the diagonal motif. However, all had a fully colored fin and rudder. The tailplanes were often left white and sometimes, the upper strake and a small area above and below it were white. On other thing is that there are areas of black on the leading edges
 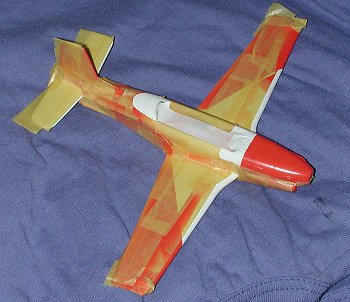 of the wings, tail surfaces and intakes that are not shown in the instructions. If you look at the photo above, you'll see what I'm talking about. This makes for a LOT of masking.
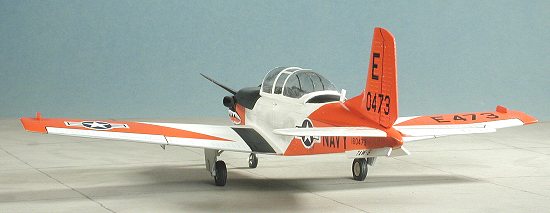
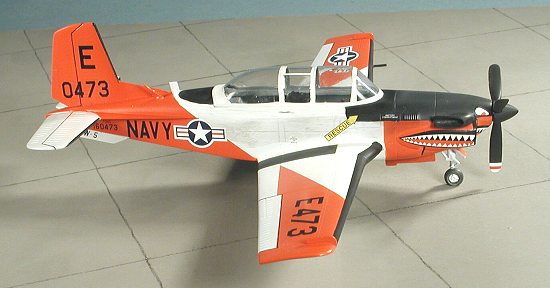
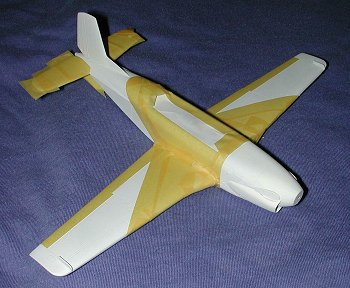
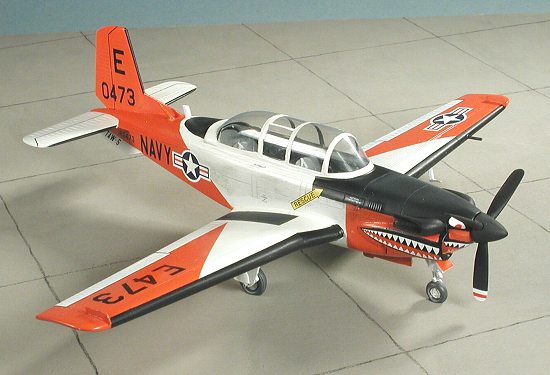
Once the white was sprayed on, the plane was masked in preparation for the International Orange (see the image to the left). As luck would have it, I didn't have any. I also couldn't find any in local stores so had to resort to mixing my own. I mixed Humbrol orange and some Testors red (in the small bottles), until I got the color I liked. It was a bit more red than what is shown on the box top. Once that was dry, it was time for probably the most difficult part of painting this model; the black parts. The kit instructions show only the anti-glare 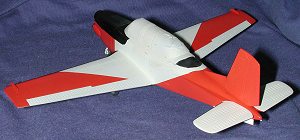 panels and wing walk areas. In fact, as you can see from the photo at the head of the article, there are a few more parts to do. This includes the leading edges of all the flight surfaces and the engine intakes. This meant more laborious masking (see image to the right). I didn't do the wing walk areas as I felt these might be better done with black stripe decals than paint. As usual, two hours of masking was followed by two minutes of painting. The results can be seen to the left.
| BACK TO THE BENCH |
Now that the majority of the painting was done, the kit was returned to the bench, this time to have some more parts glued in place. I concentrated on the landing gear so that it could stand on its own. From what I've been able to see, these are the poorest molded parts on the kit. The seam lines are large and even when finished don't look very clean. The alleged attachment points in the wings and nose gear are not properly aligned so I used copious amounts of glue to ensure a good, snug attachment. Once dry, the construct was very very sturdy.
 When it comes to the wheels, the main ones need to be drilled out a bit more than they are to fit onto the axles. The nose gear has no axle. I made one from a short section of paper clip and then drilled out the nose strut and the wheel to allow it to fit. This really worked quite well and only took a few minutes to do. Then the wheels were placed on the axles and super glued in place. It was at this time that I noticed that I hadn't put enough weight in the nose. You really have to pack it as full as you can. Fortunately, the canopy had not yet been attached so I was able to stuff more weight into the nose section, though some of the bits do rattle around a little! I also looked around for a resin nitrogen cart so I could inflate the flat tires that are provided. I do wish that Squadron and others would either provide these with flat bottoms or perfectly round and let us file the bottoms of them. No pilot would ever fly a plane with the bottom of the tires as bulged as they are!
 Then it was time to attach the canopy. As mentioned before, it didn't fit well so I attached what I could with superglue. The sides were then built up again using superglue and accelerator. When that was smoothed out and sanded, any holes were filled with regular putty. This was then sanded once again and any lost paint was restored. This was another of those operations that can be told in a few sentences, but takes hours to do. Just want to say 'hi' to Drew on the off chance he has actually read this review.
I then did more masking and repainted the area that was messed up with the sanding. During this operation, I cut the handles off the sprue and they immediately broke in half during the process. No choice but to make some out of bent wire. Then the area was again, repainted. When dry, the tape was removed and I was blessed with several shades of white where the touch-up was done. Throwing up my hands, I continued with construction.
| DECALS |
 Initially, I wanted to reproduce the aircraft in the photo at the head of the page. Unfortunately, all of the letter/number decals I had were the wrong size and font. I then decided to do the shark mouth version. The decals went on quite well and the Microsol was sufficient to get most of them to stick. The white is quite opaque and bleed-through was not a problem. I did have to put a bit of Sovaset on the shark mouth as they needed some help to conform to the intakes. At this time, I had my disaster. Some of the setting solution leaked under my thumb where I was holding the kit by the aft fuselage. Under my thumb was a fuselage insignia. Needless to say, the insignia was horribly smudged and managed to smear blue and white decal ink all over the area around the decal. AAUUUGGGHHHH!
No way to replace the decal as white surround US Insignia are not a common item. Besides, time was running out to get the kit finished in time. I carefully painted the smudged white and put on another insignia that was nearly the same size (it seems to me that all of the markings on this kit are a bit oversized). When all was dry, the setting solution was wiped off it and more bits were glued in place.
| FINAL BITS |
Now it was time to add all that stuff that is easily knocked off during handling. Starting at the bottom, I glued on the gear oleo scissors. These are too big and I'd recommend finding a replacement for them when you do your kit. Then the gear doors were butt glued in place. An underwing pitot tube had the mounting hole drilled into the wing and installed. Same with a leading edge pitot tube (it's a trainer so having one for each seat is not uncommon).
 On the rear aft, there are two antennas, a UHF blade and VHF whip antenna. The UHF antenna is too fat and the VHF antenna really should be replaced with wire, but since this is an out of the box kit, I don't do modifications unless I absolutely have to. The Exhaust were then glued on. The starboard one doesn't fit properly and were I not pressed for time, I'd have done some carving to get it properly situated. I then applied some black stripe decal for the wing walk areas, drew in the control surface hinge lines and then added some pastels to soot up the sides a bit. Then I took the kit to have another coat of clear gloss and some matte (where needed). Final steps were to remove the masking (no fogging!!!) and glue on the prop.
A couple of additional notes. I used a very thin superglue called Acrabond. It is super pure superglue and as you can see, didn't fog up the canopy. It is being marketed by Dave Reed, who can be contacted about it at dave37167@hotmail.com . It is the best superglue I've ever used and comes with a bottle of accelerator. Supposedly, it won't bond until the accelerator is applied, but I found that not to be the case. Anyway, it is great and if I haven't messed up Dave's e-mail, you should contact him about it (assuming he still sells it).
Secondly, you'll notice that only one prop blade has warning stripes on it. White, red, white on one side and yellow on the other. I've seen and photographed dozens of T-34Cs over the years and this seems to be the norm. As a bit of an additional notation, I'd also either lengthen/replace the nose gear or shorten the main gear as this plane seems to take on a bit of a tail-low stance when on the ground and unmanned. Of course, this will only mean that you'll have to install even more nose weight!
| CONCLUSIONS |
It really is an excellent kit despite some of the situations mentioned in the review. I do hope that it spawns a decal sheet or two as the T-34C has been done in many interesting schemes. I also hope that someone does some extra white surround insignia so that I can eventually fix my screw-up! Recommended for those who want a very nice short run kit. Judging by its quick disappearance from the shelves, I think this kit will do well.
OK, I know you all want a good look at the screwed up port fuselage decal so here it is!

December 2002
# 1250 in a series
Copyright ModelingMadness.com. All rights reserved.
If you would like your product reviewed fairly and fairly quickly, please
contact the editor or see other details in the