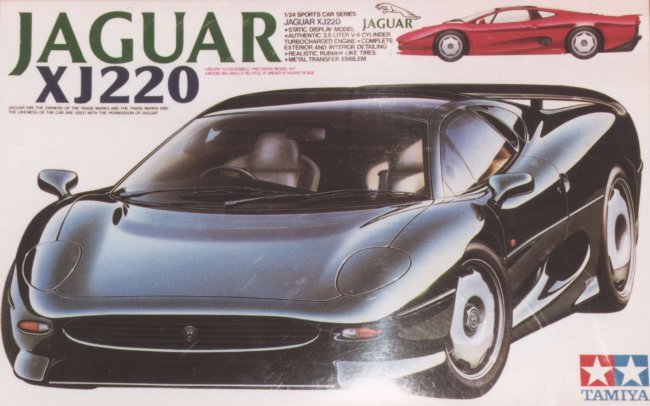
Tamiya 1/24 Jaguar XJ 220
|
KIT # |
24129 |
|
PRICE: |
$40.00 (AUD) |
|
DECALS: |
2 sets of plates and badges |
|
REVIEW : |
|
|
NOTES: |
|
|
HISTORY |
The Jaguar car company is synonymous with some of the world’s greatest car companies such as Ferrari, Bugatti, Mercedes, BMW, Porsche, Ford, Renault, Peugeot to name but a few. The list is far longer than this reviewer has time to spend typing. For those of you that think I have slighted your favourite car manufacturer please do not despair, I probably have and am just not admitting it right now! In Australia if you drive either a Ford or a Holden (GM for all others) it can amount to all out war, especially at the track when these two local marques go head to head in the local V8 Supercar Championships.
But I digress. The Jaguar car company began producing machines in the area of England known as Coventry – not much more can be said! No, again only kidding. This company produced quality cars that were also bred for the racetrack. Their lines were sleek and very sensuous and almost immediately generated a strong following for this British car manufacturer.
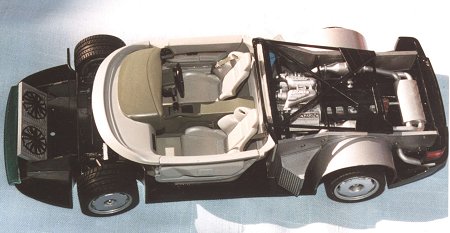
The XJ220, the first British Supercar, went into production in the early nineties following the release of a concept car at the 1988 Birmingham Motor Show. The XJ220 was to be limited to a production run of 350 cars, most of which were pre-sold. Featuring two doors, a mid-engine configuration it is powered by a 3.5 litre, DOHC, twin turbo-charged V-6, which had been developed for the race going Jaguar XJR-11 sports car. The engine was subsequently modified for street use, being "limited" to producing 542 horsepower at 7000 RPM with the ability to exceed 342 kph. This, in the vernacular of Bill Cosby, can be done "in any side street"!
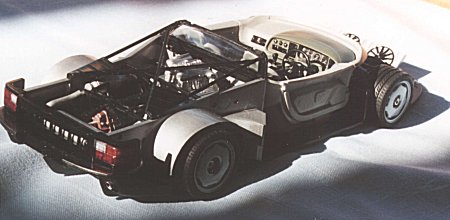
The body was dramatically styled to have excellent aerodynamics and yet retain the distinctive Jaguar elegance.
The suspension was the result of racetrack development presented as four-wheel independent suspension with unequal wishbones, inboard concentric coil springs and Bilstein shock absorbers. This combined to give the car unparalleled road holding at all speeds – something that this race-bred machine needs.
Typical of the racecars produced by this famous company the XJ220 has a fully cowled underpan that covers the entire length of the body. The rear of the car has a diffuser that allows the optimum ground effect to be attained.
The interior of this cat is luxurious in the manner of all Jaguars aimed at giving the driver and passenger the best in ergonomic efficiency. Seats and trim are in stylish leather and the analogue instrumentation combine to allow the driver to concentrate on the primary task of driving.
This is one of those cars that everyone turns to ogle as it glides by the Piazza or purrs along on the autobahn at delirious and deliciously high speed! I want one! Now where is that robber’s mask?
|
THE KIT |
 |
 |
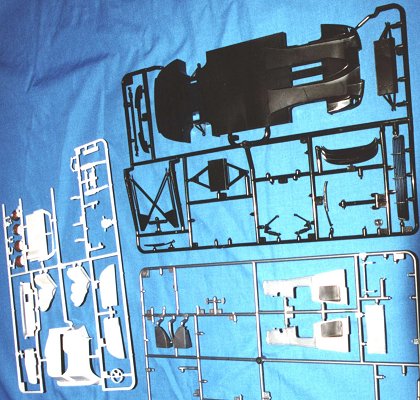
The kit is presented with a number of different coloured sprues as seems typical of Tamiya’s line of cars and bikes. There are two grey sprues, one black and one clear. The tyres are rubber and are presented as a rear and front set, remember that this car is race-bred and as such has race tyres! The body of the car is presented as a single molding with the two door panels presented on one of the other sprues.
There is no flash and no sink marks visible on the moldings although a seam is present on the wheel guards, both front and rear. They are quite small and easily removed with some fine sand paper.
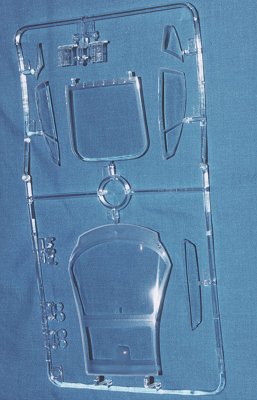
A word of caution: the clear parts are brittle and care should be exercised when trying to mask and burnish said mask to prevent paint bleeding. I successfully cracked mine and had to wait an age to get the parts from our agent. This would not have been the case had I taken my normal path of direct contact with the manufacturer. Something I will try to remember when next I stuff up!
|
CONSTRUCTION |
The Engine
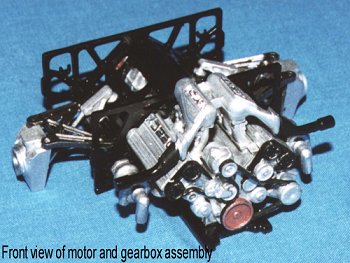 Normally I would be constructing the cockpit here, but horses
for courses and as this is a car we start with the engine. In this case a very
finely detailed 3.5 litre, twin turbo charged V6 piece of metal that hurtles
this beast at a fair old clip! The construction is very straightforward with the
standard colours called out in the instructions. The only addition made to the
kit was the inclusion of Bare Metal Foil for the "XJ220" logos
on the heads and air filter boxes.
Normally I would be constructing the cockpit here, but horses
for courses and as this is a car we start with the engine. In this case a very
finely detailed 3.5 litre, twin turbo charged V6 piece of metal that hurtles
this beast at a fair old clip! The construction is very straightforward with the
standard colours called out in the instructions. The only addition made to the
kit was the inclusion of Bare Metal Foil for the "XJ220" logos
on the heads and air filter boxes.
Tamiya invariably mix their existing colours to create the
necessary ones found on such things as gearboxes and transfer cases and, as I
have no idea what the true colour would be, I dutifully followed the instruction
sheet. The engine assembly was then mated to drive shafts and connected to sub
frame 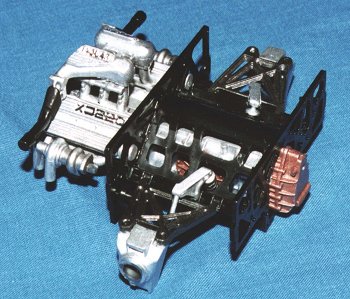 assemblies and put aside whilst other things were tackled.
Once the suspension and inner walls had been attached to the motor the completed assembly was attached to the subframe pan, which has by now been painted with Tamiya X-18, Semigloss black. The back under section of the chassis is painted with Tamiya X-10, Gun Metal and the front apron is painted with the same colour as the body, in this case it is Boyd enamel 52703, Chezoom Teal.
The Interior
The interior is comprised of the seats, instrument panel and steering wheel, door trim and the various pedals, gear stick (or shift for our American readers) and the ever-useful hand brake, which is still considered to be an emergency brake and NOT parking brake. Hence it is hand operated and may be used to get the car sideways in the event of an unforeseen danger, or just a way of getting round the corner really fast in a rally! This is colloquially known as "throwing out the hand brake", which locks up the rear wheels (assuming it operates on the rear) and causes the back to slide out and helps the car get out of shape and negotiate the curve.
 The basic interior colour is grey with various shades being
used as per the instructions. The only break from the Tamiya range was to
use the Gunze Sangyo RLM 02, Grey (old aircraft kit building habits die
hard – imagine using German colours in a very British motor car? "I say
Old Chap, that’s just not cricket you know!"). Again Semigloss black was
used for the console, instrument panel, foot pedals and the hand brake handle.
The completed interior was then attached to the sub frame and the rear firewall
was attached to the back of the interior tub.
The basic interior colour is grey with various shades being
used as per the instructions. The only break from the Tamiya range was to
use the Gunze Sangyo RLM 02, Grey (old aircraft kit building habits die
hard – imagine using German colours in a very British motor car? "I say
Old Chap, that’s just not cricket you know!"). Again Semigloss black was
used for the console, instrument panel, foot pedals and the hand brake handle.
The completed interior was then attached to the sub frame and the rear firewall
was attached to the back of the interior tub.
I decided to add the seat belts, as the car looks odd without
them, and used some photo etched belt buckles from a Hasegawa kit. The
belts were made from some thin plastic sheet and attached at
 the side and rear
of both seats. They were passed through the appropriate holes in the shoulders
of the seats, although my references on this car do not extend to interior
shots, unfortunately. The belts were painted with RLM02, Grey.
The final assembly of the chassis is attaching the wheels using the metal axles
supplied with the kit. Each hub nut is given a little Jaguar head decal.
the side and rear
of both seats. They were passed through the appropriate holes in the shoulders
of the seats, although my references on this car do not extend to interior
shots, unfortunately. The belts were painted with RLM02, Grey.
The final assembly of the chassis is attaching the wheels using the metal axles
supplied with the kit. Each hub nut is given a little Jaguar head decal.
The Body
Now I know most of you would think that this could be about Elle MacPherson, The Body, but as much as she has a beautiful form this is about another sensuous shape. If you don’t know about Elle then you need to get out more!
|
PAINT |
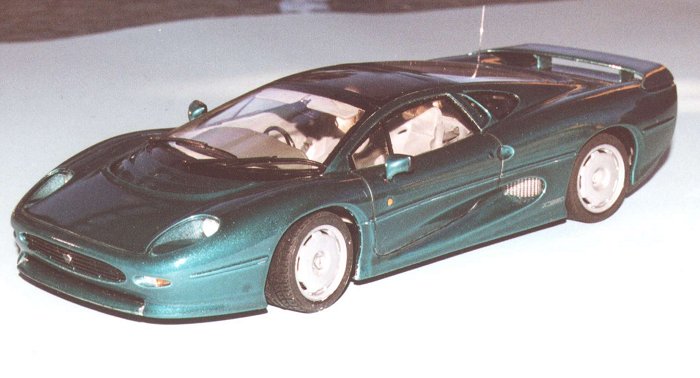
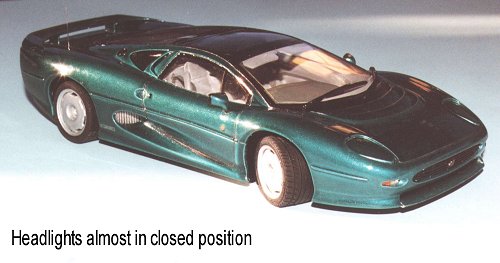
When Jaguar made this car they left the colour selection up to the customer, as it is a rather exclusive piece of machinery. This little extravagance has led to many varied colours being used on the car. I choose to paint mine with a metallic paint from the Boyd brand, 52703 Chezoom Teal. It is enamel that does take a while to dry but the effect is well worth the wait. I had pre painted the body with Tamiya TS17, Gloss Aluminium to help bring out the metallic colour of the final coat. he body colour is painted on the headlight covers, the mirror pods, the front apron as well as the lower door parts.
|
MORE CONSTRUCTION |
The major bit of fiddling is attaching the headlights. These actually pop down by means of a little bar arrangement with a rod extending down through the front floor pan. The idea is that the headlights can be posed open, by pushing down on the headlight covers, or closed, by pushing the rod back up into the car body. Care needs to be taken to ensure the smooth operation of this mechanism. Mine is not overly cooperative but does work.
 All other separate bits are now attached with the clear
pieces being painted with matt and Semigloss black around the borders.
All other separate bits are now attached with the clear
pieces being painted with matt and Semigloss black around the borders.
When the new parts arrived I had found an alternative to the Tamiya acrylic Smoke in the form of Gunze Sangyo spray Smoke. I have used this on a few models now and with a very light application it is possible to build up a very convincing scaled window tint.
Masking the windows is a simple task preferring to use Tamiya masking tape. The only problem I seem to find with this method is the paint tends to bleed under the tape no matter how well I rub it onto the surface. A suggested way to prevent this is to first spray the surface, including the masking tape, with clear gloss. You then spray the desired colour for the frame, or border in this case and carefully remove the masking tape. I have yet to use this method so cannot offer advice as to its merits. If it were to be tried on an aircraft it would be best to complete the final coat of clear to obtain the desired finish prior to removing the masking tape. Once the body assembly had been completed the rear spoiler and font and rear grilles were attached and the body was eased over the chassis and glued along the edges and front apron.
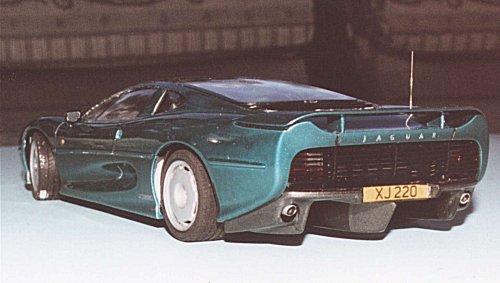 The decals for this model are basic with two number plate
options and two colours of badges for the side of the car. There are quite a few
Jaguar symbols and a metal "decal" that is positioned on the rear of
the vehicle under the spoiler. This was a tricky attachment as the glue on my
example had long since seen its use by date. I used fast setting superglue
sparingly to attach each letter.
The decals for this model are basic with two number plate
options and two colours of badges for the side of the car. There are quite a few
Jaguar symbols and a metal "decal" that is positioned on the rear of
the vehicle under the spoiler. This was a tricky attachment as the glue on my
example had long since seen its use by date. I used fast setting superglue
sparingly to attach each letter.
The final bits were ready for attachment and some last minute painting to complete the kit. The mirrors are very hard to get to sit correctly and, although I didn’t do this, it would be easier to drill a small hole in the base of each and a corresponding hole in the bodywork and pin the mirror to the door. I used Bare Metal Foil for each of the mirrored surfaces. The aerial is a thin stiff wire and was simply inserted in a hole drilled into the antenna base, attached with superglue.
|
CONCLUSIONS |
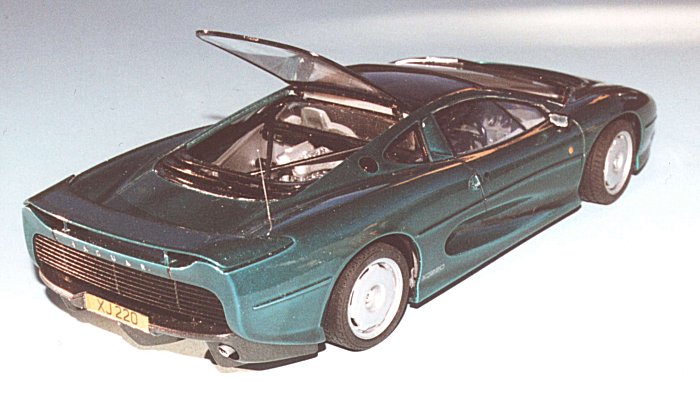
I must admit that I like to build the occasional model car and prefer the 1/24 scale, although I have had a go at the 1/12 and 1/18 kits around. Tamiya do an excellent kit and my only complaint with the latest set of 1/24-scale kits is that they do not accurately represent the engines. It seems to be the trend to simply depict the bottom half of a motor, which for an amateur mechanic is simply no fun! It’s not always the case but I do find these "engineless" kits unappealing. I have a couple of Hasegawa kits that go to the nth degree with the engines and these are a much more appealing kit. The model simply looks that much better as a display with the hood up (bonnet in UK parlance) and the motor visible.
On the whole this kit is very detailed and builds into a great kit of a classic car manufacturer who likes to explore the envelope of technology. The kit is hard enough to satisfy the anal retentive and yet easy enough to be a simple build for all grades of modeller. I really enjoyed putting it together.
|
REFERENCES |
Jaguar - Best of British Video: Synchro Sports TV
Other assorted magazines and photographs
Copyright ModelingMadness.com
grenjag.htmIf you would like your product reviewed fairly and fairly quickly, please contact the editor or see other details in the Note to Contributors.
Back to Reviews Page 2019