Tamiya 120mm Erwin Rommel
|
KIT # |
36305 |
|
PRICE: |
$14.00 |
|
DECALS: |
none |
|
REVIEWER: |
Rick Brownlee |
|
NOTES: |
Injected styrene kit |
|
HISTORY |
When Scott
and I met for the first time at the KC-Con contest in Overland Park (a Kansas City suburb) on 23 March of this year, we had a good exchange about painting figures. Susan Powers, another entrant and fine figure painter from New Baden, Illinois area was also talking with us at the time. It was there that I volunteered to write a review of my just completed figure of the famous Feldmarschall for MM ‹ I had the figure entered in the KC-Con competition that day. So here I am with the review, trying to keep my promise. My word is my bond, you might say.Well, I feel that Rommel is very well known to readers of MM so I will not comment further. For the first time Military Enthusiast, I suggest the Internet as there must be many volumes about and photos of the WWII German hero ‹ who's life came to a tragic end!
|
THE KIT |
|
CONSTRUCTION |
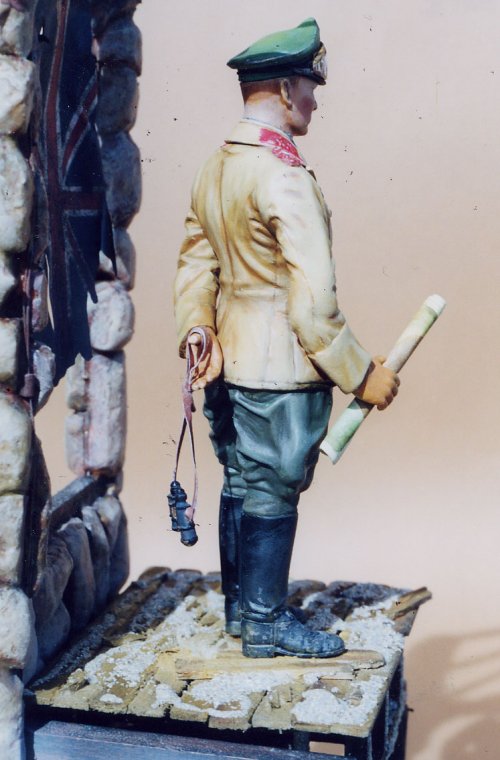
As with most standing plastic figures in this scale the construction part is simple and obvious as to what to do. I did reposition his left arm, cutting it at the elbow so it would extend around his back to hold the strap (of the binoculars) wrapped around his thumb. I thought that would be a more candid pose and something different from the other Tamiya 1/16th Rommel figures I'd seen in competitions. In my view, the aspect of static poses like this that brings them to life, is in the painting of the figure ‹ and perhaps, if you're wanting to be a little creative ‹ the setting or base that you design for the figure to stand on.
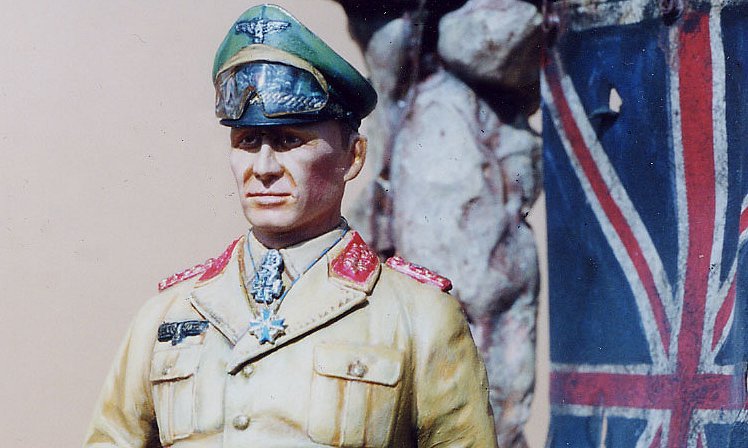
I initially finished with the tube acrylics base coats and had just started putting on the shadow details and highlights (such as in the folds of his uniform jacket) using tube oil paints applied with a double zero brush and a #3 brush. In this picture the shadows in the folds are too dark. Later I went' back into the folds of the jacket with a slightly lighter shade of tube oil paints.
Although, I think using an airbrush to get a super smooth and uniform surface with large scale figures is a good plan, I only applied the acrylics and oil paints with artist's paint brushes on this figure. I will say more about brushes later.
I presume those of you who are not familiar with this figure ‹ released some time ago ‹ will, however have probably seen the great full page Tamiya ad that appeared recently advertising the Tamiya paint system with the headline, "We won't wear anything except Tamiya." The figure shown in that advertisement is the Rommel figure I am reviewing here.
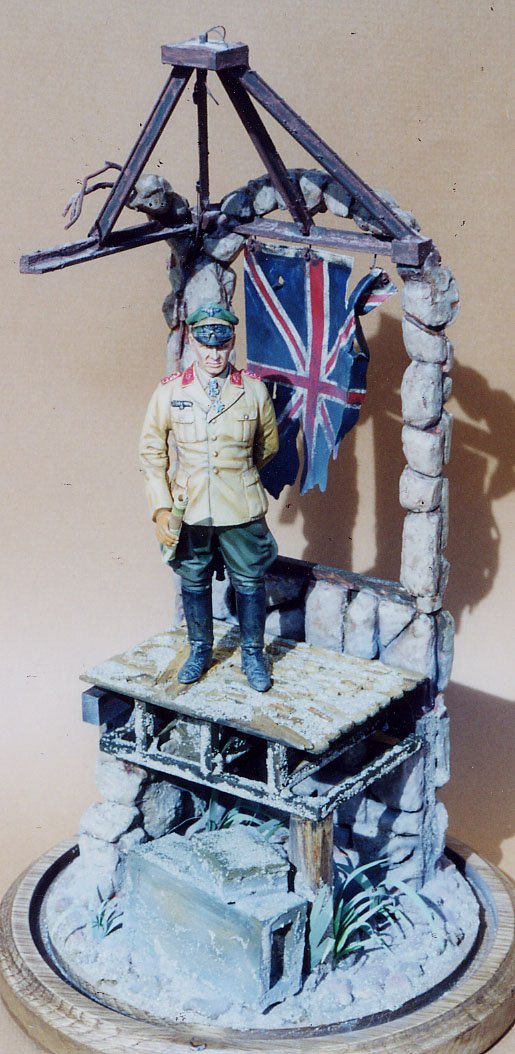
To avoid the problem of dust, I wanted to buy a glass dome and circular base to cover the figure when complete. Ha, the domes were too short for 120mm. The next size up was approximately 11 and 1/2 inches tall. Too tall for Erwin-baby . . . .>
Wait a min, says I . . . . . I'm always saying that on a contest table that height attracts attention. Light bulb time! I thought I could design something that would give Rommel a reason to be up on some kind of structure or terrain feature that would be tall enough to look right in regards to composition, and still not create a scene that would put it into the diorama category at a contest. Locally, our contests have no figure diorama category. So it was either the concrete walls of Normandy or the sands of North Africa. I chose the later. I picked an idea for a portion of a heavily damaged masonry building. Bass wood was used for the wooden parts. The masonry walls were individual pieces of Styrofoam shaped to size with an industrial razor blade and then dipped in Durham' Water Putty. The ground cover was a combination of white flour, brown earth I dug up outside and white glue. The smaller pebbles came from the children's swing area in the park next door.
 You
can also see that I'd worked on smoothing out the various
tones of brown in the highlight and shadow areas ‹ with the smaller paint
brushes ‹ in his cap, uniform jacket and pants.
You
can also see that I'd worked on smoothing out the various
tones of brown in the highlight and shadow areas ‹ with the smaller paint
brushes ‹ in his cap, uniform jacket and pants.
I think of myself as a novice figure painter. But like Scott, I also really enjoy doing them between aircraft model projects. To me they are a lot easier than all that sanding and filling of seams with aircraft models. But, I have a long way to go to become a good figure painter, I accept the fact that I may not accomplish this goal. But hey, excuse the repeating parrot! These figures are so much fun! You dig?
At the IPMS Nationals I have seen the figure painter's work and you can really tell the difference. No brush strokes show at all. All tones are so even and applied so smoothly. For me, this is not easy to do. It will take me a long time and many more figures to start getting better ‹ hopefully. But painting figures is just so much fun; especially the creative side of it. The things you add to the base or add to the figure to express your creative side; what you dreamed up to make it even more fun. I feel that part of that was the building in ruin Rommel is mounted upon.
Part II will show the finished figure on the finished base. Pictures will show that I added a burned and tattered British Union Jack hanging from the arch behind Rommel for added color ‹ to compliment the red in his rank emblems and to give added symbolism without creating a scene/diorama. I will also explain how the flag was created.
In addition, you will learn more about painting with tube acrylics and with tube oil paints. We'll go over the advantage of using pure red sable brushes that hold their point (for the tiny details like eyeballs) and make painting in general (and I'm sure that pun was intended, Ed) much easier.