Monogram 1/48 C-47 Skytrain
| KIT #: | 5603 |
| PRICE: | $30.00 |
| DECALS: | Three one option |
| REVIEWER: | Torben Plesberg |
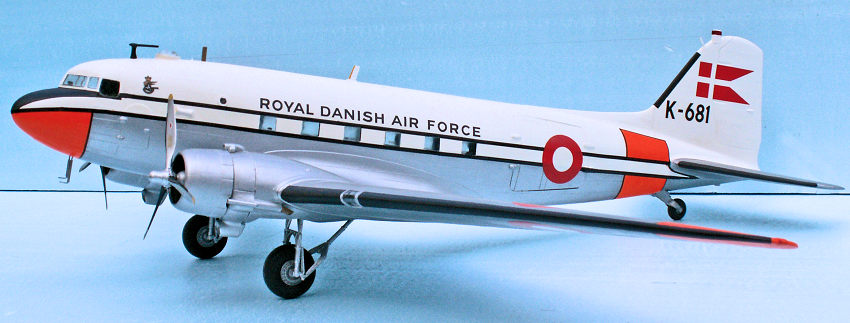
| NOTES: | Flyvevåbnet (RDAF) K-681, VIP color scheme, Stoppel Decals. |
| HISTORY |
For a general C-47 history see here. For a history of C-47 in service with Flyvevåbnet, the Royal Danish Air Force, see here. For a bibliography of K-681, see here.
| THE KIT |
 The kit
Comes in a rather large box with a picture of a C-47 during operation
“overlord”, June 1944. The instructions is a booklet of 12 pages, roughly A4
sized. Page one contains general advice for the assembly in six languages and a
color guide with a letter (A-J) for each color. Pages two to 11 show in 30 steps
with illustrative sketches how to assemble the model. Pages eleven and twelve
show how to paint and decal the finished model. There are three options.
The kit
Comes in a rather large box with a picture of a C-47 during operation
“overlord”, June 1944. The instructions is a booklet of 12 pages, roughly A4
sized. Page one contains general advice for the assembly in six languages and a
color guide with a letter (A-J) for each color. Pages two to 11 show in 30 steps
with illustrative sketches how to assemble the model. Pages eleven and twelve
show how to paint and decal the finished model. There are three options.
The kit consists of four large sprues in a very dark olive drab styrene and a single smaller sprue with the clear parts. The airframe parts are with fine raised panel lines and no rivets. Most of the parts fit well together, an important exception is the fit of the assembled wing to the fuselage. The wheels are movable and the tail wheel can furthermore turn 360 degrees in its base. To avoid unexpected taxiing on the shelf, it might be a good idea to sand the tires flat against the ground or simply glue the wheels in place. The quality of the cabin windows is poor. They need to be filed down to get the same thickness overall. However, the windows have the correct size, which is not the case with some 1/72 kits. The canopy is OK, but almost impossible to place in the assembled fuselage, step 29. It is a good idea to cut the side windows off the canopy and glue these in place before the assembly of the fuselage, step 9.
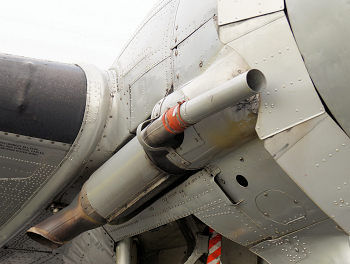
The
exhausts are poor and probably not correct, compared to my photos of the actual
K- 682. The K-681 is almost identical to the K-682, and the exhausts are not an
exception. The carburetor intakes are optional, and the smallest of the three
options is the correct one for the K-681. The kit should offer an option more
for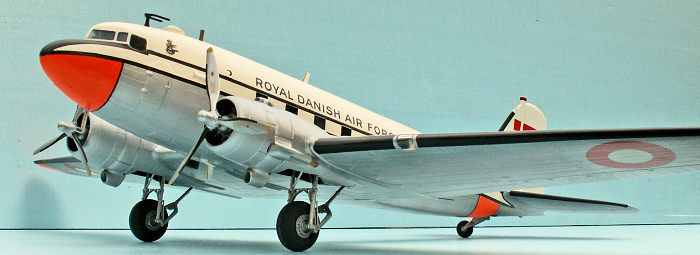 the
propellers, the thick ones with paddle blades.
the
propellers, the thick ones with paddle blades.
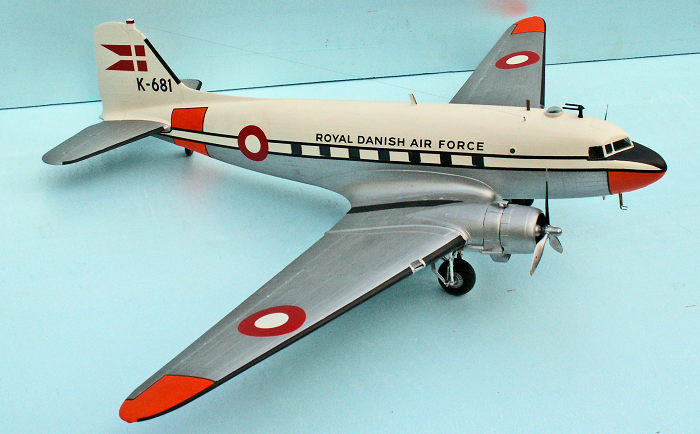
The overall shape of the assembled model is very accurate, and it looks very much like a C-47. The dimensions are correct and the scale definitely 1/48. However, the dihedral of the wing is too small. The difference in height between the central wing and the wing tips should be 35 mm in each side, the factual distance is close to 25 mm and this is a flaw of the kit.
The decals are first class in the printing, in register and with the correct colors and probably better than the Danish markings of the Stoppel decal sheet. However, when the decals are soaked in water, and they become loose, some white stuff adheres to the decals and spreads in the water. This is the glue between the paper and the carrier film, and has to be removed completely, before the decal is applied to the model. Otherwise, this glue may be visible on the paint of the model. This means that it takes quite a long time to apply the original decals of Monogram. The Stoppel decals do not have this problem.
| CONSTRUCTION |
The
construction is straightforward following the instructions. The interior is well
detailed. However, when the model is finished you can’t see much of your effort.
Painting is only necessary inside the cockpit, unless you choose a model with
opened cargo doors for a diorama. The wing spar with the landing lights in each
end is responsible for the fake dihedral. Airfix repeats this feature in the new
tool Dakota 1/72 – by
 courtesy of
Monogram? It might be possible to modify the wing spar – part no 50 – to get the
correct dihedral. However, I did not take the trouble to find a way to do it.
courtesy of
Monogram? It might be possible to modify the wing spar – part no 50 – to get the
correct dihedral. However, I did not take the trouble to find a way to do it.
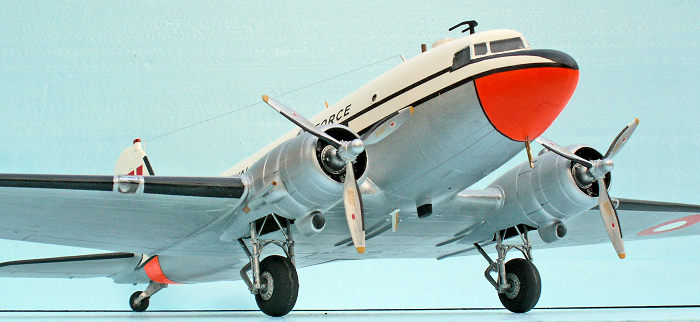
The two engine parts no 32 have three fastening pins for the nacelles. One of these does not fit with the three holes in the nacelle fronts, part no 92, and it is necessary to drill out two of the holes for a larger gauge to make a perfect assembly. Such an error should not be seen in an otherwise well engineered kit. Be sure that the propeller shaft (part no 49) can easily get into the center hole of the propeller. I drilled out the hole with a 0.1 mm larger gauge drill just to be sure. If you must force the propeller in place on the shaft, there is a risk of damaging the propeller. If the holes have the correct gauge, no glue is necessary.
The
assembled wing is a huge unit with a bad fit to the assembled fuselage (step
22). On the upper side of the wing there is a 2 mm gap in the joints. The
easiest way of dealing with these gaps is using some 2 mm plastic strips to
close the gaps and some filler to make a smooth finish. Some of the details of
the wing may be more or less damaged during this procedure, however, this flaw
will not appear too evident, as the black walk
 way
will cover this area. On the underside, there is a one mm gap between the wing
unit and the fuselage. This gap can be fixed with filler alone.
way
will cover this area. On the underside, there is a one mm gap between the wing
unit and the fuselage. This gap can be fixed with filler alone.
There are three options for carburetor intakes, and the smallest of these (part no 12) should be used for the K-681. I like the tail wheel assembly, because it allows the free turning of the tail wheel, which contributes a lot to realistic photos of the finished model.
The hinges of the large cargo door (part no 24) must be reduced to less than half size, since the K-681 was modified from C-47 to DC-3, however, without removing the cargo door. The pitot tubes were “built in” in the port fuselage half, and because they were too bad and besides they were in the way when handling the assembled fuselage, I simply cut them off. The model deserved some better scratch built pitot tubes, and they were the last details added to the finished model. The antennas beneath the side windows of the cockpit should not be applied for the K-681.
I used the propellers that came with the kit, knowing, that they were of the wrong type for the K-681. Unfortunately, the kit does not offer another option for propellers: the thick paddle bladed ones. When I come across a couple of paddle bladed propellers to a 1/48 scale, the K-681 will get the right propellers.
| COLORS & MARKINGS |
It is a major job to paint and decal such a large model. The color scheme is overall natural aluminium with a white fin and top of fuselage to the lower edge of the cabin windows. There are day glow areas on the nose and the rear fuselage just in front of the tail planes. The wing tips have day glow areas, too. All day glow areas are outlined in black.
Since the plastic
is a very dark olive drab, it takes a lot of paint to cover the white areas:
five layers were needed for the fin and fuselage top, HB 22 White Gloss. The day
glow areas on the wings needed only three la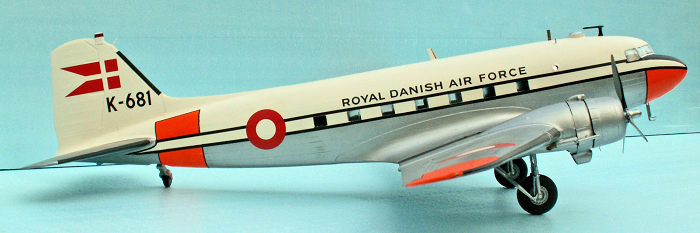 yers,
Testors Reefer White flat 4873, and four layers of Testors fluorescent red 4703.
The aluminium color, Revells Aqua Aluminium 99, covered the rest of the airframe
with three layers. The black stripes on the fuselage above and beneath the cabin
windows were made as decals as supplied with the Stoppel decal sheet. The
thinner black stripes outlining the day glow areas were also with the decal
sheet. The anti - glare area on the nose and the walkways on the wings got
Testors engine black flat 4888. The tires got Tamiya’s rubber black XF-85. This
color is definitely different from the engine flat black, and is a good choice
for all rubber tires. However, it stinks, even if it is a water-based color, but
it dries very quickly.
yers,
Testors Reefer White flat 4873, and four layers of Testors fluorescent red 4703.
The aluminium color, Revells Aqua Aluminium 99, covered the rest of the airframe
with three layers. The black stripes on the fuselage above and beneath the cabin
windows were made as decals as supplied with the Stoppel decal sheet. The
thinner black stripes outlining the day glow areas were also with the decal
sheet. The anti - glare area on the nose and the walkways on the wings got
Testors engine black flat 4888. The tires got Tamiya’s rubber black XF-85. This
color is definitely different from the engine flat black, and is a good choice
for all rubber tires. However, it stinks, even if it is a water-based color, but
it dries very quickly.
The roundels and the split flags were easy to apply, and so were the ROYAL DANISH AIR FORCE and the K-681 markings. The squadron badge came from an American Flying Color sheet covering Danish squadron badges 1/72 and 1/48, especially made for IPMS Denmark. There were no further markings for stencils or symbols with the Stoppel sheet, and that is too bad, considering there are lots of them with the 1/72 sheets for Danish Dakotas. The only decals to be applied from the sheet of the kit, were the markings for the propeller blades. A further detailing with decals must wait until I come across a suitable decal sheet with the needed stencils and symbols.
| CONCLUSIONS |
The Monogram 1/48 C-47 kit makes an impressive and accurate large model. The only flaw of the finished model is the fake dihedral. However, not many people will notice this, simply because they don’t know how the correct dihedral looks. The kit is recommended to everyone fancying the C-47 or DC-3, but consider it is a very large model for the shelves! If you have room enough, don’t hesitate to buy and build it, because it has just the right look of a C-47/DC-3. The finished Monogram model is very different from my first camouflage painted K-681, which was the ancient Airfix kit from the sixties.
30 November 2017
Copyright ModelingMadness.com
If you would like your product reviewed fairly and fairly quickly, please contact the editor or see other details in the Note to Contributors.
Back to the Main Page Back to the Review Index Page Back to the Previews Index Page