In the last episode, I had about 75 feet of track set up. Of course, one never really has as much as one wants and though the track was fun to race on, it didn't have any really challenging bits in it. Now to some, a lot of straights and sweeping curves makes for a fun track, but I wanted more twisty bits. I also needed to make room for all that.
So I looked at how that part of the basement was arranged and realized that a large upright piano that was in the way of expansion had to be moved. Knowing that I couldn't count on anyone to help me move it, I started making room around it and after much grunting and struggling (the caster wheels had long ago been rusted into place), I managed to move it into another part of the basement.
This opened up a considerable amount of space, but I still had to be careful of what went where so after much deliberation, I realized that I could only really add in another smallish section.
 I
got another 4x8 foot section of 1/2 inch particle board and had it cut into
I
got another 4x8 foot section of 1/2 inch particle board and had it cut into
 two
pieces. One was 4x6 feet and the other was 4x2 feet. I attached the 4x6 section
above the current hairpin and tacked the smaller bit along the 4x6 piece. It
basically gave me a 6x6 'L' shaped piece. I had to have the 'boot' of the L bit
at the farthest distance, leaving a notch which allowed cars to be reached if
(when) they deslotted. Again, I used a frame of 2x2s with 2x4 legs.
two
pieces. One was 4x6 feet and the other was 4x2 feet. I attached the 4x6 section
above the current hairpin and tacked the smaller bit along the 4x6 piece. It
basically gave me a 6x6 'L' shaped piece. I had to have the 'boot' of the L bit
at the farthest distance, leaving a notch which allowed cars to be reached if
(when) they deslotted. Again, I used a frame of 2x2s with 2x4 legs.
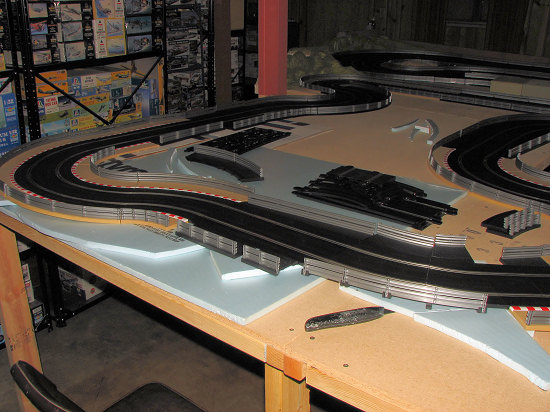
Into this space I ran what track I had left over. It made for an interesting loop and also allowed for the addition of more track, and I had more, but not really enough to fill in the space. I also experimented a bit with some elevation changes by adding in pieces of foam insulation board that I bought many years ago for my train set up that never really got very far. While playing around on this, I took bits of track from the rest of the layout to see what I could do with all the space in the center of the new section. As I mentioned, I'm a 'max track' sort of guy and couldn't stand to see all that space unused.
I came up with a layout that added in
even more track and had a number of tight turns in a series of switchback. Each
of the turns in the switchback was as different as I could make them by
combining several radii of corner pieces into each turn. Thankfully, Scalextric
makes some pretty tight corner pieces that, with borders, will provide a 21 inch
radius turn. Of course, adding in wider
 radii
corner pieces will allow for broader corners, but thanks to a lot of fiddling
about, I was able to get a pretty neat section added in place.
radii
corner pieces will allow for broader corners, but thanks to a lot of fiddling
about, I was able to get a pretty neat section added in place.
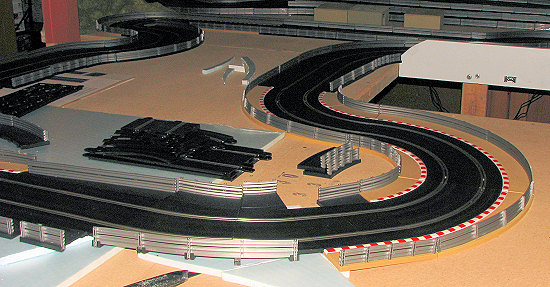
Unfortunately, I didn't have the loot for the additional track that I'd need so for the time being, I at least got some of the corners in place and you can see those in the image here. The pieces you see in this image were going to stay as they were with one additional set of switchbacks going into the open space that you see.
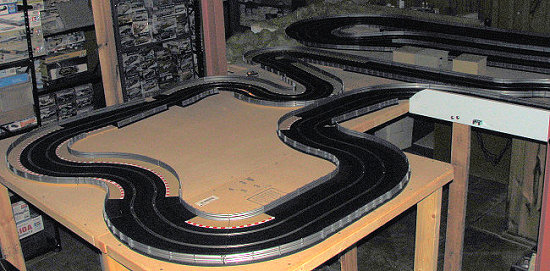
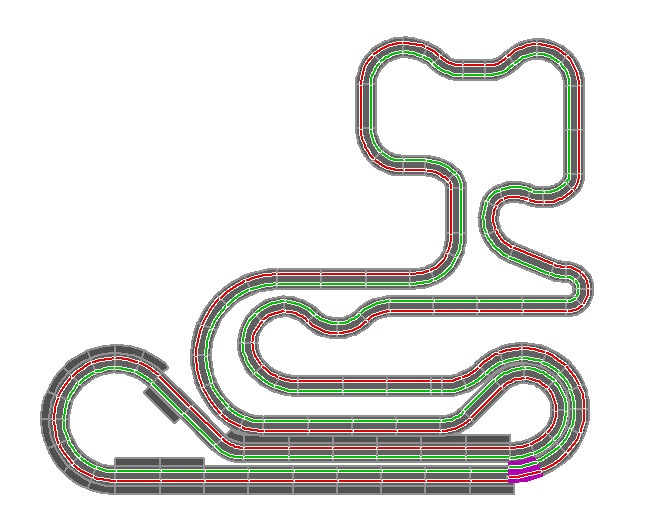
All of what you see was figured out without the benefit of track planning software. I know that there are many who like to use these programs and they are quite handy. I got the one for which you see the plans after the track had been set up just so I could figure out lap length. The standard way of doing this is to take a long length of string and insert it into the slot as one goes around the track. Then pull it out and measure it. That is how I came up with the 75 foot length on the earlier incarnation of the track, though that is only the length of the shortest lane. Without a crossover, you will have one lane longer than the other.
Anyway, though not exactly accurate in terms of all the track pieces installed, here is a map of how the track looked at this particular juncture. I should mention that the long loop at the lower left was a lot more square at this juncture.
Well, that is it for this installment. If you’d like to share some of your experiences or photos of your cars or track, please e-mail me at mmreaders@aol.com.
Scott