IN THE GROOVE ̺
Welcome back. I'm glad to see that the first installment was interesting enough to provide another opportunity to pass on some information about this fascinating hobby. In this go around, I'd like to show you another area of the hobby that is like the olden days, but different; that is the use of clear plastic bodies.
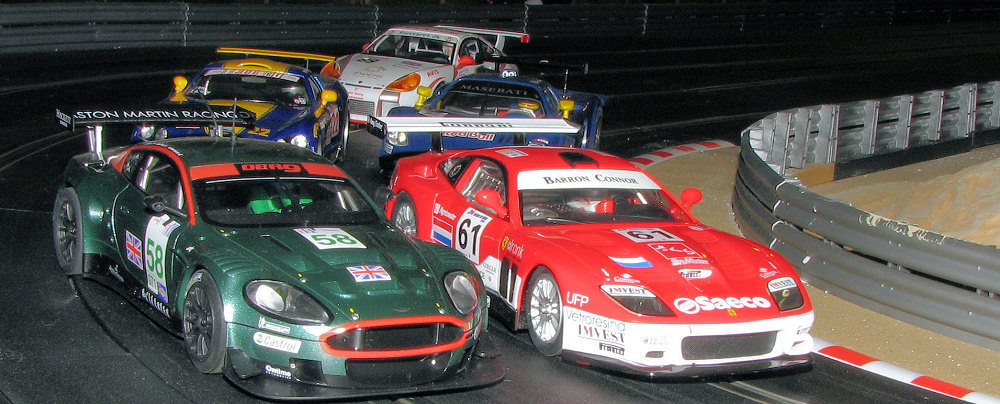
Especially in 1/24th scale but also in 1/32 there is a desire to run a body that isn't made of heavy ABS plastic. More often than not, these sorts of cars are popular on what we call 'wood' tracks. These are tracks where the owner has actually used a router to make the slots in particle board (hence the 'wood' part of things. This is often the next step to the dedicated enthusiast once he realizes that as nice as plastic tracks are, they are not very smooth owing to the sometimes hundreds of pieces of plastic that go into making the layout. By building his own track and routing it out, there are no limitations to the design of the track. Some can be simple ovals while others can be road courses that have lap lengths of over 100 feet and are as good as the professional 8 lane commercial tracks.
Of course, there are increases in the power requirements and the sophistication of the lap scoring mechanisms and often as not, the race is timed using computer software. The cars on these tracks are generally quite different from those on the plastic tracks and are more of a commercial type than before. As such, fidelity to scale isn't as important as speed, hence the lightweight and thin clear bodies used.
These bodies are made by a number of companies around the world, some good and some not. They used to be made of butyrate plastic but are now pretty much Lexan (which actually started being used for this purpose back around 1967) and in thicknesses of .007, .010, and .015 inches for the three major uses. They are painted on the inside to keep them from being scuffed up by the inevitable accidents.
Back with the old style bodies, one
would apply decals on the inside by reversing them when the came off the backing
and rubbing them in the glue that was there before applying them to the car.
Then the inside would be painted with whatever colors and designs one would
want. I recently did this with a 1/32 scale Aston Martin body, using an old
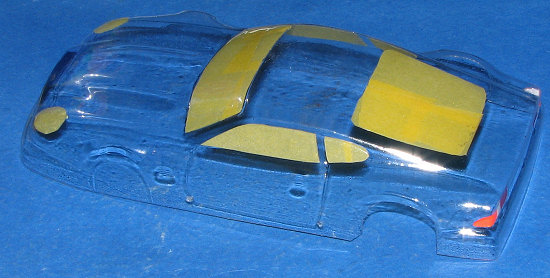 sheet
of NASCAR decals. I first trimmed the body of the excess around the bottom, then
mounted it to the chassis to see where to cut the wheel holes. In modern bodies,
the front wheel area is left closed, but clear to show the fro
sheet
of NASCAR decals. I first trimmed the body of the excess around the bottom, then
mounted it to the chassis to see where to cut the wheel holes. In modern bodies,
the front wheel area is left closed, but clear to show the fro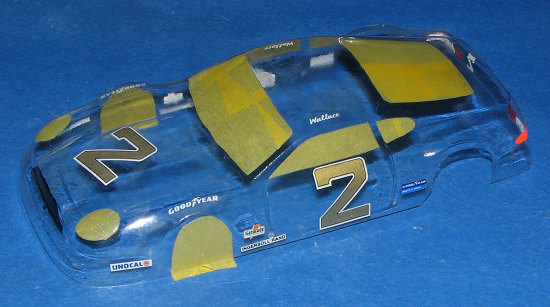 nt
wheels. I used Tamiya tape to mask the windows from the inside, then painted the
tail lights and grille opening before spraying on Future to seal in the decals.
Then I applied several coats of Alclad II 'Scarabus' to the body, which is
almost transparent. However, when I painted the black behind it, wow! Scarabus
will look blue if the light is coming from behind and green
nt
wheels. I used Tamiya tape to mask the windows from the inside, then painted the
tail lights and grille opening before spraying on Future to seal in the decals.
Then I applied several coats of Alclad II 'Scarabus' to the body, which is
almost transparent. However, when I painted the black behind it, wow! Scarabus
will look blue if the light is coming from behind and green
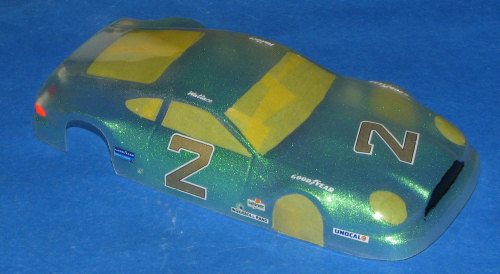 if
light strikes it from the direction of viewing. It looks superb, but I
found that if I didn't cut the masking for the windows first, I tended to peel
off the paint. Apparently this paint won't stick well t
if
light strikes it from the direction of viewing. It looks superb, but I
found that if I didn't cut the masking for the windows first, I tended to peel
off the paint. Apparently this paint won't stick well t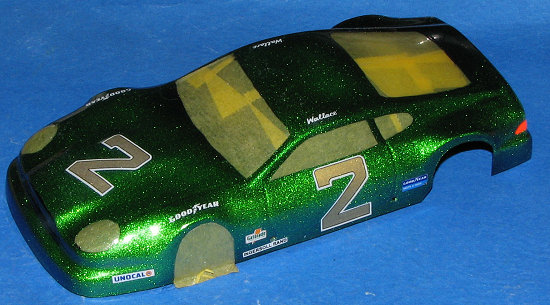 o
the Lexan. Eventually, I imagine that I'll have this stuff start to break apart,
but for a while it will be a real beauty.
o
the Lexan. Eventually, I imagine that I'll have this stuff start to break apart,
but for a while it will be a real beauty.
So that is the 'old school' way of doing these things. Worked for me for many years, but things change. I asked around as to the current method for painting bodies and learned more about it. But I'll save that for next time.
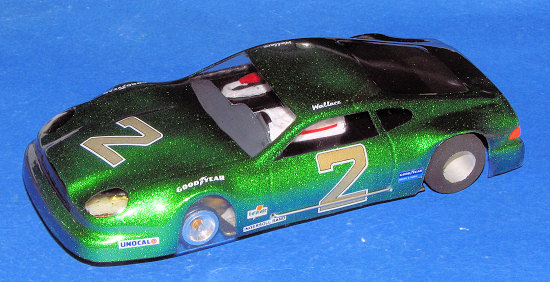 In
case you are interested, here is a shot of the completed car. I painted an
interior and installed it using masking tape. The body is held to the chassis
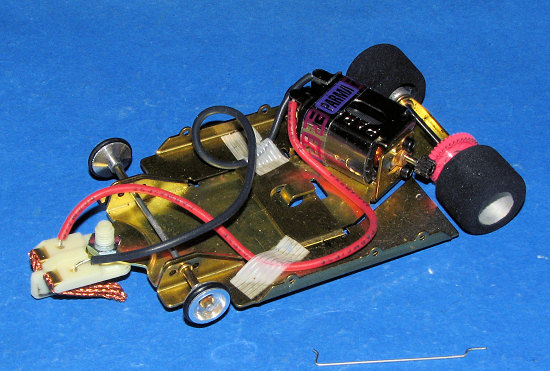
with long wire clips as you can see running through the number 2. A shot of the
bare chassis shows that this is what is known as an anglewinder installation.
You can see that the motor is at an angle so that it can drive the spur gear.
When using wide tires, a straight sidewinder installation wouldn't work so this
is the next best thing. You can see the wire clip and the mounting holes on the
chassis. The body is reinforced with strapping tape on the inside to keep the
body from tearing free during wrecks.
In
case you are interested, here is a shot of the completed car. I painted an
interior and installed it using masking tape. The body is held to the chassis
with long wire clips as you can see running through the number 2. A shot of the
bare chassis shows that this is what is known as an anglewinder installation.
You can see that the motor is at an angle so that it can drive the spur gear.
When using wide tires, a straight sidewinder installation wouldn't work so this
is the next best thing. You can see the wire clip and the mounting holes on the
chassis. The body is reinforced with strapping tape on the inside to keep the
body from tearing free during wrecks.
Hope to see you again in the near future and if you’d like to share some of your experiences or photos of your cars or track, please e-mail me at mmreaders@aol.com. I can’t promise to get back to you quickly or that your images will be published, but who knows!
Scott