 Welcome back. If you recall,
the last installment was about clear plastic bodies. In that one, I did a number
of things quite wrong. The result is that what was a very nice looking car body,
ended up looking terrible after a few off track excursions knocked the paint
loose from the inside of the body.
Welcome back. If you recall,
the last installment was about clear plastic bodies. In that one, I did a number
of things quite wrong. The result is that what was a very nice looking car body,
ended up looking terrible after a few off track excursions knocked the paint
loose from the inside of the body.
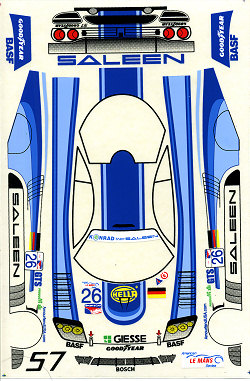
Well, since then, I have asked questions and learned the right way to do things. This time, I went modern and used an JK Productions Saleen body and decals. Well, decals is a bit of a stretch as it seems that on cars nowadays, they use sticker. Yup, just like on kiddie toys, the 'decals' are a solid clear sheet on which are printed the various markings and logos. You can see what you get off to the right. It is superbly printed, but unlike decals, these stickers will not easily conform to any but the most gentle curves, and I found that compound curves will give one fits when using them.
OK, so now on to the body.
 JK
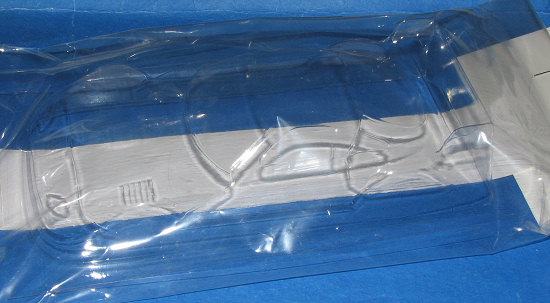
Productions bodies are all made of either .007 or .010 lexan. Unlike what I've
seen from other companies, the bodies also come with a set of masks for the
windows. As these bodies are painted from the inside, the masks go on the
inside. I also found that the masks are not quite what you'd call precision cut
as they don't completely match the window openings. Not a problem as you can
either trim back or use additional material from the mask sheet as is needed.
The body needs to be trimmed of excess material and while you can leave some on
the edges to trim later, it is a good idea to get it as close to
JK
Productions bodies are all made of either .007 or .010 lexan. Unlike what I've
seen from other companies, the bodies also come with a set of masks for the
windows. As these bodies are painted from the inside, the masks go on the
inside. I also found that the masks are not quite what you'd call precision cut
as they don't completely match the window openings. Not a problem as you can
either trim back or use additional material from the mask sheet as is needed.
The body needs to be trimmed of excess material and while you can leave some on
the edges to trim later, it is a good idea to get it as close to
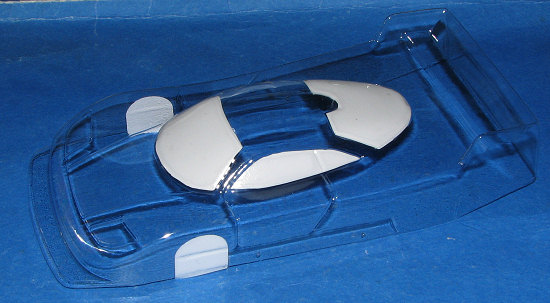 the
finished size as you can.
the
finished size as you can.
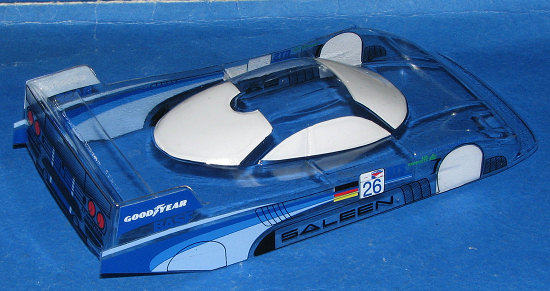
So step one is to apply the masking,
except for the front wheel opening, and we'll get to that later. The next thing
is to carefully cut out the various markings. This is all on a solid sheet so
that is why care needs to be taken. I found that starting on the sides and
the back was the easiest way to go. With the sides on, I realized that where I'd
placed the front wheel
 openings
didn't match. This is why one has to wait to apply them. Fortunately, they can
be peeled off and reapplied several times without any problems.
openings
didn't match. This is why one has to wait to apply them. Fortunately, they can
be peeled off and reapplied several times without any problems.
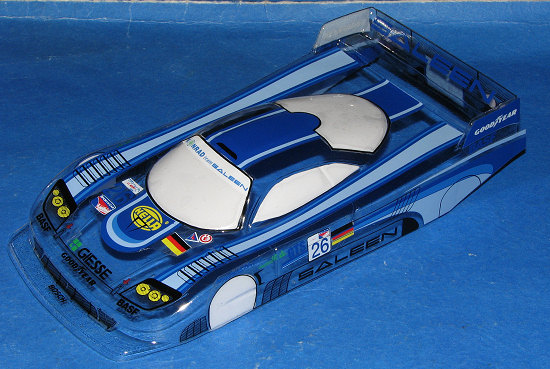
Where I did have problems was with
the p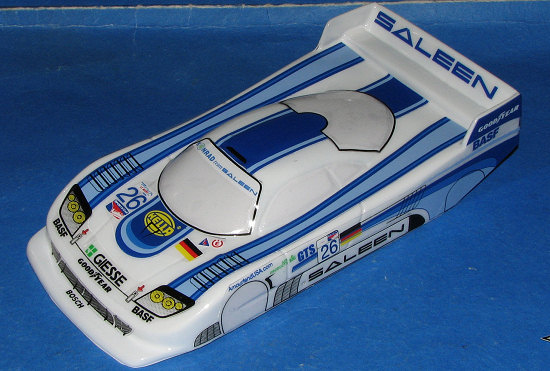 arts
that fit over the roof intake scoop and around the base of the windscreen. The
former I never could get to properly fit as the area seems to be just too sharp
for the stickers to properly handle. The area below the windscreen was cured by
cutting a wedge out of the sticker so that I could more easily get the
windscreen to bend around. You'll see where this is when you get to that point.
arts
that fit over the roof intake scoop and around the base of the windscreen. The
former I never could get to properly fit as the area seems to be just too sharp
for the stickers to properly handle. The area below the windscreen was cured by
cutting a wedge out of the sticker so that I could more easily get the
windscreen to bend around. You'll see where this is when you get to that point.
With all the stickers in place, it
was time to match the body up with the chassis and put in the mounting holes.
Waiting until it is painted just makes this so much more difficult. Finally, it
was time to paint. This time I got wise and bought some
 paint
designed for lexan. The most easily found is Pactra paint and it comes in a
variety of colors. You can either airbrush it or hand paint it on. The paint is
lacquer and actually smells more like AeroGloss airplane dope than anything. Be
sure to wear a respirator with an appropriate filter when using this. I sprayed
on a couple of coats and the paint was dry within a half hour or so.
paint
designed for lexan. The most easily found is Pactra paint and it comes in a
variety of colors. You can either airbrush it or hand paint it on. The paint is
lacquer and actually smells more like AeroGloss airplane dope than anything. Be
sure to wear a respirator with an appropriate filter when using this. I sprayed
on a couple of coats and the paint was dry within a half hour or so.
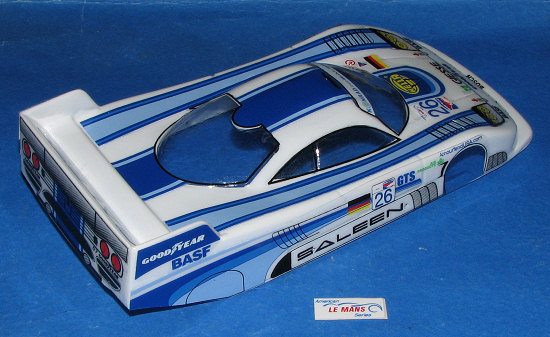
I then removed the masking and had a
completed body. Yo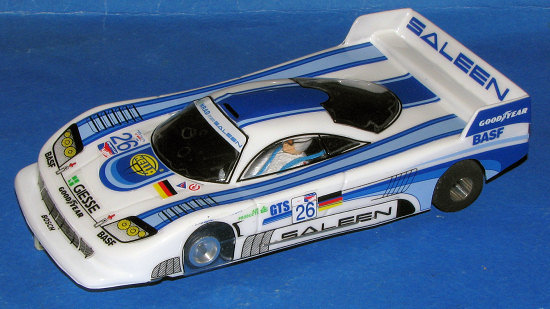 u
can see from the image that there were places where the mask didn't match up.
This was my first body using this method and I learned a lot from doing. The
last thing that was done was to cut out the rear wheel openings and install the
chassis. When I was sure that all was going to fit, I painted up an interior and
installed it in the car. Then, using the clips that came with the chassis, the
body was mounted. I now have a very nice Saleen racer.
u
can see from the image that there were places where the mask didn't match up.
This was my first body using this method and I learned a lot from doing. The
last thing that was done was to cut out the rear wheel openings and install the
chassis. When I was sure that all was going to fit, I painted up an interior and
installed it in the car. Then, using the clips that came with the chassis, the
body was mounted. I now have a very nice Saleen racer.
Hope to see you again in the near future and if you’d like to share some of your experiences or photos of your cars or track, please e-mail me at mmreaders@aol.com. I can’t promise to get back to you quickly or that your images will be published, but who knows!
Scott