Academy 1/72 OV-10A 'Bronco'
|
KIT # |
1665 |
|
PRICE: |
$9.50 when new. |
|
DECALS: |
Two aircraft |
|
REVIEW : |
|
|
NOTES: |
|
HISTORY |
In the early '60s, there was a requirement from all US Armed Services for a Light Attack and Reconnaissance Aircraft (LARA). The aircraft should also be able to perform the function as a COIN (COunter INsurgency) aircraft as well. This meant that it needed to be able to carry a variety of ordnace in addition to having internal guns. It should also be easy to maintain and equally easy to fly. North American's entry into the field was what was eventually to become the OV-10 'Bronco'.
It is powered by two small turboprops, has four 20mm cannon in a short weapons pod and is also capable of handling various ordnance including 2.75 and 5 inch rocket pods, 1,000 bombs, marker rockets and Sidewinder missiles for self defense. There is an aft cargo area that can handle two stretchers or five fully equipped troops.
 The OV-10 was first introduced in the last few years of the
Vietnam War as a replacement FAC (Forward Air Controller) to replace the Cessna
O-2A. It was an instant success as it was armed, better protected and faster
than the O-2. It was also used by several Marine Corps Squadrons and by one
(perhaps two) Navy squadrons as well. After the end of the war, the OV-10 was
still in use by regular USAF squadrons in both the US and overseas. It is one of
the few aircraft that was not used by the USAF Air National Guard, those units
getting the OA-37B instead. The final USAF OV-10 was retired in the late 1980s
with the last USMC versions being retired in the early 1990s.
The OV-10 was first introduced in the last few years of the
Vietnam War as a replacement FAC (Forward Air Controller) to replace the Cessna
O-2A. It was an instant success as it was armed, better protected and faster
than the O-2. It was also used by several Marine Corps Squadrons and by one
(perhaps two) Navy squadrons as well. After the end of the war, the OV-10 was
still in use by regular USAF squadrons in both the US and overseas. It is one of
the few aircraft that was not used by the USAF Air National Guard, those units
getting the OA-37B instead. The final USAF OV-10 was retired in the late 1980s
with the last USMC versions being retired in the early 1990s.
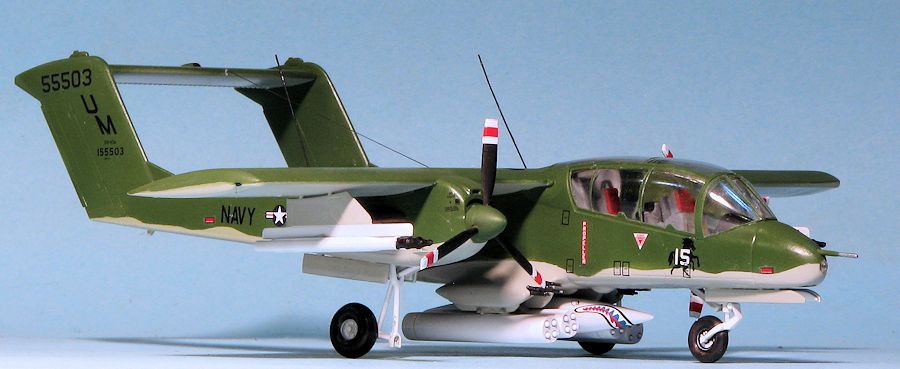
The U.S. Navy formed Light Attack Squadron Four (VAL-4), the "Black Ponies", on 3 January 1969, and operated in Vietnam from April 1969 to April 1972. The Navy used the Bronco OV-10A as a light ground attack aircraft, for interdiction of enemy logistics, and fire-support of Marines, SEALs and naval riverine force vessels operating on the Mekong River and its delta. It succeeded in this role, although the U.S. Navy did lose seven OV-10s during the Vietnam War to various causes. Other than OV-10 Fleet replacement training done in cooperation with Air Antisubmarine Squadron Forty-One (VS-41) at NAS North Island, California, VAL-4 was the only squadron in the U.S. Navy to ever employ the OV-10 and it was decommissioned shortly following the end of major US involvement in the Vietnam War. VAL-4's surviving OV-10s were subsequently transferred to the Marine Corps.
|
THE KIT |
Until this kit appeared, there were only two other OV-10s in
1/72 scale, that from Airfix and another from Hasegawa. Both are not new kits,
first seeing the light of day in the late 1960s shortly after the aircraft
appeared in service. The Airfix kit was later modified to OV-10D NOGS with the
longer nose, FLIR pod and belly cannon. The Academy kit may look somewhat like
those earlier kits, but this 1999 kit is in all effect a new tool. It is completely modernized
with engraved panel lines and super detail on the rest of the model. There is a
full load of ordnance available for t The instructions are very good showing
colors where needed as well as what needs to be done to do either an air force
or marine version. Colors are generic other than for the exterior camouflage
which gives FS numbers. Decals
are given for both a USAF and USMC OV-10A. The USAF version is from the 20th
TASS at DaNang, South Vietnam in 1969. It is painted an overall ADC grey FS
16473 with a white upper wing. It also has a shark mouth to add some interest.
The other is a HML-267 OV-10A from Camp Pendleton, CA in 1970. It is FS 34097
green upper with FS16440 light gull grey undersides and a white upper wing. The
reason for the white upper wing is so that the strike group could spot the
aircraft against the ground so have an idea of where to place their ordnance. In
addition to the kit decals, which look very nicely done, there are other
recently produced sheets of the OV-10 that may be useful. CONSTRUCTION In fact, it is due to a recent AOA sheet on VAL-4 aircraft that
I decided to grab this kit from the stash and start building. The AOA
instructions provide a lot of information and notes if anything else is required
to properly build a VAL-4 aircraft. One thing needed are some dual Zuni pods and
if you have an Academy Crusader, you have what you need. These were dutifully
robbed and stuck in the OV-10 box so I'd have them available. All the VAL-4
options use wing pylons. The kit pylons are for the rather poorly done
I then started gluing together rocket pods. Normally, the Zuni
pods would not have the forward cover attached, meaning a lot more rocket sticks
out. However, Academy does not provide this option. I also grabbed a couple more
four shot pods from the Hasegawa weapons set for rockets and bombs. Note that
Academy has you put the forward 'cap' on the back of the pod. Reverse this as
I'm pretty sure the longer part of the pod should be aft of the pylon attachment
point. Moving on, I glued the wing halves together, attached the nose
halves, installed the gear wells in one half of each boom, and built up much of
the interior, including the seat. The instructions state that the interior is
ADC Grey, FS 16473, but that seems a bit light so I used Dark Gull Grey FS 36231
which is pretty standard stuff for military aircraft of the time. I also painted
the gear wells and some other pieces on the sprue with white. The interior
bits were then painted with the other colors and the decals applied on the
panels and consoles. You'll need to use a strong setting solution to get these
to snuggle down. Something like Solvaset.
I then closed up the fuselage halves and attached the nose
cone. Back at the booms, since there wasn't room for the piece that allows the
prop shaft to turn, I glued on the cowling front pieces. These are not an exact
match to the area behind them, but a bit of sanding took care of that. I should
also mention that the these pieces do not look like the box art so one of them
is wrong. After test fitting the booms to the wing again, I attached the exhaust
pieces. I did the test fit as there is no room above the exhaust to fill gaps.
Back at the fuselage, I glued together the lower pod pieces
and then glued these to the fuselage. Fit is actually rather poor with large
gaps between the pod and the fuselage. With that taken care of, the wing was
glued in place. This was followed by the booms and then the horizontal
stabilizer. At this time, I masked the clear bits and installed them. Getting
all the main pieces aligned will require a bit of fiddling around. I found that
first gluing in the top piece then adding in the side sections seemed to work
the best. The windscreen is a very tight fit (as is the upper clear piece).
 he kit and some of the sprues are marked
for the OV-10D, which is why there are things like cutouts for the addition of chaff dispensers. In addition, the modeler
needs to cut away some later addition antennas to do the early versions that are
offered with this kit.
he kit and some of the sprues are marked
for the OV-10D, which is why there are things like cutouts for the addition of chaff dispensers. In addition, the modeler
needs to cut away some later addition antennas to do the early versions that are
offered with this kit.
 Sidewinders that are included. These missiles were not normally carried during
Vietnam if at all, but the pylons and attached rack are just what is needed for
the Zunis. Holes in the wing were drilled out to accept these.
Sidewinders that are included. These missiles were not normally carried during
Vietnam if at all, but the pylons and attached rack are just what is needed for
the Zunis. Holes in the wing were drilled out to accept these. 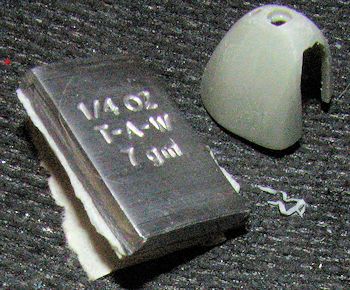 Meanwhile, I built up the tail booms. Note that you will not
be installing any of the 'towel rack' antennas on this one as the plane did not
carry them. At least none of the VAL-4 photos I looked at seemed to have them. I
did not attach the forward portions of the booms as I seriously doubted that I
could fit all 8 grams of nose weight in the nose as shown by the instructions
and there is darn little room for any of this stuff under the cockpit. With the interior done, it
was installed in one fuselage half. Then I attached the other side and also
glued on the nose. The nose is hollow back to the join and I can put some weight
into it, but not all. When the fuselage was dry, I dry fit the wings, booms and
stabs to see where else I might put weight. Most of it went behind the cockpit
tub. Some went in the nose, some under the cockpit floor and some in the forward
engine nacelles.
Meanwhile, I built up the tail booms. Note that you will not
be installing any of the 'towel rack' antennas on this one as the plane did not
carry them. At least none of the VAL-4 photos I looked at seemed to have them. I
did not attach the forward portions of the booms as I seriously doubted that I
could fit all 8 grams of nose weight in the nose as shown by the instructions
and there is darn little room for any of this stuff under the cockpit. With the interior done, it
was installed in one fuselage half. Then I attached the other side and also
glued on the nose. The nose is hollow back to the join and I can put some weight
into it, but not all. When the fuselage was dry, I dry fit the wings, booms and
stabs to see where else I might put weight. Most of it went behind the cockpit
tub. Some went in the nose, some under the cockpit floor and some in the forward
engine nacelles.
|
COLORS & MARKINGS |
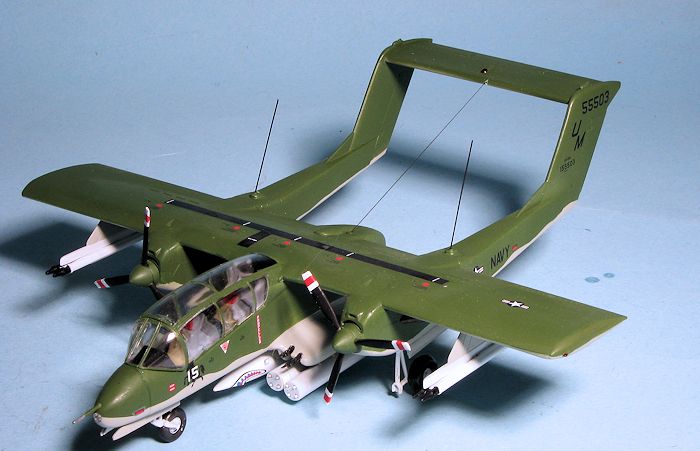
After filling the wheel wells with tissue,
I started painting. Now the easy way out would have been overall light gull
grey, but I like the earlier scheme, despite the fact that it will require a lot
of masking. I first painted all the undersides in light gull grey. Then some
masking and the upper surfaces were painted in
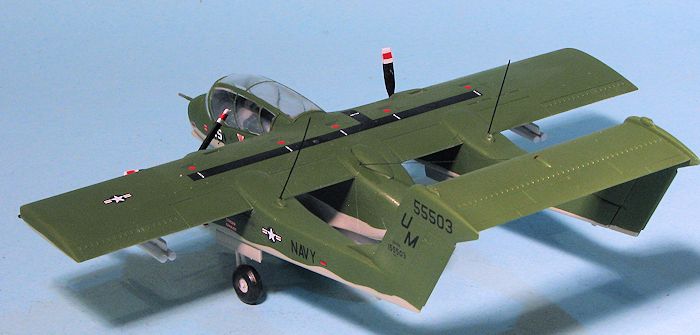 FS 34097 green. I did some more
masking to get the wavy line on the fuselage and booms and finished the
spraying. Note that the upper part of the gun pod is in the underside color for
some reason. I used Testors enamels for the paints.
FS 34097 green. I did some more
masking to get the wavy line on the fuselage and booms and finished the
spraying. Note that the upper part of the gun pod is in the underside color for
some reason. I used Testors enamels for the paints.
Once this was done, I applied the markings. I chose one of the
earlier VAL-4 options with the pony behind the nose number. The decal stencil
selection is considerable and not wanting to get bogged down, I minimalized
things some. The AOA decals are outstanding. I used no setting solution and had
no issues with silvering on a glossed airframe. I did have to use four decals
from the kit sheet. I used the prop tip decals and found they were too narrow
for the Academy kit. I suggest painting these.
I also glued on the landing gear. Despite all the weight I put
in the plane, it will tail sit if the rear goes back too far. I am somewhat
concerned that the main gear legs will not be able to hold up all that well as
they seem a bit rickety.
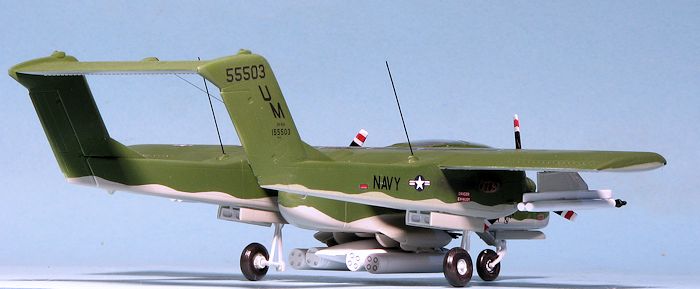
After the markings were on, I continued adding bits. Those
wondering why there are no elevator balances will have to ask the carpet
monsters about those as the pieces went zinging away while I was trying to
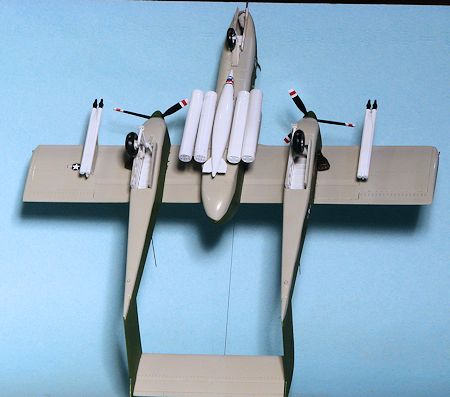
install them. Next bits to install were the weapons racks. These should have
been glued on prior to
A clear matte was applied to seal in markings and I then
peeled off the masking. A few small leaks, but nothing major. Holes were drilled
for the wire antennas and for the EZ-line long wire antenna. Gear doors were
attached as were the center line tank, rocket pods, and wing pylons. The last
steps were to push the nose landing light into place, glue on the props and add
a bit of pastel exhaust soot. 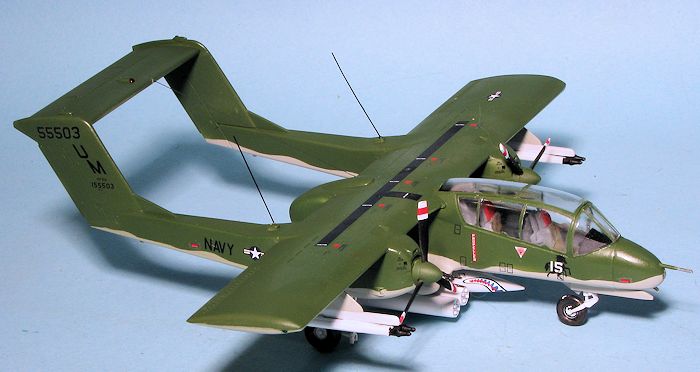 painting. Fortunately, the attachment holes for the
Academy pods and the Hasegawa pods are the same. The exhaust was painted at this
time as well and showed that perhaps pre-painting the booms would not have been
a bad move.
painting. Fortunately, the attachment holes for the
Academy pods and the Hasegawa pods are the same. The exhaust was painted at this
time as well and showed that perhaps pre-painting the booms would not have been
a bad move.
|
CONCLUSIONS |
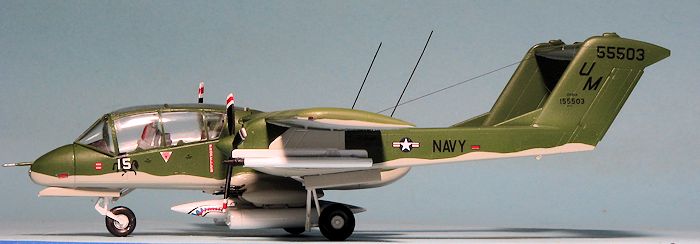
 The kit took
a bit longer than I thought it would, mostly due to the need to do a lot of
masking. Next one will be overall light gull grey. I used a lot of weight on
this one so have to wonder how long the main gear legs will hold out. Long
enough to take photos anyway. The AOA decals are simply superb and quite highly
recommended. It makes for a very nice looking model and while perhaps a bit
overloaded with ordnance, certainly looks the part.
The kit took
a bit longer than I thought it would, mostly due to the need to do a lot of
masking. Next one will be overall light gull grey. I used a lot of weight on
this one so have to wonder how long the main gear legs will hold out. Long
enough to take photos anyway. The AOA decals are simply superb and quite highly
recommended. It makes for a very nice looking model and while perhaps a bit
overloaded with ordnance, certainly looks the part.
May 2015
Review kit courtesy of me and my wallet. Decals courtesy of
www.aoadecals.com
If you would like your product reviewed fairly and
fairly quickly, please contact
the editor or see other details in the Note to
Contributors.