| KIT #: | PK-29 |
| PRICE: | $ Not much |
| DECALS: | Two options |
| REVIEWER: | Scott Van Aken |
| NOTES: |
| HISTORY |
The A-4M was a dedicated Marine version with improved avionics and more
powerful J52-P-408a engine with 11,200 lbf (50 kN) thrust, enlarged cockpit, IFF
system. L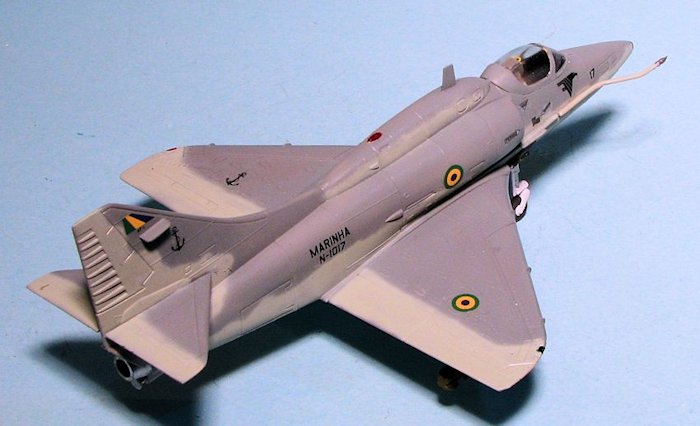 ater fitted with Hughes AN/ASB-19 Angle Rate Bombing System (ARBS) with
TV and laser spot tracker, 158 built.
ater fitted with Hughes AN/ASB-19 Angle Rate Bombing System (ARBS) with
TV and laser spot tracker, 158 built.
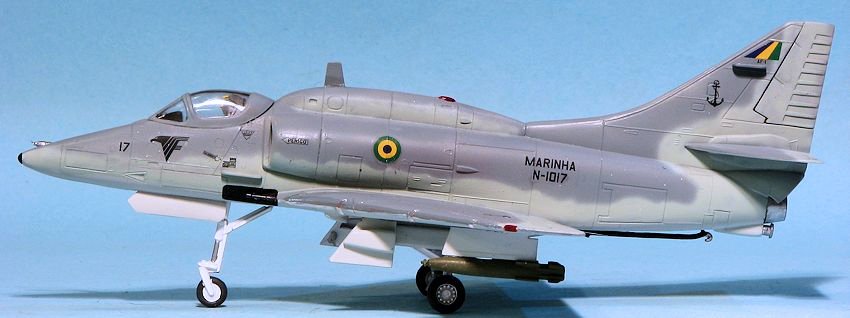
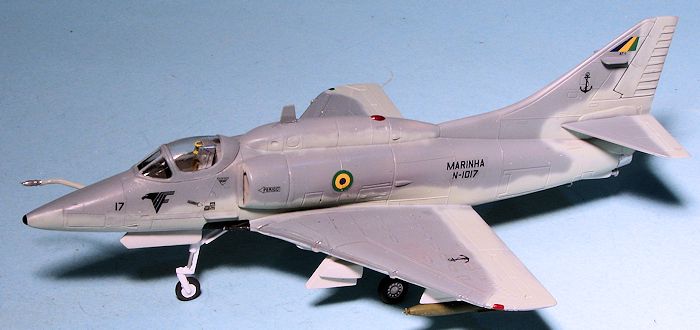
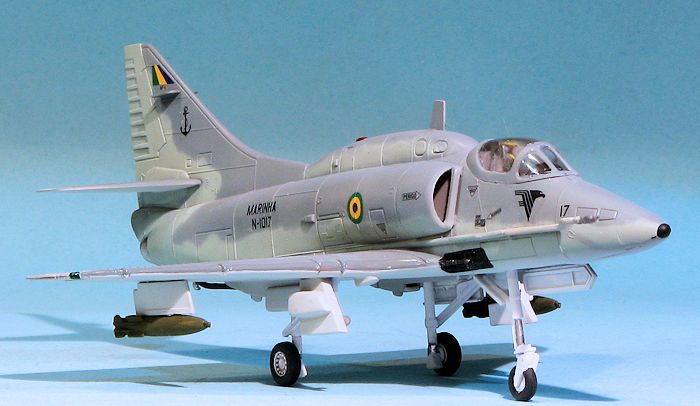
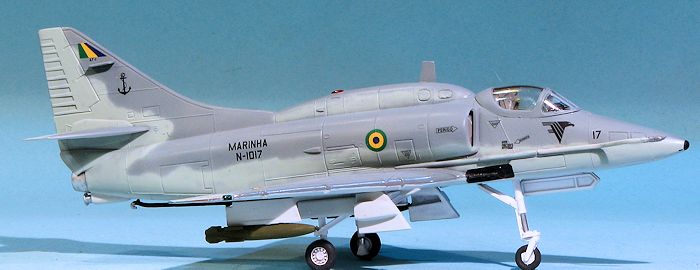
Once withdrawn from USMC service, the type served in the adversary role for many years. 36 refurbished aircraft were later sold to the Argentine Air Force. These airframes were upgraded with F-16 avionics systems. These aircraft are designated A-4AR and entered service starting in 1998. Brazil also operates the type, purchased from Kuwait and upgraded similar to the Argentine planes. Brazil designates these planes as the AF-1 and operates them from the Sao Paulo, the ex-French carrier Foch.
| THE KIT |
Matchbox is somewhat unique in that they molded their sprues in color with the smaller kits having two shades and the more complex kits having three or more. This was just done for visual appeal and marketing as the colors used rarely had any coincidence with the painting colors of the final product. This one was molded in medium grey and brown.
 These kits are also not known for a lot of detail, but for relative ease of
construction and a lack of fiddly bits. They are also fairly accurate in
outline. One could say that these are true weekend kits for the modelers that
were the target market; kids. There is little in the cockpit save a generic seat
and a pilot figure. Wheel wells are shallow and the landing gear is simplified.
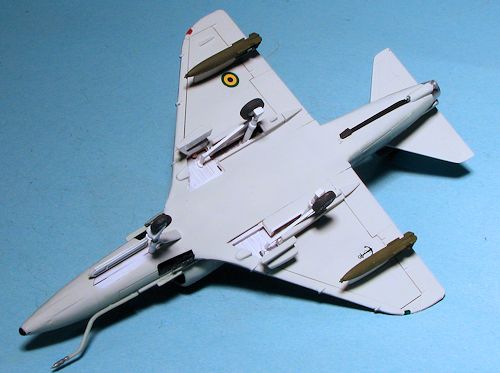
The only thing for under wings are the outer pylons and a pair of Bullpups.
These kits are also not known for a lot of detail, but for relative ease of
construction and a lack of fiddly bits. They are also fairly accurate in
outline. One could say that these are true weekend kits for the modelers that
were the target market; kids. There is little in the cockpit save a generic seat
and a pilot figure. Wheel wells are shallow and the landing gear is simplified.
The only thing for under wings are the outer pylons and a pair of Bullpups.
The kit itself is an initial production A-4M without the tail mounted antennas nor any of the other small lumps and bumps that were added to the nose and the tail section. Instructions are the unique Matchbox version that have all the painting information for the build on the last page. The decals are for two planes. ONe is the box art A-4M from VMA-324 in light gull grey and white while the other is an Israeli A-4N in the then-current desert camouflage.
| CONSTRUCTION |
Despite this being pretty much a three day build, I'm not fast and do not
have the free time of the average 14 year old so it took a while. First thing I
did was to glue a goodly amount of weight into the
 nose to prevent tail sitting.
Not sure if this is an issue with Skyhawks, but wanted to be sure. I then
installed the aft fuselage blanking plate and glued the fuselage halves
together. I also glued the wing upper and lower halves together.
nose to prevent tail sitting.
Not sure if this is an issue with Skyhawks, but wanted to be sure. I then
installed the aft fuselage blanking plate and glued the fuselage halves
together. I also glued the wing upper and lower halves together.
Next were the intakes. These are see-through hence the blanking plate in the rear fuselage. With that done, the wings were attached and the usual filler applied. There are two large sink areas on the upper flaps so those had to be filled as well. Once that was taken care of, the tailplanes were attached along with the parachute housing end plate. I also filled in the area under the nose for the sensor that is not present on Brazilian planes.
The model seriously needs a seat so I used one from Quickboost to put into the cockpit. About half of the lower part of the seat needs to be removed so the canopy will fit. I also made fin and spine antennas out of plastic card. The decal instructions have a template. The canopy was masked and installed.
| COLORS & MARKINGS |
 For this model
I used Caracal Decals 72025 for Brazilian AF-1s. I chose the standard scheme for
this one and while some may comment that it is a waste to use them on the
Matchbox kit, I think it does not matter. These planes are in a three grey
scheme with FS 35237 on the top along with 36440 and with 36495 on the underside
surfaces. I used Testors MM enamels and freehanded the camo scheme, though one
could easily mask it. The model was gloss coated in prep for the decals.
For this model
I used Caracal Decals 72025 for Brazilian AF-1s. I chose the standard scheme for
this one and while some may comment that it is a waste to use them on the
Matchbox kit, I think it does not matter. These planes are in a three grey
scheme with FS 35237 on the top along with 36440 and with 36495 on the underside
surfaces. I used Testors MM enamels and freehanded the camo scheme, though one
could easily mask it. The model was gloss coated in prep for the decals.
I installed the landing gear so that I could more easily apply the decals. The decals went on well enough with Solvaset decal solution, but even after multiple applications, some of the markings still silvered.
| FINAL CONSTRUCTION |
 With the decals
in place, a clear matte was sprayed on the airframe. Then began the process of
adding the final bits and doing touch up painting. All of the gear doors are
butt fit and the main doors are really far too thick. The tail hook was painted
black and glued in place as were the guns. The kit does not supply wing tanks
and the only pylons are the outer versions. I rummaged through the spares box
and came up with a pair of Snakeyes from a Fujimi A-7 kit that looked like they
would fill the bill as I did not want to use the kit's Bullpups. After
installing the refueling probe, I found that there was quite a gap between it
and the fuselage part. Rather than goober up my decals and paint, I left it as
it was. The exhaust piece was glued on and finally the pylons with the bombs.
The masking was removed and that was it.
With the decals
in place, a clear matte was sprayed on the airframe. Then began the process of
adding the final bits and doing touch up painting. All of the gear doors are
butt fit and the main doors are really far too thick. The tail hook was painted
black and glued in place as were the guns. The kit does not supply wing tanks
and the only pylons are the outer versions. I rummaged through the spares box
and came up with a pair of Snakeyes from a Fujimi A-7 kit that looked like they
would fill the bill as I did not want to use the kit's Bullpups. After
installing the refueling probe, I found that there was quite a gap between it
and the fuselage part. Rather than goober up my decals and paint, I left it as
it was. The exhaust piece was glued on and finally the pylons with the bombs.
The masking was removed and that was it.
| CONCLUSIONS |
 For me, this
was a relatively quick build, taking about three weeks from start to finish. I'm
sure many would have it done in less time, but I've always got several projects
underway and have to spend valuable modeling time doing the web site, so
infrequently get long periods of time to work on models. The end result is quite
pleasing and using the Matchbox kit, while lacking in detail and some
necessities, does provide an airframe that requires minimal modification to do
the AF-1. In all, it very much looks the part and is something that will look
good on the shelf.
For me, this
was a relatively quick build, taking about three weeks from start to finish. I'm
sure many would have it done in less time, but I've always got several projects
underway and have to spend valuable modeling time doing the web site, so
infrequently get long periods of time to work on models. The end result is quite
pleasing and using the Matchbox kit, while lacking in detail and some
necessities, does provide an airframe that requires minimal modification to do
the AF-1. In all, it very much looks the part and is something that will look
good on the shelf.
| REFERENCES |
http://en.wikipedia.org/wiki/Douglas_A-4_Skyhawk
November 2014 Thanks to
www.caracalmodels.com for the decal
sheet. If you would like your product reviewed fairly and fairly quickly, please
contact
the editor or see other details in the
Note to
Contributors.