Hasegawa 1/72 A-1H Skyraider
| KIT #: | 51406 |
| PRICE: | 1380 yen on sale |
| DECALS: | Two options |
| REVIEWER: | Scott Van Aken |
| NOTES: | AOA #72009 decals |
| HISTORY |
The A-1 Skyraider was the close air support workhorse of the RVNAF for much of the Vietnam War. The U.S. Navy began to transfer some of its Skyraiders to the RVNAF in September 1960, replacing the RVNAF's older Grumman F8F Bearcats. By 1962 the RVNAF had 22 of the aircraft in its inventory, and by 1968 an additional 131 aircraft had been received. Initially Navy aviators and crews were responsible for training their South Vietnamese counterparts on the aircraft, but over time responsibility was gradually transferred to the USAF.
 The initial trainees were selected from among RVNAF Bearcat pilots who had
accumulated 800 to 1200 hours flying time. They were trained at NAS
Corpus Christi, Texas, and then sent to NAS
Lemoore, California for further training. Navy pilots and crews in Vietnam
checked out the Skyraiders that were being transferred to the RVNAF, and
conducted courses for RVNAF ground crews.
The initial trainees were selected from among RVNAF Bearcat pilots who had
accumulated 800 to 1200 hours flying time. They were trained at NAS
Corpus Christi, Texas, and then sent to NAS
Lemoore, California for further training. Navy pilots and crews in Vietnam
checked out the Skyraiders that were being transferred to the RVNAF, and
conducted courses for RVNAF ground crews.
Over the course of the war, the RVNAF acquired a total of 308 Skyraiders, and was operating six A-1 squadrons by the end of 1965. These were reduced during the period of Vietnamization from 1968 to 1972, as the U.S. began to supply the South Vietnamese with more modern close air support aircraft, such as the Cessna A-37 and Northrop F-5, and at the beginning of 1968, only three of its squadrons were flying A-1s.
As the U.S. ended its direct involvement in the war, it transferred the remainder of its Skyraiders to the South Vietnamese, and by 1973, all remaining Skyraiders in U.S. inventories had been turned over to the RVNAF. Unlike their American counterparts, whose combat tours were generally limited to 12 months, individual South Vietnamese Skyraider pilots ran up many thousands of combat hours in the A-1, and many senior RVNAF pilots were extremely skilled in the operation of the aircraft.
| THE KIT |
Though dated 1996, this kit is considered by most to be the best A-1 in this scale. This happens to be the base boxing of the kit and was reissued in January 2019 much to the delight of fans of the airplane. As one can never have too many A-1s and to help spread out the shipping cost, I bought two of them. Previously, Airfix, Fujimi, and Tsukuda all did the A-1, but this one eclipses those in terms of detail. Molded in medium grey plastic and up to the usual standard of Hasegawa with engraved panel lines, and the use of small poly caps to hold in the prop. The cockpit is adequate with a seat, stick and control panel all fitting into the cockpit tub. Decals are used for instruments.
 There is a
nicely detailed engine and the proper engine cover that was spring loaded to be
closed when the engine was not running. This kept salt spray and other crud out.
Once the engine started up, airflow opened these so cooling air could enter. It
also looks like the kit has the right wheels, these being spoked. The usual mass
of weapons pylons are on the bottom of the wing. The kit provided a centerline
and two wing tanks. Along with this are four triple rocket launchers. Again, I'm
pretty sure these are USAF weapons and not what was carried by Navy Skyraiders.
You'll have to delve into one of the Hasegawa weapons sets for a decent load. As tempting as it is
to fill all the stations, you have to realize that rarely was this done as all
aircraft have to trade carrying capacity (which includes fuel) for range.
There is a
nicely detailed engine and the proper engine cover that was spring loaded to be
closed when the engine was not running. This kept salt spray and other crud out.
Once the engine started up, airflow opened these so cooling air could enter. It
also looks like the kit has the right wheels, these being spoked. The usual mass
of weapons pylons are on the bottom of the wing. The kit provided a centerline
and two wing tanks. Along with this are four triple rocket launchers. Again, I'm
pretty sure these are USAF weapons and not what was carried by Navy Skyraiders.
You'll have to delve into one of the Hasegawa weapons sets for a decent load. As tempting as it is
to fill all the stations, you have to realize that rarely was this done as all
aircraft have to trade carrying capacity (which includes fuel) for range.
Instructions are what one would expect after all these years from Hasegawa. They include Gunze and some FS 595 color references. Markings are for two planes. One is the CAG bird from VA-52 as shown on the box art and the other is from VA-145 in predominately green markings. Both are in the Light Gull Grey and White scheme. The decals for this particular boxing are the really excellent ones that Hasegawa has been providing in many of its newer models. The white is actually white and the decals come away from the backing in just a few seconds of being dipped in water.
| CONSTRUCTION |
 My main reason for purchasing
this kit was to use it for the excellent AOA Decals for Vietnamese Skyraiders.
Picking the scheme to use is the most difficult part of getting one of these
sheets. However, since the kit only provides the Navy wheels, that helped to
limit things a bit. I chose an easy way out by deciding to concentrate on an
overall grey plane. AOA's instructions are top rate so the first thing I did was
to remove the unneeded antennas and fin tip light from the kit. Then the
interior bits were painted dark gull grey and the decals applied to the various
panels. These worked just great.
My main reason for purchasing
this kit was to use it for the excellent AOA Decals for Vietnamese Skyraiders.
Picking the scheme to use is the most difficult part of getting one of these
sheets. However, since the kit only provides the Navy wheels, that helped to
limit things a bit. I chose an easy way out by deciding to concentrate on an
overall grey plane. AOA's instructions are top rate so the first thing I did was
to remove the unneeded antennas and fin tip light from the kit. Then the
interior bits were painted dark gull grey and the decals applied to the various
panels. These worked just great.
I then assembled the three fuel tanks. I'm not sure which I'll install, but it is best to have them all done ahead of time. I also went looking for ordnance as the kit's offerings of rocket tubes is fairly lame. The cockpit was then installed into the fuselage halves as well as the lower intake and the halves closed. I also assembled the wings at this time.
 The wings were then attached to
the already sanded down fuselage. Fit is quite good though I had a small gap at
the aft wing/fuselage join. I also attached the tailplanes and glued on the
upper intake piece. After a bit more filler and sanding, I built up the engine
and after painting it attached it. I did not use the engine cover piece as that
was often removed on land based planes. The rest of the cowling was attached as
were the cowl flaps. These latter pieces do not fit quite as well as I'd have
hoped. The seat had some tape belts attached and was inserted into the cockpit.
I then masked the windscreen and canopy and glued them in place.
The wings were then attached to
the already sanded down fuselage. Fit is quite good though I had a small gap at
the aft wing/fuselage join. I also attached the tailplanes and glued on the
upper intake piece. After a bit more filler and sanding, I built up the engine
and after painting it attached it. I did not use the engine cover piece as that
was often removed on land based planes. The rest of the cowling was attached as
were the cowl flaps. These latter pieces do not fit quite as well as I'd have
hoped. The seat had some tape belts attached and was inserted into the cockpit.
I then masked the windscreen and canopy and glued them in place.
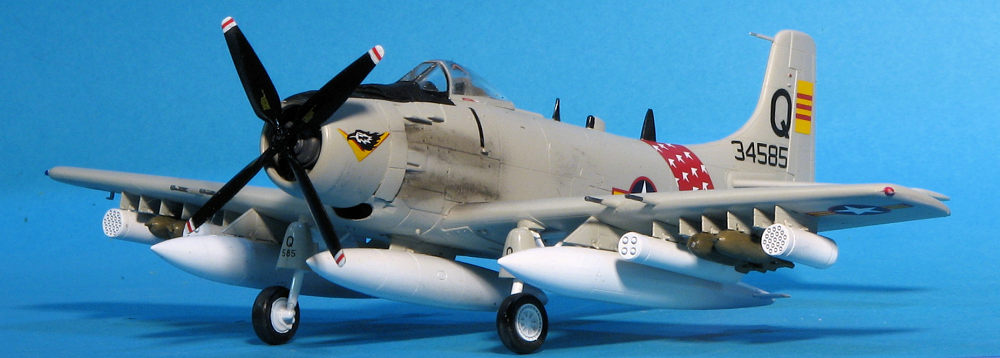
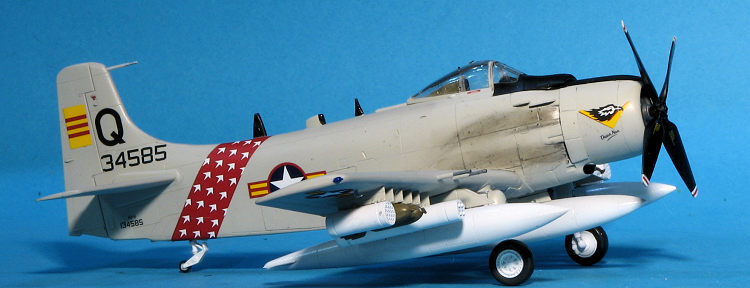
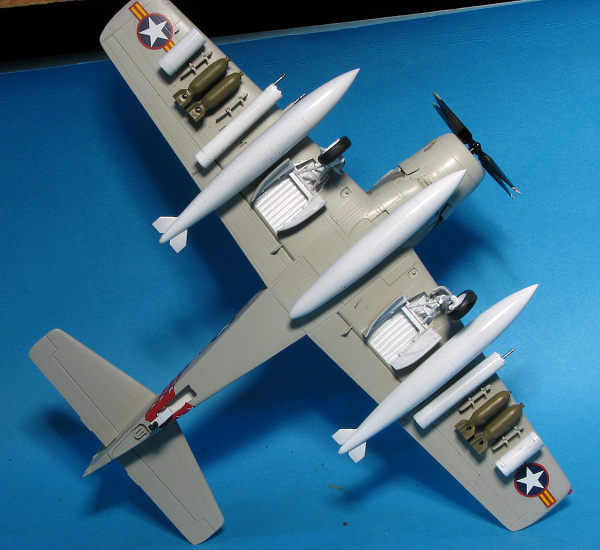
Flipping the airframe over, I started attaching the various pylons. The smaller ones are individually numbered, but they all look the same. Regardless, I glued them in the order provided. I also attached the larger fuel tank pylons and the centerline pylon. This was a fairly tedious job and naturally, I lost one of the tiny anti-sway braces. I then painted the wheel wells white and filled them with Silly Putty. Wasn't really sure what to do about the tail hook well. Ground based planes did not have a tail hook but they may have left the attachment point. I eventually cut the kit hook shaft where it went into the attachment point and cemented that in place if for no other reason than to fill the attachment hole. After masking and attaching the canopy and windscreen, I filled the engine opening with the aforementioned Silly Putty and headed for the paint shop.
| COLORS & MARKINGS |
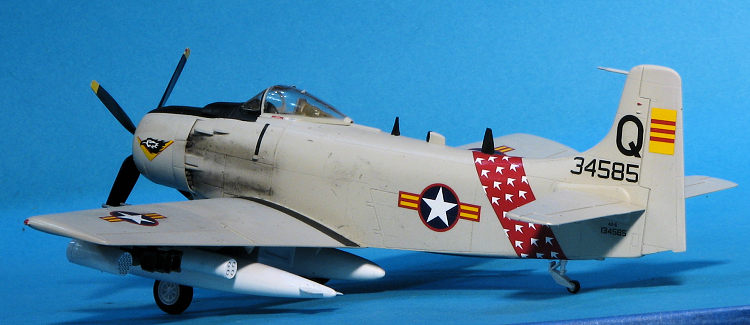
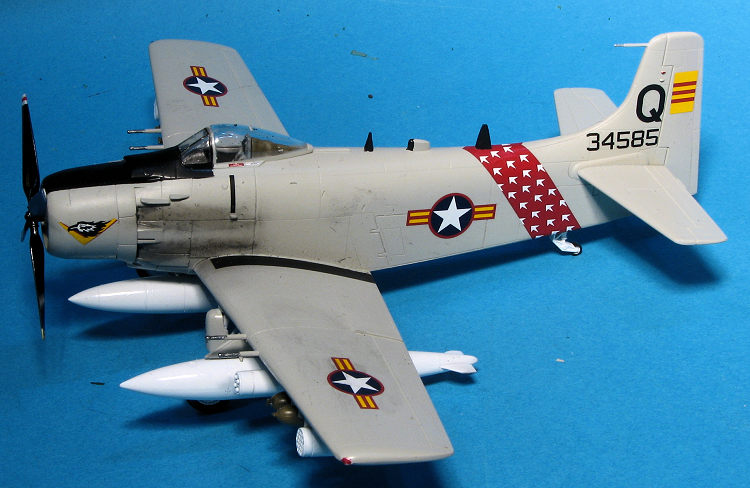
 For this build, I decided to use one of the early South Vietnamese Air Force
planes, hence the trimming of a few items not used on their planes. I chose
a scheme that still used the Navy wheels and had a fuselage band. This
aircraft was listed as overall light gull grey. I thought this was a tad odd
as they came from Navy stocks, but indeed, photos in the book VNAF 1945-75
showed that there were quite a few of these overall light gull grey planes.
This, of course, simplifies painting the airframe and I used Testors Model
Master enamel for this. The large tanks were still white so those and the
landing gear bits were painted this shade using Tamiya gloss white.
For this build, I decided to use one of the early South Vietnamese Air Force
planes, hence the trimming of a few items not used on their planes. I chose
a scheme that still used the Navy wheels and had a fuselage band. This
aircraft was listed as overall light gull grey. I thought this was a tad odd
as they came from Navy stocks, but indeed, photos in the book VNAF 1945-75
showed that there were quite a few of these overall light gull grey planes.
This, of course, simplifies painting the airframe and I used Testors Model
Master enamel for this. The large tanks were still white so those and the
landing gear bits were painted this shade using Tamiya gloss white. 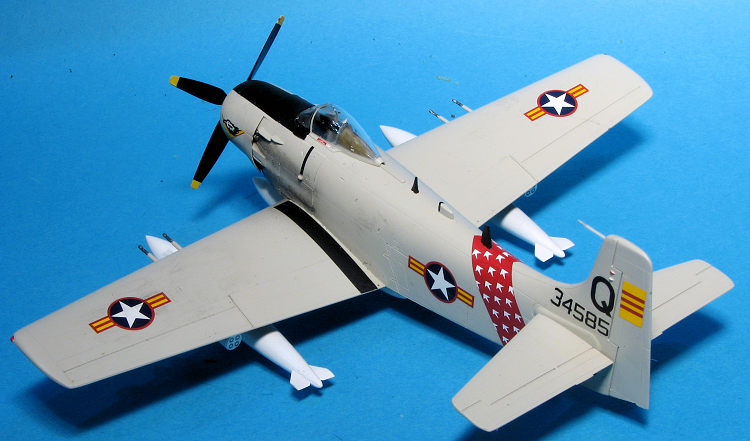 With all
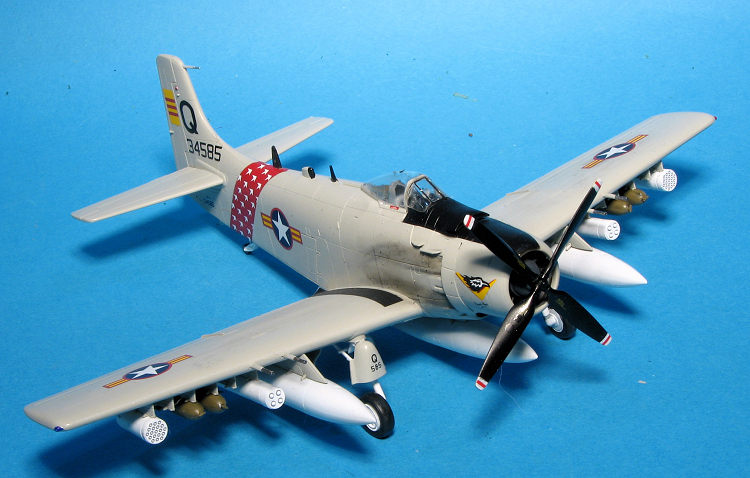
the markings eventually in place, I continued with some painting and
assembly. The prop has red/white tip markings on the front and yellow on the
back. I used a decal for the red stripe. Then I started adding things like
gear doors, wheels and other antennas. These planes had a large rear blade
antenna that the kit does not provide so it needs to be made from card
stock. Then it was time to provide a clear coat. The light gull grey of the
time was matte so a matte clear was applied. I then did some exhaust stains.
I really am terrible at doing these.
With all
the markings eventually in place, I continued with some painting and
assembly. The prop has red/white tip markings on the front and yellow on the
back. I used a decal for the red stripe. Then I started adding things like
gear doors, wheels and other antennas. These planes had a large rear blade
antenna that the kit does not provide so it needs to be made from card
stock. Then it was time to provide a clear coat. The light gull grey of the
time was matte so a matte clear was applied. I then did some exhaust stains.
I really am terrible at doing these. | CONCLUSIONS |
This was not the first Hasegawa Skyraider I've built nor will it be the last. They are nice kits that, with the usual care in building, will turn into equally nice models. They are also kits that tend to sell out rather quickly when reissued so it is worth picking up a pair (as I did) when they are re-released. The AOA decals are very nicely done and worth getting if you are wanting to do a VNAF plane in any scale.
| REFERENCES |
https://en.wikipedia.org/wiki/Douglas_A-1_Skyraider#Republic_of_Vietnam_Air_Force
VNAF: South Vietnamese Air Force 1945-75, by Jim Mesko, 1987, Squadron/Signal Publications.
29 March 2019
Copyright ModelingMadness.com. All rights reserved.
Thanks to me for providing this preview kit for your added education, and AOA
decals for the sheet. If you would like your product reviewed fairly and
fairly quickly, please
contact the editor or see other details in the
Note to
Contributors.