Fine Molds 1/72 F-4C Phantom II 'Air National Guard'
| KIT #: | FP46S |
| PRICE: | $47.00 delivered from Japan |
| DECALS: | Three options |
| REVIEWER: | Scott Van Aken |
| NOTES: | 2021 initial release |
| HISTORY |
The McDonnell Douglas F-4 Phantom II is an American tandem two-seat, twin-engine, all-weather, long-range supersonic jet interceptor and fighter-bomber originally developed by McDonnell Aircraft for the United States Navy. Proving highly adaptable, it entered service with the Navy in 1961 before it was adopted by the United States Marine Corps and the United States Air Force, and by the mid-1960s it had become a major part of their air arms. Phantom production ran from 1958 to 1981 with a total of 5,195 aircraft built, making it the most produced American supersonic military aircraft in history, and cementing its position as a signature combat aircraft of the Cold War.
 The success
of the Navy's F-4B and the delays in getting the F-111A into service led the
USAF to order the F-4C (originally the F-110A) into production. The aircraft
differed little from the Navy's version aside from large lower pressure tires,
and some USAF avionics. In fact, USAF training units borrowed 36 F-4Bs in order
to qualify air crew and maintenance technicians. The type did fairly well in
Vietnam and went on to be the basis for future upgraded variants. Once replaced
in USAF units, the F-4C soldiered on with ANG units until near the end of the
F-4s service life.
The success
of the Navy's F-4B and the delays in getting the F-111A into service led the
USAF to order the F-4C (originally the F-110A) into production. The aircraft
differed little from the Navy's version aside from large lower pressure tires,
and some USAF avionics. In fact, USAF training units borrowed 36 F-4Bs in order
to qualify air crew and maintenance technicians. The type did fairly well in
Vietnam and went on to be the basis for future upgraded variants. Once replaced
in USAF units, the F-4C soldiered on with ANG units until near the end of the
F-4s service life.
| THE KIT |
Fine Molds has turned their expertise to the F-4 Phantom II. Initial releases were of the Japanese F-4EJ but they have now put out other versions. This is the F-4C and it is quite welcome. Now this isn't the only F-4C by far as the type has been previously kitted by Monogram, Fujimi, and Hasegawa just to name the three biggies. Those kits are still available and still make nice models. However, this one has raised the bar in terms of engineering if nothing else.
Here are some of the interesting features. In the cockpit, the side consoles are separate inserts to take into account the various differences between variants. There is full intake trunking back to the first compressor stages. Not surprising is that the forward fuselage is separate. The main fuselage is a single piece with an upper deck insert so no worries about seams. There is also a detail piece for the engine aux intake doors.
 Wings are a lower section that includes most of the
lower fuselage with upper halves and separate wing tips. There is no folding
wing option with this kit. The wing underside has inserts for where the cat
attachment points would be on the naval versions. Two different radomes are
provided, one with and one without the IR seeker.
Wings are a lower section that includes most of the
lower fuselage with upper halves and separate wing tips. There is no folding
wing option with this kit. The wing underside has inserts for where the cat
attachment points would be on the naval versions. Two different radomes are
provided, one with and one without the IR seeker.
The metal portion of the rear fuselage is a separate item with an insert for the very aft portion. Again, to eliminate some of the usual seams one sees in other kits. You are provided a clean fin and can attach the RHAWS antennas if needed. Horizontal stabs are interlocking to help with alignment.
Inner main gear doors include a portion of the gear well so attaching these will be a breeze. You are provided missile pylons and three drop tanks. However, there are no weapons, those being offered in a separate weapons pack. Finally, you can do canopy open or closed with a separate closed canopy piece. Since this is the initial release of the kit, you are provided with a pair of crew members.
Instructions are in booklet form and are excellent, providing Gunze and FS 595 color references.Three markings options are provided, all in overall ADC Grey. Two are from the 171 FIS, Michigan ANG with these planes differing in serial number and the small nose art these planes carried. The third is a three time MiG-killer with the 123 FIS, Oregon ANG. The superbly printed decal sheet includes the expected mass of stencils and also has decals for the instrument and console panels. An interesting decal is for the arrowhead shaped reinforcement panels that were on the horizontal stabs of post-Vietnam F-4s. Saves on having to tool new plastic parts.
| CONSTRUCTION |
I was very much looking forward to giving this one a go. Others who have built this kit really liked it, and there was reason for it. The engineering is superb. It isn't a shake and bake, but I had fewer fit issues with this kit than I've had with other 1/72 F-4s.
 Surprisingly, it starts with the cockpit. The kit offers
raised instrument panels and side consoles as well as those that are flat so you
can use decals. I put decals over the raised detail and it seemed to work just
fine. In line with other F-4 kits, the nose gear well fits on the underside of
the cockpit. With that done, the forward fuselage halves are closed and the
intakes installed, after painting the inside of the trunking white. Next the
splitter plates and the outside of the intakes are installed. There are inserts
that are installed fore and aft of the cockpit.
Surprisingly, it starts with the cockpit. The kit offers
raised instrument panels and side consoles as well as those that are flat so you
can use decals. I put decals over the raised detail and it seemed to work just
fine. In line with other F-4 kits, the nose gear well fits on the underside of
the cockpit. With that done, the forward fuselage halves are closed and the
intakes installed, after painting the inside of the trunking white. Next the
splitter plates and the outside of the intakes are installed. There are inserts
that are installed fore and aft of the cockpit.
Moving to the upper rear fuselage piece, the compressor face piece was painted and installed along with a rear brace and a bulkhead to which the exhaust will eventually fit. Then the upper fuselage insert is installed and the forward fuselage attached with the intake trunking fitting into a ring around the compressor face. I had issues on one side with a rather sizeable gap so sanded down that intake where it fit into the compressor face. That helped some, but no amount of sanding would close the gap.
I then drilled the holes for the pylons on the lower wing piece and installed a pair of braces in the main gear well, the engine bits visible through the bleed in doors and the area that would surround the nose gear well. Then the upper wings were installed. These fit very well, but you need to be sure you have properly cleaned all the sprue attachment stubs from the parts or you will have issues. I left off the wing tips until later. The wing was then attached to the fuselage and various inserts added to the lower wing/fuselage. I did build up the nose cone, but left it off until after painting. The seats were painted and installed, followed by the clear bits, which were then masked. I also built up the wing pylons and the wing drop tanks. Attaching the missile rails to the pylons was a frustrating experience as the attachment points are tiny and difficult to get just right.
| COLORS & MARKINGS |
 Next, construction moved to the hot section. This area is
separate so you don't have to mask anything. These parts were painted in various
metallic shades along with the tail hook. I had lost the kit tail hook, so
robbed one from a Fujimi kit that I had in the dead kit pile. At this time, I
painted the gear wells with white and masked them with Silly Putty. Then the
airframe was painted with Model Master ADC Grey enamel. The nose section was masked and the
black anti-glare was painted. I had prepainted the landing gear and gear wells
with white using Tamiya paints. Before the airframe was painted overall, I'd
filled the wells with Silly Putty, which is what I've used for years. One of the
benefits of the overall ADC Grey scheme is that it is easy to paint and it is
gloss so no need to provide a gloss clear prior to decal application.
Next, construction moved to the hot section. This area is
separate so you don't have to mask anything. These parts were painted in various
metallic shades along with the tail hook. I had lost the kit tail hook, so
robbed one from a Fujimi kit that I had in the dead kit pile. At this time, I
painted the gear wells with white and masked them with Silly Putty. Then the
airframe was painted with Model Master ADC Grey enamel. The nose section was masked and the
black anti-glare was painted. I had prepainted the landing gear and gear wells
with white using Tamiya paints. Before the airframe was painted overall, I'd
filled the wells with Silly Putty, which is what I've used for years. One of the
benefits of the overall ADC Grey scheme is that it is easy to paint and it is
gloss so no need to provide a gloss clear prior to decal application.
Once the landing gear and doors were attached, I started on the fairly tedious job of applying decals. I first put on the walk areas, followed by the wing insignia. Then followed several weeks of putting on sometimes tiny markings. Once that was done, various bits had to be touched up.
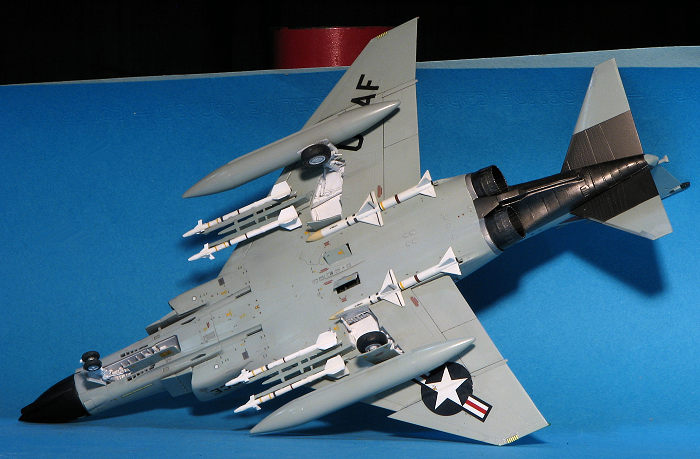
I had wondered if I should bother attaching any weapons.
Aircraft will spend the vast majority of their life with nothing on the various
weapons pylons. However, I did buy a weapons set for this and other F-4 kits so
decided to use it. For this one I decided on four AIM-9J Sidewinders and a pair
of AIM-7E Sparrows, the latter fitting in the aft bays. One thing I wasn't all
that jazzed about is the separate forward fins on the Sidewinders. Hasegawa
managed to mold those in place for their set so not sure why Fine Molds made
them 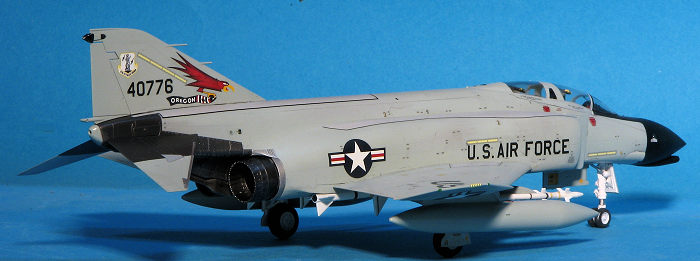 separate.
I also didn't see that much improvement in detail over the Hasegawa offerings.
These were painted gloss white and had the various stripes and such attached.
separate.
I also didn't see that much improvement in detail over the Hasegawa offerings.
These were painted gloss white and had the various stripes and such attached.
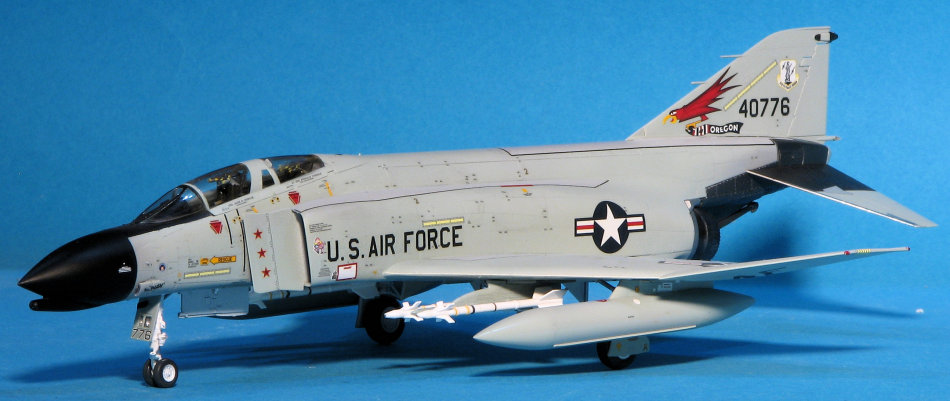
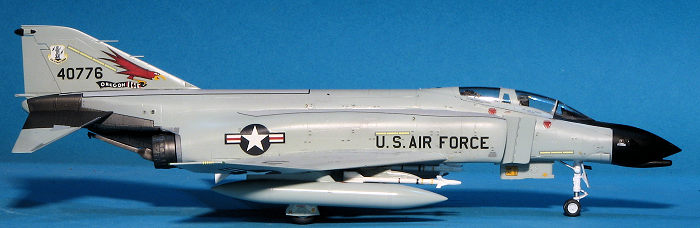
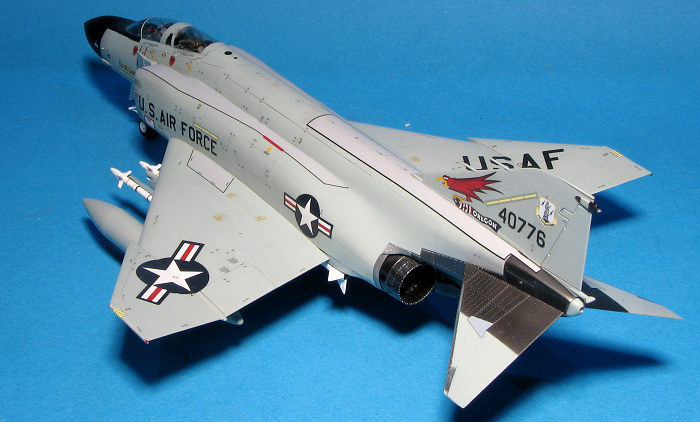
With all that done, it was time to bring it all together. All the hot section bits that had been pre-painted were glued in place as were the landing gear and gear doors. These latter items have very positive locators, which is a huge help. With all the common markings in place, I chose the 123 FIS, Oregon ANG scheme. I picked this as I figured it would be the least modeled one of those offered and it was a MiG killer. Generally the decals all went on well, though I discovered after spraying on a gloss clear coat, that some had silvered. Atop this went a semi-gloss as these aircraft, while glossy, were not that glossy. The landing light cover was attached along with the pylons and tanks and the masking removed. That was it.
| CONCLUSIONS |
While not the simplest 1/72 F-4 kit I've ever built, it is well engineered and offers all the detail one could want in this scale. While I won't go and bin my other 1/72 Phantoms, I can say it has to be the best 1/72 F-4 kit I've built and I look forward to doing another.
| REFERENCES |
https://en.wikipedia.org/wiki/McDonnell_Douglas_F-4_Phantom_II
27 October 2023 Copyright ModelingMadness.com. All rights reserved. No
reproduction in part or in whole without express permission from the editor.
If you would like your product reviewed fairly and fairly quickly, please
contact
the editor or see other details in the
Note to
Contributors.