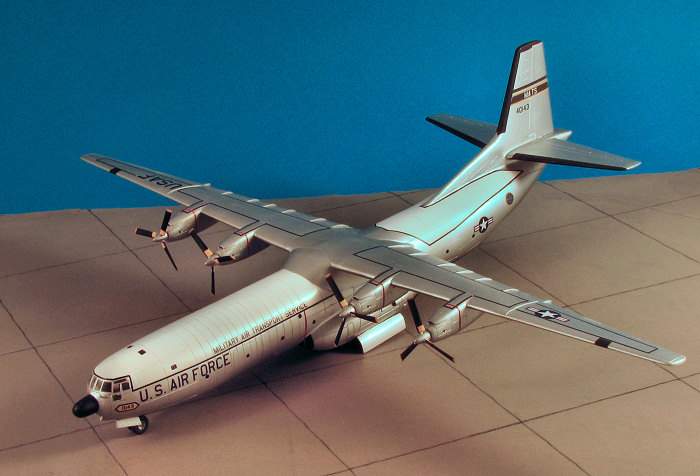
Nostalgic Plastic 1/144 C-133A Cargomaster
| KIT #: | 14401 |
| PRICE: | $110.00 MSRP |
| DECALS: | Five options |
| REVIEWER: | Scott Van Aken |
| NOTES: | Full resin kit |
| HISTORY |
The Douglas C-133 Cargomaster was a large cargo aircraft built by the Douglas Aircraft Company between 1956 and 1961; 50 aircraft (32 C-133A and 18 C-133B) were constructed and put into service with the USAF. A single C-133A and a C-133B were built and kept at Douglas Long Beach as "test articles." They had no construction numbers or USAF tail numbers.
The C-133 had large tail doors and side doors and a large, open cargo area. With the C-133B, the rear cargo doors were modified to open to the side (petal doors), making an opening large enough to transport ballistic missiles such as the Atlas, Titan and 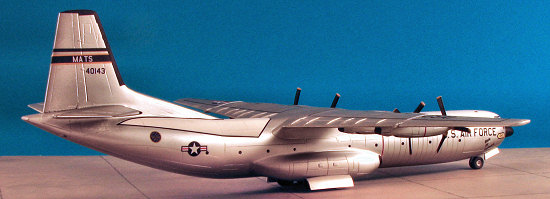 Minuteman more cheaply, safely and quickly than road transport. Several hundred Minuteman and other ICBMs were airlifted to and from their operational bases. The C-133 also transported Atlas, Saturn and Titan rockets to Cape Canaveral for use as launch boosters in the Gemini, Mercury and Apollo space programs. After the Apollo capsules splashed down, they were airlifted in C-133s from Norfolk Naval Station or Hickam AFB to Ellington AFB, Texas, or to California.
The C-133 was for many years the only aircraft capable of hauling very large or very heavy cargo. Despite the C-124's capabilities, there was much cargo that it could not carry because of its configuration with a cargo deck 13 ft (4 m) off the ground and its lower, though substantial, engine power.
By 1971, shortly before the introduction of the Lockheed C-5 Galaxy, the Cargomaster was obsolete as well as being worn out, and all were withdrawn from service in 1971. The C-133 was originally a 10,000-hour airframe that had been life-extended to 19,000 hours. Severe vibration had caused critical stress corrosion of the airframes to the point that the aircraft was beyond economical operation any longer. The Air Force managed the C-133 fleet to keep as many as possible in service until the C-5 finally entered squadron service.
| THE KIT |
There are many aircraft kits that enthusiasts have been asking for over the years. One of those is the C-133 Cargomaster along with a number of other large aircraft. Nostagic Plastic in concert with Anigrand of Honk Kong has finally brought what many have wanted, an accurate C-133A/B kit. Since doing something this large in 1/72 would be prohibitive due to its size, 1/144 scale was chosen and a wise one, I think. Even in this scale, the fuselage measures over a foot in length so you can imagine the space 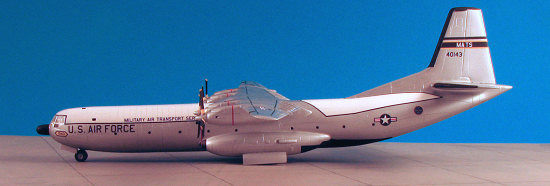 required for a larger scale kit.
This kit is very much like other kits produced by Anigrand for themselves and others. The resin is well detailed with engraved panel lines that seem initially to be too deep, but once you get the model together and paint it that impression goes away. There are the usual air bubbles and voids that those of us who have built kits like this are used to seeing. Repair is easy and a variety of materials can be used to take care of that. The two piece fuselage has keyways to assist in providing the proper alignment and I'd recommend getting the the front and rear sections properly together before gluing the halves. There is room in the nose for weight as I'm thinking this one may well need some to keep from tail sitting.
Engines and flight surfaces are a single casting, making it easy to assemble once the parts have been cleaned up and prepared. A single clear resin part is provided for the cockpit. The resin is thick so little will be seen through the windows. The major bits of the cockpit like seats and consoles are also provided. The engines are one piece and have different keyways to keep you from mounting them in the wrong place. Prop blades are separate and must be placed properly in the spinners.
 Instructions are quite good in that there is a history of the plane, some construction suggestions, an exploded view of the parts (more than adequate for a kit like this), and a decal/painting guide printed in color. The instructions will also tell you how to scribe new panel lines for the larger rear doors on the C-133B if you wish to model that version. There are decals for five aircraft, all in unpainted metal. There are three C-133As with white fuselage tops; one with the 1607th ATW from Dover AFB in 1958, with a second from that wing in 1964, but with da-glo bands on the nose, fuselage and wings. The third is another Dover based plane 'State of Delaware' from 1957. Two C-133Bs are from the 1501st ATW at Travis in 1964 with no white upper fuselage. The other is the one at the AMC museum in Dover, DE. Decals are well done and provide basic markings. Wing walk and upper/lower fuselage demarcation stripes will have to come from another source. Microscale makes several sheets of stripes and the ones for N gauge should be about right. Check your local train shop as thin stripe decals are not that easy to find.
This kit also included a CD-ROM with detail photos of two planes, one at the AMC museum at Dover AFB and the other at the Pima Aerospace museum in Tuscon, AZ.
| CONSTRUCTION |
As always with resin kits, the initial stage should be used to take care of the inevitable molding glitches. This one was pretty clean aside from the usual air pockets at the tips of the wings, fin, stabilizer and around the cockpit opening. Superglue was used to fill these as none were really bad.
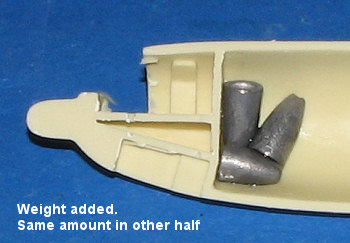 I then added considerable weight to the nose section behind the cockpit to keep this from tail sitting. Basically, I taped the fuselage halves together, stuck on the tail section bits and then taped on weight until it was nose-heavy. The weights were glued in with super glue. I also attached the front and rear fuselage sections together. Once the usual detritus of resin was removed from pins and receptacles, the fit was quite good. There was a small step between them that was easily removed by light sanding.
 While all that was being done (and it often takes several applications to fill the holes), I did some research on the cockpit. There is no info in the instructions, but the accompanying CD-ROM is a wealth of information. I had thought just regular Dark Gull Grey, but there are a multiplicity of colors used in the C-133 cockpit. I used a variety of greys when doing this and even left a few bits in the natural resin shade as it matched some of the bits shown on the CD-ROM. It would have been very
 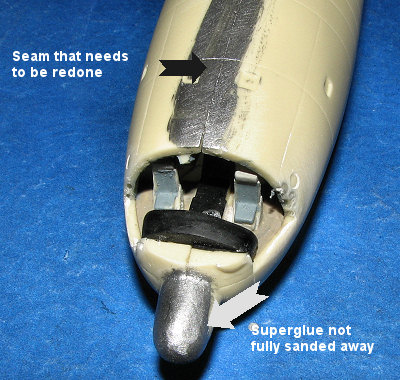 nice to have decals for the instruments on the main panel, flight engineer panel and navigator's panel, but really, they won't be easily seen through the transparency anyway. The detail level isn't the highest in this scale and I'm thinking that the seats may well be generic. There are holes drilled for two control columns, but all I was able to find was one so it was placed before the left seat.
Once the interior was done, it was time to cement the fuselage halves together. As the forward fuselage is heavily 'ribbed', I made sure that the upper section was as even as I could get it and did not cement the lower section until all the upper parts were glued. Once the fuselage was glued and dry, I sanded down all the super glue. It is pretty normal that the first application won't be enough, but just where to find the seams when using a clear material for filler can be a problem, as can being sure all is sanded. For this, there is no better material than silver paint. Simply brush along the areas where there are seams and any area that needs redone will become quite obvious.
I also took this time to start cleaning up the smaller bits like prop blades, hubs, wheels, landing gear and the like. The canopy was cleaned of its attachment point and then fit into place. It actually fit quite well, much to my delight. I did notice that the fit on the right side left quite a lower gap. I also saw that the air pocket situation wasn't totally taken into hand. Due to the close proximity of windows, it would be wise to handle ALL glitches prior to attaching the canopy section. More glue added to the bubbles and I shimmed the gap with .025 plastic strips. You can see the strips added in place along with the results of the first round of additional filler application in the image. The danger of too much sanding is also visible in the tiny pin-holes you see on the upper fuselage. Areas needed additional application of filler show up darker than those recently filled, where the paint has seeped into the seam.
I also prepped the tail area for the fin and horizontal stabilizers. The stabs are keyed, which is nice. Once drilling out the mounting holes to the proper size (mostly to get rid of built up resin), I found the left one a perfect fit, but the right one was a bit low in the front. Sanding the top of the mounting pin 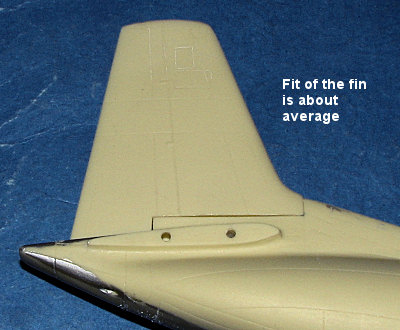 gave enough slop to bring it up to the proper level. And level they were. Even without cementing them in place, I was able to use them to attach the fin and get it properly aligned. As usual, the fit was only fair and filler will be needed to take care of the gaps. Tailplanes were removed to prevent me from doing something stupid and damaging them while I applied filler and sanded on the fin.
I moved to the wings. There are square protuberances on the trailing edge that had large air pockets in them that took considerable time to repair. I also needed to fill some small air pockets on the trailingedge of the engine pods to fix. These engines are not a universal fit and each one goes in a specific place. You can determine that by test fitting them and it is not a difficult choice as it is quite obvious what goes where. Each engine pod has a pin to fit into the hole drilled in the wing. All the engine pod pins are short shot, but 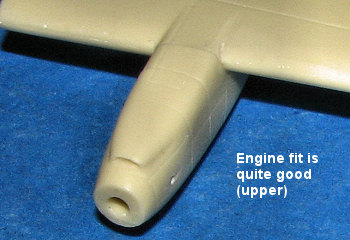 there is enough there to fit into the assigned hole. Fit on these is very good with only a bit of filler needed on the top wing/engine join.
While that was drying, I glued on the main gear housings. These have alignment pins on them to fit into holes on the side of the fuselage. However, the pins were so short-shot as to be nonexistent. Fortunately, you can line things up using the wheel well detail on the fuselage just be very careful when installing them. Once on, I did the usual deal with superglue on the seams and it took several sessions to remove all the seam.
The wings were then glued in place. Again, a very good fit, though several applications of super glue for filler was needed. All of this took several days as I've learned not to use accelerator on joins unless there is no option as using this material creates a considerably weaker join and promotes air pockets. I now use accelerator only when I absolutely have to.
 As the wheel wells were aluminum, I figured that now would be a good time to install the gear. The fit is quite good though you do need to keep the nose gear strut rather long so be careful trimming it. I also found that the main gear had the axles out of alignment as they were slightly 'twisted' so the wheels won't be even with each other. No real fix other than to cut the gear legs and re-glue the axles. I didn't do this. I also found one main gear leg missing so e-mailed Nostalgic Plastic about it and they sent one to me so I could finish the kit. Meanwhile, I attached the canopy and did the usual filler around it to get it to blend in with the surrounding fuselage. Fit is actually quite good as these things go and masking it wasn't the guesswork as it was with the previous vacuformed clear bits.
| COLORS AND MARKINGS |
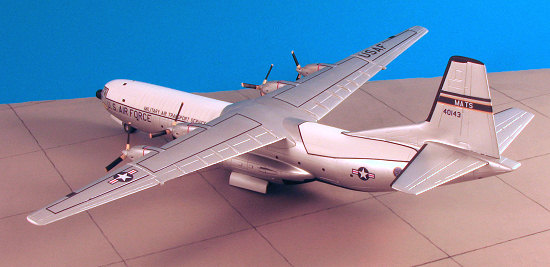
I had decided on the general color scheme for this aircraft, which was aluminum with a white fuselage top. That being the case, I painted several coats of white using Floquil's Reefer White and then followed that with a coat of Testors Model Master gloss white and several coats of Future. This was all carefully masked off and the rest of the airframe was painted with Humbrol #11 aluminum. Even in 1/144, there is a lot of paint that needs applied. Thanks to already having the landing gear struts installed, I was able to set the model down on them to allow the paint to dry. I also painted on the black areas of the t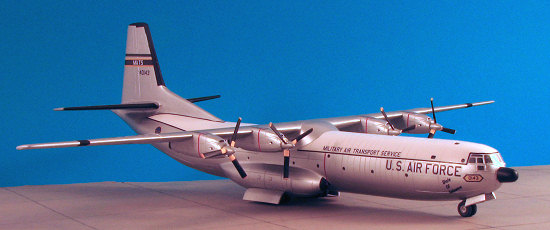 ail section, wing antennas, nose and front of the sponsons. Thanks to the CD, I was able to get a good idea of how the APU exhaust area looked and after much masking, had that painted as well. Once done, I had to hunt around for some striping.
Now the stripes on this aircraft are supposed to be insignia blue, but that is near impossible to find. I eventually located some Microscale N gauge black stripe decals to use. Problem is that they are in 3 inch lengths (sort of like Simpson's Individual Stringettes) so the addition of the fuselage stripes was a bit prolonged. I also installed the wing walk stripes, a job that was even more time consuming. However, it is worth the work. The decals were then added. These worked just fine with Solvaset. I chose the option for the 'State of Delaware' plane and this meant using the additional strip decal sheet. These look very much as if they were done on an ALPS printer. The sheet has a solid carrier, which means the individual markings need to be cut out. The decals are also extremely prone to scratching so one has to be especially careful in their application. The yellow is not as dense as with the other decals in the kit and it would have been nice to have a white background decal for the nose numbers. Fortunately the aluminum background does not dull or affect the yellow as much as a darker background would. The last task in this area was to take my technical pen and paint in the windows and other intakes and vents. I know a lot of people 'poo-poo' these pens, but they are as important to most builds as are glue and sandpaper.
| FINAL BITS |
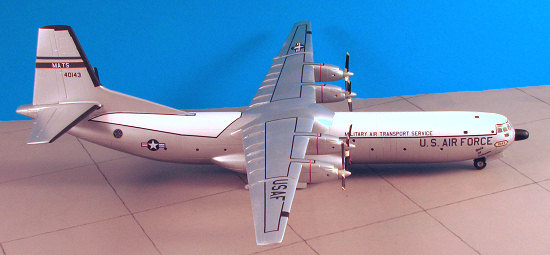
With the decals on, I turned my attention to the props. The kit includes 16 blades, though only 12 are needed. I chose the best 12, cleaned them up and painted them black. I then painted the tips with Insignia Yellow using some of my old Aeromaster Acrylics. I brush painted these. I also painted the area near the root using Vallejo Golden Yellow acrylic as it was more this shade than the 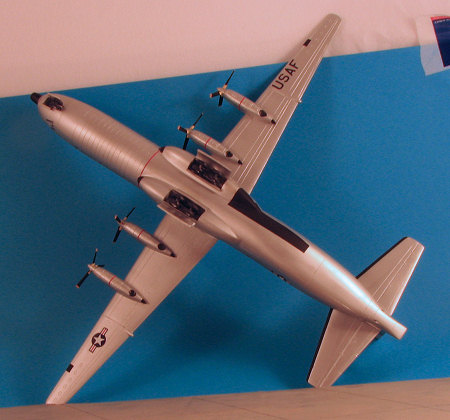 Insignia Yellow called out in the instructions. The CD that comes with the kit is a real help in getting down these sorts of color details. I then attached the blades. The props spin counter clock-wise so it is important to have the blades mounted the correct way. I found that some of the blades seemed to have been molded for clockwise rotation as they just didn't match the 'sit' of the other blades. Not much to do about it other than glue things in place.
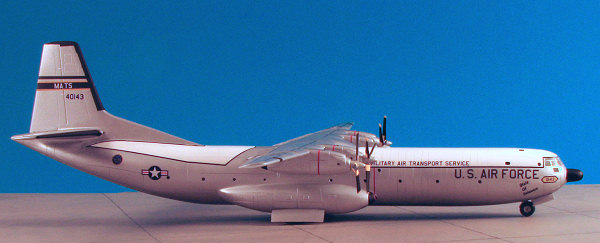
I then added the red turbine and prop warning stripes. Again I used Microscale N gauge train striping. This time the stripes gave me a lot of trouble. They were brittle and tended to break quite easily. Obviously these had not been stored in a controlled environment. I suspect they had been allowed to get too hot and dry. I did manage to get the striping done using considerably more stripes than what the end result would suggest.
I also attached the wheels at this time as well as most of the gear doors. Fit is quite good for all these. I'll add a caution in regards to the main wheels/gear. You need to attach the wheels before installing the main gear struts. You also need to thin down the outer gear housing or you'll never get the outer main wheels to fit. Keep the wheels as close to the gear strut as you can when installing these. It means additional test fitting, but you'll not have the problems I had mounting the wheels if you do so. After cutting the gear doors, I glued them in place. Again, the CD was most helpful in this regard, though there is still some question in my mind as to exact fitting of the inner main gear doors and the small nose gear door as they are hidden in all the photos provided. I removed the masking from the windows, noticed that I didn't paint all the dash, cursed, glued in the props and took photos.
| CONCLUSIONS |
 I have to congratulate Nostalgic Plastic on having this kit produced. It makes into a very nice model of an important transport and is a kit that needed to be done sooner or later. I'm glad it was sooner. I'm also pleased that it was in 1/144 as not only does that mean it will fit on my display shelves, it also means that it is more likely to get built than a 1/72 behemoth would be.
Since I built this one, Roden has come out with one in injected plastic that has
to be an easier project.
I have to congratulate Nostalgic Plastic on having this kit produced. It makes into a very nice model of an important transport and is a kit that needed to be done sooner or later. I'm glad it was sooner. I'm also pleased that it was in 1/144 as not only does that mean it will fit on my display shelves, it also means that it is more likely to get built than a 1/72 behemoth would be.
Since I built this one, Roden has come out with one in injected plastic that has
to be an easier project.
September 2007
#1486 in a series
COpyright ModelingMadness.com. All rights reserved.
If you would like your product reviewed fairly and fairly quickly, please contact the editor or see other details in the