| KIT #: | F-11 |
| PRICE: | 800 yen when new (1986) |
| DECALS: | Three options |
| REVIEWER: | Scott Van Aken |
| NOTES: | Initial 1986 boxing |
| HISTORY |
The United States Army has not been permitted to operate fixed-wing combat aircraft since the establishment of an independent United States Air Force (USAF) in 1947. To meet its need for close air support of its troops in South Vietnam, the Army pressured the Air Force to procure a specialized subsonic close air support fixed-wing aircraft that would suit its needs better than the general-purpose supersonic aircraft that the USAF preferred.
The Vought A-7 seemed to be a relatively quick and inexpensive way to satisfy this need. However, the USAF was initially reluctant to take on yet another Navy-designed aircraft, but Secretary of Defense Robert McNamara was insistent. On 5 November 1965, Secretary of the Air Force Harold Brown and USAF Chief of Staff General John P. McConnell announced that they had decided to order a version of the Corsair II, designated A-7D, for the Tactical Air Command.
 The A-7D differed from the Navy's Corsair II in several ways. For one, the Air
Force insisted on significantly more power for its Corsair II version, and it
selected the Allison TF41-A-1 turbofan engine, which was a license-built version
of the Rolls-Royce Spey. It offered a thrust of 14,500 lbf (64,000 N), over
2,000 lbf (8,900 N) greater than that of the TF30 that powered the Navy's
Corsair IIs. Other changes included a head up display, a new avionics package,
and an M61A1 rotary cannon in place of the two single-barreled 20-mm cannon.
Also included was a computerized navigation/weapons delivery system with
AN/APQ-126 radar and a head-up display.
The A-7D differed from the Navy's Corsair II in several ways. For one, the Air
Force insisted on significantly more power for its Corsair II version, and it
selected the Allison TF41-A-1 turbofan engine, which was a license-built version
of the Rolls-Royce Spey. It offered a thrust of 14,500 lbf (64,000 N), over
2,000 lbf (8,900 N) greater than that of the TF30 that powered the Navy's
Corsair IIs. Other changes included a head up display, a new avionics package,
and an M61A1 rotary cannon in place of the two single-barreled 20-mm cannon.
Also included was a computerized navigation/weapons delivery system with
AN/APQ-126 radar and a head-up display.
Two YA-7D prototypes were completed with TF30-P-6 engines, and the first of these flew on 6 April 1968. The first Spey-powered A-7D (67-14854) flew for the first time on 26 September 1968. The seventeenth production aircraft introduced a provision for boom flight refueling in place of the Navy's probe/drogue system, with the boom receptacle being on the top of the fuselage behind the cockpit and offset to port.
The USAF quickly rid itself of the A-7D once the A-10 came into production, foisting its aircraft on the ANG, where they served until 1993.
| THE KIT |
 The kit provides an adequate cockpit with decals for instruments and the
ability to pose the canopy open, though without any actual support
mechanism. The intake is fairly long though there is a major seam that takes
a bit of work to remove. This section is different depending on the armament
of the version being built. No indication of weight is mentioned, but I
always add some.
The kit provides an adequate cockpit with decals for instruments and the
ability to pose the canopy open, though without any actual support
mechanism. The intake is fairly long though there is a major seam that takes
a bit of work to remove. This section is different depending on the armament
of the version being built. No indication of weight is mentioned, but I
always add some. | CONSTRUCTION |
 I began this kit in a standard way. That means I built up the cockpit. Due
to the age of the kit, it took a long time for the instrument decals to come
free of the backing, but they worked fine. They are oversize, which is
better than too small, I guess. I also prepainted things like intakes, wheel
wells and wheels. I used white for the first two and silver for the front
with black for the rear wheels. I have photos of this combo so it isn't
unusual.
I began this kit in a standard way. That means I built up the cockpit. Due
to the age of the kit, it took a long time for the instrument decals to come
free of the backing, but they worked fine. They are oversize, which is
better than too small, I guess. I also prepainted things like intakes, wheel
wells and wheels. I used white for the first two and silver for the front
with black for the rear wheels. I have photos of this combo so it isn't
unusual. 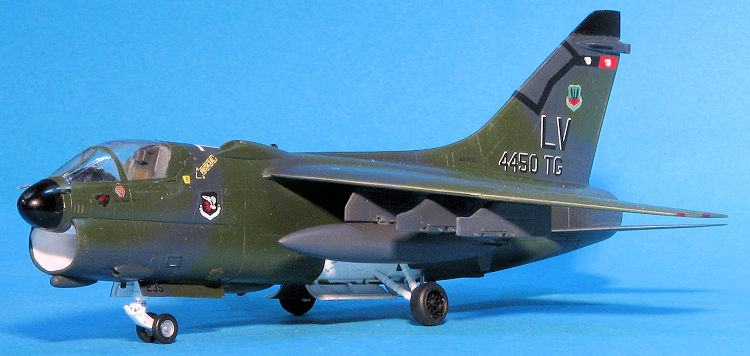 The A-7D has more external bits to add to the fuselage than the earlier A-7s
so I spent some quality time attaching those. The instructions are not real
precise on some of these but the markings guide was helpful in placement.
The large fairing just behind the nose gear well needs to have holes opened
up for it prior to closing the fuselage halves. The instructions make no
mention of this need so I had to cut the attachment pins and flush mount
it. The under nose Pave Penny pod was not used on USAF planes and was only
added after they'd been transferred to the ANG.
The A-7D has more external bits to add to the fuselage than the earlier A-7s
so I spent some quality time attaching those. The instructions are not real
precise on some of these but the markings guide was helpful in placement.
The large fairing just behind the nose gear well needs to have holes opened
up for it prior to closing the fuselage halves. The instructions make no
mention of this need so I had to cut the attachment pins and flush mount
it. The under nose Pave Penny pod was not used on USAF planes and was only
added after they'd been transferred to the ANG. | COLORS & MARKINGS |
 fill
wells, you should. The nose and fin tip were then painted black and masked.
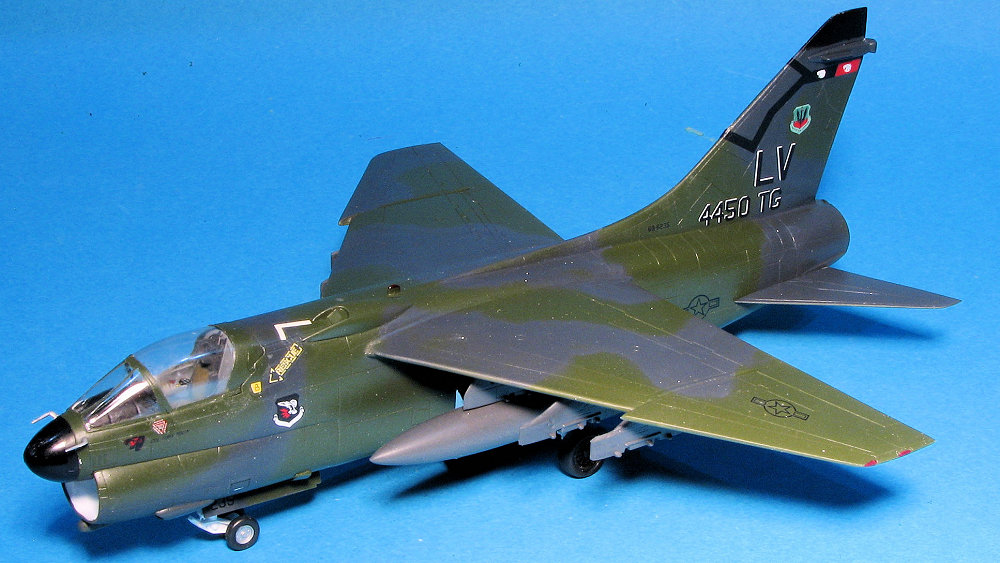
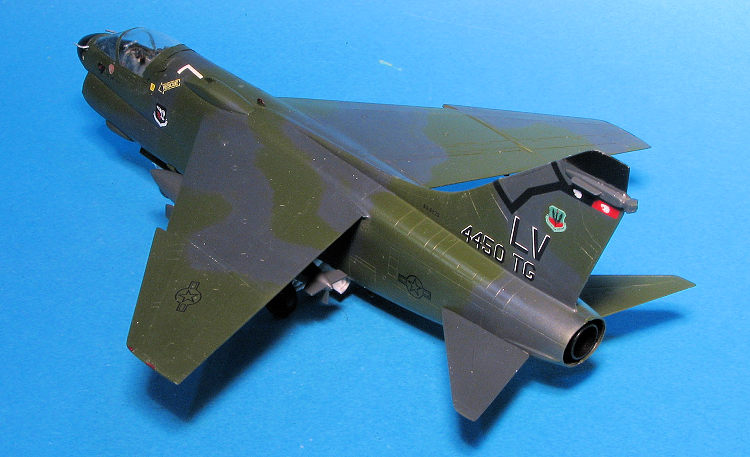
I decided to use Superscale sheet 72-567 which has a Euro 1 painted A-7 from
the 4450th Test Group. These planes were used to help train F-117 pilots as
the aircraft has similar flying capabilities. I don't think they were
modified, but am not sure. These aircraft were somewhat unique in being an
active USAF unit with A-7s in this scheme. The USAF had transferred all its
A-7s to the ANG while in the SEA or SEA wraparound camouflage.
fill
wells, you should. The nose and fin tip were then painted black and masked.
I decided to use Superscale sheet 72-567 which has a Euro 1 painted A-7 from
the 4450th Test Group. These planes were used to help train F-117 pilots as
the aircraft has similar flying capabilities. I don't think they were
modified, but am not sure. These aircraft were somewhat unique in being an
active USAF unit with A-7s in this scheme. The USAF had transferred all its
A-7s to the ANG while in the SEA or SEA wraparound camouflage. | FINAL CONSTRUCTION |
 Once
painted, the putty was removed and the landing gear installed. The nose gear
well on these kits is pretty lame, but it will be hidden unless you turn
over the model. Then everything was given a clear coat. I had no issues with
the decals and used several of the kit decals, also with little issue,
though they took a long time to come free of the backing.
Once
painted, the putty was removed and the landing gear installed. The nose gear
well on these kits is pretty lame, but it will be hidden unless you turn
over the model. Then everything was given a clear coat. I had no issues with
the decals and used several of the kit decals, also with little issue,
though they took a long time to come free of the backing. | CONCLUSIONS |
I built this and an A-7A at the same time since construction is basically the same. This one lagged for a few weeks as I concentrated on finishing a couple of other kits. It is not a throw together kit and does show its age in several ways. However, it is considered by many to be the most accurate in this scale and can often be found for $10 or so, which will appeal to the frugal modeler. It is a great addition to a growing collection.
| REFERENCES |
https://en.wikipedia.org/wiki/LTV_A-7_Corsair_II
13 September 2019
Copyright ModelingMadness.com. All rights reserved.
If you would like your product reviewed fairly and quickly, please contact the editor or see other details in the Note to Contributors.