
| KIT #: | FC5 |
| PRICE: | 2280 yen |
| DECALS: | Three options |
| REVIEWER: | Scott Van Aken |
| NOTES: | Two kits in the box |
| HISTORY |
 The Phantom II is a plane that needs no introduction
for most of us, so here are the specifics on the E model. The F-4E was a USAF
version with an integral M61 Vulcan cannon in the elongated RF-4C-style
nose, AN/APQ-120 radar with smaller cross-section to accommodate the cannon,
J79-GE-17 engines with 17,900 lbf (79.379 kN) of afterburner thrust each.
Late-series aircraft equipped with leading-edge slats to improve maneuverability
at the expense of top speed under the Agile Eagle program. Starting with Block
53, aircraft added AGM-65 Maverick capability and smokeless J79-GE-17C or -17E
engines. First flight 1 August 1965. The most numerous Phantom variant; 1,370
built.
The Phantom II is a plane that needs no introduction
for most of us, so here are the specifics on the E model. The F-4E was a USAF
version with an integral M61 Vulcan cannon in the elongated RF-4C-style
nose, AN/APQ-120 radar with smaller cross-section to accommodate the cannon,
J79-GE-17 engines with 17,900 lbf (79.379 kN) of afterburner thrust each.
Late-series aircraft equipped with leading-edge slats to improve maneuverability
at the expense of top speed under the Agile Eagle program. Starting with Block
53, aircraft added AGM-65 Maverick capability and smokeless J79-GE-17C or -17E
engines. First flight 1 August 1965. The most numerous Phantom variant; 1,370
built.
| THE KIT |
Platz has partnered with F-toys to produce a growing catalogue of 1/144 kits. These kits are marketed as two to a box, which provides a good value for the builder. They are also designed to be built without too much fuss and you'll find most of the attachment points to be quite large. The kits provide engraved panel detail which is grossly overscale, but once painted will not look all that bad.
The kit provides a
 well
appointed cockpit with raised detail on the side consoles and instrument
panels. It has separate seats and while there are no control sticks, if one
uses the two crew figures that are supplied, this will not be noticed. All
this will eventually be under a somewhat thick one-piece canopy assembly
anyway.
well
appointed cockpit with raised detail on the side consoles and instrument
panels. It has separate seats and while there are no control sticks, if one
uses the two crew figures that are supplied, this will not be noticed. All
this will eventually be under a somewhat thick one-piece canopy assembly
anyway.
As a first for me and an F-4 kit, there is an insert for the section between the afterburner cans. Intakes are pretty standard stuff with a separate splitter piece and outer intake section. no indication is provided as to any need for weight but the bigger scale ones do not need it. The wing is a single piece with the holes for the pylons and tanks already opened.
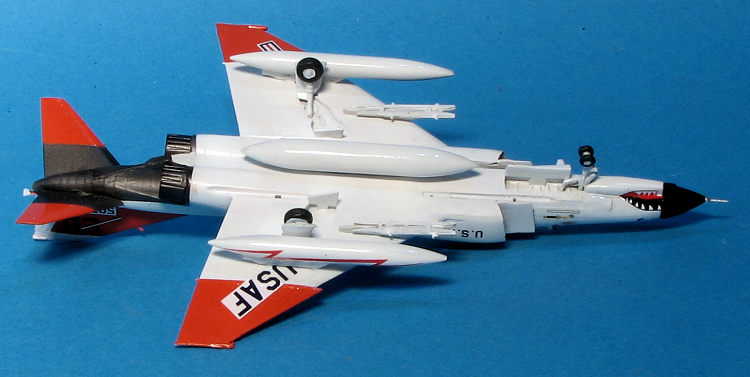
The kit does provide an option to have the kit built gear up, and while there is no display stand provided, one could easily be made or adapted. As mentioned, the attachment pins are large, so getting the landing gear and doors attached will be pretty easy. Attaching the Sidewinders is the usual butt join.
Now for a couple of notes. First of
all, this molding is used for a number of other boxings, as such, there are
features that may not apply to the markings option you wish to use. For
instance, the wing-tip ECM antennas would not be used in a Vietnam War
plane. The same goes for the stabilizers with the arrow shaped reinforcement
plate, though the slotted stabs would have been used. So fill those plates
in at least for the first option. The first option would have probably not
have had the later gun muzzle so you may want to consider sanding that back.
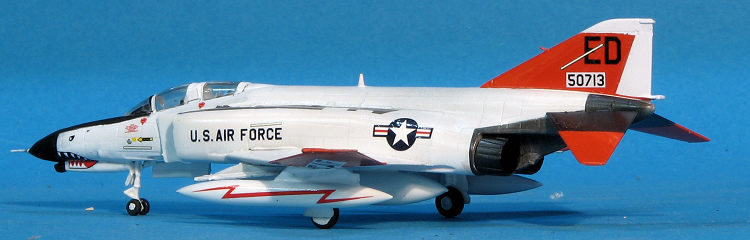
Finally, the Edwards test plane was really a modified F-4D. While later it
life it did have the proper gun muzzle, it never got the slotted
stabilizers. Fortunately, the kit provi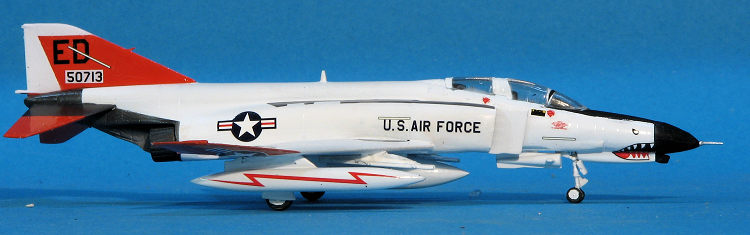 des both styles so you can make the
change. I am also not positive if the slime lights would have been applied
to the second option. It is stated as shown as it was in 1972 while the
lights were a late 1970s addition.
des both styles so you can make the
change. I am also not positive if the slime lights would have been applied
to the second option. It is stated as shown as it was in 1972 while the
lights were a late 1970s addition.
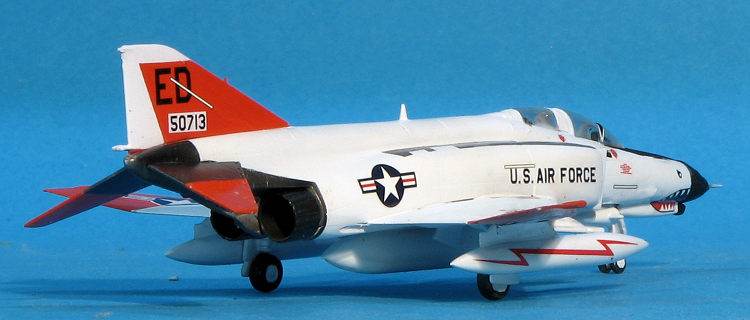
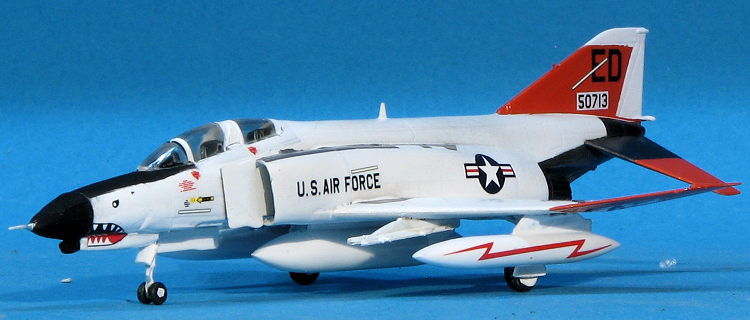
So the instructions are well done and in Japanese. There are six construction steps and FS 595 color references are provided. The first option is from the 34th TFS and is a Vietnam War bird. The second is from the 421st TFS and this unit flew the E in the last couple of months of the war from Thailand. The third is the YF-4E that was developed from an F-4D, it is shown in its later scheme from 1983 so would have had most of the E updates, though as you can see from the photo I've included, still have the early stabs. The small decal sheet is nicely done and offers markings for all three planes. Notice that the original sheet was missing the red bits of the insignia but this was covered by an addendum. Note also that all three planes have shark mouths. There are aftermarket sheets out there if you care to search for them, but I think that what is supplied will make some great models.
| CONSTRUCTION |
As is often the case, a simple looking kit is not really all that simple. I started by painting the interior bits save the seats and instrument panels in dark gull grey. The instrument panels were black and I used NATO black for the seats. The seats sit rather low in the cockpit and there is no really good attachment point for the instrument panels. The fit of this item into the fuselage is very positive as are several of the various attachment points.
I did s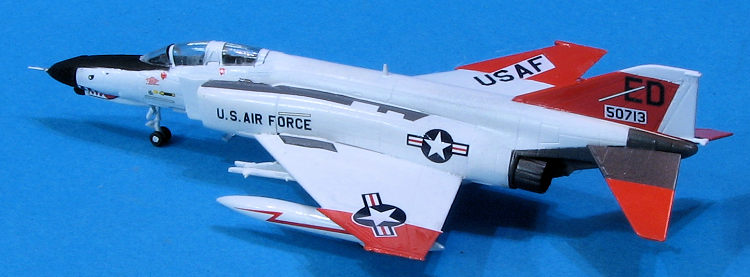 tick
a bit of weight in the nose, though it is probably not needed. The fuselage
halves leave a relatively big seam when attached to each other and the
intakes do not fit very well. Attaching the wing is even worse with a huge
step between the forward fuselage and the forward wing section. As I was
going to do the Edwards option, I attached the landing gear and gear doors.
The doors have huge tabs that fit into slots in the gear wells, but they
don't fit all the way down. Main gear and the outer doors are a single piece
and did not come close to properly fitting in the gear wells. Apparently the
main gear leg fit into a hole outside the well. Not this kid and I simply
butt fit the main gear into the well as best I could. On the nose gear, the
retraction strut piece broke when I was removing it from the sprue. Thanks
to all these hassles, the other kit in the box will be gear up.
tick
a bit of weight in the nose, though it is probably not needed. The fuselage
halves leave a relatively big seam when attached to each other and the
intakes do not fit very well. Attaching the wing is even worse with a huge
step between the forward fuselage and the forward wing section. As I was
going to do the Edwards option, I attached the landing gear and gear doors.
The doors have huge tabs that fit into slots in the gear wells, but they
don't fit all the way down. Main gear and the outer doors are a single piece
and did not come close to properly fitting in the gear wells. Apparently the
main gear leg fit into a hole outside the well. Not this kid and I simply
butt fit the main gear into the well as best I could. On the nose gear, the
retraction strut piece broke when I was removing it from the sprue. Thanks
to all these hassles, the other kit in the box will be gear up.
The canopy has very large attachment points and comes with a completely smooth windscreen without the usual demarcation lines. The small windows between the forward and aft canopy are impossible to mask. I attached the canopy (cracking it down the centerline seam as I did so and it is not a tight fit), masked most of it and headed for painting.
| COLORS AND MARKINGS |
 nge.
I did the stabs this color as well. Model Master enamels for these. The
orange areas on the stabs and the area around the exhaust was masked off and
this as well as the burner cans were painted Alclad II steel. What takes two
minutes to type took several days to accomplish.
nge.
I did the stabs this color as well. Model Master enamels for these. The
orange areas on the stabs and the area around the exhaust was masked off and
this as well as the burner cans were painted Alclad II steel. What takes two
minutes to type took several days to accomplish. | CONCLUSIONS |
 Well, what
can I say about this one. Uh...decals are great. It is pretty obviously not a
Platz mold as their kits are superb, however, it does make into a nice shelf
model and for those with more skill than I, it can be made into a very nice
little model. Things I found frustrating were the fit of some of the parts, the
canopy and the rather odd way they want you to attach the main gear. I know
these can be made into real gems as I see them all the time on the 'net. It will
fill a lot of spaces in your 1/144 aircraft collection and looks a lot more like
a proper F-4 than any previous attempts. I still have one to go and will take
what I've learned, applying it to that one when my decals arrive.
Well, what
can I say about this one. Uh...decals are great. It is pretty obviously not a
Platz mold as their kits are superb, however, it does make into a nice shelf
model and for those with more skill than I, it can be made into a very nice
little model. Things I found frustrating were the fit of some of the parts, the
canopy and the rather odd way they want you to attach the main gear. I know
these can be made into real gems as I see them all the time on the 'net. It will
fill a lot of spaces in your 1/144 aircraft collection and looks a lot more like
a proper F-4 than any previous attempts. I still have one to go and will take
what I've learned, applying it to that one when my decals arrive.
| REFERENCES |
https://en.wikipedia.org/wiki/List_of_McDonnell_Douglas_F-4_Phantom_II_variants
18 August 2017
Copyright ModelingMadness.com. All rights reserved.
Thanks to Platz
for the review kit. You can find this kit at
this link.
If you would like your product reviewed fairly and fairly quickly, please
contact the editor or see other details in the
Note to
Contributors.
Back to the Main Page
Back to the Review Index Page
Back to the Previews Index Page