
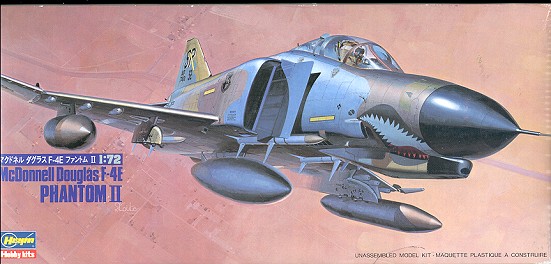
Hasegawa 1/72 F-4E Phantom II
| KIT #: | 702 |
| PRICE: | $3.00 on super sale |
| DECALS: | Two options |
| REVIEWER: | Scott Van Aken |
| NOTES: | Second generation Hasegawa F-4 kit |
| HISTORY |
Those who know little about the F-4 Phantom II really need to read a lot more and that includes the many fine reviews on this site. I will go into more detail on the F-4E variant. After realizing that missiles of the day were not as good as they'd hoped, the Air Force directed McDonnell to add a gun to the next generation of F-4. The 20mm Vulcan cannon was the latest and greatest so that is what was installed in the nose of the F-4E variant. The basic systems in the plane were quite similar to the F-4D, but new engines were part of the fit as it never hurts to have a bit more thrust.
 The F-4 was then able to actually have a back-up to the unreliable 'dog-fight' missiles that it was carrying in combat over the air in Vietnam. The Falcons were hopeless and the Sidewinders had a very small angle of lock. Sparrows worked quite well, but with the rules of engagement requiring visual contact before firing, the enemy was often inside the minimum range of the Sparrow when the fight began. I don't think the gun was really used in all that many MiG kills, but at least it was there.
No one could call the Phantom a dog-fighter. It worked best in vertical maneuvering as it had a ton of thrust. In order to help it turn a bit better, modifications were made to add slats to the outer wing panels. The inner slats were also changed in the way they worked when compared to the C and D versions. This increased the wing area and allowed a smaller turn radius compared to unslatted F-4s. It came at a price and that was a minor loss in speed. In order to handle that 'visual sighting' thing, a TV camera was installed in the right wing. This allowed crew to spot an enemy at a longer range and it also had some low light level capabilities. A similar item was installed on F-14s. Finally, there were problems with cracking on the rear stabilators and so a metal reinforcement in the shape of an arrowhead was placed on the stabiliators to offer greater strength. Apparently the Luftwaffe didn't have this problem as their nearly identical F-4Fs did not have this reinforcement.
For those who are camo freaks, the F-4E wore all of the Phantom's camo schemes except for the light gull grey and white scheme carried by early F-4s. Only a few F-4Cs and RF-4Cs were ever to have the honor of wearing all the different schemes the F-4 used in its career. The standard SEA, SEA wraparound, Euro 1, and Hill Grey II schemes were all used by the F-4E. In actuality, the F-4E may have actually been in service with the USAF longer than the G model if you include the 20 FS. This is (or was as they are darn close to disbanding [2004]), the German F-4 Training Squadron at Holloman AFB. They used F-4Fs in the last years of the unit's existence, but did have F-4Es for a long time. Now, the only place you'll see an F-4E in the US is one of the remaining drones that are used by USAF at Holloman and Tyndall.
| THE KIT |
 I mentioned in the stats box that this was the second generation of Hasegawa's F-4 kits. The first was a kit that by today's standards is incredibly crude, though it does look like an F-4 when done and wasn't any worse than much of what was around at the time. This one is an improvement over that earlier kit, but still falls far short of what the modeler expects today and what is provided in the most re
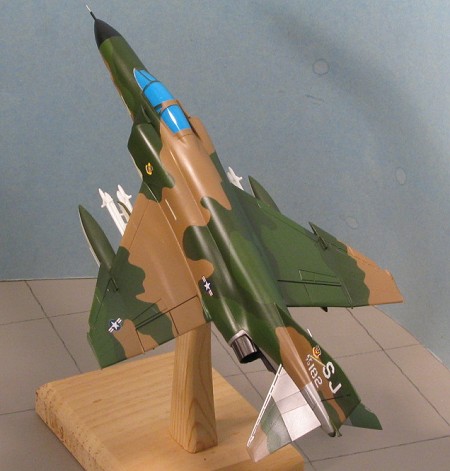 cent of Hasegawa's Phantoms in this scale. Now you may take me to task for not doing a proper preview on this one, but I bought it in a started condition so doing a full preview isn't really possible.
The detailing on this one consists of petite raised panel lines with huge troughs for the control surface delineations. Holes for the various pylons are already drilled and the inner pylons come with or without chaff dispensers molded on them. There are no Sidewinders but there are Falcon mounts (no Falcons, though). Sparrows are provided, but for the other missiles, one must turn to the Weapons Sets in order to have those. A pair of travel pods are provided so that you can put something on the inner mounts. This F-4E has the later slatted wing and a TIESO (probably misspelled that acronym) is provided as well. Even with the slatted wing, the tail planes (which are a bit more rounded than needed) do not have the arrow shaped reinforcement that was common on these later aircraft.
The cockpit is a fair attempt at detail with overly wide and rather generic looking Martin Baker seats. There are a pair of skinny crewmen to install in those seats as the kit foregoes any unnecessary trash like control sticks or rudder pedals. There is raised detail on the instrument panels and side consoles, but any commonality with what is actually in the F-4 is purely coincidence. This is topped with a rather thick one-piece canopy. Landing gear are simplified with the wheels having only a vague resemblance to what is actually on the aircraft. No detail whatsoever in the wells nor on the inside of the burner cans. You get both the short and long gun muzzles, but with the slatted wing the long muzzle is the only one you can really use. The inside of the intakes have huge ejector pin marks that really should be removed. There is an antenna on the spine as part of an insert. This may or may not be applicable to the plane you are modeling.
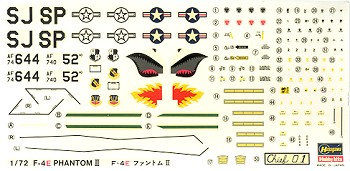 Instructions are pretty well typical of even today's Hasegawa kits. The date on this one is 1985, but really, this kit dates back to the 1970s. Hasegawa's most recent F-4s, and superb they are, come from about 1988. You can still find this old kit in their catalogue and it will be the one you find on the shelves that is relatively cheap. As a hint, the three digit part numbers (like 702 as opposed to 00702) are the older molds. Markings are provided for two aircraft, both in overall European 1 wrap-around camouflage. The box art plane was from the 480 TFS/52 TFW which was then at Spangdahlem in Germany. The other is a flame-nosed 335 TFS/4TFW plane from Seymour-Johnson AFB in North Carolina. This unit has gone on to F-15E Strike Eagles. Decals are well printed, though a bit thick. They will work just fine as I've always had good luck, even with old Hasegawa decals. Just don't use any setting solution on them!
| CONSTRUCTION |
I mentioned that this kit was on super sale. Well, that is because it was started. The previous owner had glued the cockpit tub to the top of the nose gear well and painted it. Also did the fuselage interior. He'd bought a pair of rather odd looking aftermarket seats and drilled holes in the sides of the upper cushions (obviously thinking that this is where the ejection seat grab handles went. WRONG!
 Now was the time for me to make a major decision. Was I to build this on the gear or use up one of my display stands and do this one in flight. The truth is that the rather pathetic interior was nothing to shout about and the same can be said of the rather bland landing gear. Besides, it has been quite a while since I've done a nice stand model. It would give me an opportunity to weed through some really old aftermarket decals for an appropriate scheme. It'd also allow me to use some of the many spare 1/72 F-4 bits I've hoarded over the years.
So the first thing to do was to gather all the bits I wouldn't be using and give them the heave. This was basically the landing gear as I wasn't sure about doing the 'blue canopy' thing or not. There is a lot to say about not having to deal with painting crew members, especially as the ones in the kit are so poorly done. But I don't have to deal with that for a while. First actual gluing was to cement in the interior and then glue together the fuselage halves.
While all that was drying, I went to work on the wings. The top and bottom parts were glued together and I noted that there are no upper wing hinges at all, just a thin panel line. Then it was time to glue in the gear doors. Now one would expect them to fit the openings, but as is often the case, they don't. Not only are they too large, they are not exactly the same shape as the openings. Of course, this means one breaks out the various tools to resize and reshape the doors. Even when done, it was obvious that I'd have to use filler to handle a few gaps and to shape things a bit better.
 While fussing with the gear doors, I also decided that now would be the time to handle the intakes. They were first painted white on the inside using Floquil Reefer White. Then they were glued in place. As you might expect, the fit wasn't that great. You know, I had forgotten how poor the fit of the intakes were on this kit. The intakes are a problem with just about all F-4 kits and nearly every kit maker tackles them the same way. Some just fit better than others!
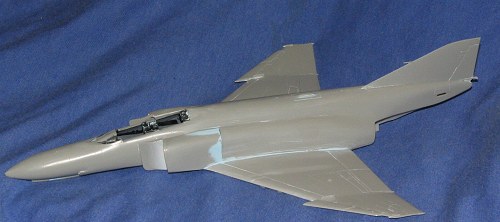 After the usual plethora of filler applications and sandings, I now had things pretty well smoothed out. Of course, most of the detail in those areas was gone, but for a stand model, that isn't really a problem. Some of the more important panel lines will be rescribed, but most won't. I did things a bit different on this one by painting the metallic portion of the aft fuselage first. Since I used Alclad II and it is pretty impervious to tape, it should cut down on masking when painting it after the rest of the kit.
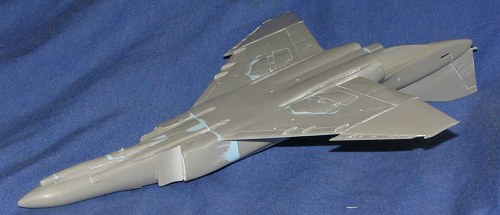 Digging through my spare Phantom pieces, I was dismayed that I didn't have any replacement stabilators with the reinforcement area on them. I did have a better set of plain ones from a later Hasegawa kit so decided to use those. I also came up with better wing and centerline drop tanks. Though I had some improved burner cans, using them would have meant cutting large holes in the back of the kit and I wasn't really sure I was up to doing something like that just to use the better cans. Though I was going to have to make a big hole in the back anyway for the mount, I felt it would be better to have just the one.
Once the filler had all been smoothed out, I masked the canopy and painted the inside of it with a shade called Vallejo Blue, from the Vallejo acrylics line. I put on two coats to make sure it covered well then glued it to the rest of the airframe.
| COLORS & MARKINGS |
Now it was time to determine just how to paint it. After various conversations with folks on the Forum (and I'd especially like to thank Ben Brown for all his advice), I realized that I had some research to do. You see, I had to find an F-4E that had slatted wings and no reinforcement arrow on the stabilators. Not an easy task at all. I'd have liked to have had the ARN-101 on there as well, but after going over several hundred old F-4E slides in my collection, I came to some interesting conclusions.
 First of all, every early F-4E that I had photos of without the reinforcement on the stab also did not have slatted wings. Once the slatted wings were installed, apparently so was the reinforced stab. This meant that I had to find aircraft that had the slatted wings installed on the production line, but not the reinforced stab. I did find a few, and all were in the later batches of planes, from 71-xxx to 74-xxxx serial numbers. These were all in the standard SEA camo scheme and many were festooned with white data stencils. None had the ARN-101 mod nor the TISEO. By the time those were added, so were the reinforced stabs and new paint schemes of SEA wrap-around.
So at least I could do my model. The first thing I did was to sand off the ARN-101 antenna and consign the TISEO to the spares box. Then I painted the underside of the kit and the wing pylons with FS 36622 light grey using Testors Model Master Enamels. The stabs got several applications of various Alclad II shades. These were later masked so that the standard colors could be added to the outer sections.
I then sprayed on the FS 30219 tan shade on the upper surfaces after masking off the lower bits. More masking and then the FS 34102 lighter green shade. Then I completely lost interest in the project and the kit languished in the box for nearly a year, only days away from completion.
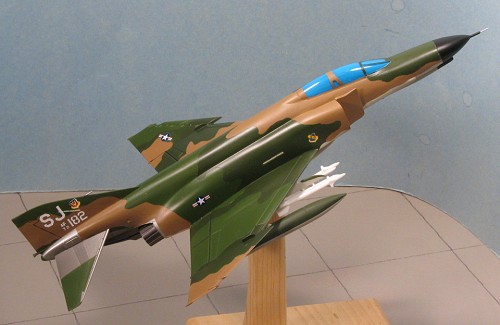
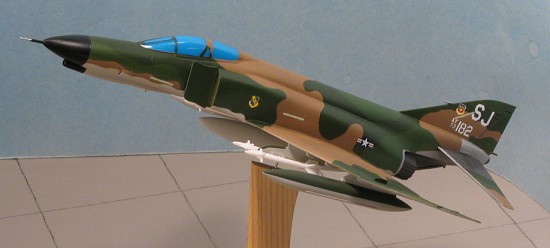 Fast forward to just a short time ago and a decision to finish up some of these long quiescent projects. I masked over the lighter green and sprayed on the FS 34079 dark green. When that had dried, I pulled up all the tape and masked the nose section so I could spray the radome black. That complete, the kit received a coat or two of gloss clear acrylic in preparation for the decals.
The decal sheet I'm using is Microscale sheet 72-198, so they have to be even older than the kit. I chose the only aircraft on there that met my requirements which was a 4 TFW version from the mid 1970s. As I'd given away the kit sheet, I was left scrambling for some markings as the Microscale sheet was without insignia or any common markings. I managed to scrounge some of these from an old ESCI decal sheet but the truth is that ESCI decals of the time were not the best. They seem to hate setting solutions. I also had trouble with the larger markings on the Microscale sheet as they tended to break apart. Should have coated them, but I'm stupid sometimes and didn't. I ended up having to fix some of the serials by painting in the missing bits. I then gave the kit a coat of clear flat.
| FINAL CONSTRUCTION |
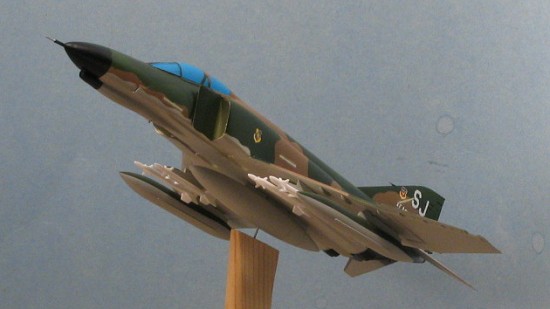
I then started gluing on the stuff to the bottom. This included the outboard and centerline tanks as well as the kit supplied inner pylons. I should mention that I used a number of non-kit items when doing this one. Basically, I had bits left over from much better molded ESCI and Italeri kits and used the stuff from these kits for the tanks and the stabs. It still looked a bit naked. 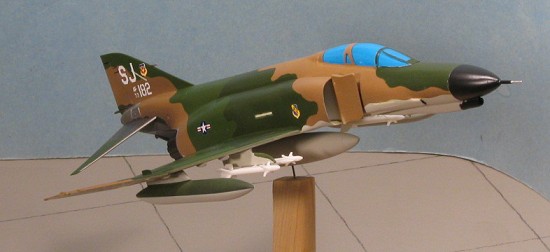 The kit did not come with any pylon mounted weapons, just some fuselage Sparrows, which I didn't want to use. Scrounging around some more, I came up with four later Sidewinders and a rack. Not designed for this kit at all, but I needed something so I glued the white plastic Sidewinders to the white plastic rack and attached these in a rather crude way to the bottom of the pylons. Not very well done, but I was not going to waste perfectly good Hasegawa weapons set Sidewinders on what is basically a beater. If you recall, I paid $3 for this and wasn't going to sink any more money into it.
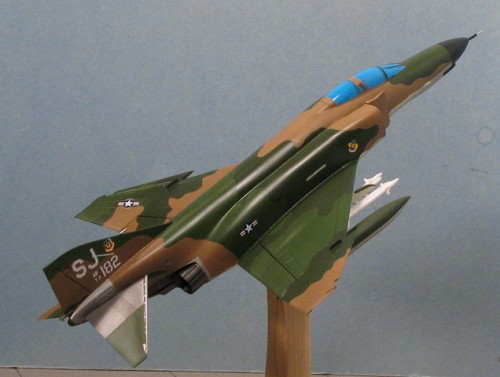
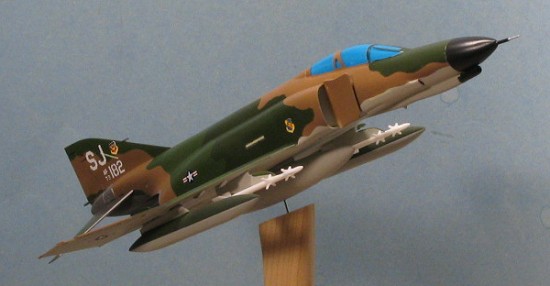
With that done, I drilled through the centerline tank into the bottom of the plane. Then, I attached a section of paper clip to it and then plunked it onto a wooden stand I had made for me by a friend who disappeared from the scale model scene once he got married. Things like this happen and I've not seen him for over 3-4 years though he lives nearby. Must be pressure from the wife as he was a very promising and talented builder.
Anyway, the last thing was to yank off the masking and do some touchup painting. Then it was done.
| CONCLUSIONS |
Every year I try to build at least one F-4 and one Bf-109. This is the 2005 Phantom and while it isn't anything fancy, it does show that you can make a very nice stand model out of what is generally a less than perfect kit. I'd never do this to a quality late-model Hasegawa kit, but for those vendor specials, it is the perfect way to make something nice.
October 2005
#1383 in a series
Copyright ModelingMadness.com. All rights reserved. No reproduction without express permission.
If you would like your product reviewed fairly and fairly quickly, please contact the editor or see other details in the