Italeri 1/72 B-26K Counter Invader
| KIT #: | 1249 |
| PRICE: | $30.00 MSRP |
| DECALS: | five options |
| REVIEWER: | Scott Van Aken |
| NOTES: | New Mold kit (2006) |
| HISTORY |
Back in the late 1950s, there was a need for an effective light/COIN bomber for countries that couldn't handle either the cost or the maintenance of a jet aircraft, but had the infrastructure for a reciprocating engined aircraft. Looking through the boneyard, it was noticed that there were quite a few A/B-26 Invaders in there, many with relatively low airframe hours. The decision was made to 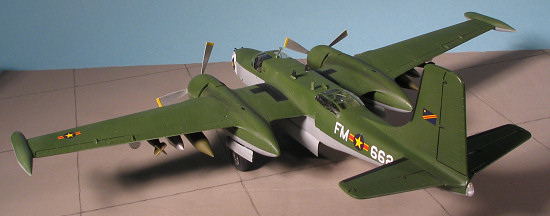 refurbish many of these, some of them being further modified with wing tip tanks and plumbed for additional drop tanks. Different square-tip props and a larger fin or rudder were part of the package as well as newer avionics systems. These were all modified by On-Mark Aviation who received a contract to rework 40 aircraft.
These were to be used by various air commando units, mostly working in southeast Asia (Laos and Vietnam), while mostly working out of Thailand, whom the US had provided much assistance in terms of equipment and payoffs to be able to operate in the relative safety of a non-war torn nation. From what I've read, all the B-26Ks were gun nose versions without any dorsal or ventral guns. They were basically used by the USAF Air Commando squadrons and by the CIA in the Congo. Of the forty built, 30 of them saw action overseas with the remaining 10 staying in the US with the training squadron at Hurlburt Field in Florida. Some were later converted to air tankers, though most of them were broken up.
It is the opinion of this reviewer that a number of the Invader warbirds that have been flown over the years are probably B-26K versions.
| THE KIT |
It is nearly totally flash free (I found a tiny bit inside one wheel), and while I did find ejector pin marks inside gear doors and the such, no sink areas. The interior is superbly done with most of it a single casting that includes the bombardier's compartment for the upcoming A-26 and B-26 versions. The instrument panel is a decal and the underside of the cockpit floor is the nose gear well 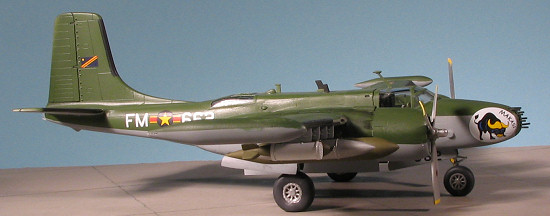 (good luck getting out the ejector pin marks). A full bomb bay with racks and 8 500 pounders is included. I'm not sure how many B-26Ks actually carried bombs, but they are there for you.
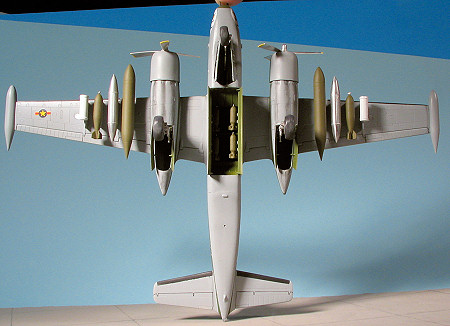
This kit includes the 8 gun nose and provides a place to put weight (20 grams) as it will need it. The wings come with guns that will need to be cut off and the builder will open the holes for the wing pylons. A variety of stores includes fuel tanks, napalm, M117 bombs and rocket pods. The wing tip tanks are separate and slip on the tip of the wing. The tires and wheels one one half are separate to make it easier to paint. The tires have been flattened and bulged as well so they look low on air.
Couple of other things. There is no detail in the main gear wells and it seems the bomb bay doors are to be kept open as no closed option is shown. I also cannot tell if this kit has the broader fin/rudder so I'll leave that to the Invader freaks to judge. It does seem to have the proper canopy used on just about every Invader aside from the very early one. One thing for sure, if the fin/rudder is right for this kit, it will be too narrow for all the other variants, assuming that Italeri doesn't mold a new fuselage for the other boxings. A last comm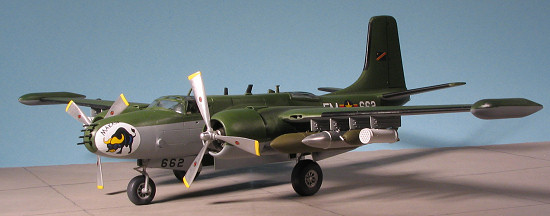 ent is that this one does have the vortex generators nicely molded on the right fuselage half with none on the left, which is correct.
Instructions are excellent and provide all the info you need to build the kit. Five options are provided. Three are USAF from the 600 SOS in standard SEA camo with black undersides. The other two are from the CIA operated aircraft in the Congo during 1966/67. These are in a Field Green upper (FS 34097) with Light Grey (FS 36375) undersides. Though the colors listed for the Congolese planes are matte, photos in the reference clearly show that they are gloss. The decals are well printed and should work without too much trauma. A nice touch is that the upper wing walk areas are provided so you don't have to sweat painting them. One other note on the USAF planes. Photos in the reference do show that some had insignia on the upper and lower wings, though they were not on the fuselage. I suggest checking references to see if they apply to your choice.
| CONSTRUCTION |
Where to start is always a problem with doing models. Generally, I like to start with various subassemblies so I can be working on those as the kit progresses. This one has the one thing that generally keeps me from doing a lot of modern jets and that is ordnance. Lots of it, so I started with that. Meanwhile, I painted as many of the parts on the sprues as I could. This meant the  interior bits and gear door insides and such got a nice coat of darkened US Interior Green, using Testors Model Master enamels. It may be that some of you think I should have used separate shades for the interior and for the wheel wells and bomb bays. Perhaps, but really few will care and it looks fine. I painted the various bits black that the instructions called out using Vallejo acrylics. To be honest, the interior for this aircraft is probably correct for a WWII or Korean War Invader as On-Mark did considerable work removing old stuff and replacing it with modern (for the time) equipment. Again, the amount of work you want to do is up to you. I left it stock as I tend to build kits that were provided for that purpose as much out of the box as I can.
The main instrument panel is a decal and it fit well, succumbing to Solvaset without any problem. I painted the seats OD and glued them in along with the control column. I then glued in the nose gear parts to the lower cockpit floor. Then the various bulkheads were added. Don't bother painting the bombardier's section as it will disappear behind the gun nose. With that done, I started gluing bulkheads and bomb racks in place, eventually trapping all this between the fuselage halves. You do need to glue these all at
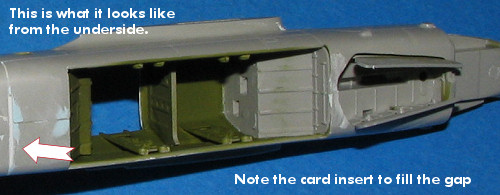 the same time so you can make whatever adjustments are needed before the cement sets. Overall, the fit is good without any real trouble, though the area around the nose gear is quite thin and needs to be clamped while the cement dries. I applied my usual filler to the joins and then attached the tailplanes. Some have commented that these are not parallel with each other, but I must have missed something as they look OK to me. I g
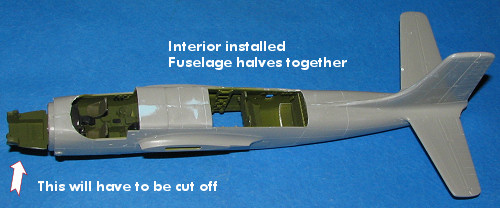 lued the lower compartment panel in place, but it was a bit too short and so I ended up using a bit of card to fill the gap. Though you can see it from the inside in the picture, this was resprayed before popping on the transparencies.
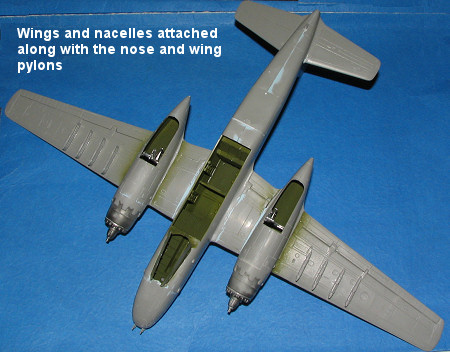
With that done I attached the upper rear compartment panel. It was then puttied into place. It took two applications to get it properly smoothed in. I then glued the wings together after opening the holes in the lower wings for the pylons. The wing guns were removed and this area given an application of filler after sanding the stubs down.
 After painting the main gear with Alclad II Airframe Aluminum (which is really too bright and will be dulled down later), it was trapped between the engine nacelles. Care needs to be taken during this step to be sure all the mounts stay in place while the nacelles dry. Though I didn't do it, it would be wise to fit these to the wings before the glue dries. I did not and had a gap in one of them when I did fit them in place. The other nacelle fit quite tightly. Both have rather large gaps at the rear wing/nacelle join on the top so more filler was needed there.
Meanwhile, I glued the engine faces to the forward engine mounts. These faces are almost devoid of detail. Yes, there are cylinders and push rods, but no cooling fins at all, just a smooth section of plastic for the cylinders. Not very representative at all. This was then glued to the front of the nacelles. I flooded the joins with cement to soften the plastic so I could get the best fit and obviate the need for a lot of filler.
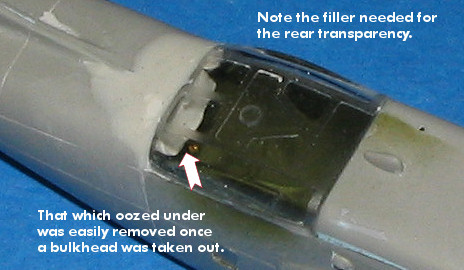 Back at the fuselage, I glued the small window to the interior and then attached the rear upper transparency. Fit on three sides was excellent, but the aft part has a huge step it in. No choice but to use epoxy filler to take care of this and try to get a good blending into the rear fuselage. I made sure that the transparency was well protected with tape during this procedure. I also used some of the epoxy filler on the engine attachments as there were some gaps here as well.
While all this was drying, I went back to working on the ordnance and getting it painted. I also glued the wheel halves together and then painted them. Italeri's 'bulged tires' are not that well done and it may behoove you to either sand off the bulges or get replacement wheels.
 Then I attached the wings. Fit is pretty good as I'd sanded down the mating surfaces and used liberal amounts of glue to soften up the plastic. When dry, the usual filler went down. At the nose, I tried to put in 40 grams of weight (which is an ounce and a half) in the nose. By removing the bombardier's panel (which you won't see anyway), I was able to get enough in there. The nose itself is a bit narrower than its attachment point, so I can see some heavy duty sanding in my future. In fact, it wasn't that bad once I glued it in place. I did find it impossible to smooth out the fuselage join section right in front of the nose gear, however.
Both wings needed some attention from filler on the attachment locations, but nothing horrendous. I also glue on the wing pylons. Be sure not to remove the ordnance attachment stubs (as I did on one), thinking it to be a lump. You'll need it later. In fact, if doing
 the Congolese aircraft, you may want to leave these off until after painting as they have black anti-icing panels on them, according to the instructions. I didn't realize this until it was a bit too late.
With the wings on, I glued on the engine cowlings, and the cockpit canopy. This section fit a lot better than the back one. I masked it and the rear one (along with the small side fuselage window), in order to prep things for painting. This included filling the wheel wells, cowling fronts, and bomb bay with tape and tissue.
| COLORS & MARKINGS |
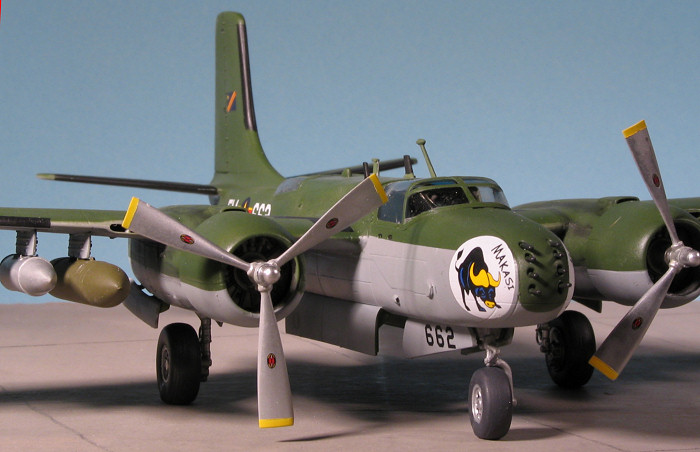
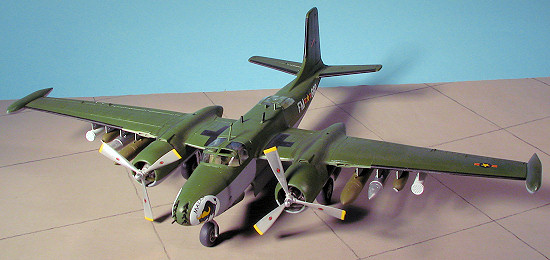
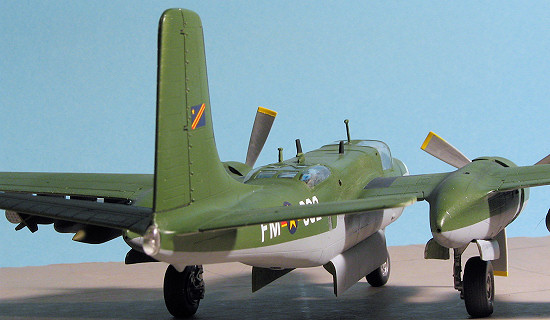
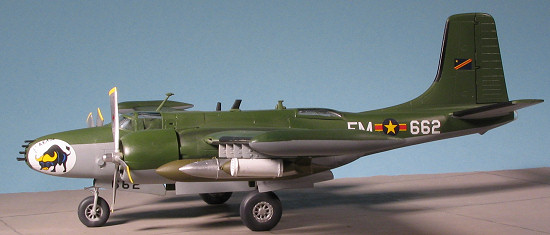
 Though it may be that the US versions would be easier to paint, I couldn't pass up on the Congolese options provided in the kit. This calls for the plane to be FS 36375 Light Ghost Grey (a color that did not exist in 1967) on the bottom, and FS 34097 on the upper side. The demarcation line is a hard one so masking is the only way to go. I painted the underside color first, along with as much of the ordnance as I could. I also masked off the prop tips and painted them yellow. The props were painted bare metal, for the photos in the reference show them not to be black. I used Testors Model Master enamels for both of these shades and most other colors as well.
 Once the paint was dry, I sprayed some Future over it (clear acrylic gloss) and then started to mask off the black leading edges of the flight surfaces. I'd seriously considered blowing this off, but just couldn't bring myself to do it. So after about 30 minutes of masking, followed by about 30 seconds of painting, the job was done and I could get on to the decals.
For me, the choice of markings was not a problem. I've a penchant for small air forces, and at this time, they didn't come much smaller. Of the two Congolese options, I chose the version with the large nose marking, as much to cover up my poor masking where the camo curved down around the guns. The decals went on with little trouble and I used Solvaset to make sure they stuck. I was concerned about the nose markings as those had to cover some compound curves. This area took several applications to get right, but the extra work was worth it. I then sprayed a semi-matte over the whole thing. Actually, the colors look glossy in the reference, but few will know anyway.
| FINAL CONSTRUCTION |
It was about this time that I realized I'd forgotten the tip tanks. These were painted and masked then glued on. The openings in the tank for the wing are really rather large and had I put them on earlier, I'd have filled the gaps. As it was, I left it as it fit. Then the main gear doors and wheels were glued on. The doors fit quite well as the hinges are such that they curve into the wells and you can really add a lot of cement to keep them on. The addition of the nose wheel made that assembly very wobbly. It is a lot of plastic to 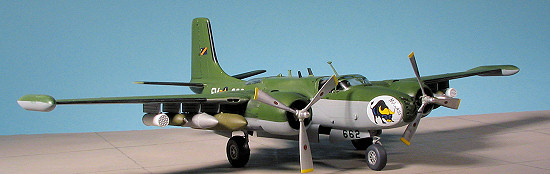 put on the end of a skinny strut and it wasn't helped by the nose weight needed to keep from tail sitting.
I then added some pastels for the exhaust and probably underdid it as these planes really sooted up the nacelles. This was then sealed with a light coat of clear matte and I sprayed this matte on the wing walk areas as well as the wheels. It was now time for the ordnance. I had only made up 4 bombs for the bomb bays as I figured you'd not see the others. These were carefully glued in and then the bay doors. Next, all the stuff for the pylons was glued in place. Naturally, most of them fell off at least once, but perseverance paid off and they were all eventually stuck on and aligned rather well. At least rather well for me. I took off the masking and added a few of the upper fuselage antennas as shown in the instructions. These were then brush painted the required colors. I managed to knock in the small aft fuselage window so replaced it with a white glue replacement. It actually looks better than the original. The clear tail light was glued on, then I attached the props. The prop shaft is a bit short and you'll end up with the props rubbing the front of the engine cowlings, so one has to be careful to prevent it. I then photographed it before something major fell off!
| CONCLUSIONS |
Well, it is sort of a mixed bag. On one hand, it doesn't quite come up to what I was expecting. I guess that not all new kits can match some of those from Japan, and perhaps my expectations were too high. The only real area of concern I ran into was the rear upper clear part and the fit of the lower fuselage inserts. The others are what I'd call 'standard kit' in that I always end up fixing gaps around engines and on fuselage joins.
 Another area of note is that there doesn't seem to be any differentiation between the later On-Mark Invader and the WWII one in terms of the cockpit interior. Until we get a WWII A-26, I won't know if things are the same or not, though I suspect they will be. I would also have liked to have had a more detailed engine front.
On the other side of the coin, this is a whole lot better than the old Airfix kit. The panel line work is well done and the general fit of the model is good, especially by comparison. One gets a nice weapons load and open bomb bays, which is also nice to have. We also don't have to try to hunt up parts to modify our Airfix versions for this later variant as they are all included in the kit.
| REFERENCES |
May 2006
#1413 in a series
Copyright ModelingMadness.com. All rights reserved.
If you would like your product reviewed fairly and fairly quickly, please contact the editor
or see other details in the