| KIT #: | ? |
| PRICE: | $ |
| DECALS: | Two options |
| REVIEWER: | Scott Van Aken |
| NOTES: | Short run resin kit |
| HISTORY |
The first L-23As entered service in 1953 and the type served
the US Army for almost forty years, the last U-8Fs being retired in 1992. When
US military aircraft designations were revised in 1962, the remaining L-23D,
RL-23D, L-23E and L-23F aircraft became U-8Ds, RU-8Ds, U-8Es and U-8Fs. A
further 47 Model 65s were ordered in 1962 and 1963 as U-8Fs;
 one of these was
delivered to the Pakistan Army, the only delivery outside the US
military (although other nations bought Queen Airs as military aircraft). These
were the final new-build aircraft in the series, however the unique Beechcraft
Model 87 turboprop proof-of-concept aircraft used in developing the King Air was
delivered to the Army as the NU-8F in 1964 (this was later re-designated
the YU-21) and a few used Queen Airs were also taken by the Army.
one of these was
delivered to the Pakistan Army, the only delivery outside the US
military (although other nations bought Queen Airs as military aircraft). These
were the final new-build aircraft in the series, however the unique Beechcraft
Model 87 turboprop proof-of-concept aircraft used in developing the King Air was
delivered to the Army as the NU-8F in 1964 (this was later re-designated
the YU-21) and a few used Queen Airs were also taken by the Army.
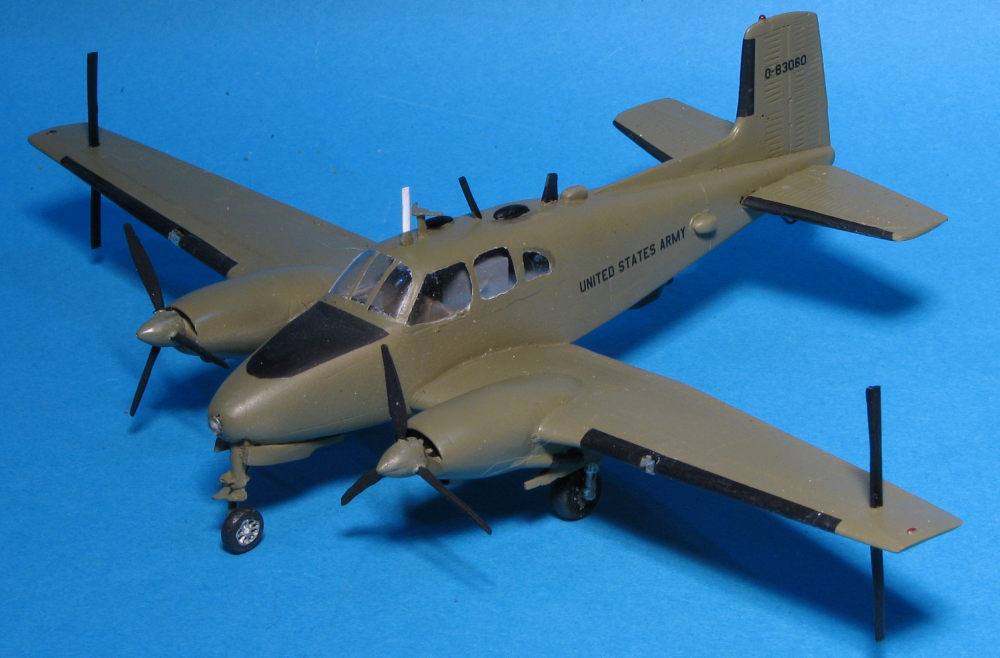
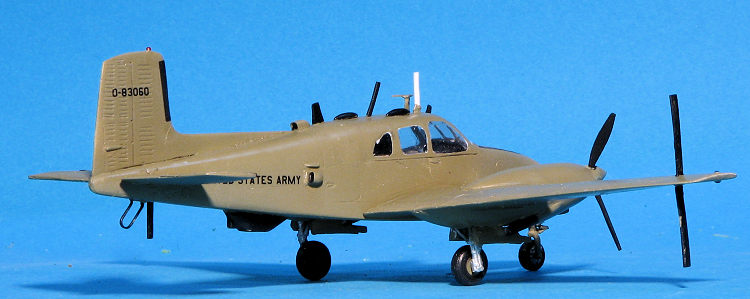
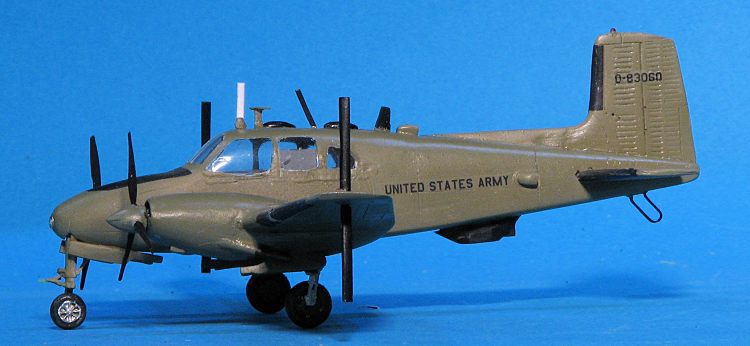
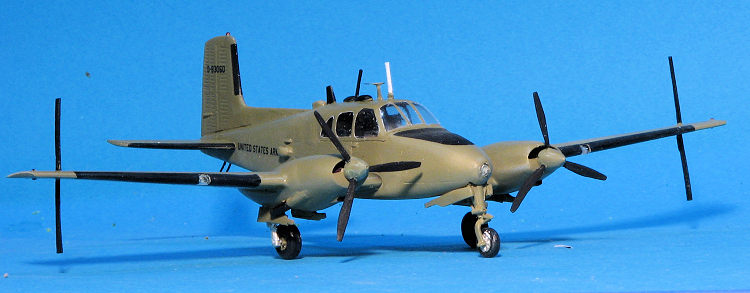
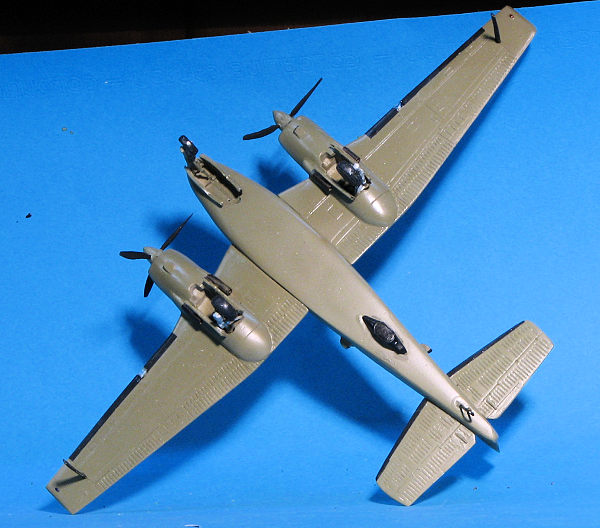
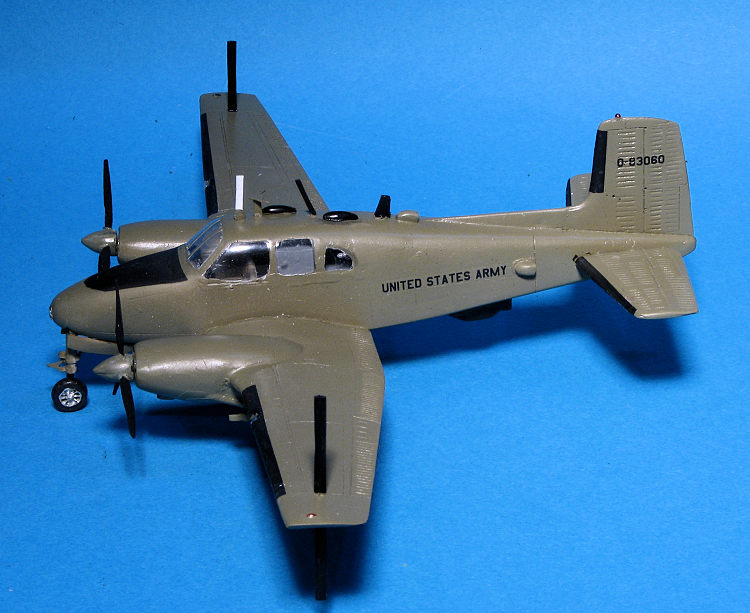
Many U-8Fs were modified during their service lives to a similar standard as civilian Excalibur Queen Airs. The most obvious modifications are more powerful Lycoming IO-720 eight-cylinder engines in place of the factory-fitted six-cylinder engines; and bulged main landing gear doors that fully enclose the wheels when the gear is retracted instead of the wheels partially protruding through the doors. Many L-23Ds/U-8Ds and U-8Fs have been registered as civilian aircraft since retirement from military service.
| THE KIT |
This is very much your standard garage kit, but without the issue of molding glitches. That means no air bubbles or pockets, though you do have to drill out the holes for mounting the flight surfaces. Not a big deal and standard stuff for those who build these sorts of kits.
 The sturdy box comes with the fuselage halves and wings
separate with the rest of the parts in zip bags of various sizes. All of the
parts are free of any pouring stubs and only a few, like the props and landing
gear, are still surrounded by the resin wafers. This helps to keep them from
breaking during shipment.
The sturdy box comes with the fuselage halves and wings
separate with the rest of the parts in zip bags of various sizes. All of the
parts are free of any pouring stubs and only a few, like the props and landing
gear, are still surrounded by the resin wafers. This helps to keep them from
breaking during shipment.
The interior consists of a floor onto which the front seats are attached. Behind this is a bank of radios and a seat for the radio operator. A small shelf is also included. This will fit into the left fuselage half where there are ridges to accept them. While no indication of how much weight is needed, you will need to fit it into every available space forward of the main gear. There is a good size cavity above the nose gear well for this.
Once the fuselage halves are joined, you can attach the various flight surfaces. The instrument panel with the control wheels is then glued in place followed by the cockpit/cabin clear piece. This is a large vacuformed part that has the windows and the surrounding fuselage. Two of these are provided in case you need a second one.
Both the nose and main gear take up a goodly number of parts
with each having separate oleo scissors and retraction
 struts. The main gear
cant forward a bit which is why it is important to put in as much nose weight as
you can. Engine nacelles are an upper and a lower half which are joined
together. A full engine is provided which attaches to the cowling front piece
and is then inserted into the cowling. The cowling is joined to the wing. If
concerned about weight, you may consider removing the last four cylinders from
the engine to provide space.
struts. The main gear
cant forward a bit which is why it is important to put in as much nose weight as
you can. Engine nacelles are an upper and a lower half which are joined
together. A full engine is provided which attaches to the cowling front piece
and is then inserted into the cowling. The cowling is joined to the wing. If
concerned about weight, you may consider removing the last four cylinders from
the engine to provide space.
The last steps are adding the considerable number of antennas and vents that were standard on the ELINT version. This also includes building up the props from separate blades and a spinner and attaching the vacuformed landing light cover.
The instructions consist of a nicely done drawn page that is folded to include 14 construction steps. All the color information is in Russian, but that should not be much of an issue. Basically, the outside is olive drab with the interior in dark grey. There is a nicely restored plane at the Combat Air Museum and here is a link. It includes interior photos: http://www.combatairmuseum.org/aircraft/beechbonanza.html . These aircraft were minimally marked and you are provided serial numbers for three planes on the small sheet.
| CONSTRUCTION |
 It has been a long time since I've built a short run resin kit and this one
seemed like as good a one as any. I expected to use those modeling skills during
the process and was not disappointed. As is often the case, each of the parts
neededed cleaned up and in some cases, closed openings had to be dealt with. In
particular the slots for the large airframe parts were not all open so some
drilling needed to be done to deal with that. I also had some voids to fill. The
first was the rear fuselage of one half and there was a big air pocked in the
aft bulkhead of the interior.
It has been a long time since I've built a short run resin kit and this one
seemed like as good a one as any. I expected to use those modeling skills during
the process and was not disappointed. As is often the case, each of the parts
neededed cleaned up and in some cases, closed openings had to be dealt with. In
particular the slots for the large airframe parts were not all open so some
drilling needed to be done to deal with that. I also had some voids to fill. The
first was the rear fuselage of one half and there was a big air pocked in the
aft bulkhead of the interior. 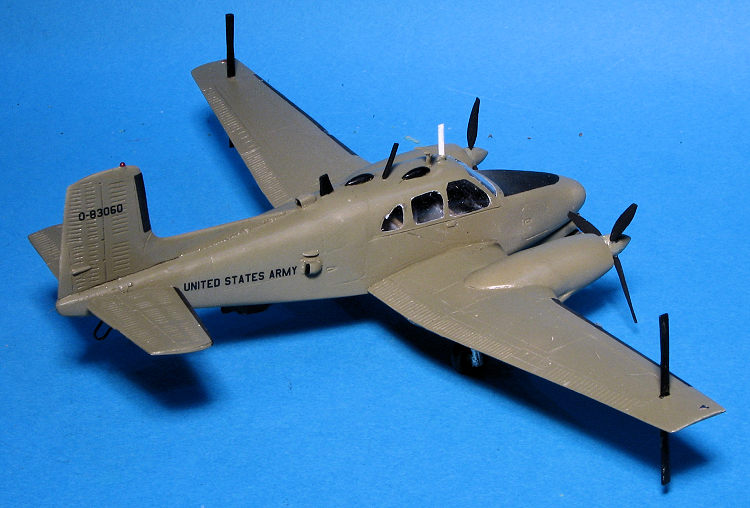 lings were
attached to the wings. Fit here was not good as the exhaust did not match up as
hoped.
lings were
attached to the wings. Fit here was not good as the exhaust did not match up as
hoped. | COLORS & MARKINGS |
 d those as well. During this
time I masked off and sprayed a nose anti-glare panel. I should have done
the de-icer boots as well, but decided to decal those, a choice that wasn't
the best. I then attached the
d those as well. During this
time I masked off and sprayed a nose anti-glare panel. I should have done
the de-icer boots as well, but decided to decal those, a choice that wasn't
the best. I then attached the | CONCLUSIONS |
The only way to get interesting kits like this is with resin or vacuform as the major kits makers won't touch them. It has been many years since I built a kit like this and the time it took verified this. Still, it was nice to be able to use some of those skills that had been dormant for a while. Not the best result I've ever had from a kit, but the end result is pleasing to me and gives me the confidence needed to tackle another of this type.
| REFERENCES |
https://en.wikipedia.org/wiki/Beechcraft_L-23_Seminole
July 2019
Copyright ModelingMadness.com. All rights reserved.
Thanks to Croco for the review kit. The kit can be found on-line
if one does a search. If you would like your product reviewed fairly and
fairly quickly, please
contact
the editor or see other details in the
Note to
Contributors. Back to the Main Page
Back to the Review
Index Page
Back to the Previews Index Page