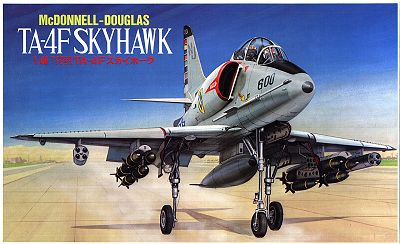
KIT: | Fujimi 1/48 TA-4F Skyhawk |
KIT # |
|
PRICE: | $5.00 (back in the mid 1980's) |
DECALS: | Three versions in grey and white: VF-126, |
REVIEW BY: | |
NOTES: | Kit is actually about 1/50 |
HISTORY |
Probably the longest running jet ever developed by Douglas, later Mcdonell-Douglas, later Boeing, the TA-4 version of the Skyhawk is still in service with the US Navy as of this review, though it's demise is coming soon. Still a very popular jet, Skyhawks serve with other countries around the world. Recently A-4Ms and TA-4Js have been sent to Argentina with Bolivia currently looking at the TA-4 to augment it's T-33 fleet.
THE KIT |
This particular kit is from Fujimi and is probably closer to 1/50 than it is to 1/48. Panel lines are raised and there are a fair number of rivets on the kit, though not overwhelming as on other kits of this era. There are no wheel wells and the cockpit is bare except for some seats. The underwing stuff consists of rocket pods for the outer stations, a very poorly detailed MER with 500 lb bombs for the inner stations and a centerline fuel tank with the pylon molded into the lower wing. Not a very auspicious beginning but one that provides a basis for a nice kit (I hope). The other TA-4 alternatives in this scale are a vac fuselage to go with the Monogram A-4E and to convert the Monogram OA-4M by removing the avionics hump and other fuselage bits. The OA-4 is probably the easiest way to go, but since I had the kit and the
Eduard detail set , #48-149 for this kit, that is the road I decided to follow.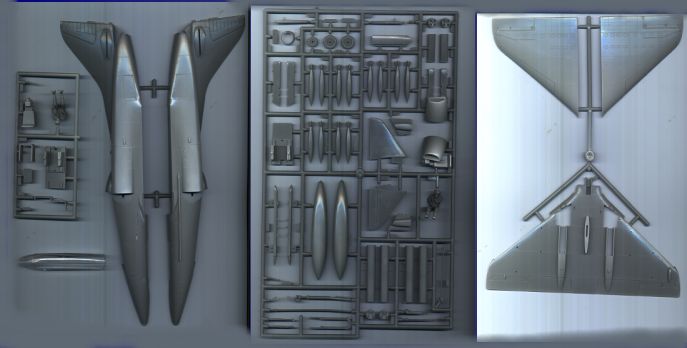
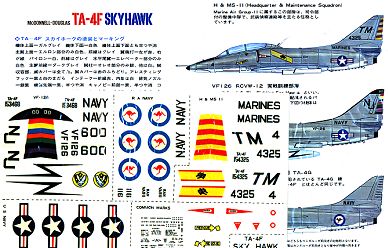
Well, upon opening the kit, one notices a really super-looking decal sheet and a few sprues of rather hard, medium grey plastic. The additional cockpit 'stuff' is simply added on a separate sprue so as to make the majority of bits the same for the A-4E kit that Fujimi produces(d).
Not much detail with what comes in the box, but a look at the
Eduard brass set shows that most of the shortcomings of the kit can be taken care of by the additon of the set.
CONSTRUCTION |
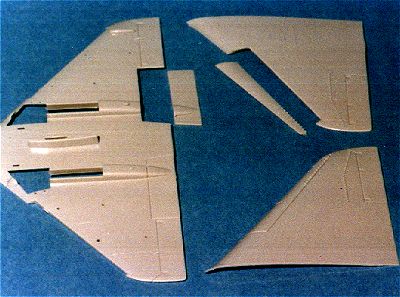
First thing I did was to remove the slats and lower flaps from the lower wing as I wanted to display these lowered. On the TA-4, the flaps were modified later in life to be split with an upper and lower section, but on the deck, the upper ones were very rarely seen deployed. These were easily removed with a razor saw and scribing with an exacto knife as the indentations for these are deep and easy to follow.
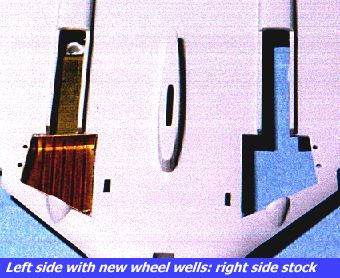
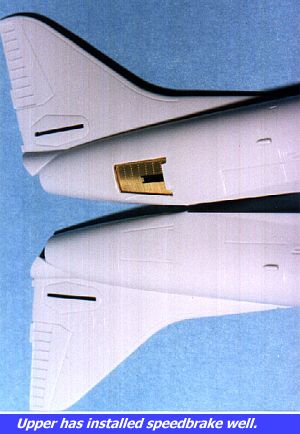
Next step was to add the main wheel wells from the Eduard set. These were folded and superglued into place. The rear section of the well had to be bent back to allow access to the main gear mounting lugs. Make sure you check before you glue!! I decided to add the brass speedbrakes as well and these were laboriously cut off the kit. The plastic is quite thick so this took some time. Once cut to satisfaction and cleaned up, the well interior was superglued in place.
|
|
|
|
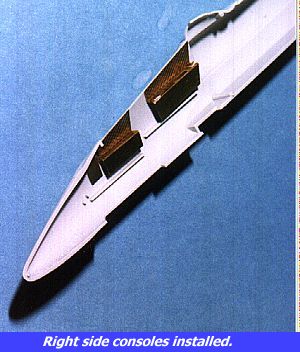
The interior was the next step and here I ran into a problem. The instructions show a nose gear well part D2. There was no part D2 in my kit!!! It wasn't left off, but must have been part of a later production run. Makes things a bit difficult as not only do I have to build a gear well from plastic, but there is no place for the brass cockpit to rest. What I did was to first install the side consoles to the interior and use them as the basis for aligning all the cockpit parts. The set comes with nice consoles tops that were superglued and the throttles were also installed.
Once that was completed, the floor was installed in one half with the aft seatback used as a guide. When that was in good and tight it was time to start working on boxing in the nose gear well. That was done using various bits of sheet styrene. Frankly, not one of my better jobs, but it will pass along as the 'flashlight and dental mirror' gang stay away!
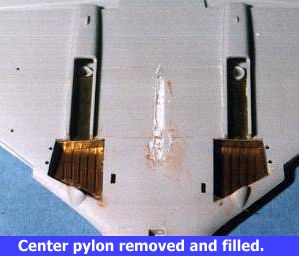
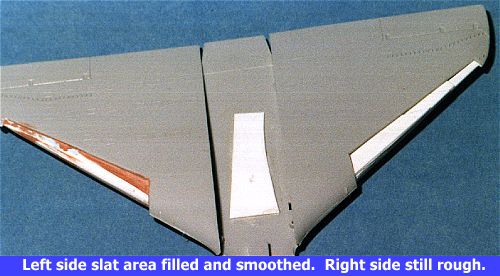
While fussing with that, it was time to go back and work on the wings. The first thing I did was to remove the built in center pylon. It was sawn off, backed with scrap plastic and then filled with gap filling superglue. Then it was hit with ZAP kicker and sanded. A bit of filler or two was enough to smooth things out. Next it was time to start filling in the huge hole left where the slats were.
This was done by first building up the area with scrap plastic sheet and then slathering in filler. Once dry it was repeated until a relatively smooth surface was obtained. Not the easiest thing to do, but probably the best way. Hey, it's the first time I have had to do this, so I'm learning!
PAINT & DECALS |
CONCLUSIONS |
REFERENCES |
Review copy courtesy of me and my wallet!! If any of you manufacturers or shop owners want to send products for review and building, please
contact me.